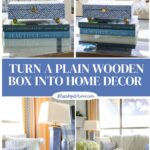
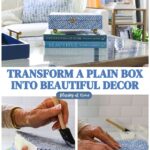
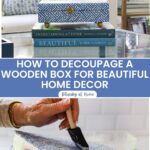
How to Decoupage a Wooden Box for Home Decor
If you’ve ever wished you could transform a plain wooden box into a stunning piece of home decor without any artistic talent, decoupage is about to become your new favorite craft. Learning how to decoupage a wooden box for home decor is one of the easiest and most satisfying DIY projects you can try – and the results look anything but beginner-level.
Decoupage is the art of decorating surfaces by gluing paper cutouts to them – think decorative napkins, scrapbook paper, fabric, or even printed images – and sealing them with layers of a protective finish.
The word itself comes from the French découper, meaning “to cut out,” and the technique has been used for centuries to give everyday objects a custom, hand-crafted look. What makes it such a fantastic method for home decor is its versatility and accessibility.
You don’t need expensive supplies, a dedicated craft room, or years of experience. With just a few basic materials, a wooden box, and a little bit of time, you can create everything from elegant keepsake boxes and jewelry organizers to seasonal accent pieces that look like they came straight from a boutique.
I love to decoupage. It’s such an easy and budget-friendly medium that always results in a pretty accessory for your home. Even using the same supplies can deliver projects that look customized for your own spaces.
In this tutorial, I’ll walk you through the entire process step by step – from prepping your wooden box to choosing the right papers and adhesives to getting that smooth, professional-looking finish.
Whether you’re a seasoned crafter or picking up a brush for the very first time, you’ll have a beautiful decoupaged box ready to display by the end of this project. I love the wooden box that I made.

We are back with another Creative Craft blog Hop, this month hosted by Donna of Modern on Monticello. If you are joining me from Suzanne at Shop at Blu, welcome to Bluesky at Home. I know you enjoyed Suzanne’s Valentine’s ornament project.
This post contains affiliate links to products used to create this project. If you should order any item from this site, I may receive compensation, but you do not pay a penny more. Your purchase is greatly appreciated as it helps support the continued publication of this site.
Supplies to Make Your Decoupage Decorative Box
- piece of wax paper or craft paper, painters’ tape to cover your work surface
- raw wooden box – I bought my box at Jo-Ann several years ago. It is 9 x 7 x 2.5 inches. This wooden box with gold hinges and a clasp is very similar.

- sanding block. This set with multiple sanding grits is a great buy and easy to use.
- either Matte or Gloss Mod Podge. I used Matte because that’s what I had on hand. This combo of Matte and Gloss with three foam brushes is the best deal.
- foam brushes, medium or small. You can use these brushes to apply both the paint and the Mod Podge.
- white acrylic paint or chalk paint to paint the box
- sharp Fiskars craft scissors. I highly recommend this pair.
- napkins of choice in color and pattern. This is the exact set of guest towels I used.

- small screw driver
- fabric glue
- small glue gun
- 2 6-inch pieces of 3/8-inch white satin ribbon
Preparing the Wood Box
Here are the simple steps to turn this raw wood box into a pretty decorative accessory.
Step 1 – Removing the Hinges and Clasp
First, remove the hinges and clasp from the box using the small screwdriver. The screws are very small.


TIP: I recommend placing the hinges, clasp, and all screws in a small zip-lock bag for safekeeping.
Step 2 – Sanding the Box.
The wood on these types of boxes is soft but rough. The entire box, inside and out, should be thoroughly sanded until smooth. Then wipe the surface with a barely damp paper towel or cloth. If need be, repeat the process.
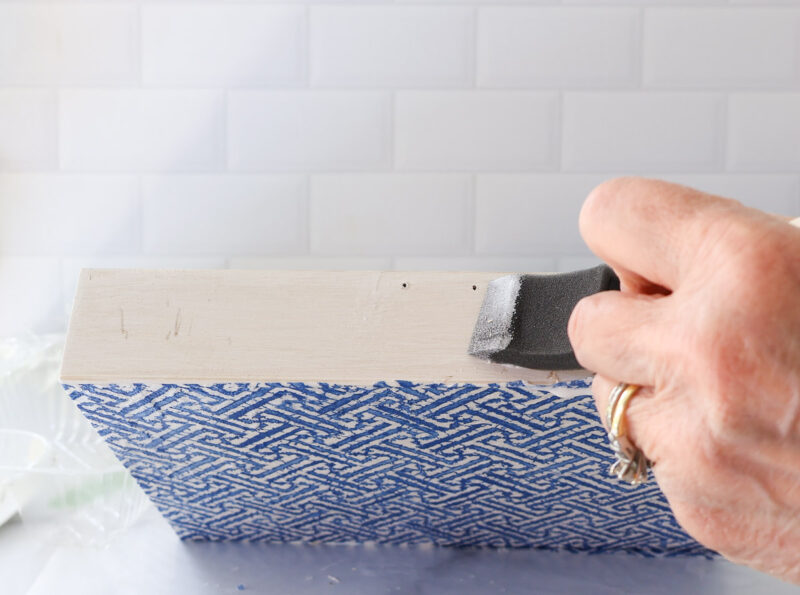
Step 3 – Paint the Box
Before decoupaging, the box must be painted on all sides with white paint. Allow to completely dry. If necessary, you can lightly sand the box again. One coat of paint should be enough.


NOTE: To be honest, this is as far as I got with the wood box. I started it last summer, but summer, life, vacations, and the holidays got in the way. I gathered all my supplies and put them in my office, where they safely stayed until a week ago.
Decoupaging the Box
First, I’ll explain what to do with the napkins or guest towels.
- Separate the front design from the back layers. Depending on the napkin, there will be either 1 or 2 plain white layers. Sometimes, you can remove both layers at once. If not, then remove them one at a time.
- For most decoupage projects, you either cut or tear the paper into pieces. For this project, I wanted to apply the guest towel to the box’s top and bottom as one large piece. I like using guest towels because of the larger size of the paper.
- For this project, you will need an overall design that will cover a larger area.
More Beautiful Blue Patterns to Try
I did a quick shopping spree and couldn’t believe how many pretty papers could be used for this project, depending on the style you wanted. Obviously, you don’t have to use blue.
- This Chinese vase motif. I actually used this guest towel to repurpose a wood tray.
- This floral pattern.
- This large blue floral pattern. This is the guest towel that I used for my chinsoiserie lamp project.
- This modern graphic design would be striking if you prefer a more contemporary style.
- If you would like a coastal theme for your wood box, this stripe design in varying shades of blue is perfect. It reminds me of a beach towel or the colors of the ocean.
- A few years ago, I saw a real decorative box at a design and fabric store that inspired my first wood box project. It was on the expensive side, but it had the checked pattern that this paper guest towel has. I may have to buy this napkin and make another box.

Here is my version of the blue check box.

Step 4 – Apply the Mod Podge
With both the top and bottom of the boxes facing up, use a foam brush to apply the Mod Podge in thin, even strokes. I started on the bottom of the box.
NOTE: I started with Gloss Mod Podge, but quickly ran out. I switched to Matte, which worked fine. I’ve already ordered another bottle of Gloss.

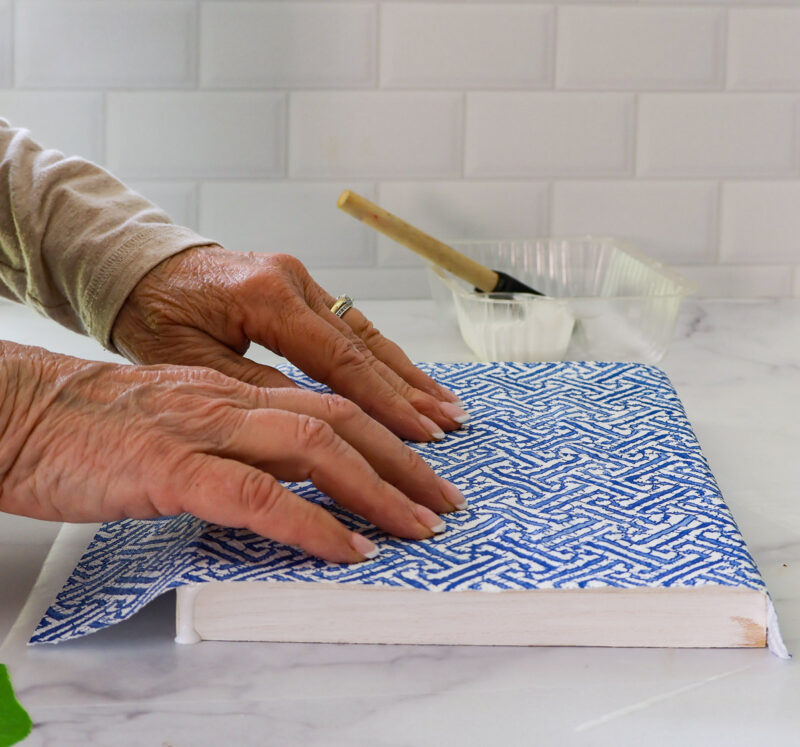
I gently placed one napkin over the box, letting it hang over one long side.
I added Mod Podge to one side of the box and smoothed the napkin over it.

Then I applied a thin coat on the napkin to seal it. I repeated on the side that had the napkin to cover it.


To cover the other three sides of the box bottom, I cut pieces of napkin the length of the sides. For the width, I cut the napkin to fold over the top edge of the box. I added Mod Podge and attached the napkin pieces.
You couldn’t tell where one piece of napkin ended and another started.


I followed the same steps to cover the box lid. This time, I first applied Mod Podge to the side of the lid, attached the napkin, then applied Mod Podge to the top and smoothed the napkin over it. I finished on the opposite side.

Finally, I used the craft scissors to remove any excess napkin from the bottom and lid of the box

Then I added another coat of Mod Podge on all the sides of the box. I allowed the box to dry overnight.

Adding Felt to the Inside of the Box
To give the inside of the box, I added a piece of off-white felt. I had bought a big multicolored package before Thanksgiving, and it came in handy now.
Fortunately, the felt was the same width as the inside of the box, so I only had to mark and cut one side of the felt.


I used fabric glue to attach the felt on the bottom of the box.

It was easy to attach the felt to the wooden box.


I repeated the felt step with the top of the lid.
Reattach the Hinges and the Clasp.
Using the small screwdriver, I marked where the hardware went and used an ice pick to make new holes for the little nails.


TIP: After the hinges were on, I used a large rubber band to keep the lid and bottom firmly together.

Adding a Pop of Gold
I thought adding little feet ot the box would give it more height and pizazz. To add a pop of gold to the box, I painted 1/2-inch wooden beads metallic gold.

To keep from getting gold on my hands, I wore a plastic food glove.

Next, I applied the beads to the bottom of the box with a small, very old glue gun.

I realize that the gold feet won’t show when the box is right side up, but I like the look they give to the box.

Adding Ribbon to the Lid
I realized that the lid needed something to keep it open when necessary. I found a piece of 3/8-inch white satin ribbon in my ribbon stash, cut it in half, and glued the ends to the lid and bottom of the box.
That last-minute idea worked perfectly.
My decoupage decorative box was finished.


Displaying the Decoupage Decorative Box
A box like this can be used in multiple places in your home; it can be practical or just decorative:
- coffee table (for remotes)
- side table
- console
- mantel
- bookshelf
- bathroom vanity (for jewelry or a man’s cuff links)
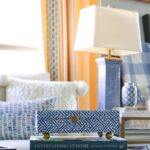
As the first place of honor, I chose our coffee table. I stacked a few blue coffee table books and placed the box on top.

I am really loving how the blue box provides a nice focal point. When you are sitting on the sofa or in one of our chairs, you can see the cute little feet.
I paired the books and box with a blue tray with gold handles and a vase of white hydrangeas from Trader Joe’s.
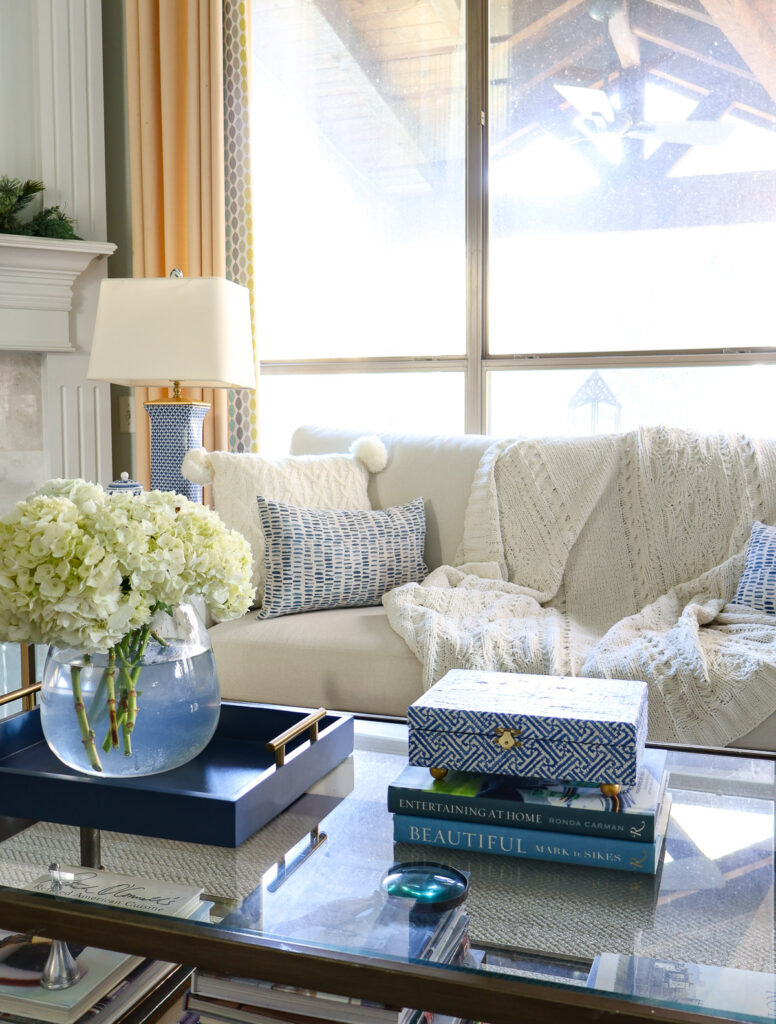

And guess what practical function the box serves as ? First time we’ve had a place for remotes.

I hope you enjoyed learning how to decoupage a wooden box for home decor. This wood box went from plain and boring to a pretty and practical decorative accessory.
I hope that you will PIN it to save the instructions and make it to decorate your own home. Using your chosen color and pattern, you can make a pretty box that is completely your style.
I encourage you to visit these Pinterest Boards (follow, too!) for more inspiration: Decoupage Projects and DIY Accessories for Your Home.
Below are the links to all the projects shared by my Creative Craft Blog Hop friends. Start by visiting my fellow Texan, Cecilia of My Thrift Store Addiction.


My Thrift Store Addiction – Crochet a Mini Hanging Planter (with Dollar Store Supplies!)
Donna – Adorable Decorative Pillows
Purple Hues and Me – Decorative Cord and Mesh Placemat
Birdz of a Feather – Eyeglass Holder
Shop at Blu – Valentine’s Glitter Ornaments
Bluesky at Home – How To Decoupage A Wood Box For Home Decor


Carol, that box is stunning! Your attention to detail is fantastic. You transformed that ordinary unfinished box into a showstopper that looks gorgeous in your home.
Thank you, so much, friend. Love your feedback.
Oh how I love blue and white accessories1 Great pattern suggestions, Carol. Pinned!
Suzanne, we are on the same wave length. Thank you for your sweet feedback. Happy to connect with you again.
This is spectacular Carol; I’m in awe at how the pattern lines up! Brilliant idea to add the ribbon too – you thought of everything.
OH, thank you, Sara. This was a fun project to create, and lucky me, everything just turned out as I planned.
Carol, thank you for sharing your beautiful decoupage box. It is so cute and very clever. You have inspired me to try my hand at it…I can’t wait.
Patricia, if I inspired you to try decoupage, then I’m a happy crafter. Thank you for your nice compliment.
Carol, you find the prettiest napkins for decoupage! Love the blue and white and the results are beautiful! Pinned! Cecilia, My Thrift Store Addiction
Cecilia, thank you so much for your sweet comment. I could spend a fortune on napkins! There are so many pretty patterns. Maybe we have a “napkin exchange” since I’ll never use all the extra napkins from projects.
Carol, you did a fantastic job mastering the smoothing process in decoupaging! Your decoupaged box really looks seamless and so professional with the design matching perfectly! And I love how it looks on your table – so beautiful!!!!
Thank you, Gail. I so appreciate you postive feedback from a master crafter.
Your box blends so beautifully with your decor. Every time you share a decoupage project, I am always impressed with the napkin styles you use. I need to get better at spotting great-looking napkins for projects. Thanks for joining again.