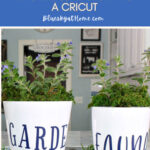
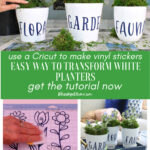
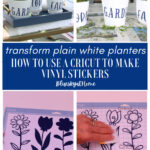
How to Decorate Pretty Planters with Vinyl
We love white planters for holding flowers, ferns, succulents, and herbs. Would you like to make them more decorative for your home decor? Have you ever thought of using vinyl decals? Let me show you how to decorate planters with vinyl.
We know there are so many creative ways to decorate flower pots. Whether they be terra cotta pots, plastic planters, or ceramic pots, the options to spiff them up are endless.
It’s fun to customize a plain pot with your own style. You can add your favorite colors or patterns or add words that fit your aesthetic.
Here is one way to give plain white ceramic planters a bit of style – adding vinyl decals using a Cricut Machine and Cricut Design Space.
This post contains affiliate links to products used to create this project. If you should order any item from this site, I may receive compensation, but you do not pay a penny more. Your purchase is greatly appreciated as it helps support the continued publication of this site.
What is a Cricut Machine and What Does it Do?
Are you familiar with a Cricut machine? Here’s the lowdown on this amazing tool to help you make thousands of projects.
A Cricut is basically a cutting machine. It can cut paper of different weights, vinyl, fabric, even wood and leather, depending on what type of machine you have. There is the Cricut Air Explore family, the Cricut Maker series and the Cricut Joy.
I have had my Cricut Air Explore for about 7 years. Over that time, I have gone in spurts of using it. After recently taking a fabulous free class from Abbi Kirstin of Abbi Kirstin Collections, I realized how much I didn’t know about how to use my Cricut. That free class sparked my desire to use my Cricut more.
I signed up for Abbi’s course, Cutting Edge Crafters. I’ve dived in and can’t wait to share more Cricut projects in the coming months.
I love making projects with vinyl. If you want to see some earlier projects and lessons, check out one of these posts:
- How to Cut Vinyl Decals
- How to Make a Farmhouse Sign with Vinyl
- Paper Flower Decorations with a Cricut
This project is a fun way to use vinyl. It’s really entry-level for Cricut. If you are a beginner, you’ll love it. If you are an accomplished Cricut user, you can always find a more intricate design to use.
About These White Ceramic Pots
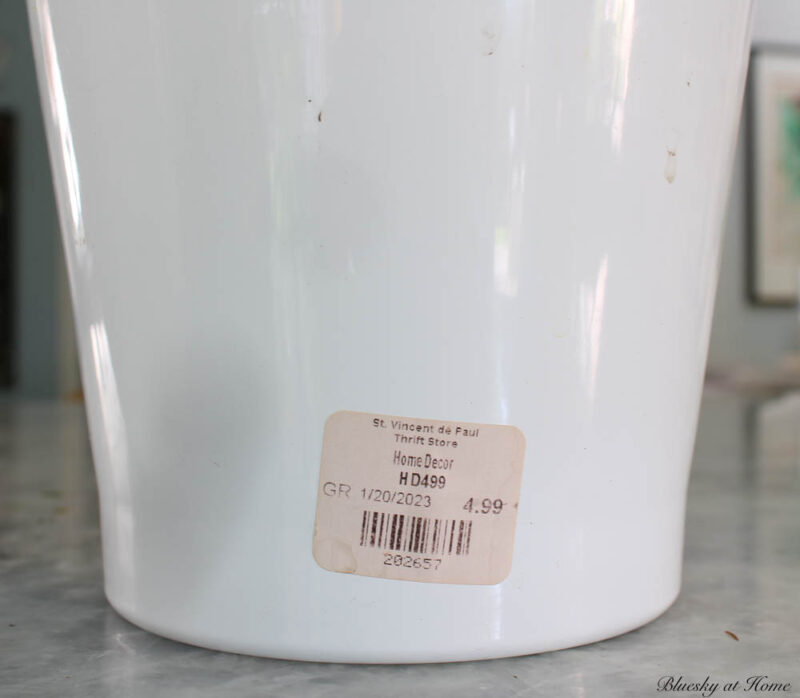
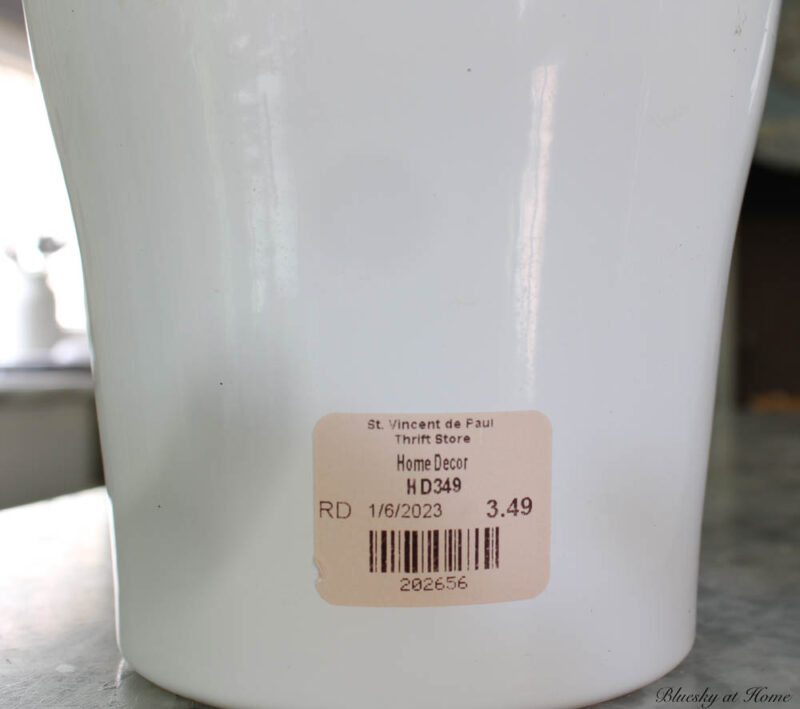
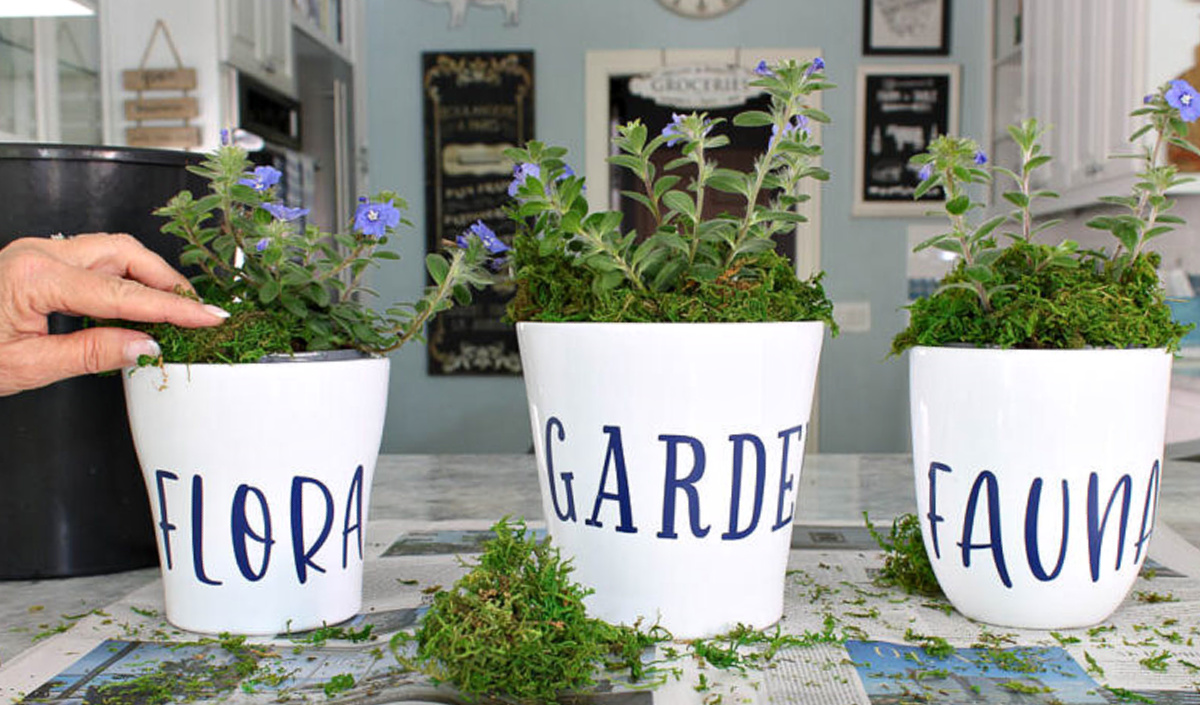
I bought these three small planters a few weeks ago at the St. Vincent de Paul Thrift Store. It was my first visit and I was impressed with the variety and scale of their offerings. Ironically, when I was most recently in Atlanta, my younger daughter and I went to the St. Vincent de Paul Thrift Store there.
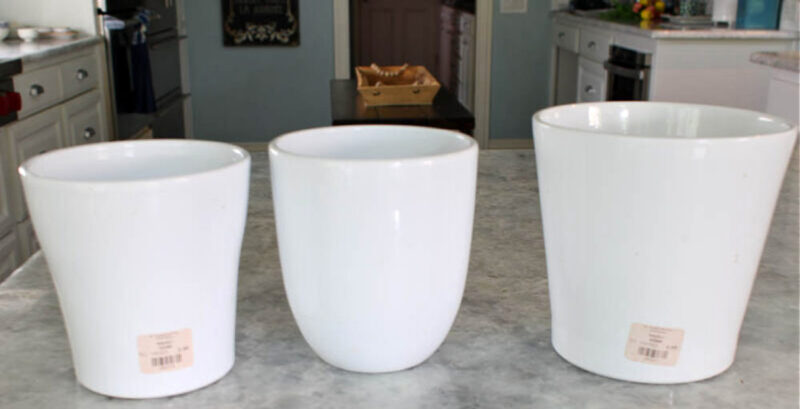
I can’t resist white pots. These are plain planters, but they were in excellent condition. The two smaller ones were $3.49 each and the larger one was $4.49.
I liked the shapes and thought they would be perfect for adding vinyl decals.
The first thing I did was removed the price stickers and wash them.
Supplies for the This Planter Vinyl Project
You only need a few supplies, other than a Cricut machine, for this project. Fortunately, except for the white pots, I had all the supplies on hand.
You can use either permanent or removable vinyl for this project. I had navy permanent vinyl on hand, so that’s what I used. Cricut vinyl comes in dozens for colors and patterns for you to choose from.
Cricut mats are used to feed your material into your Cricut machine. There are different types for different materials. The 4-pack package is the best deal as over time you will need them.
The weeder, scraper, and spatula are Cricut accessories that you will want to have on hand for many different Cricut projects. If you don’t have any of the accessories, I recommend that you get the accessory set a it’s cheaper overall.
Transfer tape is indispensable for vinyl projects. It’s how you get the vinyl from the mat to the surface you use for your project.
- Cricut Explore Air 4
- Cricut mats
- either permanent vinyl or removable vinyl
- weeder
- scraper and spatula
- accessory set
- transfer tape
- scissors


Creating the Vinyl Decals for the Planters
Your Cricut machine does the work, but Cricut Design Space is where the magic happens. In CDS, you can search for thousands of ready-to-use designs, create your own from images, text, and templates or create your own designs (I am not there yet.)
Designing and Cutting the Vinyl
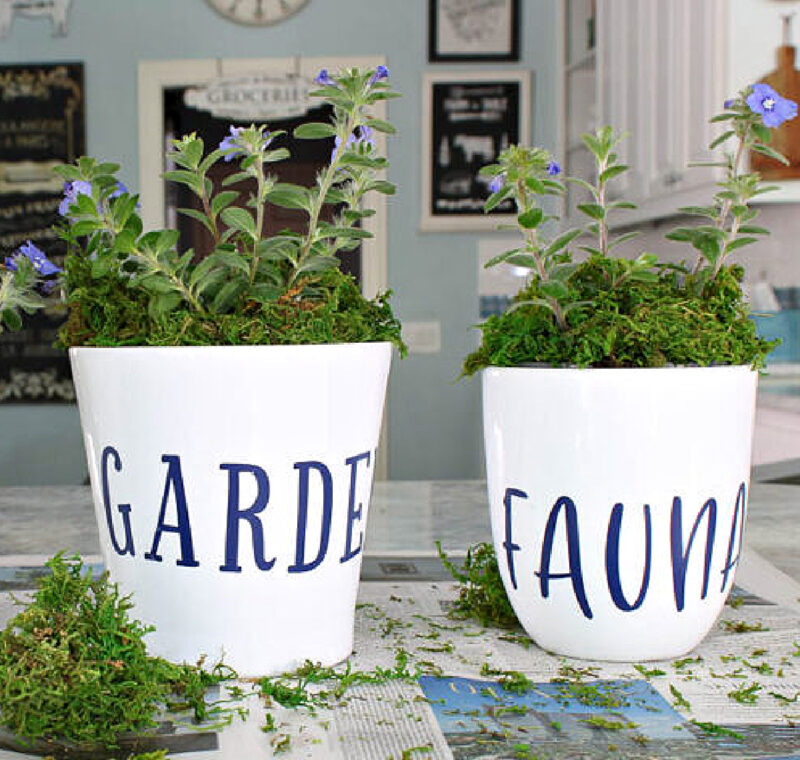
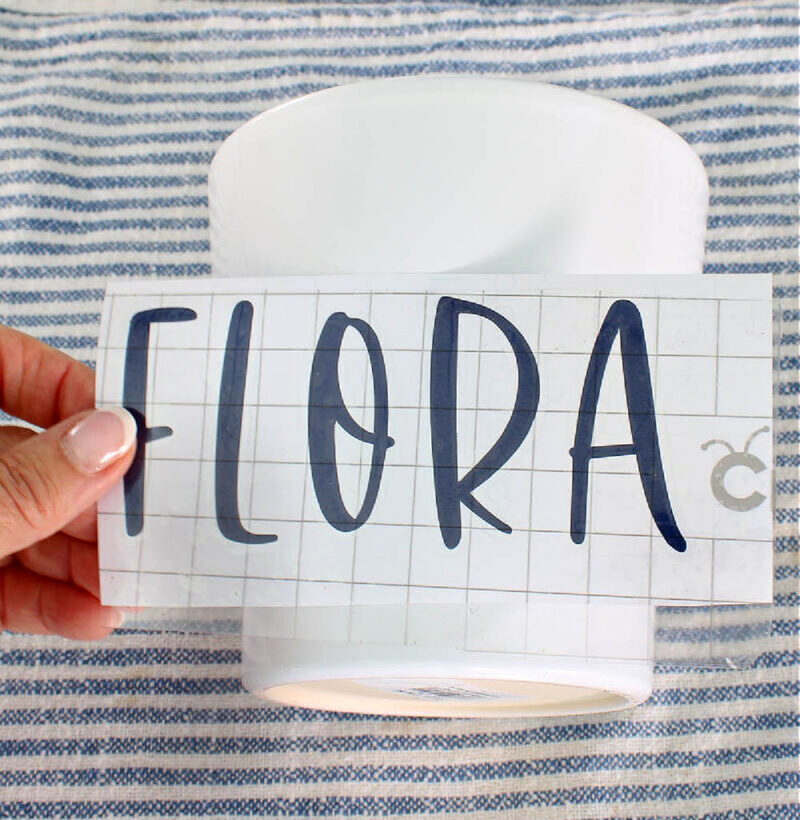
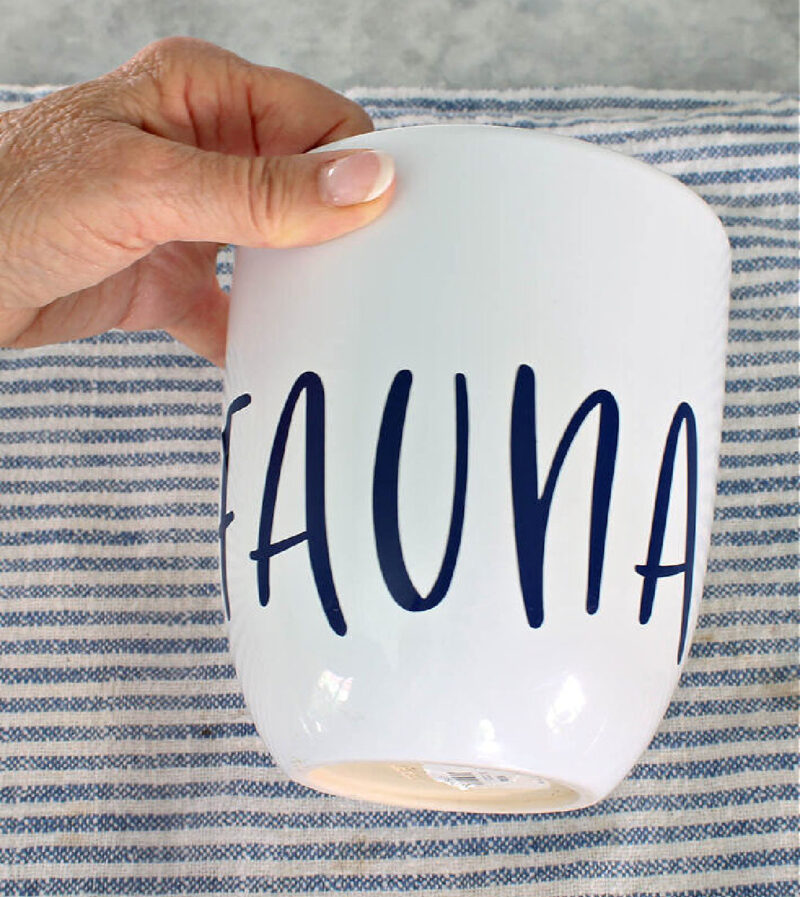
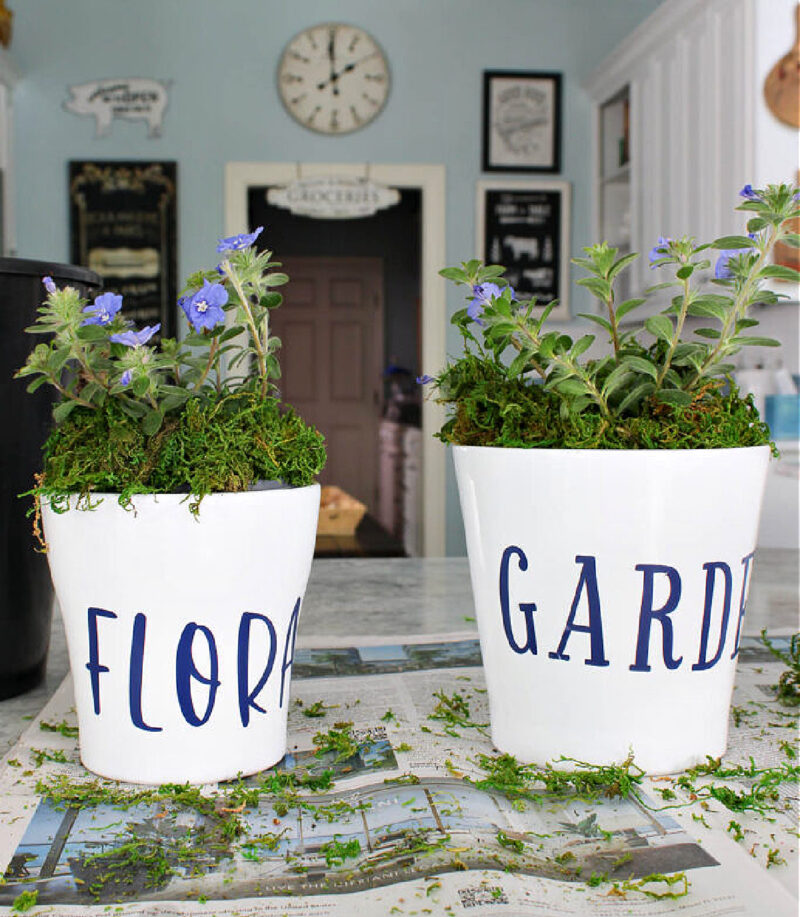
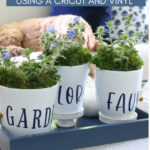
For my two smaller pots, I just wanted to create two words: flora and fauna. In the dashboard, I clicked on TEXT in the left sidebar and typed in FLORA and FAUNA.
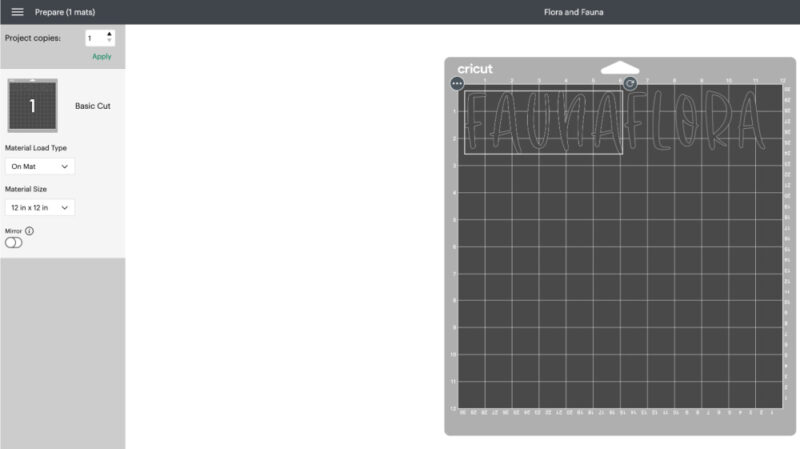
Then I scrolled through the fonts until I found one I liked for this project.
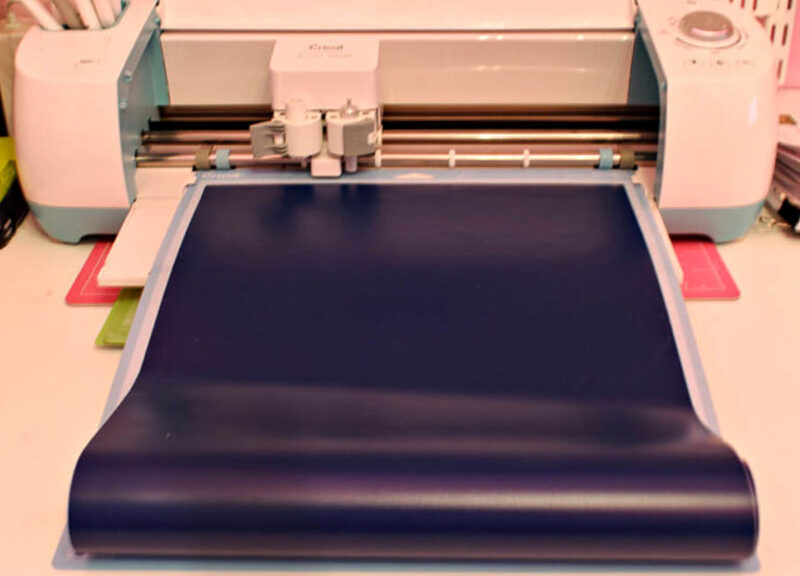
Next, I opened my Cricut machine, turned it on, and loaded bright deep blue vinyl onto my mat. You want to make sure that you smooth it down on the mat.
Cricut Design Space prompts you through every step: load your mat into the machine, cut the vinyl, and release the mat from the machine.
TIP: Be sure to adjust the dial on your machine to the proper material you are using; in this case, it’s vinyl.
I cut the cut vinyl design from the rest of the vinyl with scissors. Set it aside for now.
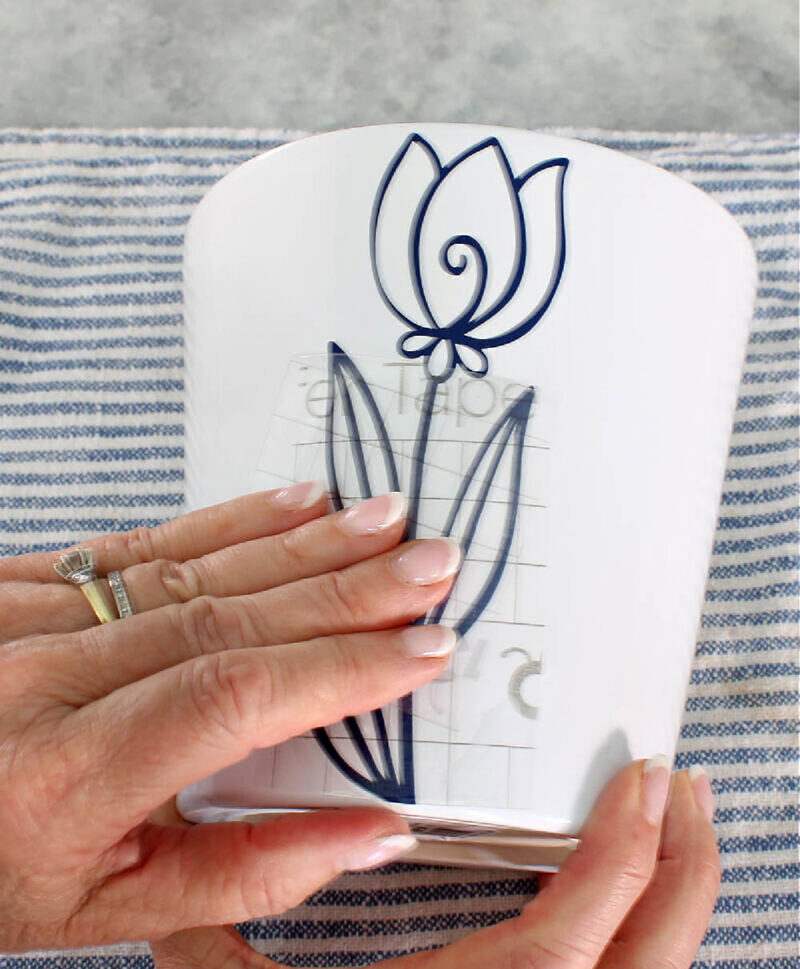
Design for the Large Pot
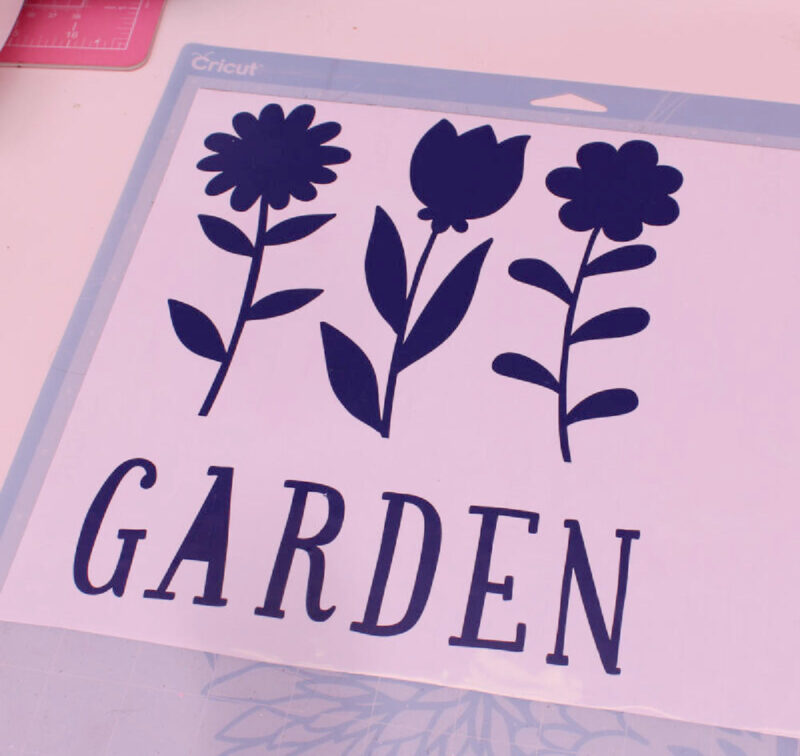
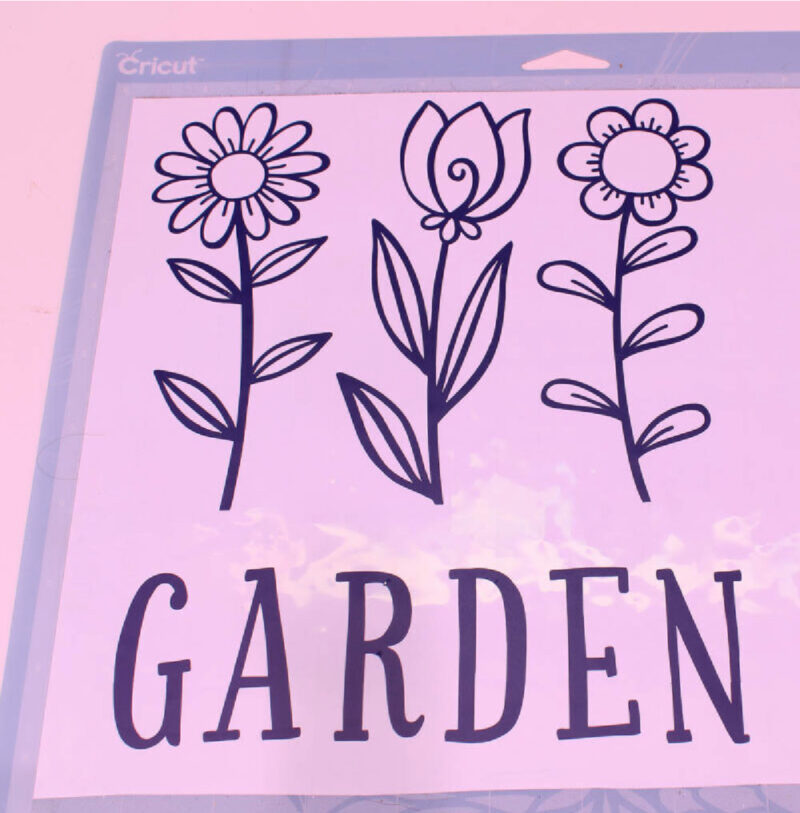
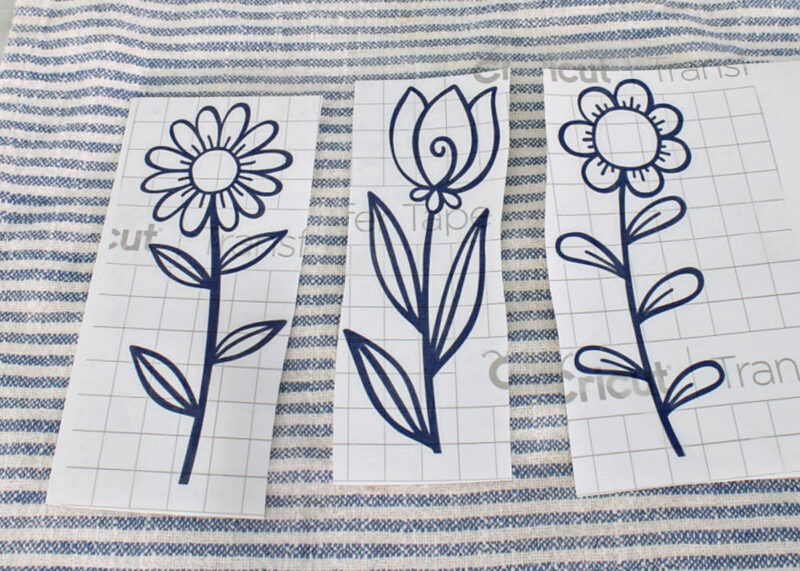
For the larger pot, I found a darling design with the word “GARDEN” and three flowers.
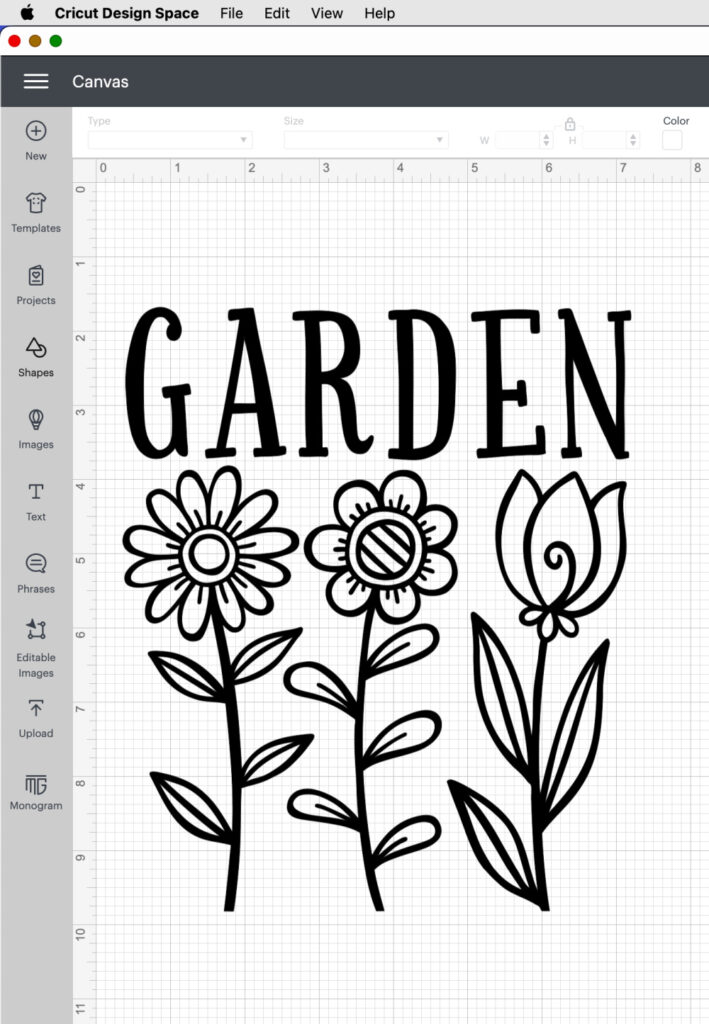
Again, I placed the vinyl on the cutting mat and followed the Cricut prompts to cut it out.
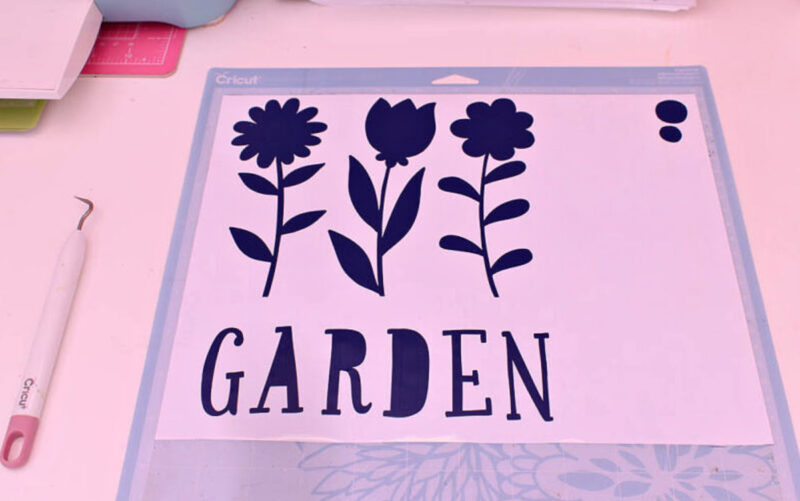
NOTE: For this design, I found that it was easier to leave the vinyl with the design on the mat. It will stay flat and secure so that you can go to the next step.
Weeding refers to removing pieces of vinyl that are not needed in the finished design. The first thing is to remove the large background piece of vinyl. Use the weeder or spatula to “pick up” a corner of the vinyl and separate it from the white backing and gently pull it away from the design.
Weeding your Designs
Now your design will be revealed.
With the sharp pointed end of the weeder, you pick up and remove the small pieces of vinyl to the side of your mat. This is one of my favorite parts – as the pieces are removed the vinyl image is totally revealed.
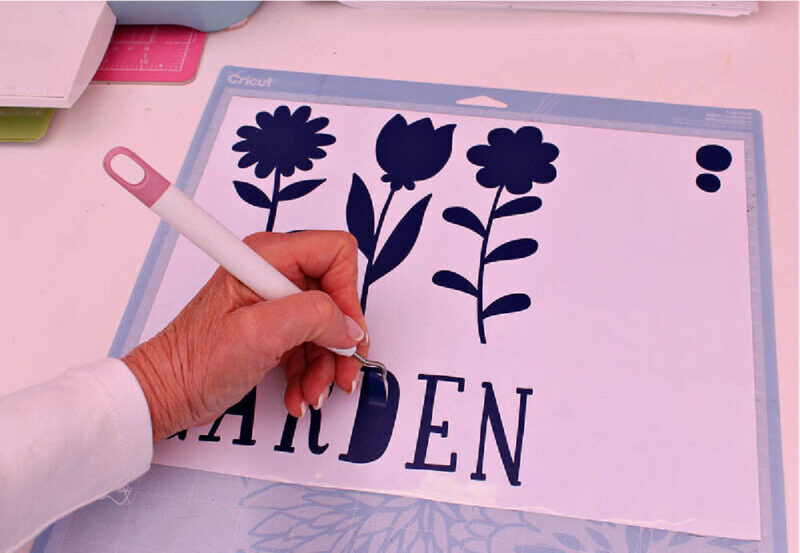
I just make a pile until I have removed all the vinyl pieces. Depending on your design, some pieces may be very small.

Using the Transfer Tape
Now you are ready to transfer the vinyl design to the transfer tape.
I set my vinyl design on top of the transfer tape to determine how much I need. Cut the transfer tape slightly larger than the vinyl design.
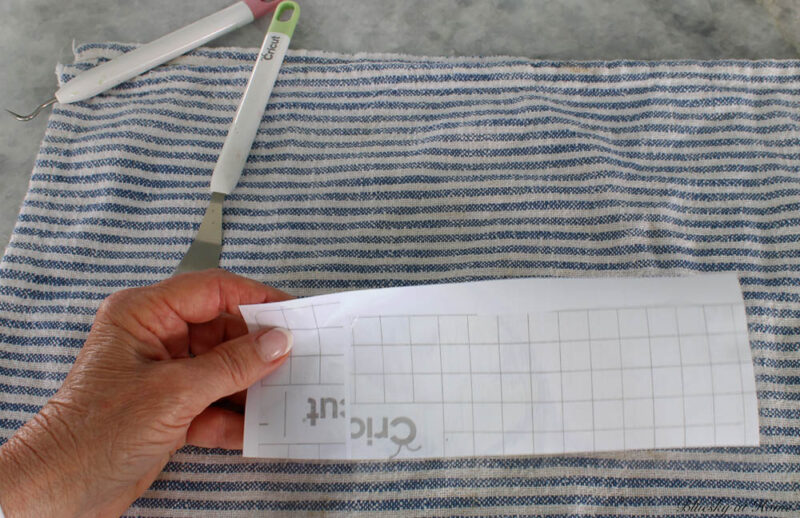
Gently pull the clear transfer tape away from the backing. Set the backing aside. You will want to keep it to reuse the transfer tape.
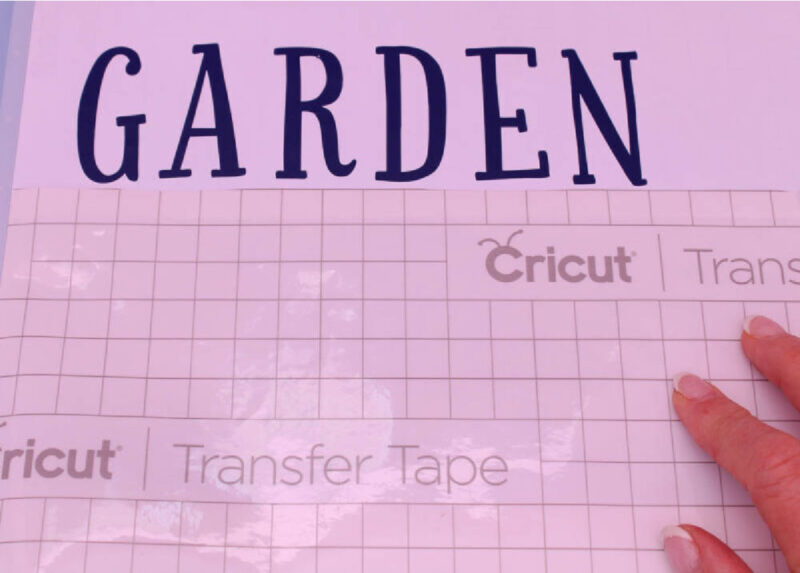
Place your clear transfer tape on top of the vinyl design. Be sure to leave some of the sticky part of the tape off the vinyl design. This will make transferring the vinyl decal from the transfer tape to your project surface much easier.
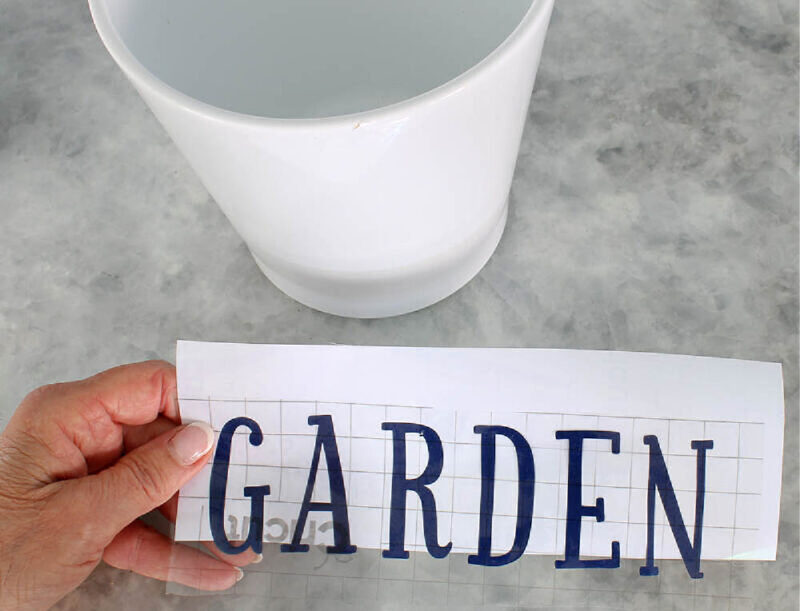
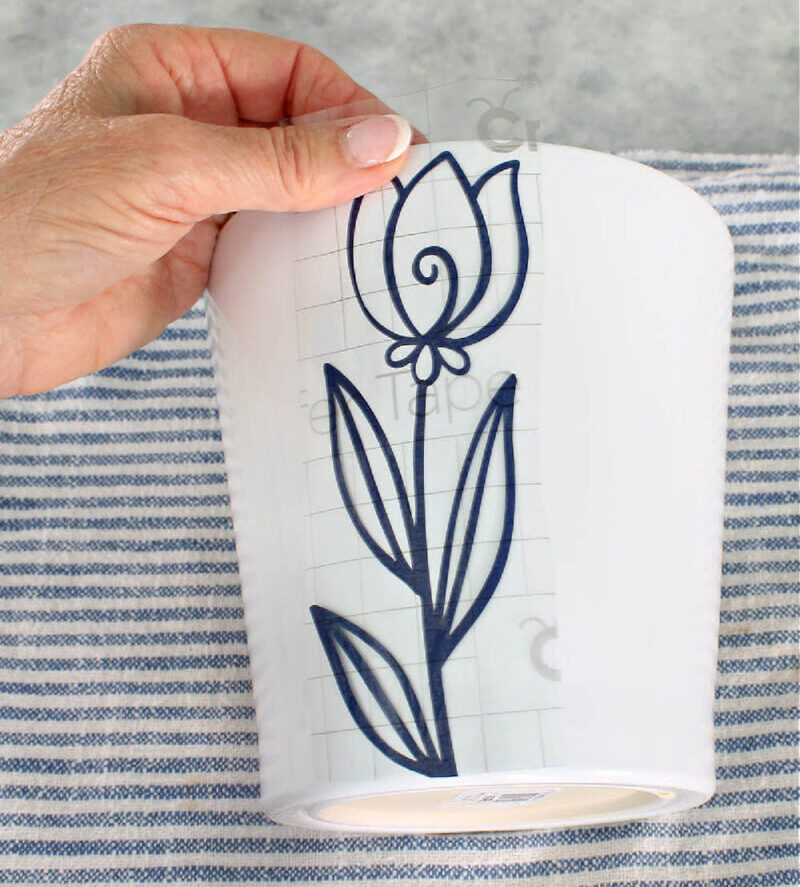
Transferring the Vinyl Design to Your Project
Since my pots are round, I laid out a dish towel to set them on.
Determine where you are going to place your vinyl decal.
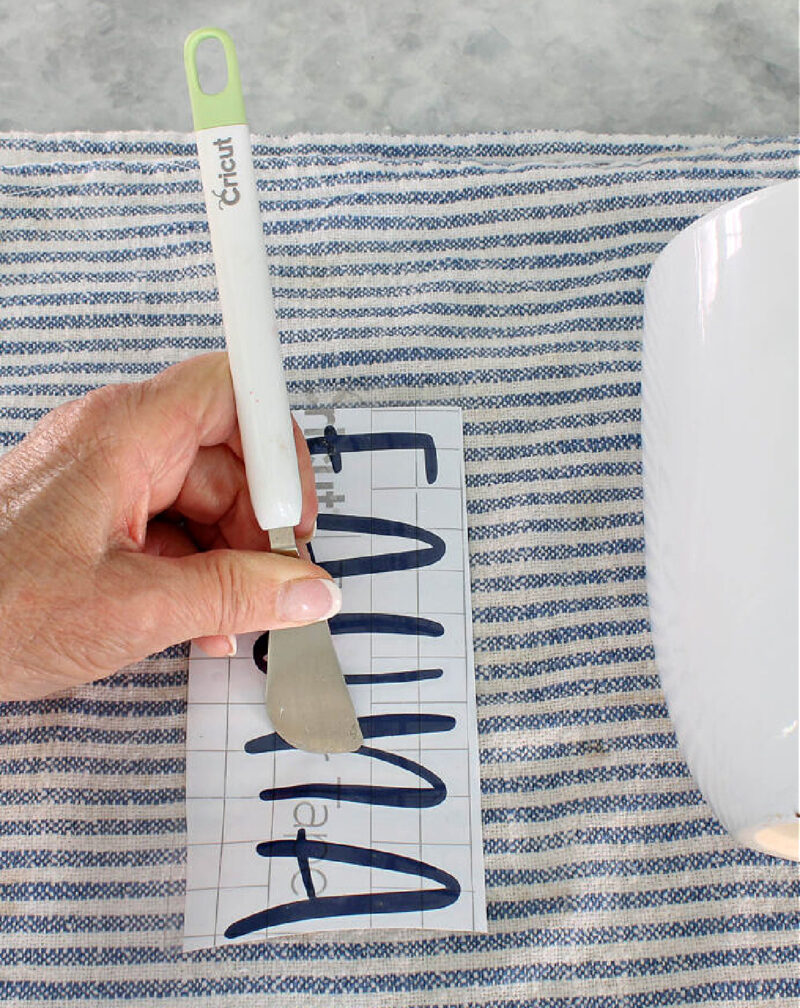
Take one of the vinyl decals and place the transfer tape on the project surface. Using your fingers rub it down to adhere the vinyl and the transfer tape to the surface.
NOTE: If you are adding the transfer tape/vinyl decal to a flat surface, use your scraper to adhere it to the project surface.
Here is another fun project you can make using words from vinyl on your Cricut.
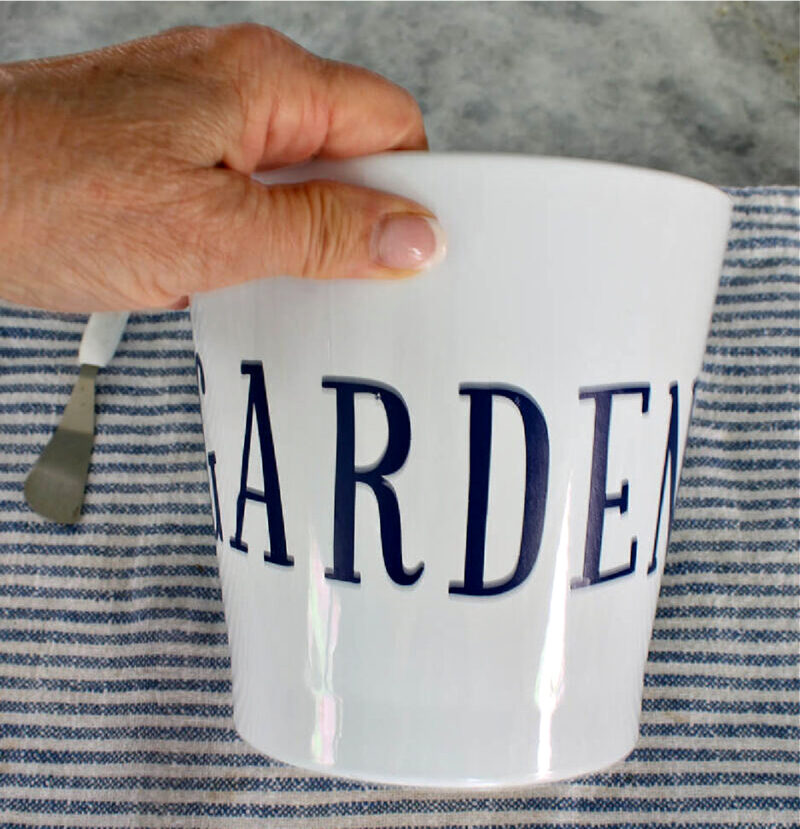
Once the vinyl decal is firmly adhered to the surface, starting at one end, slowly start pulling the transfer tape away. If the vinyl starts to lift, use the spatula, weeder, or your fingernail to hold it down. You may have to rub the transfer tape until the vinyl decal stays in place.
For the flower decals, I cut them apart with scissors.
Repeat with the other vinyl decals.
Use your fingers to rub in the vinyl decal to the white ceramic planter.

Slowly peel back the Transfer Tape and remove it to the paper backing that you removed from the back of the transfer tape. You can reuse it.
Adding your Flowers
You can add any type of flower, succulent or herb. Fresh or faux flowers will work.
These planters do not have holes in the bottom, so if you use fresh flowers you will have to remove them to water them.
I chose 4-inch fresh flowers called blue haze. We have used blue haze many times. They are great in flower beds or in hanging baskets as filler or spiller. I love the sweet blue flowers.
First, I thoroughly watered them.
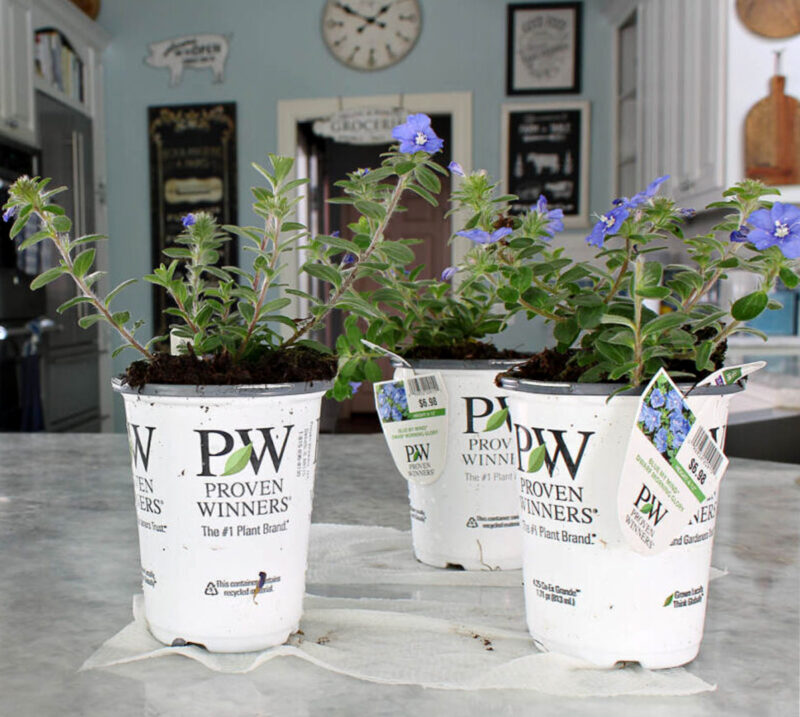
Next, I put the flowers in the planters.
As the finishing touch, I covered the dirt with my favorite Super Moss for a professional look. This also keeps the dirt from drying out as fast. This Super Moss can be be reused over and over and will last for years.
NOTE: It’s always a good idea to cover your work surface with newspaper while you plant and add the Super Moss.
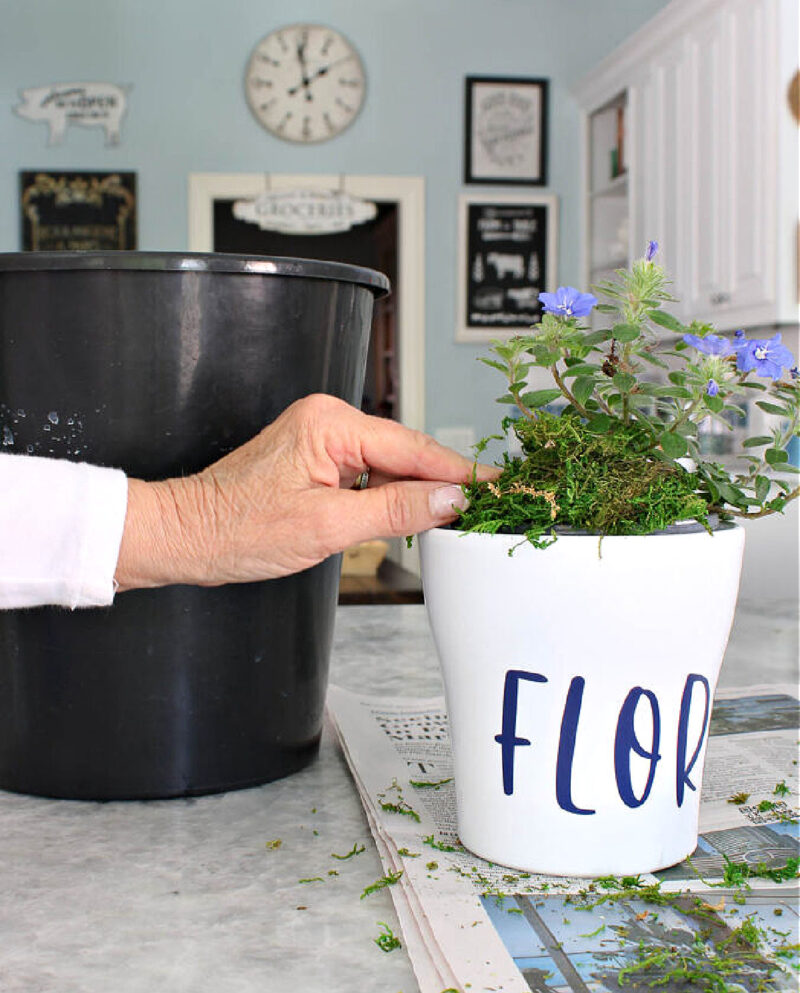
Don’t they look nice?
Displaying Your Decorated Planters with Vinyl Decals
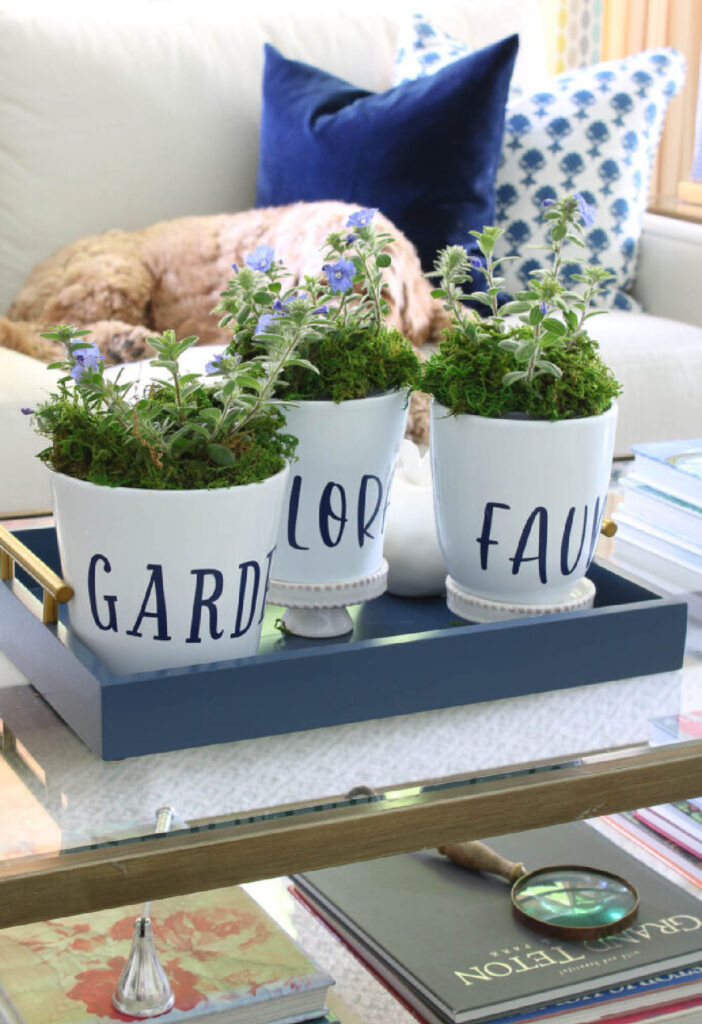
I decided to start with the three decorated planters in my blue tray on our living room coffee table. I think the blue flowers go so well with the blue throw pillows on our living room sofa.
In a couple of weeks, I will transplant the flowers to the hayracks on the sunny side of our backyard.
Don’t you love this easy way to make pretty planters with vinyl? I love that changing the vinyl decals is so simple when you want a different look for a new season or holiday.
I used them on a blue tray on our coffee table.
Be sure to PIN this POST so you have the directions and the resources.


These turned out great! They look like you picked them up at a trendy garden boutique. Featuring when my link party opens.
These are lovely, such a modern and classy look.
Your planters look wonderful! I love the font and flowers you used. I’m looking forward to seeing your upcoming Cricut projects.
Love it, so gorgeous and well done. Pinned it
Visited you via FARMHOUSE FRIDAY 296
If not already part of SSPS, this is a personal invite to hop over and come and share your posts with us at Senior Salon Pit Stop.
See my entries: 32+33 and navigate to the bottom of my page for the Senior Salon Pit Stop linkup, we hope to virtually meet you there.
Hi, Esmé, thank you so much for visiting Bluesky at Home. Thanks so much for your sweet comment. I’ll definitely visit your site.
Carol, your planters turned out so pretty! I don’t have a Cricut, but I always enjoy seeing the many creative projects created with them. Blessings, Cecilia @My Thrift Store Addiction
Thank you, Cecilia. A Cricut is an amazing resource to have in your DIY tool box.
Love, love, love how your planters turned out, Carole! I keep saying I need to get a Cricut! It is amazing what you can do with one and you make it seem so easy! You rocked it!
Hi, Gail. I love my Cricut and plan to use it more in the coming months. As talented as you are, you would love it.
Very cute Carol! You certainly are a whiz with your Cricut machine! I like the combo of words and the whimsical flower shapes, super fun! Happy Crafting!
Thank you, Jenna. I’m not yet a whiz, but I’m trying to get there.
Great job dressing up your planters. Love how they look now.
So pretty and those blue flowers are a perfect choice in your living room Carol! Now I’m inspired to try my Cricut; I haven’t even opened the box. Looking forward seeing more of your projects in the upcoming months.