Fun Thanksgiving DIY Wood Block Decoration
I have a holiday decorative project for you. You will have fun making this Thanksgiving DIY wood block decoration for the coming holiday.
This DIY project will be fun for family, friends and kids to use while you are putting the final touches on your Thanksgiving feast. This Thanksgiving DIY wood block decoration is an attractive accessory and a way to pass the time.
Do you ever buy an item at the craft store or thrift shop not knowing exactly what you will do with it? I do, and most of the time I find a way to use that item as a home decor or tablescape accessory.

With the Thanksgiving season upon us, a fun DIY project came to me. How about something that would not only be nice sitting on a table, but would be a fun and interesting accessory.
Fun Thanksgiving DIY Wood Block Decoration
Several weeks ago, I found some wood blocks at the craft store. All the wood items were 40% off. There were only 6 blocks, so I thought it was a good idea to purchase them. I knew an idea to use them would come to me.
The blocks sat in my wood stash until I turned my thoughts from Halloween to Thanksgiving.
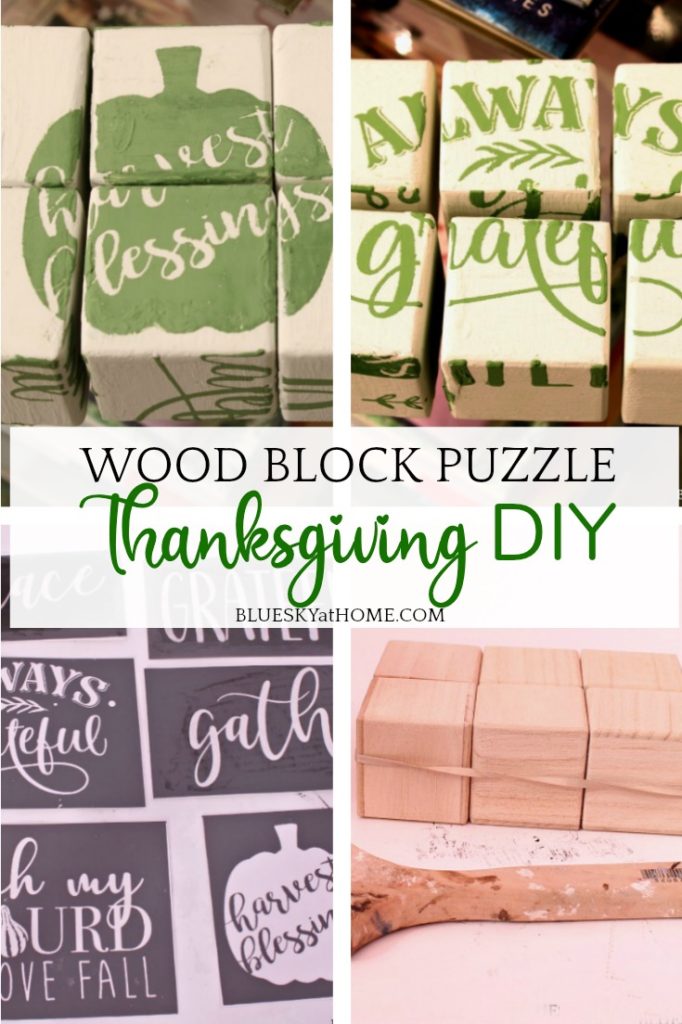
What could I do with 6 2~inch blocks? Make a Thanksgiving~theme puzzle. How, do you ask? Well, let me show you how to make a Thanksgiving DIY wood block decoration that you can use as an accessory or game.
I’ve seen other wood block puzzles used as an accessory, which I thought would be a fun project. If my grandkids were here this year for Thanksgiving, I would give them this project to keep them busy.
Supplies for the Wood Block Puzzle
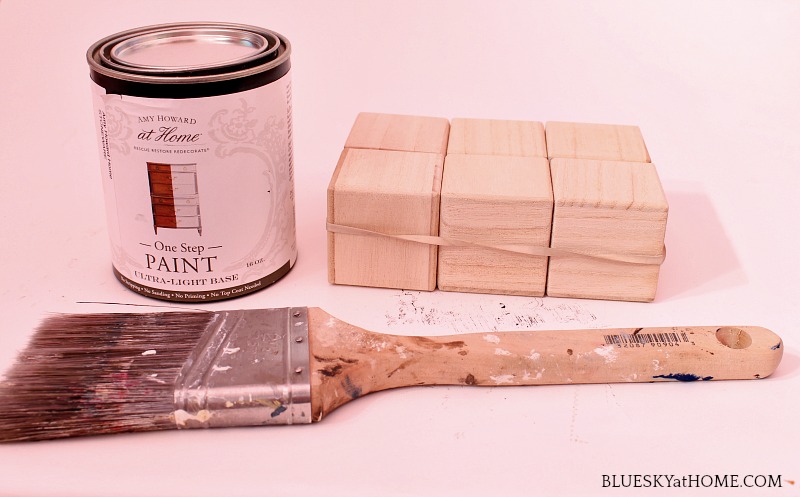
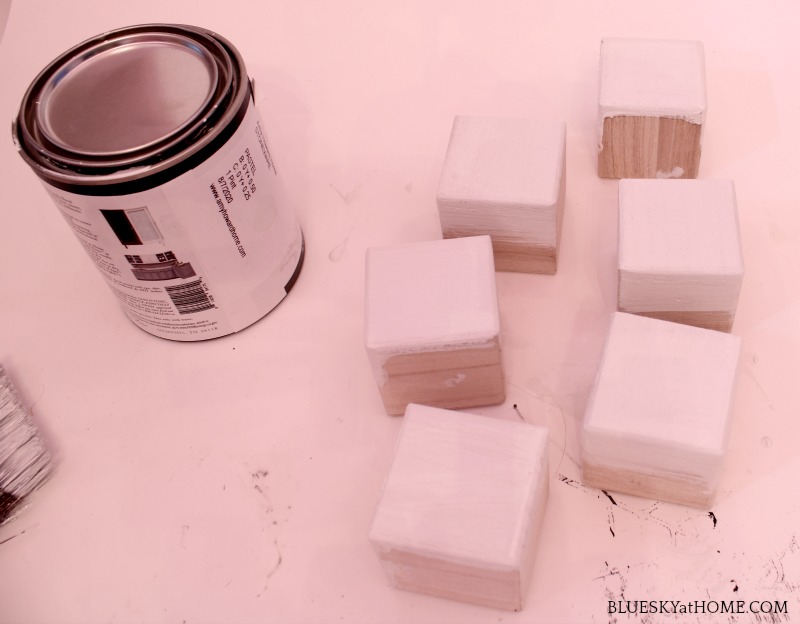
- the number of blocks you want to work with. You will need enough to form a square or rectangle. I used 6 2~inch blocks.
- large rubber band to hold wood blocks together.
- paint to paint the blocks. I used One Step paint from Amy Howard at Home in Stoneware, a soft white. You could also use a chalk paint or acrylic paint.
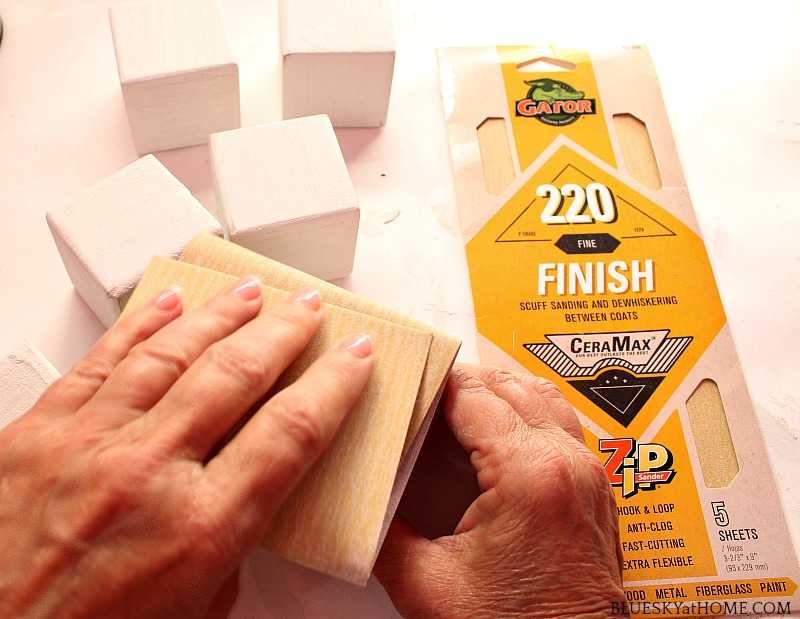
- sandpaper to smooth the wood blocks.
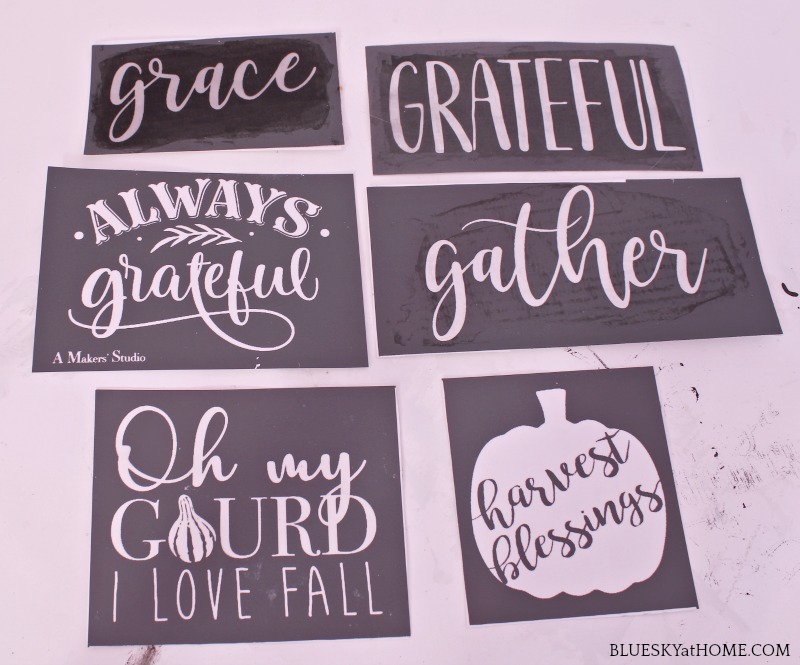
- stencils for your puzzle designs. I used stencils from A Makers’ Studio that I already had and used.
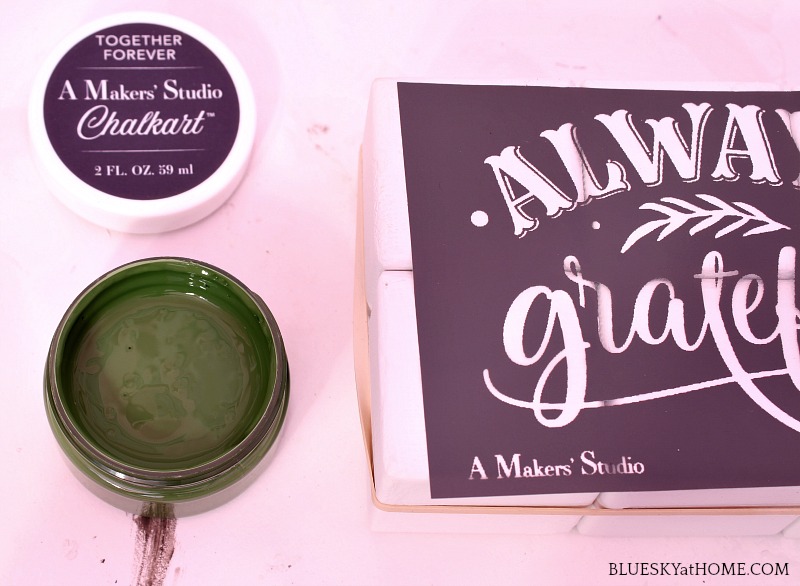
- ChalkArt to “paint” the stencils. For a fall feel, I used a green color called Together Forever.
- plastic scraper applicator.
The Plan for the Thanksgiving DIY Project
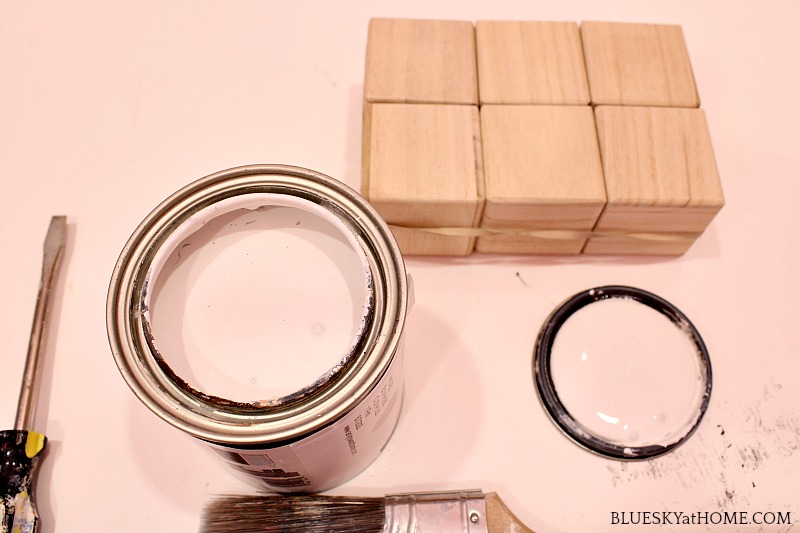
Step 1 ~ Paint one coat of paint on all sides of your block and allow to dry.
Step 2 ~ Lightly sand your wood blocks. I used a 220 grit sandpaper.
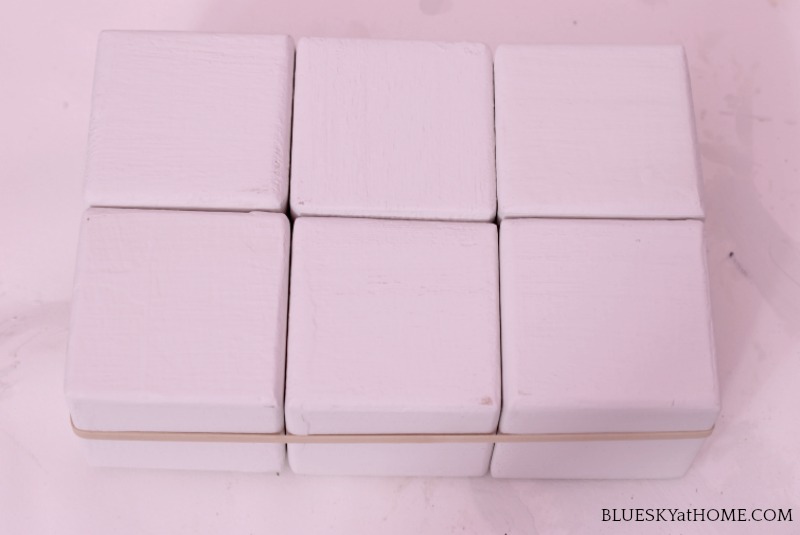
Step 3 ~ Apply a second coat of paint and allow to dry.
Step 4 ~ Place the rubber band around the blocks and make sure that your blocks are aligned.
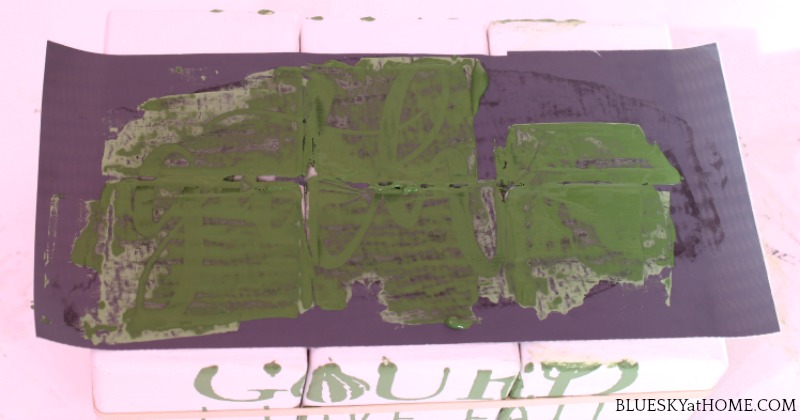
Step 5 ~ Place your first tri~mesh stencil on the top of the blocks and smooth down.
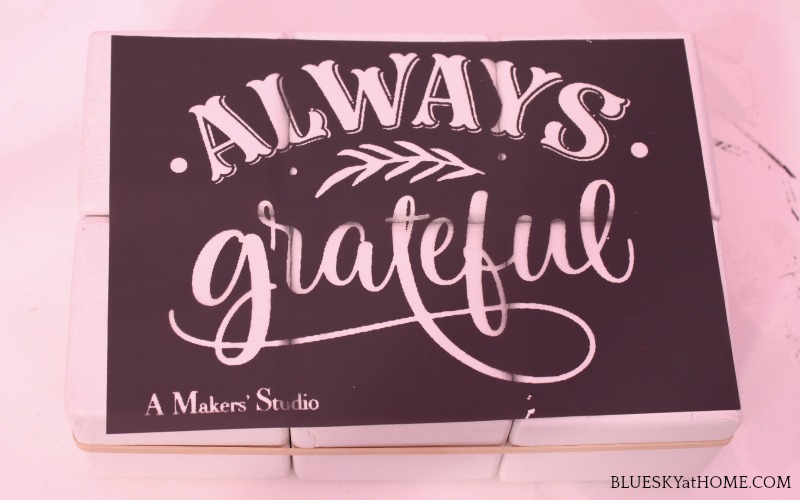
Step 6 ~ Apply your ChalkArt to the stencils, remove the stencil and allow the ChalkArt to dry for about 15 ~ 20 minutes.
NOTE: See these posts for more tutorials on using stencils.
- DIY Paint and Stencil Halloween Signs
- 9 Great Tips for Making Signs with Stencils
- How to Stencil Books
Step 7 ~ Turn your blocks to a blank side and reapply the rubber band.
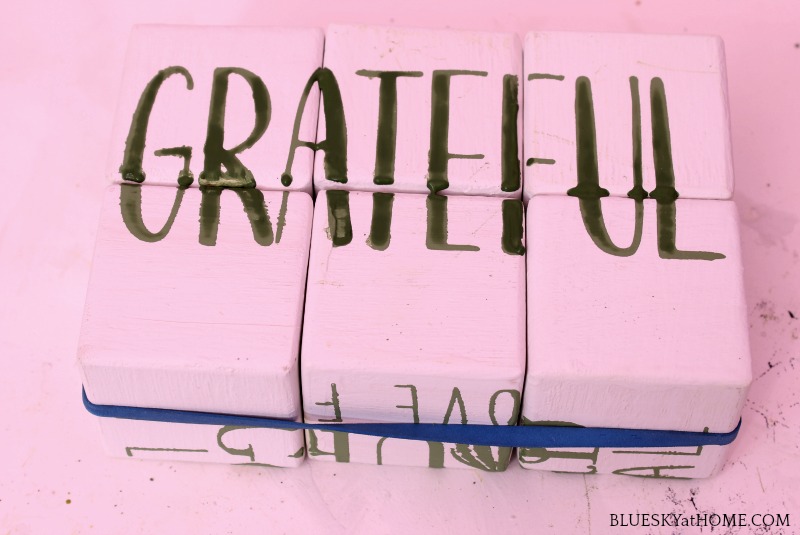
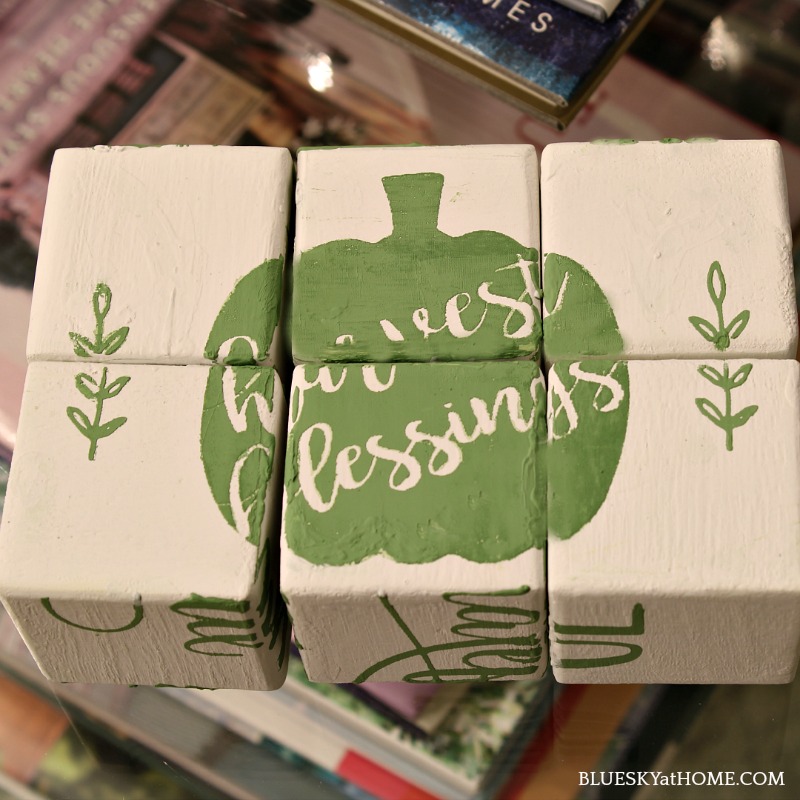
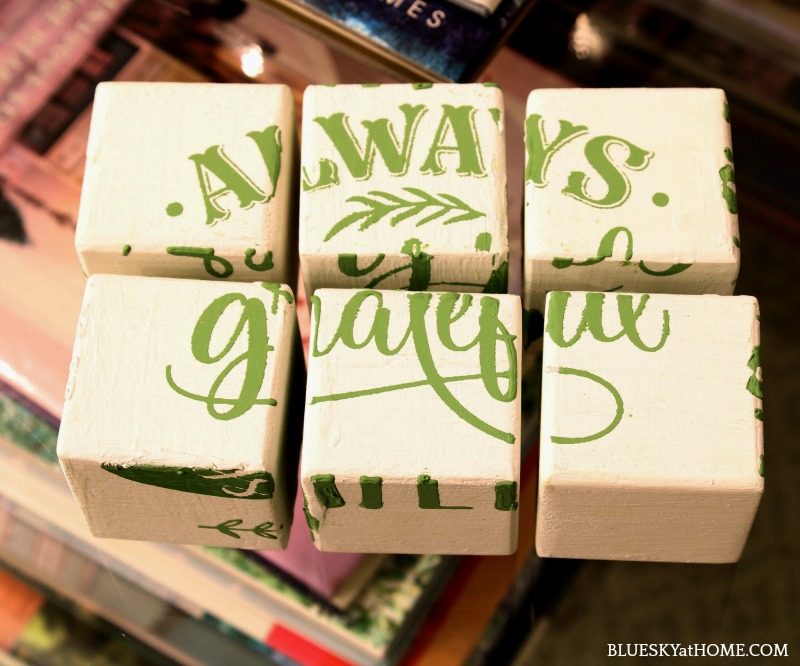
Repeat the steps with the rest of your stencils on all sides of the blocks. I covered 5 of the 6 sides of my wood blocks.
Sealing the blocks is optional. That’s all there is to making this Thanksgiving DIY wood block accessory/puzzle. You will actually spend most of your time waiting for paint to dry. This project is still under 2 hours total, most of drying time.
Displaying the Thanksgiving Wood Blocks
You can place the wood blocks on a table, on a tray, in a basket. Let your guests know that the set is not just for looks, but also as a puzzle for fun.
I hope that you like this fun DIY Thanksgiving project. Your kids, grandkids, even grown~ups will enjoy it. And don’t forget to PIN it for your holiday decor.


This is so much fun! What a creative idea.
Thanks so much for joining the Grace at Home party at Imparting Grace. I’m featuring you this week!
Carol, this is so cute! I have yet to master stenciling, one thing I really want to master!
Carole, those are so cute!! That would be a fun thing to have on the table for when everyone sits around talking after dinner, to play with (instead of phones, am I right???).
Good Morning Carol,
Such a darling project! Love the stencils you chose too.
Great Hopping with you!
Jemma
Super cute Carol! Love the ‘always grateful’ stencil too! Happy to be hopping with you again. ♥
What a great and creative idea. This is so very cute friend, love it! Thanks for sharing and wonderful hopping with you.
What a fun idea Carol! Lots of fun for busy fingers, I know everyone would love to play with this! Great decoration too, so clever!
What a fun fall decoration. It’s so original. Glad you are in the hop. You’ve got so many great decorations how do you do it. Your feed on Instagram is great!
What a creative and unique way to use thrift store blocks! Love how they turned out! Perfect for Thanksgiving especially this year. It’s a great conversation or activity starter!
You are so creative Carol. One thing my family loves are things to do while waiting for dinner to be served. This would be a great thing to have. I think I have some square blocks in my stash. Great idea!
I just love puzzles (as a matter of fact, that how Hubs proposed)! Our thanksgiving is sadly over, but will pin for next year 🙂
Carol, almost all the pictures but a few wouldn’t come up. I was able to see the one with the title on it, and how cute the blocks turned out. Pinned it!
How very creative! I think this as an activity is a great idea! I have pinned it.