DIY Air Dry Clay Pumpkin Napkin Rings: Easy Fall Table Decor Tutorial
Ready to create stunning fall table decor that guests will love? These DIY air dry clay pumpkin napkin rings are the perfect beginner-friendly project to add handmade charm to your autumn tablescape.
What makes this project special:
- Beginner-friendly – No prior clay experience needed
- Budget-friendly – Uses simple, affordable materials
- Customizable – Match any fall color scheme
Transform your dining table with these adorable handcrafted accents that look professionally made. Whether you’re hosting a fall dinner party, a Thanksgiving dinner, or want to elevate everyday meals, these charming pumpkin napkin rings add the perfect seasonal touch.
Air-dry clay is incredibly forgiving and easy to work with, making this an ideal first clay project. With basic shaping techniques and simple tools you likely already have at home, you’ll create napkin rings that rival expensive store-bought versions.
The best part? You can make an entire set in one day or less while enjoying the process of working with clay. Each ring becomes a unique piece that reflects your personal style and adds warmth to autumn gatherings.
Ready to get started? Let’s dive into this simple tutorial that will have you creating beautiful fall decor in no time.

These adorable clay creations add a personal and seasonal flair to your place settings.
They will elevate your fall dining experience from ordinary to playful. You’ll enjoy the satisfaction of knowing you made them yourself. This simple little project will add an extra layer of warmth to your autumn gatherings.
With just a few simple materials and some basic techniques, you’ll be able to create a set of charming pumpkin napkin rings that look like they came straight from a high-end home decor store.
The best part? You can customize them to match your fall color scheme or personal style, making them a versatile addition to any autumn decor.

Every fall, pumpkin DIY projects appear. (Is there a book “How Many Ways to Make a Pumpkin”?)
Since I’ve already made many pumpkin DIY projects, I wanted something new and different.
I remembered my air-dry clay project from a few weeks ago. Why couldn’t I make a diy napkin ring project with air-dry clay?
In this post, I’ll guide you through each step of the process for this easy craft, from shaping the clay to adding those final decorative touches. Get ready to impress your guests and fall in love with this simple yet stunning DIY that will get you in the mood for the fall season!
Craft Supplies for this Air Dry Clay Pumpkin Napkin Ring Project
This post contains affiliate links to products used to create this project. If you should order any item from this site, I may receive compensation, but you do not pay a penny more. Your purchase is greatly appreciated as it helps support the continued publication of this site.
You don’t need many supplies for this project, and you probably have most of them on hand:
- air-dry clay – I used the DAS air-dry clay that I used for my leaf coaster air dry clay coaster project.
- pumpkin cookie cutters – set of 3 sizes
- a knife or exacto knife to cut the clay
- a glass or rolling pin to roll out the clay; I used a glass that I wrapped in plastic wrap to keep the glass clean
- fine sand paper for sanding and smoothing the clay pumpkins

These pumpkin cookie cutters come in 3.34, 2.95, and 2.36 inches. I used the smallest one for this napkin ring project.

Making the Air Dry Clay Pumpkins
Step 1 – Start by placing a mat or cutting board on your work surface and then open the package of clay.
TIP: Keep a ziplock bag handy for storing the clay, so it stays soft while you work.

Step 2 – Cut off a good amount of clay using the exacto knife.
NOTE: I used plastic gloves to keep my hands clean.

Step 3 – Roll the clay into a ball and flatten it.

Step 4 – Using a glass or rolling pin, roll out the clay to about 1/8″ thick. It’s exactly like rolling out cookie dough.


Step 5 – Place the cookie cutter on the clay and press down. Repeat for as many pumpkins as you want. I got four pumpkins from this piece of clay. It’s just like making shaped cookies.

Step 6 – Peel away the excess clay. Roll that into a ball.

NOTE: Reroll the clay and make more pumpkins if you need to. I wanted to have six pumpkins.

Step 7 – Use a skewer with a pointed end (You could also use the tip of a pencil.) to make lines in the pumpkins.
Step 8 – Using a round skewer to make two holes at the top of the pumpkin.

Step 9 – Set the pumpkins aside to dry. If you need to move them around, you can use a metal spatula.

Step 10 – I waited until the next day to check the dryness of the pumpkins. (I estimate about 15 hours.) Turn them over so the bottom can dry.
NOTE: You can see an extra pumpkin. I made one more in a larger size, just to use up some extra clay.

NOTE: I would recommend leaving at least 24 hours to make sure that the clay dries thoroughly.
Step 11 – Using fine-grit sandpaper, sand off any rough edges from the pumpkins. Don’t forget to sand the back of the pumpkin where you poked a hole in the pumpkin.

I used a paper towel to wipe off the clay dust.

Painting the Air-Dry Clay Pumpkins
Although orange isn’t one of my go-to colors, I wanted the pumpkins to really look like pumpkins. I used the same metallic paints that I used for the leaf coaster project.
You could use any acrylic paints that you have at home.
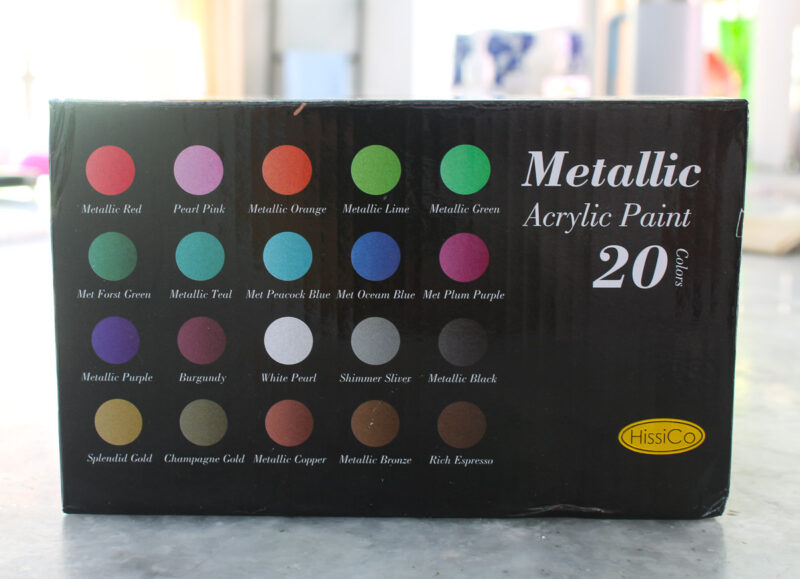
For this project, I used Metallic Orange and Rich Espresso.

Using a small brush, paint the pumpkin. I started by painting the edges of the pumpkin. I didn’t paint the back.


Then I painted the stem with the Espresso. This paint dries very quickly.

Sweet Shark came in the kitchen (where I work) and saw the pumpkins. He asked me if they were cookies. Thank goodness I told him no before he picked up one and bit into it.

That did give me the idea to make pumpkin cookies.
Assemble Your Napkin Rings
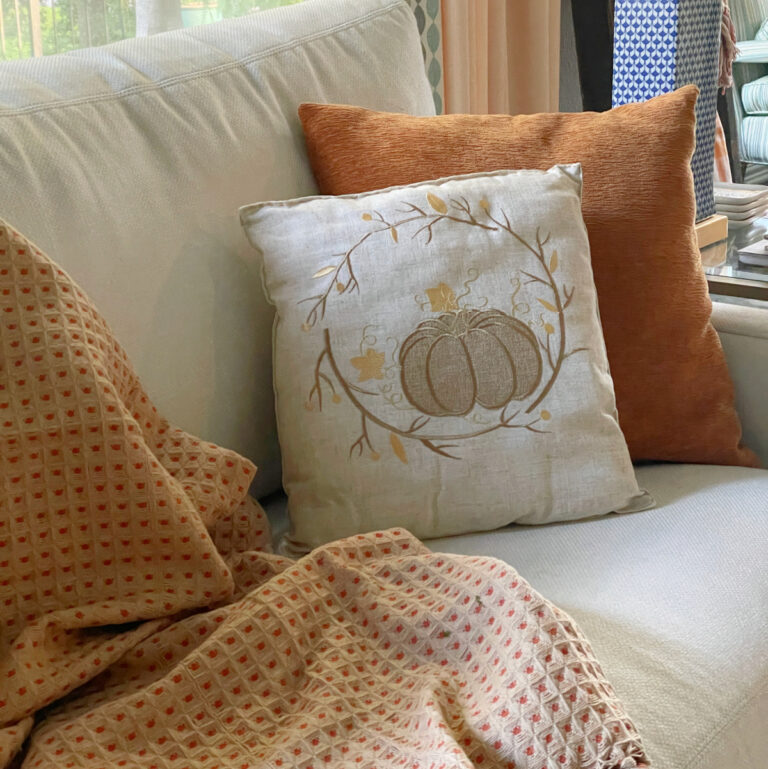
I don’t have a fall event planned anytime soon, but I chose these pretty white and taupe placemats and white estate sale napkins to demonstrate how to use this napkin ring project.

To make your napkin rings, you will ring three things:
- thin jute twine
- empty toilet paper roll*
- sharp craft scissors – these are my favorites
*Make sure your toilet paper roll hasn’t been crushed. I had to root around in the recycle bag to find this one and it was a little smushed.

Step 1 – Cut a piece of twine about 3 yards long. It has a “tail” that is about 8 inches long. Hold the twine to the side of the toilet roll.
Step 2 – Cut the toilet roll to about 3 inches wide to make it easier to wrap the twine.

Step 3 – Wrap the twine around the toilet paper roll about 20 times. Cut off the twine, leaving about 8 inches for another “tail”.

Step 4 – For the first pumpkin napkin ring, I added the pumpkin now, poking the twine tails through the two holes on the pumpkin.
Step 5 – Then tie a bow on the pumpkin to secure the napkin ring. Trim the tails with your craft scissors.

Step 6 – Using your fingers, slide the twine napkin ring off the toilet paper roll.
Step 7 – Roll your napkin up.

Step 8 – Pull the napkin through the napkin ring, holding the twine together.
As you can see, the twine came apart from the pumpkin a little bit.

Alternate Method:
Step 1 – For the next pumpkin ring, I wrapped the jute twine as before. This time, I removed the twine from the toilet paper roll first.

Step 2 – Then I placed the twine around the rolled napkin.

Step 3 – Add the air-dry clay pumpkin to the wrapped twine. This method worked much better, so that’s what I recommend.

Using the Air Dry Clay Pumpkin Napkin Rings
You can place the napkin ring to the left of the plate.

Or you can place it on the plate.

I loved this easy air-dry clay project. Using the pumpkin cookie cutters, made it a quick and simple process.
I have three different sizes of pumpkin cookie cutters. I hope to find other ways to use them to make more pumpkin clay projects for this fall. Here are some ideas that I’ve thought of so far:
- gift tags
- a bookmark
- place cards
- “ornaments” for a fall or Halloween tree (Just be sure to paint the back of the pumpkin.)
- glue a small magnet to the back of the pumpkin for your refrigerator or bulletin board
Can you think of other ways to use these little pumpkins?
Need more pumpkin projects? Take a look at these:
Pumpkin Projects for Fall
Want to keep this pumpkin napkin ring project handy? Save it to your relevant Pinterest Board. Here are more Pinterest Boards with great projects for fall: Autumn Ideas and Fall DIY Projects. I also have two brand new Boards, Fall Air-Dry Clay Projects and Pumpkin DIY Projects.


Carol,
Yes, I need to dip my toes into the world of clay. These look so simple to make. I love the idea. The metallic paints are so pretty!
Carol,
I love those pumpkins and great tutorial. Congratulations, you are being feature on TFT today. https://www.eclecticredbarn.com/2024/09/fall-ideas-on-tft.html
I hope you stop by.
Hugs,
Bev
Super cute, Carol! Great way to use air-dry clay for fall! Thanks for sharing at Tuesday Turn About! I’m delighted to be featuring your post at this week’s party!
Very cute – thanks for sharing with Create-it Link Party.
These are adorable, Carol! I have never done a clay project, but your tutorial has inspired me to give it a try. Happy Early Fall!
Carol, these little pumpkin napkin rings are so adorable and fun. I haven’t used air dry clay for anything yet but have some and am inspired to use it after seeing this. Thanks for the step by step tutorial! Happy early fall! Pinned!
So cute!!! I haven’t made any clay projects since Amy and Peter were in high school but I really should. These would be fun to put on our napkins here in the fall for when Gramma comes over for dinner or for pie. 😉 Great project, thank you!!!
These look so pretty and such perfect napkins rings for fall. Your tutorial looks so easy too. Thanks for sharing.
Carol
These turned out so cute. Love air dry clay.
Thanks, Rachel. I’m kind of smitten with them myself.
Your napkin rings turned out so festive and adorable! I’ve been wanting to do something with clay and this DIY might finally get my butt in gear. Seriously, so cute. I know you are super busy so thank you for joining us. pinned
Thanks so much, Cindy. This is just my second air dry clay project and I love how easy they are and fun, too. Thanks for the inspiration.
These are so adorable! I didn’t realize at first that you painted the clay; I thought you had used the Crayola air dry clay. I immediately thought garland with one hole punched through the stem, but your 2-hole method would be less stress on the fairly fragile clay. I have just loved garlands for the last several years. Small ones would also make cute hanging ornaments on large jars or even vases–especially with the jute twine! As a cooky cutter hoarder, I think I’d alternate the pumpkins with some leaf shapes, too!
Thanks so much for your sweet comment. I do hope you try air dry clay. So easy and so many possibilities. And painting them is so easy. And I love the idea of a banner with one hole! Share if you make them.
I love these cute clay pumpkins Carol! I thought about a pumpkin air dry clay project, but that’s as far as I got LOL! Your napkin rings are just adorable! Pinning!
How sweet, Michelle. Your clay projects from last year were some of my inspiration. I need to try free painting them.
These clay napkin ring pumpkins turned out so cute Carol, they do look like cookies! And now I’m craving cookies 😉 Thanks for the great tutorial! Pinned.
Thanks so much, Cindy. They do look good enough to eat!
These are so stinking cute, Carol! I have two nephews that are completely obsessed with all things Halloween and they would adore these. I can’t wait to send them this idea. They will be so excited! Big hugs and hope your Fall season is filled with adventure, CoCo
Thanks, Coco. I love a girl who says “stinking cute”! Yes, this would be so easy for kids. They just have to be patient to let them dry overnight. Send pics!