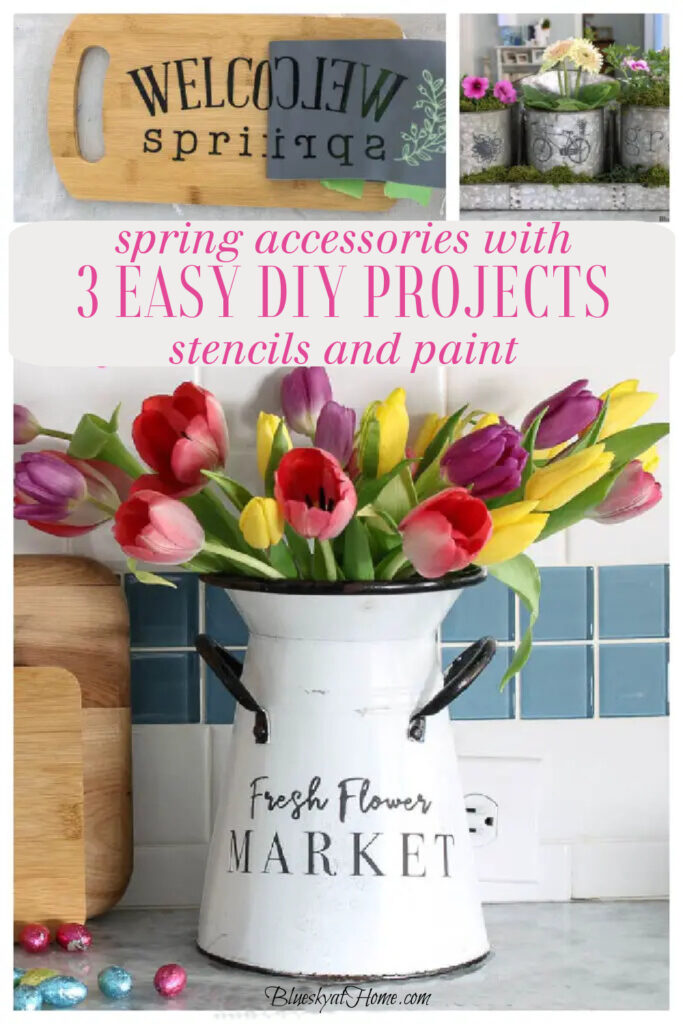
3 Easy DIY Spring Home Decor Projects
Decorating your home for spring can mean changing colors or updating with accessories. Here are 3 easy DIY spring home decor projects that can also give your space a fresh look.
I love shopping for a new season, don’t you? But I also enjoy making items myself. These 3 easy DIY spring home decor projects are so much fun to make.
As I was unpacking some of our spring decorations, I came across these 3 spring DIY projects that I made a couple of years ago. I think they are still so cute, so easy and so fun that I wanted to share them again.
These projects came about because I had some items in my home that were nice but could be so much better with a touch of spring design. Since I am not an artist, I use stencils to create the pretty motifs that I love to include in my home.
All three of these projects turned out better than I imagined.
If you have items in your home that need some embellishment to look their best, then stick around and let me show you how to bump up the cute factor for this year’s spring home decor.

DIY Spring Home Decor Project Inspiration
Do you have things around your house that you know could look better? Me too.
All I needed was the inspiration to work on them. I found it in this beautiful spring stencil from A Makers’ Studio. It’s called Welcome Spring.
I used this one stencil to make 3 different spring home decor accessories. That’s a good thing.
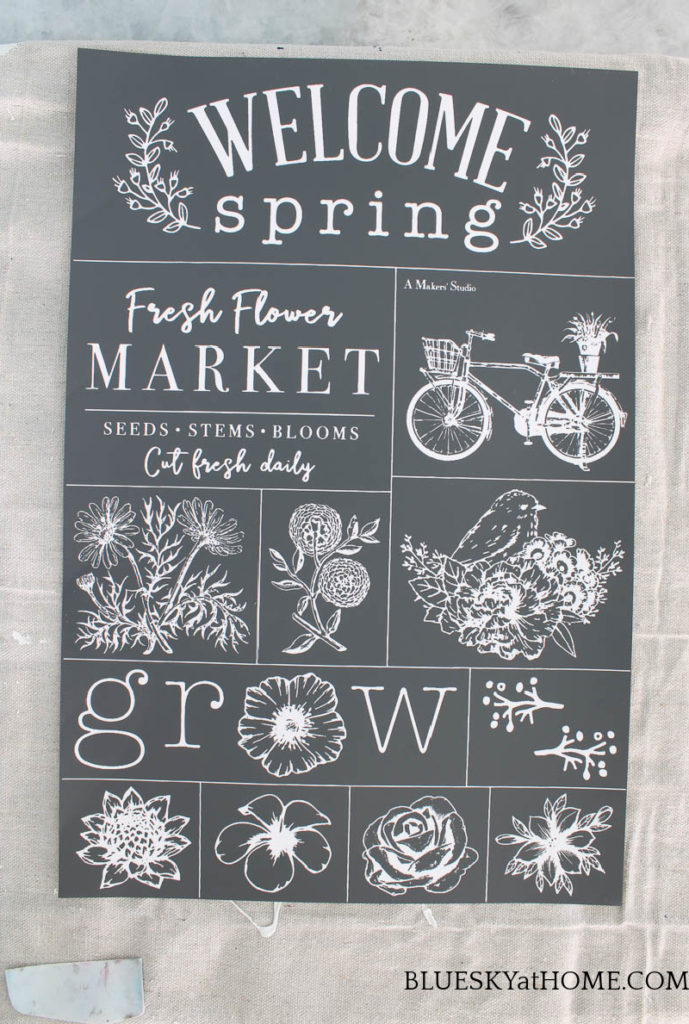
I love all the designs and the word phrases on this one stencil. Immediately, I knew that I could create some awesome spring home decor projects with just this one stencil.
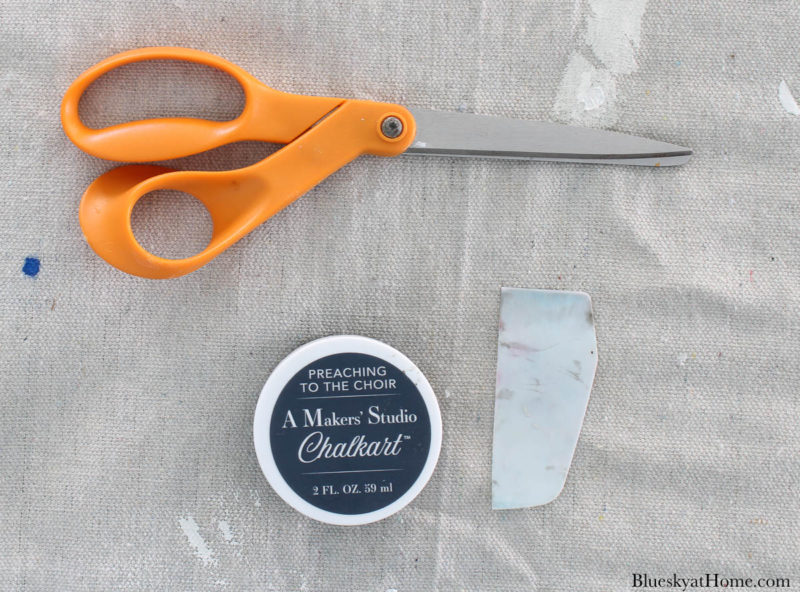
Besides the stencil, you will need ChalkArt in Preaching to the Choir. It’s black and I chose to use it for all three of my projects.
The other reason that I chose ChalkArt is that it’s removable. I may want a different design for another season or holiday.
I laid out my drop cloth to protect my kitchen counter where I do most of my DIY projects.
You will also need scissors to cut your stencils apart and a plastic scraper for applying the ChalkArt.
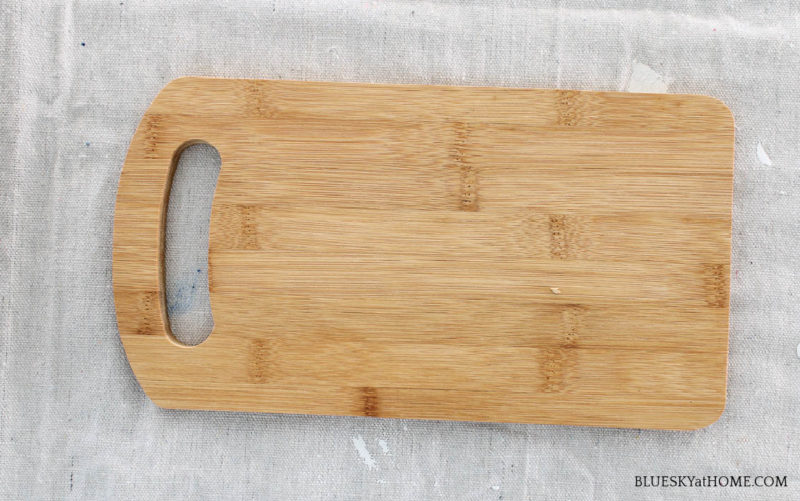
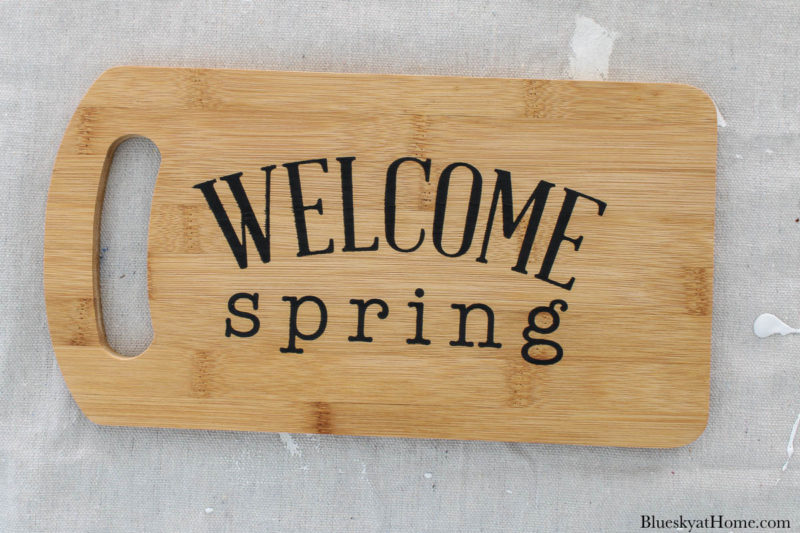
Project # 1 – Spring Wood Cutting Board
I used a free cutting board that Sweet Shark received from a client for Christmas.
There were two cutting boards in the gift box. Can you imagine? That was better than the charucterie foods included.
I was excited to use one for a spring home decor project.
For this spring DIY project, I chose this stencil design.
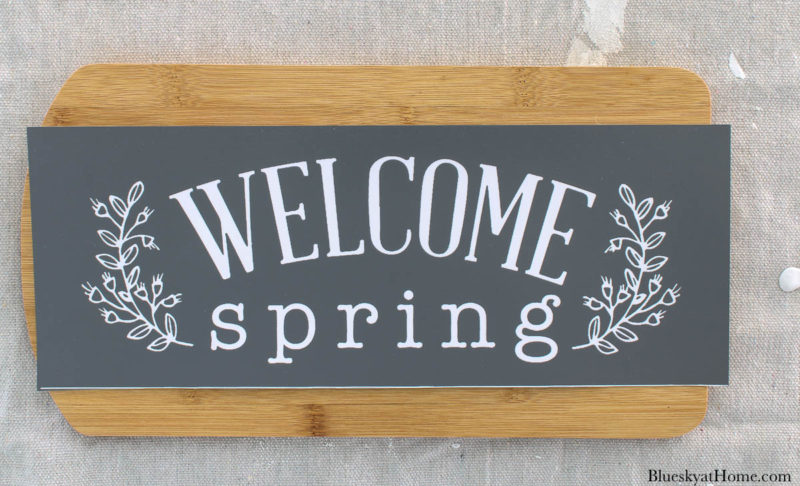
After removing the stencil from the paper backing, you will adhere the tri-mesh stencil to your surface.
The back of the stencil is adhesive so it will stay where you want it and the ChalkArt paint will not bleed through.
Since the leaf part of the design was a little too big for the cutting board, I decided to focus just on the words. It’s easy to tape off any design that you don’t want with painter’s tape.

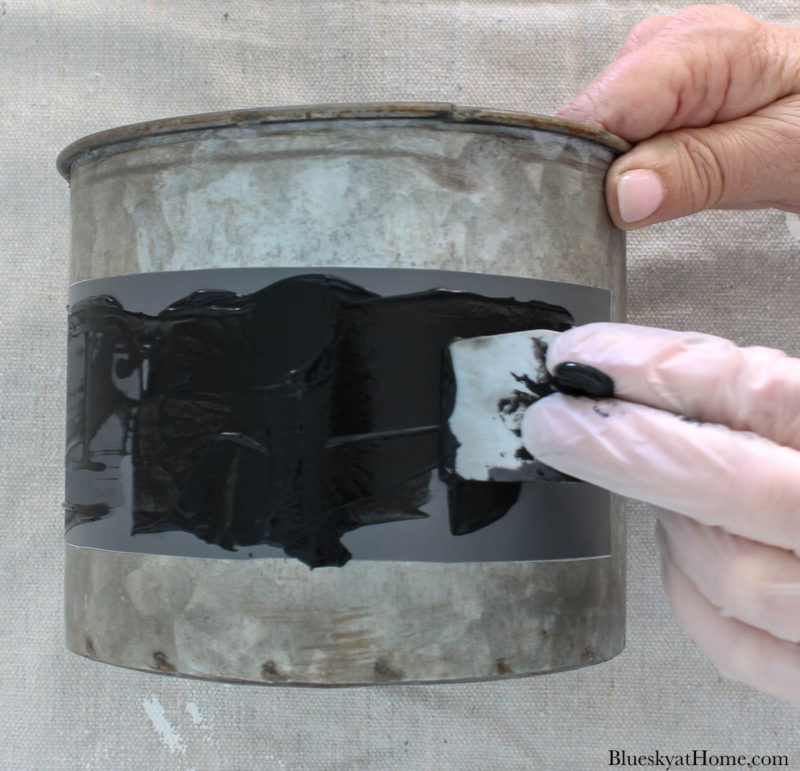
Next, you apply the ChalkArt to the stencil by pushing into and across the stencil.
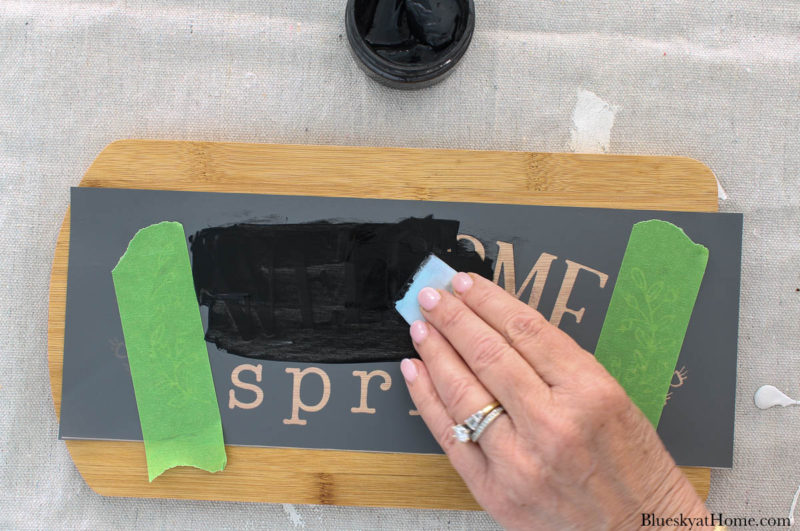
Gently remove the stencil from the surface. I have a container of water ready to put my stencils in until I’m ready to thoroughly wash off the ChalkArt.
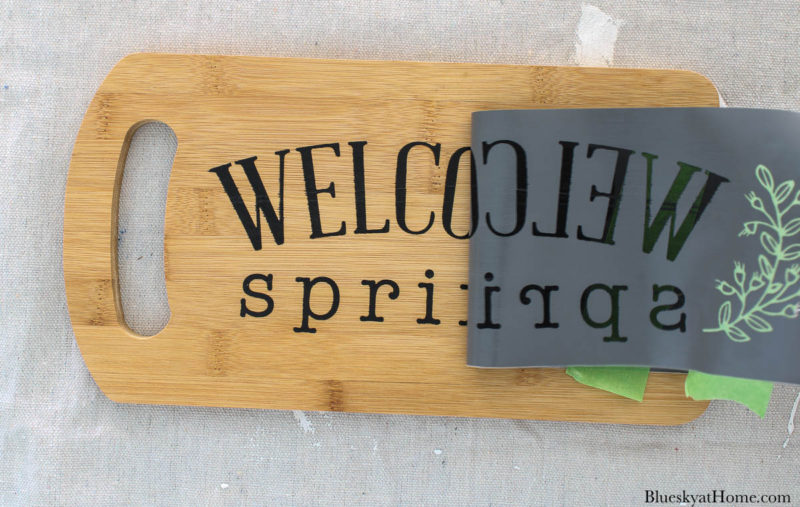
That’s it. You’re done with your first spring home decor project.
Set your board aside to completely dry for about 20 minutes. It will be dry to the touch and stay in place until/or if you wash it off.
If you don’t have a cutting board for this project, any piece of wood, glass or metal can also be used.
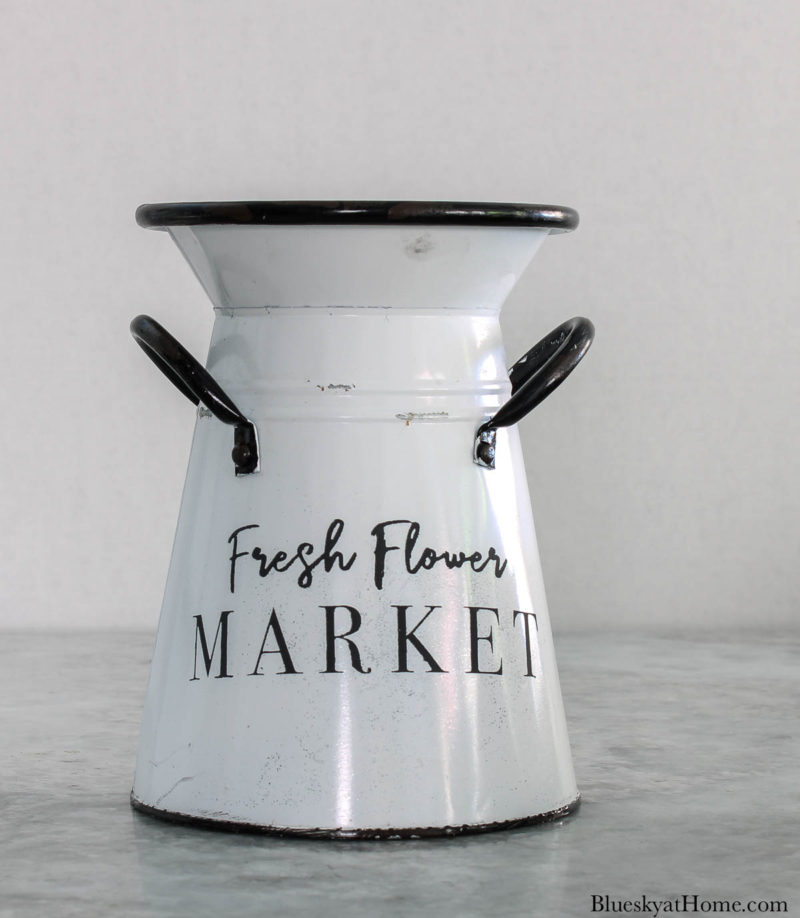
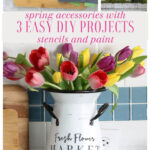
Project #2 – Spring DIY Enamel Container
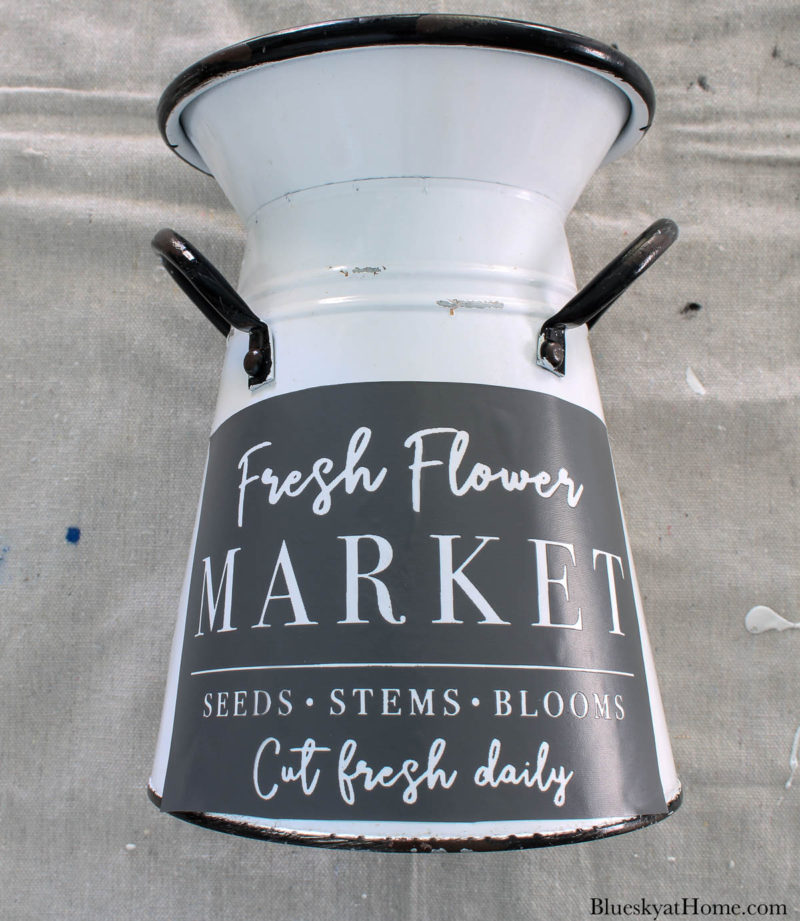
I bought this vintage-looking enamel container at Hobby Lobby on sale a few years ago. I loved the farmhouse black and white look of it. Since then, I have used it as a container for kitchen utensils on our stovetop.
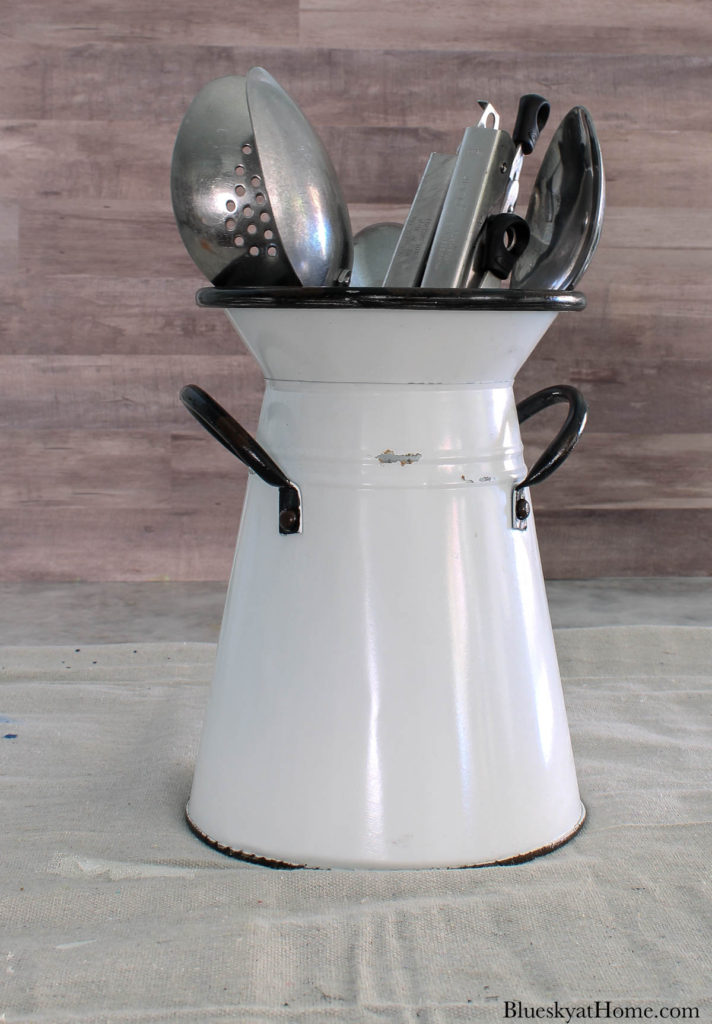
I’ve always thought the enamel container was a little dull and needed something else – like a spring or farmhouse design. Now I had one I really liked.
If you can, imagine what happens to a container sitting on the stovetop. It gets very greasy over time. So do the utensils, which I often had to put in the dishwasher for a really good clean.
As handy as it is having the tongs and spoons close by, I’ve decided that it’s not the best place for them.
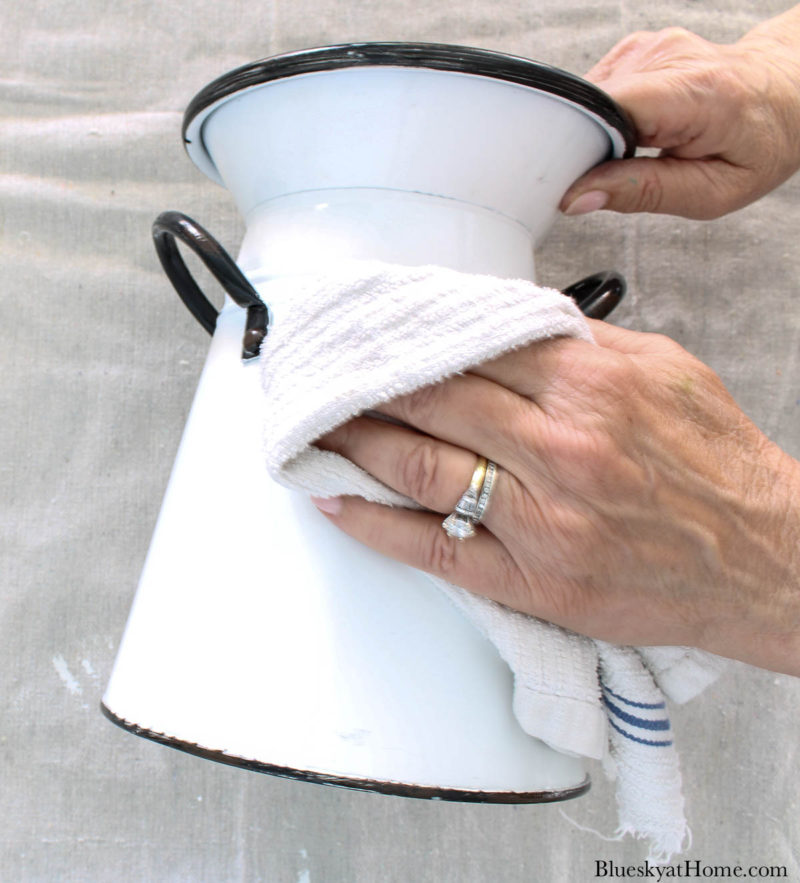
Before I could add any design to the enamel container, I had to get rid of the grease and grime.
To do that I used Clean Slate by Amy Howard at Home. I haven’t found anything better to remove dirt, grease, grime, and oil build-up on surfaces. (You can even use it to clean your kitchen cabinets!)
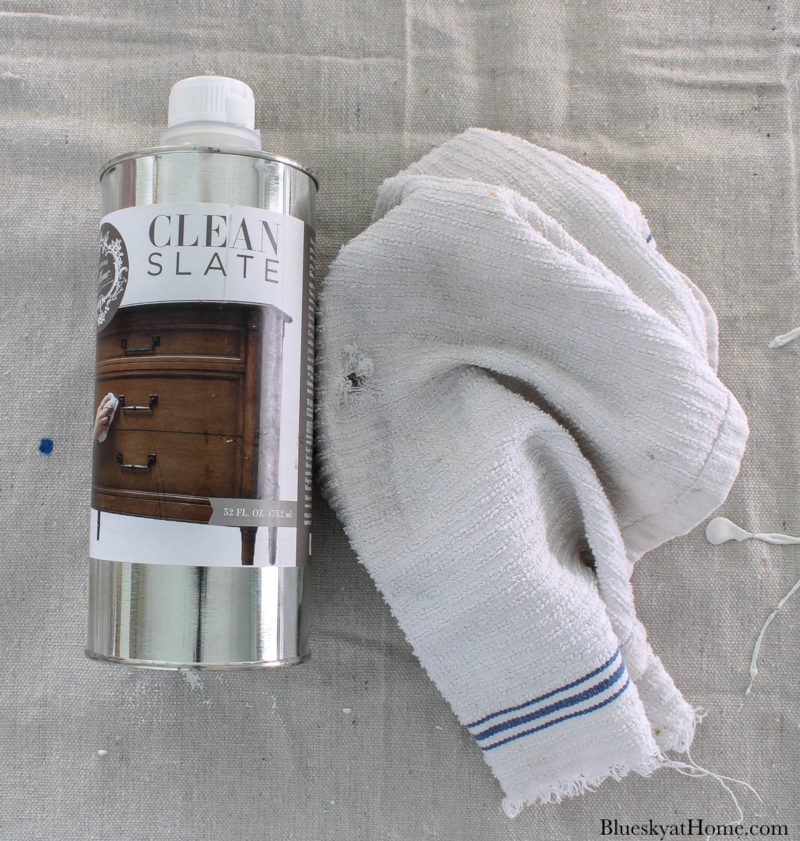
Just pour some Clean Slate onto a rag and apply it like you would any cleaner, turning it over as you remove the grease. Let it air dry for a few minutes.
Now I could use the enamel container for something else – like holding spring flowers. I cut out the stencil design I wanted to use and placed it on the enamel container.
Again, I decided to simplify and just use the top part of the stencil.
I bet you know what comes next. Apply the ChalkArt onto your stencil, then remove the stencil and enjoy your pretty design.
I think this makes a huge difference on this enamel container. It now is ready for spring home decor.
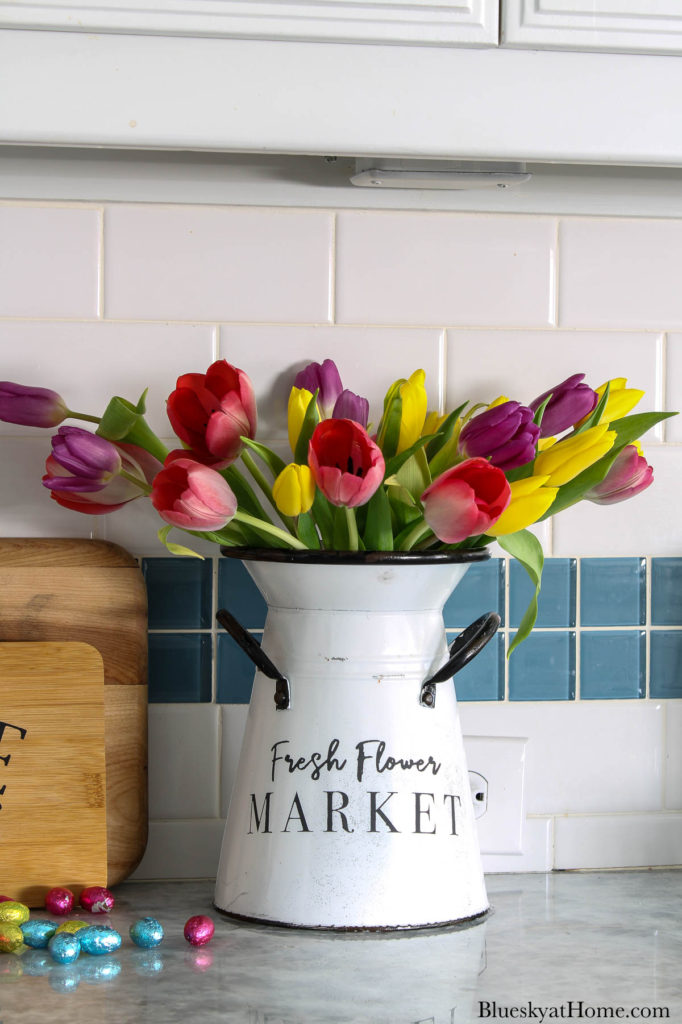
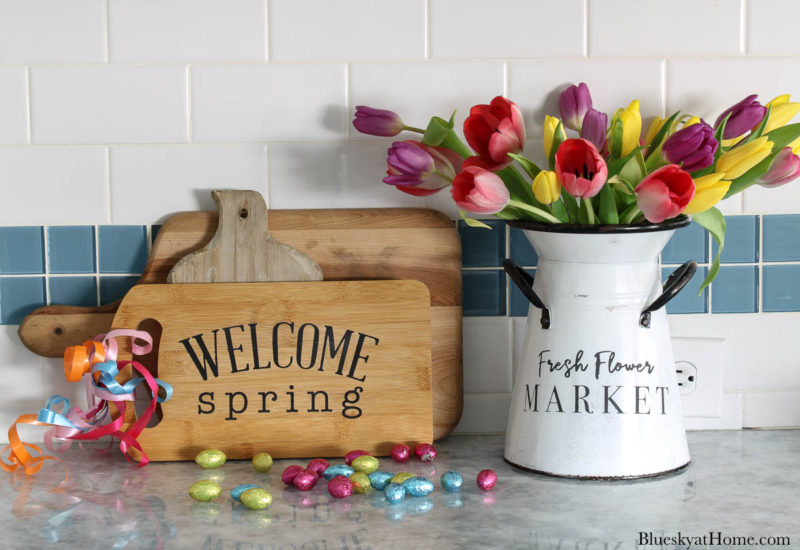
Displaying the Cutting Board and Enamel Container
The first two DIY spring home decor projects would work really well together on our kitchen counter. The enamel container finally became a flower container with a bunch of tulips from Trader Joe’s.
I tied some pretty pastel spring ribbons to the wood “Welcome Spring” cutting board. The chocolate Easter eggs are just for fun.
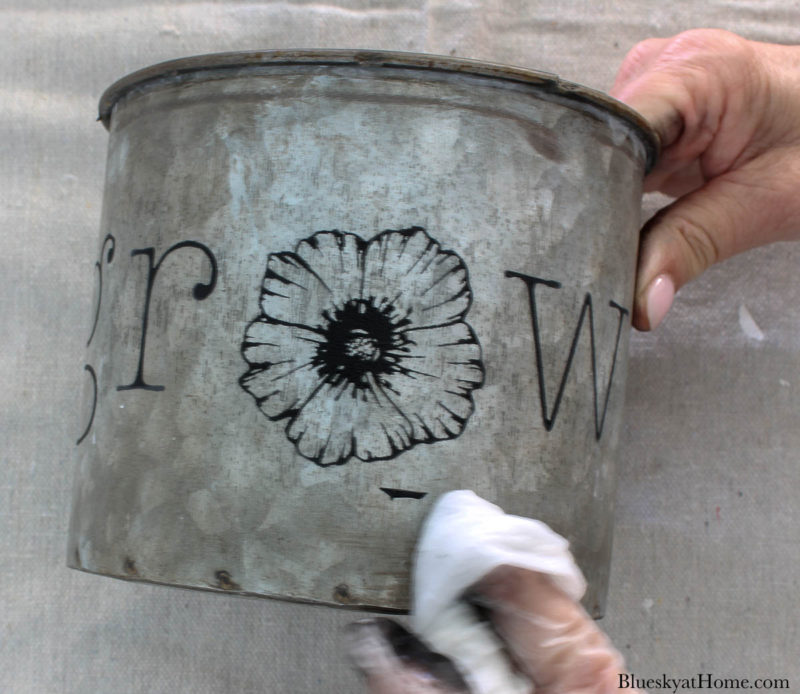
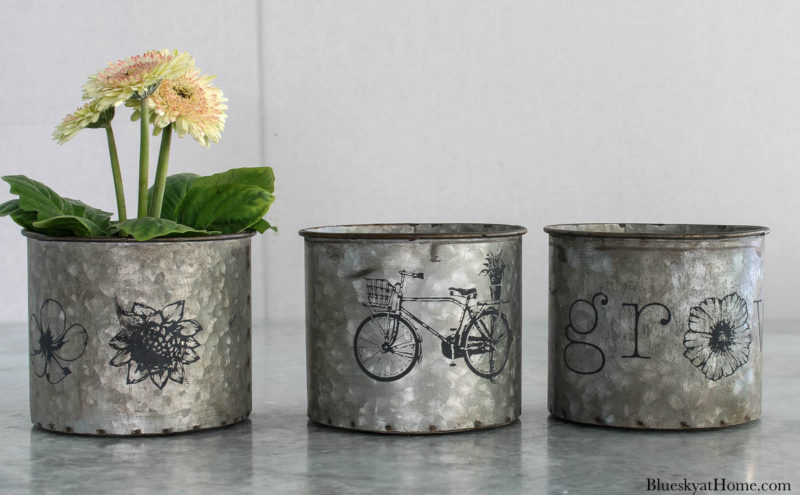
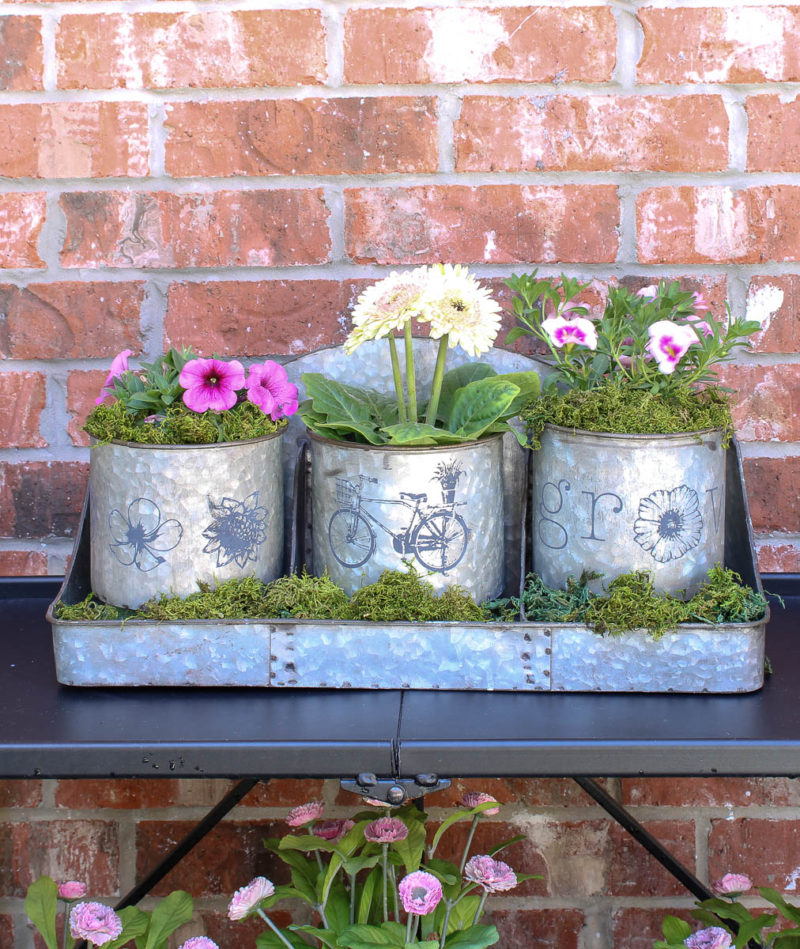
Project #3 – Spring Galvanized Flower Containers
I bought this set of three galvanized flower containers in Atlanta several years ago. We’ve used them for different flowers, but I always thought they needed some embellishment.
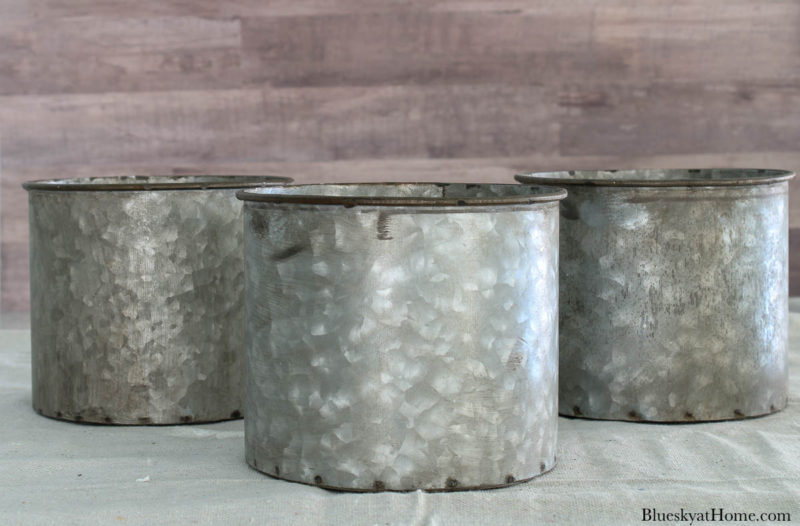
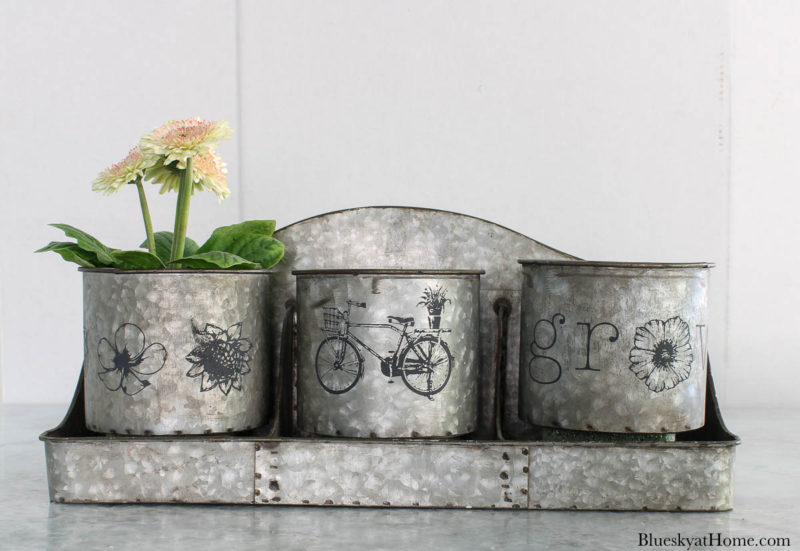
This is the holder they go in. There are hangers on the back, but I’ve never used them.
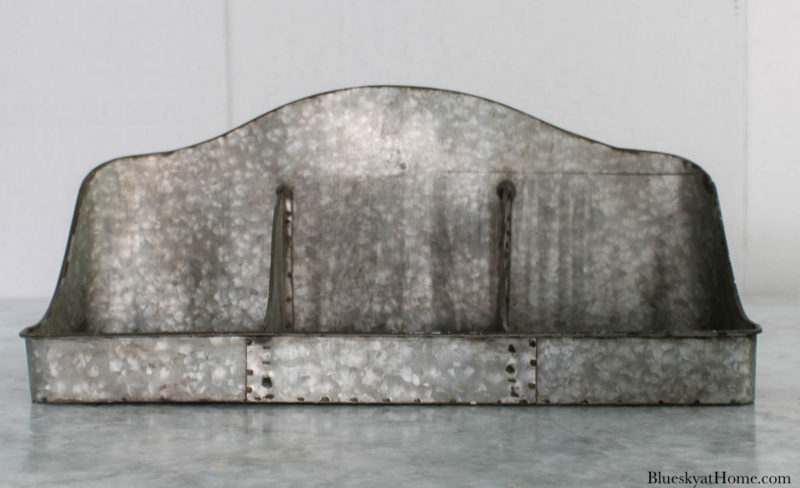
I chose three different stencils to give each container a spring look for our home.
For the first one, I chose the GROW stencil.
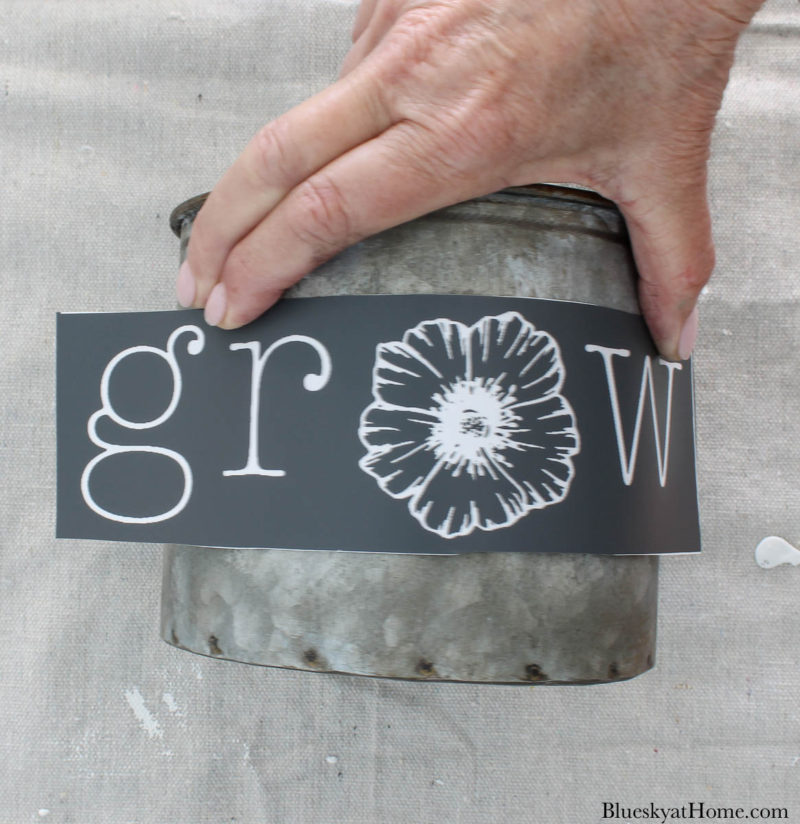
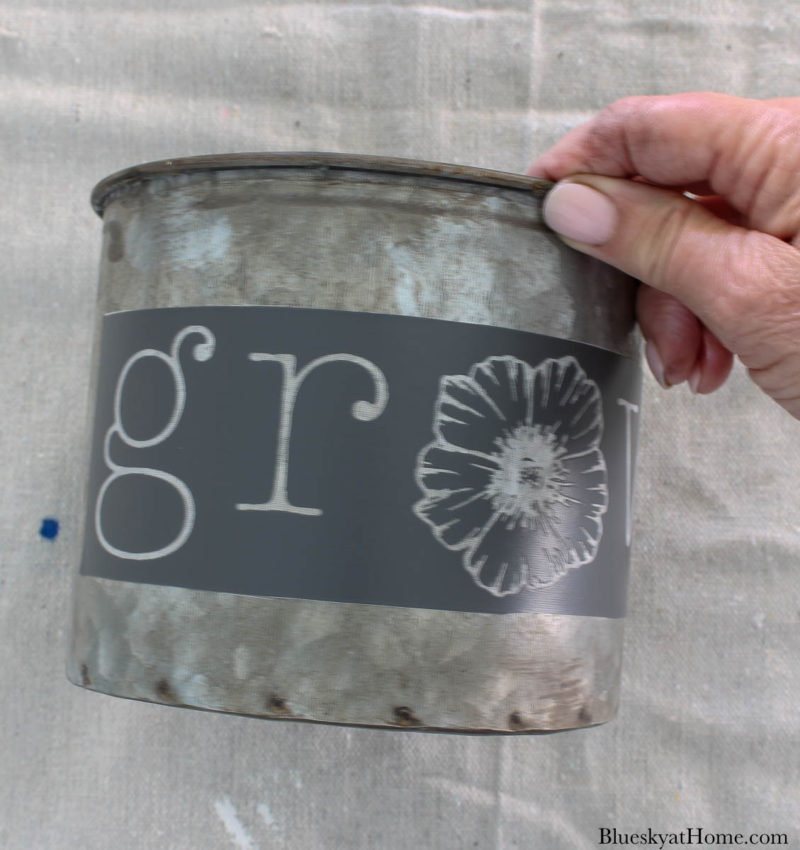
For rounded surfaces, I have sometimes worn a plastic glove and applied the ChalkArt with my fingers. But this time the plastic scraper worked just fine. I still wore the glove.
If you ever get some ChalkArt where you don’t want it, use a damp paper towel or rag to remove it. I’ve even used a Q-Tip for small spaces.
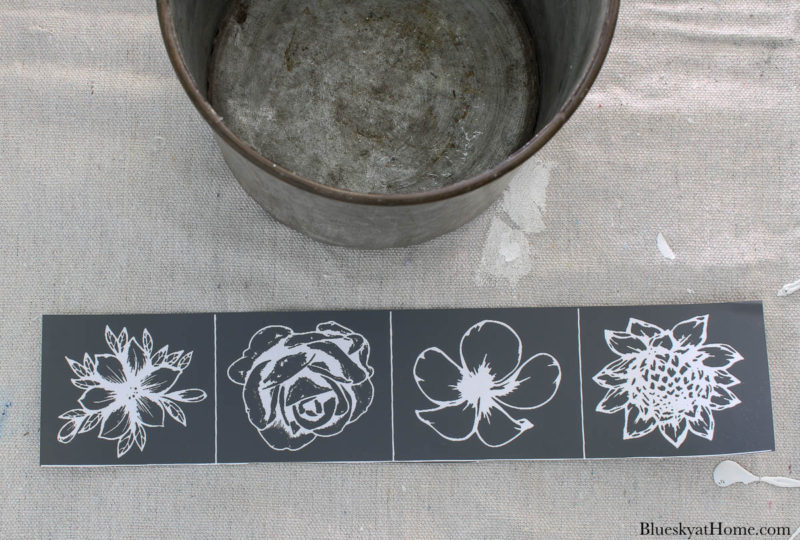
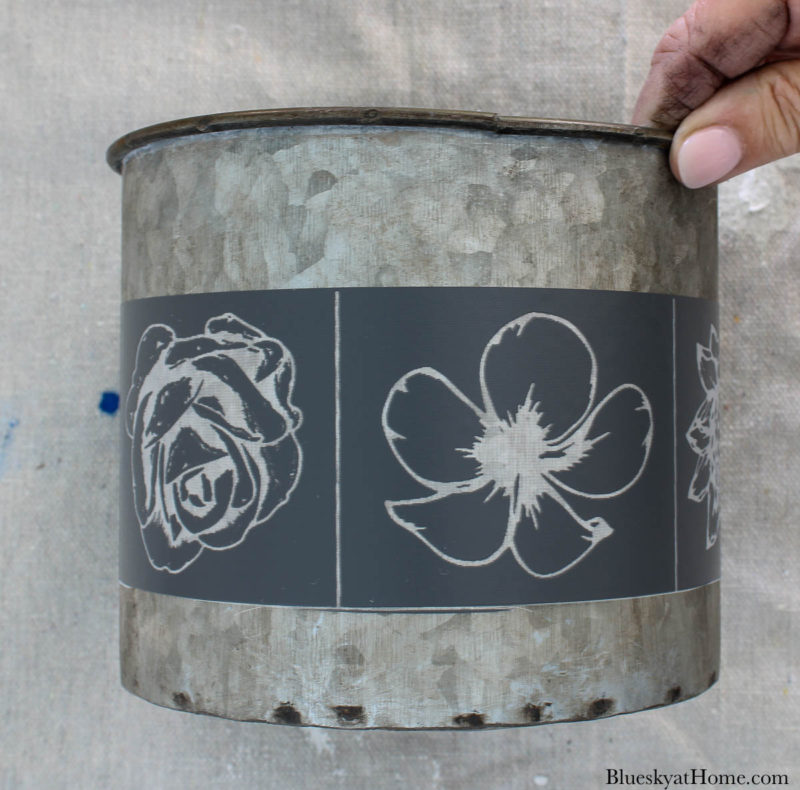
For the second galvanized container, I used the strip of flowers at the bottom of the stencil. These can be cut apart to use individually.
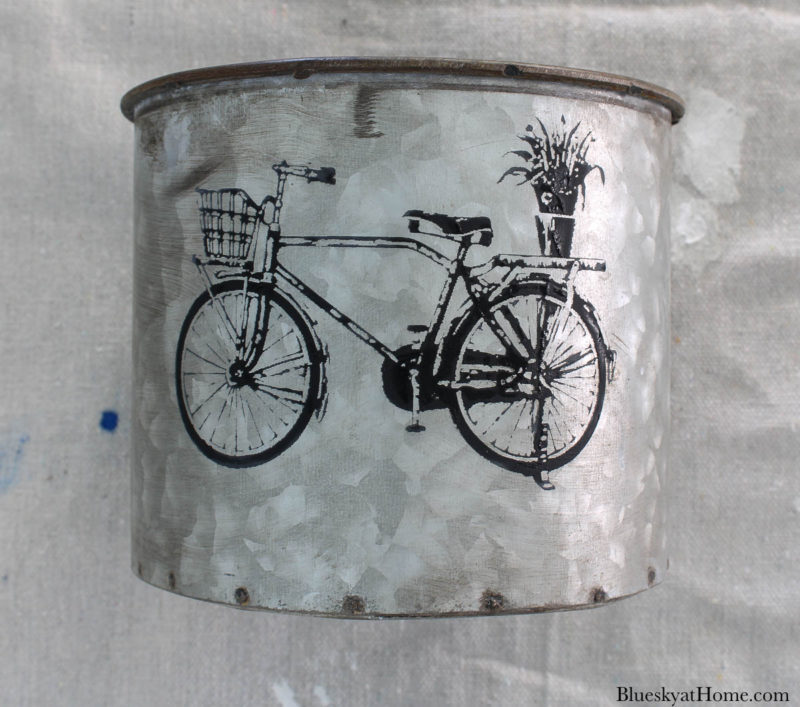
For the last container, I used the super cute bicycle design. As you can see, the stencil couldn’t lay flat on the rounded container. I just clipped it in the center and then it laid flat.
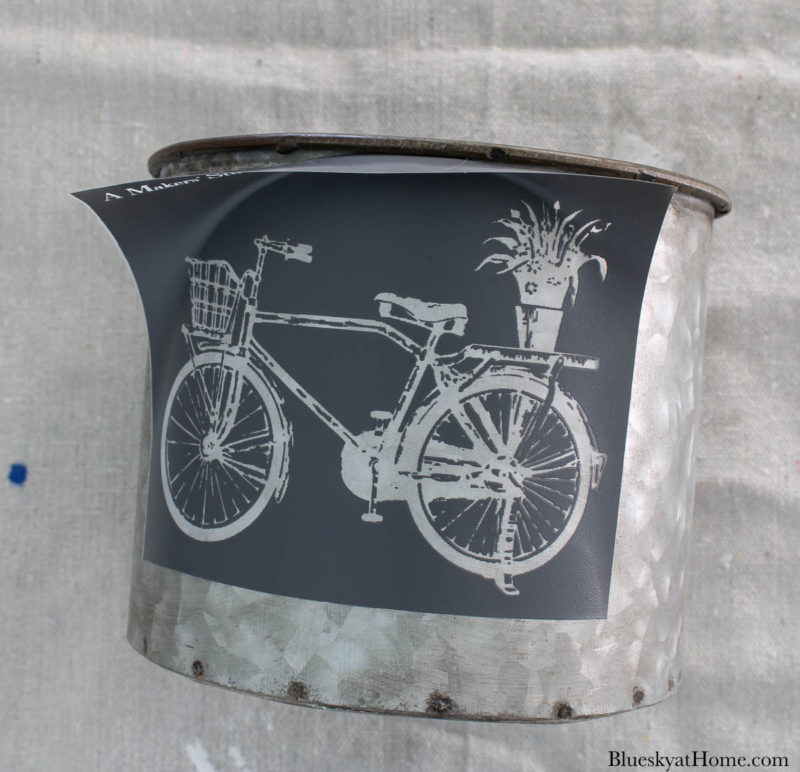

I think the detail on this design is amazing. The tri-mesh construction is what makes this possible. You could never do this with a vinyl or plastic stencil.
Now I had three cute containers ready for flowers in our spring home decor. I had one Gerber daisy from Trader Joe’s.
Displaying the Galvanized Spring Flower Containers
I only had one flower to use, so a trip to our favorite local nursery was needed.
I knew that I would move these containers outside. I picked out two types of petunias that would provide color and thrive outside.
Then I used my favorite Super Moss to cover the dirt on the top of the flowers. I added more moss around the bottoms of the containers to soften the look and provide filler.
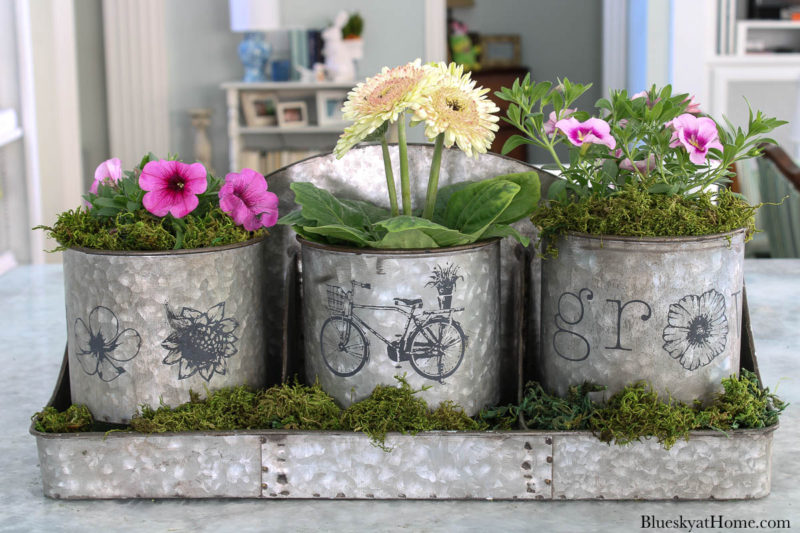
Now where to put them outside? Our patio is on the east side of our home so it gets morning and early afternoon sun.
The bar cart that I got a few summers ago from Wayfair provides the perfect setting. First, I cleaned it with the hose to remove the dust that had built up over the winter.
The plants are in their perfect growing spot and the stencil designs give this DIY spring home decor a great focal point in the backyard.
FYI – the flowers on the lower shelf are faux from IKEA last year.
I hope you enjoyed these 3 easy – and quick – spring home decor projects. With one stencil, I transformed three different surfaces from so-so to springtime fresh.
Be sure to PIN so you don’t forget where you found this project.


It’s hard to beat the bang for your buck that you can get from a stencil–but it looks like this particular stencil is a real winner! Super cute projects, all of them.
Thanks so much for joining the Grace at Home party at Imparting Grace. I’m featuring you this week!
Enamalware is my favorite! I’m leaving here all kinds of inspired tonight, Carol. Thank you!
Each of these projects are darling Carol. These stencils keep popping up, I think I need them so I can try them for myself. Thank you for sharing your inspiration with us!
Adore the stencil and all the projects too.
So cute. I’ve never used anything from Maker’s Studio. I love the idea of chalk so you can redo later, I change my mind alot! Also note to self on the Clean Slate from Amy Howard, wondering if it might work on a grungy tea kettle. Thanks! Regina
Regina, thanks so much for the feedback. One Slate is wonderful for removing grease, oil buildup, dirt. Here’s my link to the website. https://amyhowardhome.com/#5eadd5f674374
Great projects, Carol! Thank you for sharing at Party In Your PJ’s.
Love them all but especially the galvanized pitcher with tulips! Thanks for sharing at Vintage Charm. Pinned! xo Kathleen