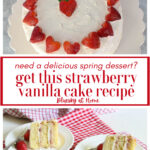
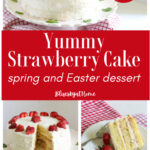
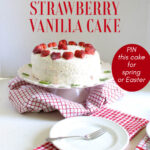
How to Make a Strawberry Vanilla Cake
Do you like strawberries? Want a mouthwatering dessert that would be perfect for a spring or Easter lunch or a summer dinner? I’m going to show you how to make a delicious strawberry vanilla cake.
Like peaches, strawberries are an iconic spring and summer fruit. The luscious berries are so delicious eaten out of hand. Their sweetness is a natural feature of this pretty fruit.
In this cake, strawberries shine. I feel certain you will like to learn how to make a strawberry vanilla cake.
Beginning in the spring and continuing in the summer, at the height of the strawberry season, the flavor of the berries comes through.
Even if you are not a baker, this strawberry vanilla cake is easy to make. It’s so pretty you will want to serve it to friends and family. It would be the centerpiece of your Easter dinner.
If your favorite flavor in a peanut butter and jelly sandwich is strawberry, you will especially love this delicious cake.
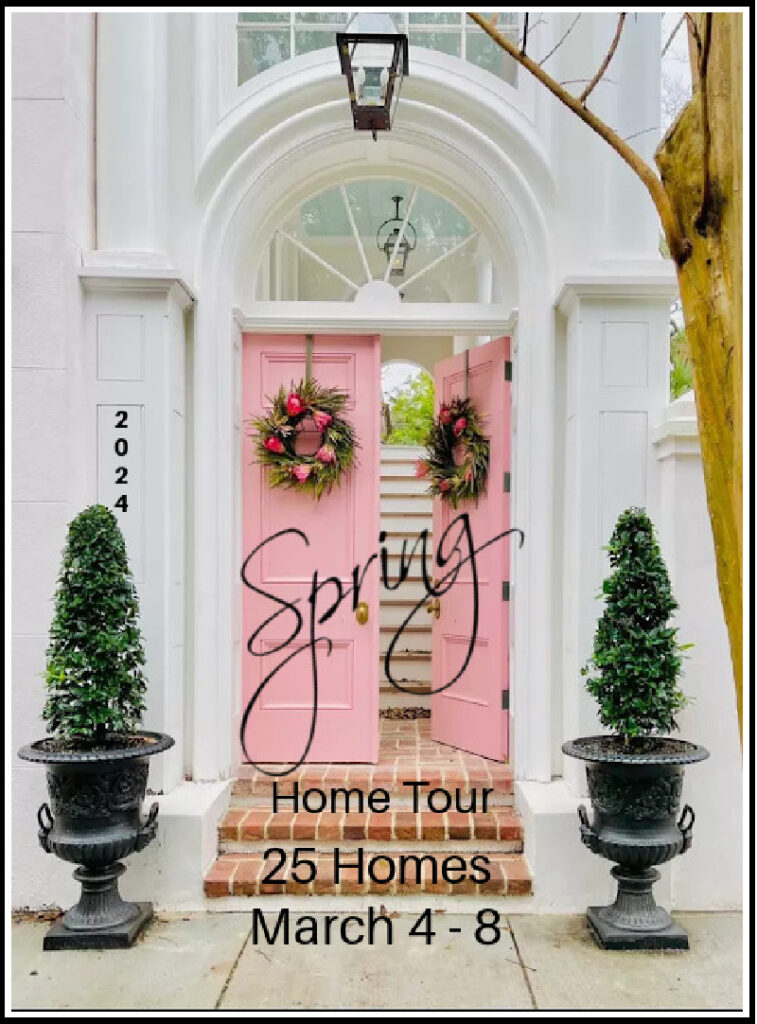
I wanted to remind you that today is the last day of the Annual Spring Home Tour Blog Hop. The complete list of all the participants is at the end of the post.
Annual Spring Home Tour
This is a special week for spring decor lovers. Twenty-five of my blogger friends are sharing fabulous ideas to dress up your home for the season. This is Day 5 of the Annual Spring Home Tour hosted by Marty of A Stoll Thru Life.
How to Make a Delicious Strawberry Vanilla Cake
This post contains affiliate links to products used to create this project. If you should order any item from this site, I may receive compensation, but you do not pay a penny more. Your purchase is greatly appreciated as it helps support the continued publication of this site.
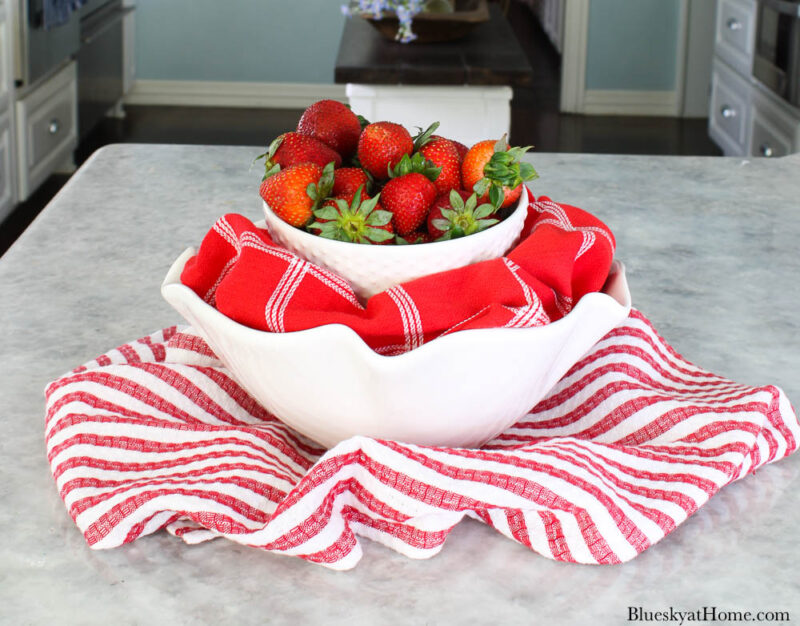
Here is my bowl of strawberries. Our Central Market offers extra sweet strawberries, and that is what we buy. I clean and core them with my handy dandy strawberry huller. Sweet Shark thought I was crazy buying it, but now he loves it, too.
Then I half them and store them in one of my plastic refrigerator storage containers.
Let’s Make Cake!
This Strawberry Vanilla Cake comes from my favorite dessert cookbook. Sweet Chic by Rachel Schifter Thebault is my go-to cookbook for cakes, cupcakes, and cookie recipes.

I also knew that I would have two helpers. My granddaughters were visiting when I made this cake. They both love to help bake. When I told them we were going to make a cake with strawberries, they loved the idea.
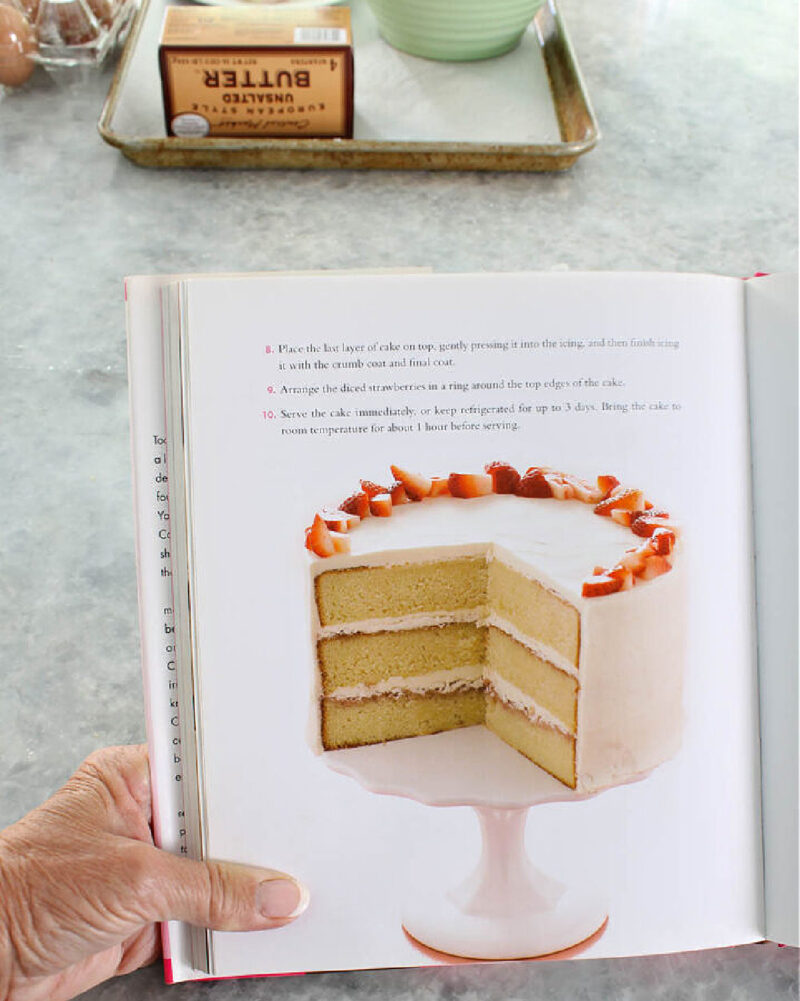
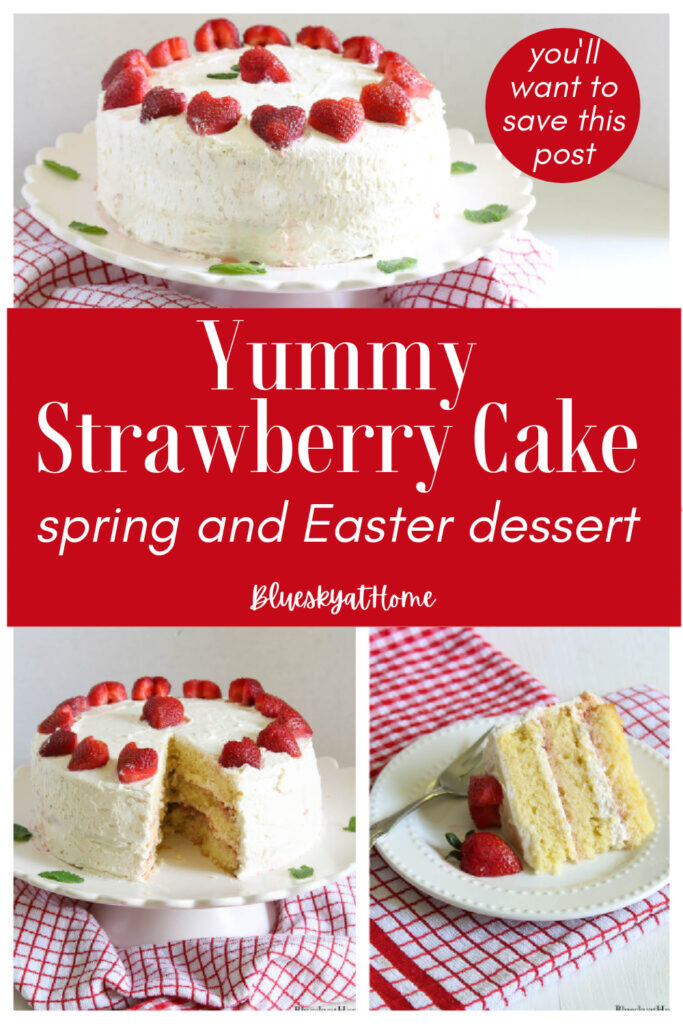
This Strawberry Vanilla Cake is moist, tender, and full of vanilla and strawberry flavor. It’s the perfect cake when strawberries are in season. This picture was my inspiration.
This cake starts with a traditional yellow cake. This homemade version packs a ton of buttery vanilla flavor. A yellow cake is the perfect base for a variety of bolder flavor additions/variations and frostings.
Making the Vanilla Cake
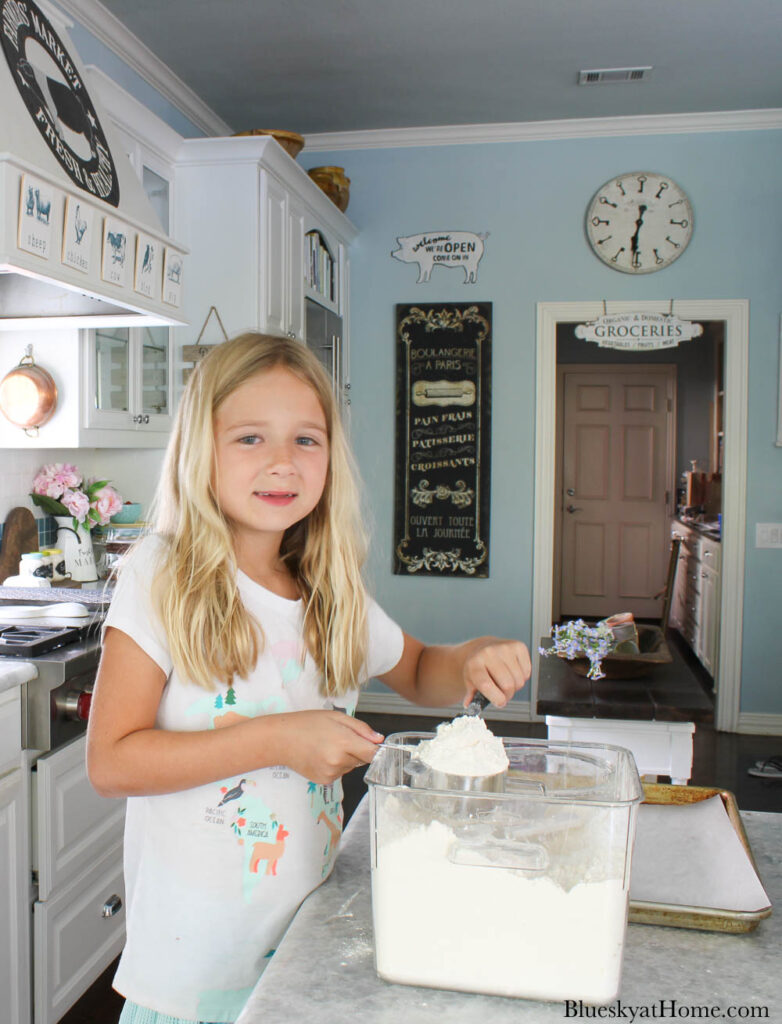
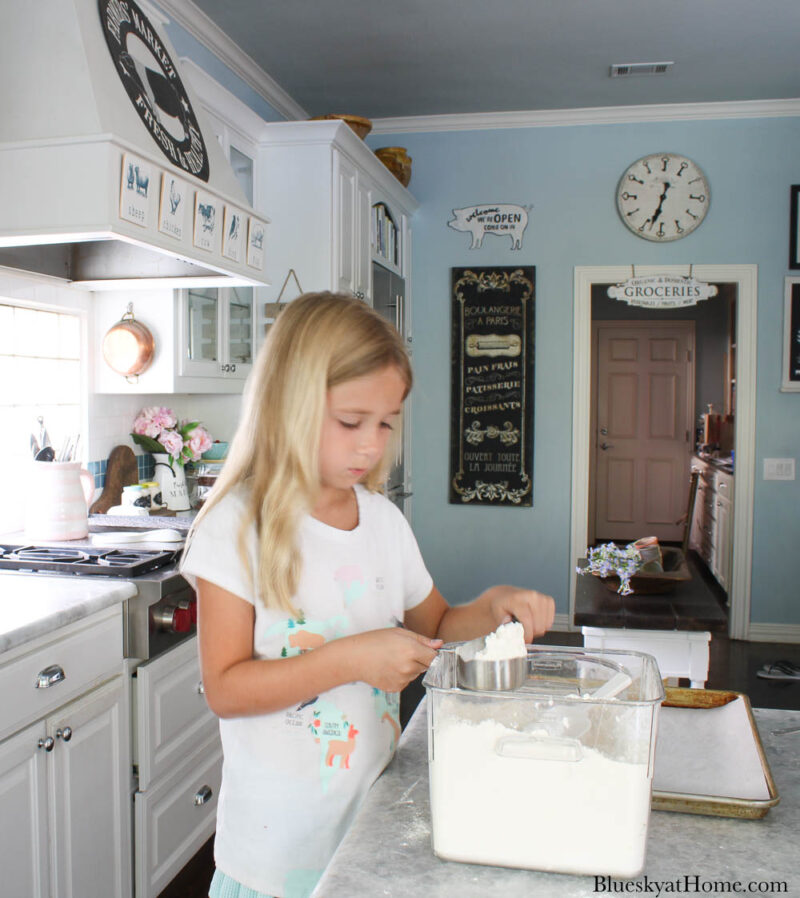
As always, for any recipe, start with your mise en place – gathering all your ingredients. Meet my assistant, Lilah.
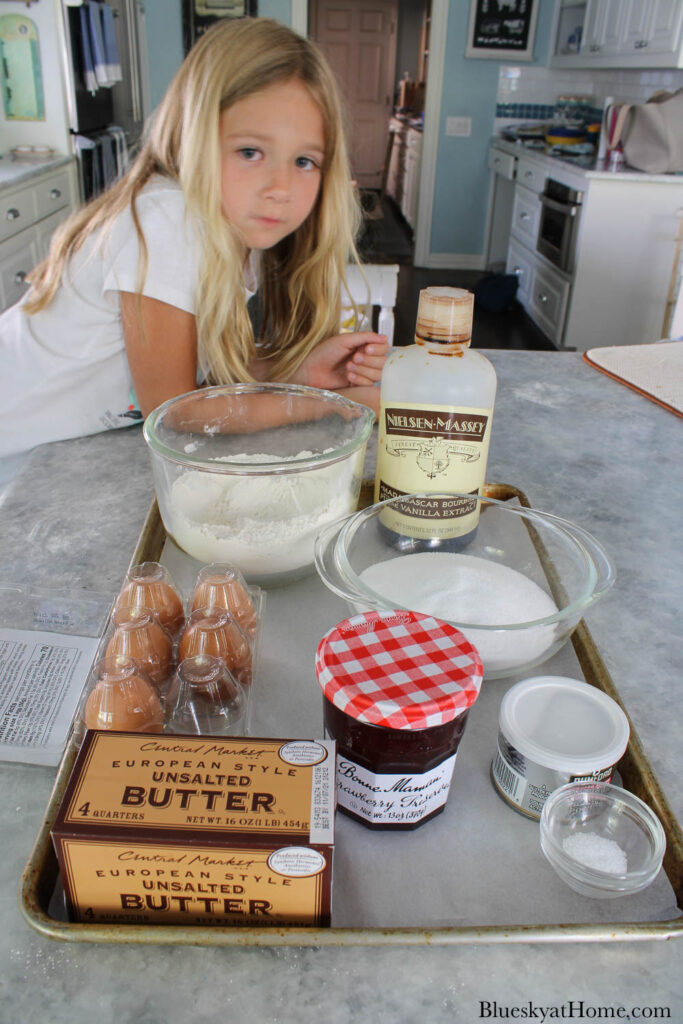
This vanilla cake recipe follows the standard cake procedure. Lilah demonstrates how to properly measure flour: overfill your measuring cup and then use a small cake spatula to level off the excess flour.
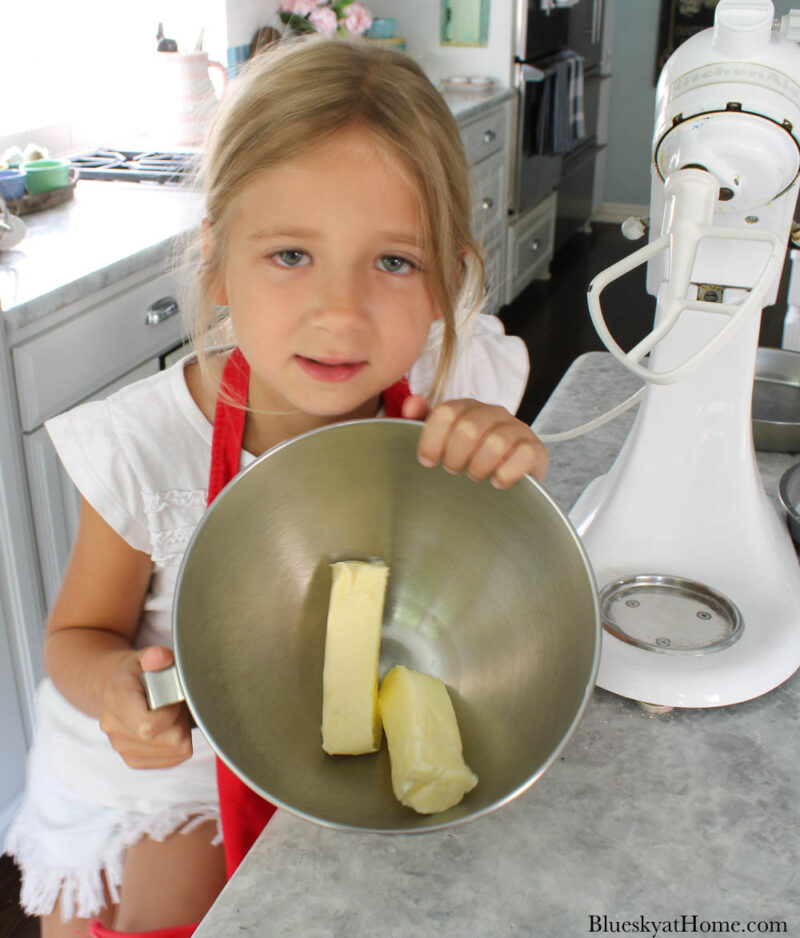
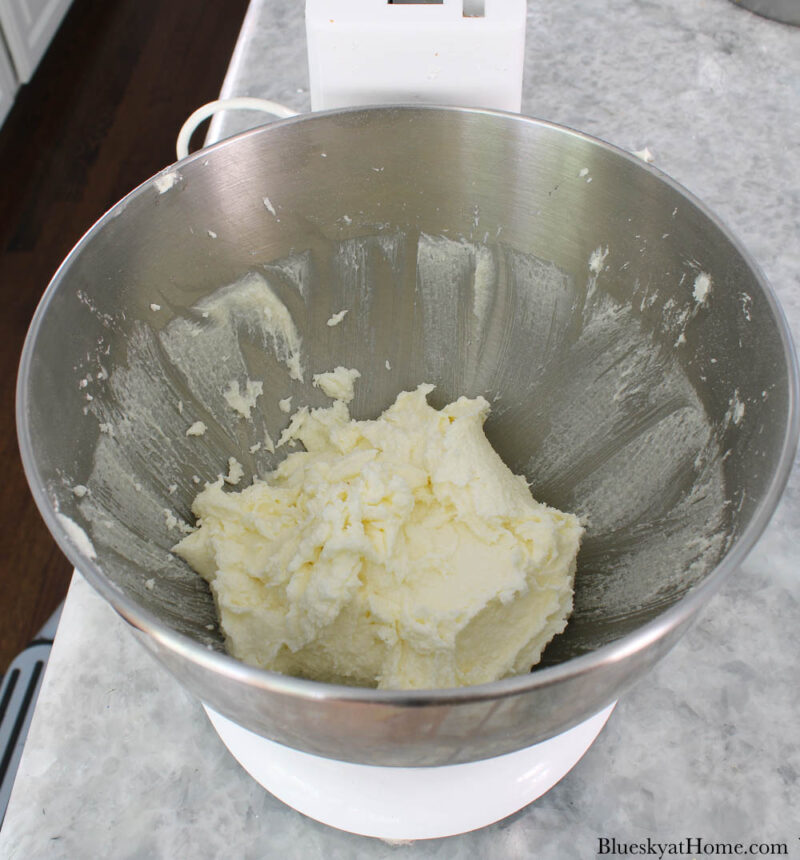
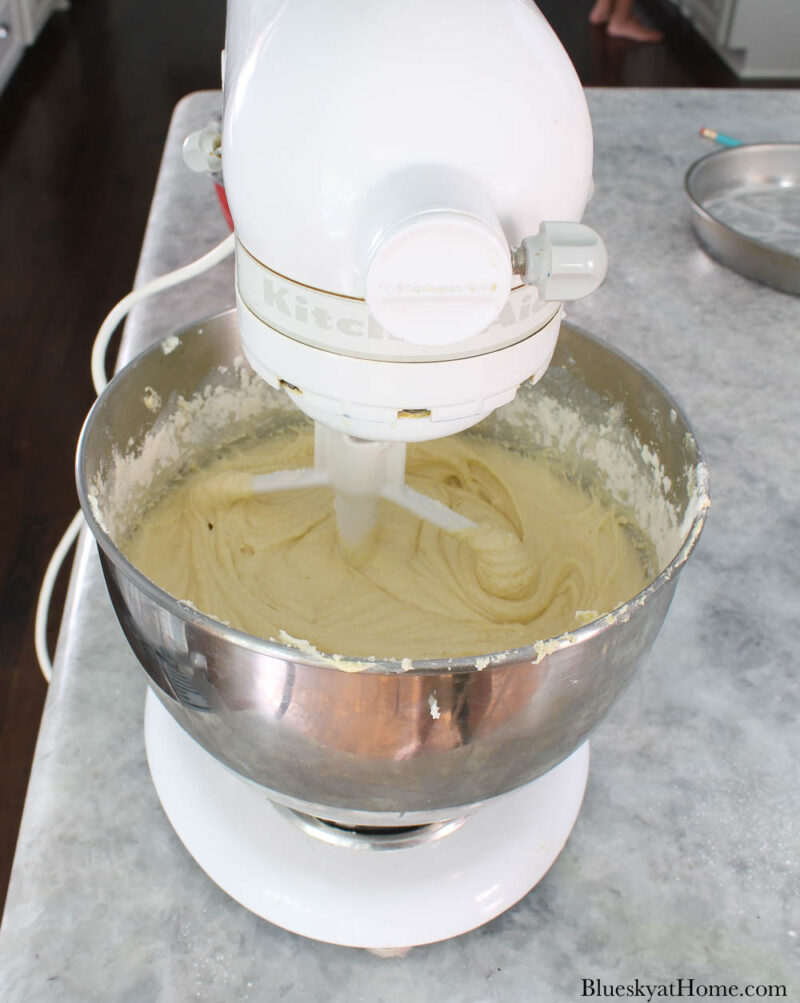
Place your room-temperature butter in the bowl of a stand mixer. I have had my Kitchen Aid mixer for years and it’s the best.
With the paddle attachment, beat the butter until light and fluffy. Then add the sugar. Beat just until the sugar is incorporated into the butter. Scrape down the sides of the bowl with a rubber spatula.
Add your eggs one at a time, briefly beating on low until incorporated. Then add half flour and beat to combine.
Next add the vanilla and buttermilk and mix until combined, about 15 seconds, beating on low until thoroughly mixed. Add the second half of the flour. Then scrape down the sides of the bowl.
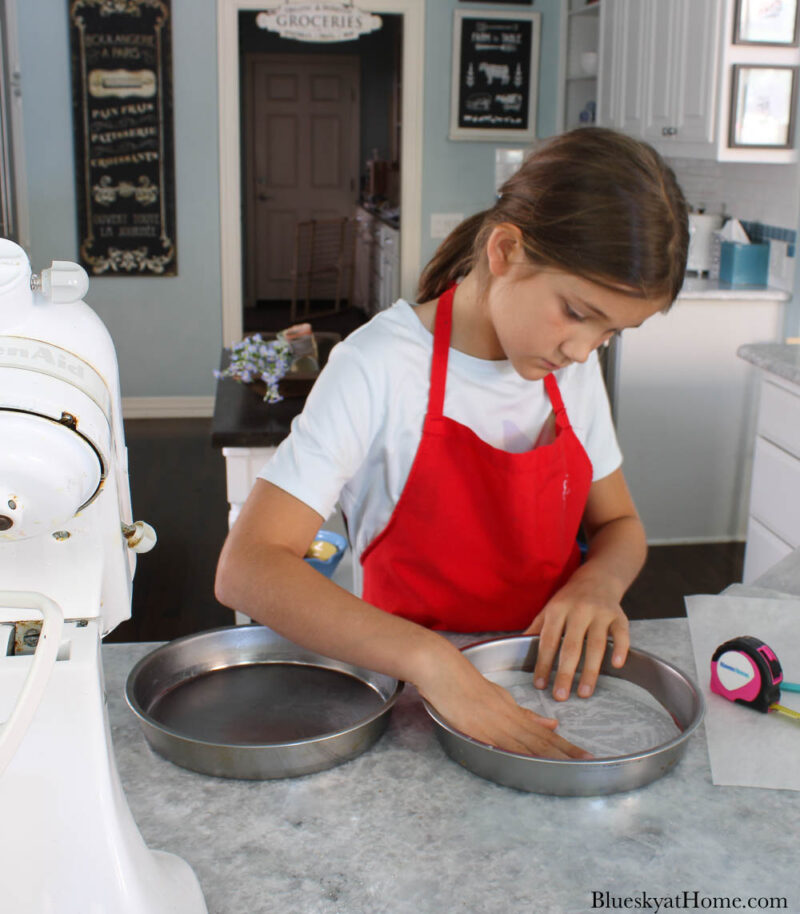
At this point Annabelle joined the fun. The girls used butter wrappers to add the softened butter to the pans.
TIP: When you remove butter from the wrappers, fold the wrappers in forths, and keep them in a zip-lock bag in the freezer. When you need to butter a pan, remove them from the freezer and allow to come to room temp.

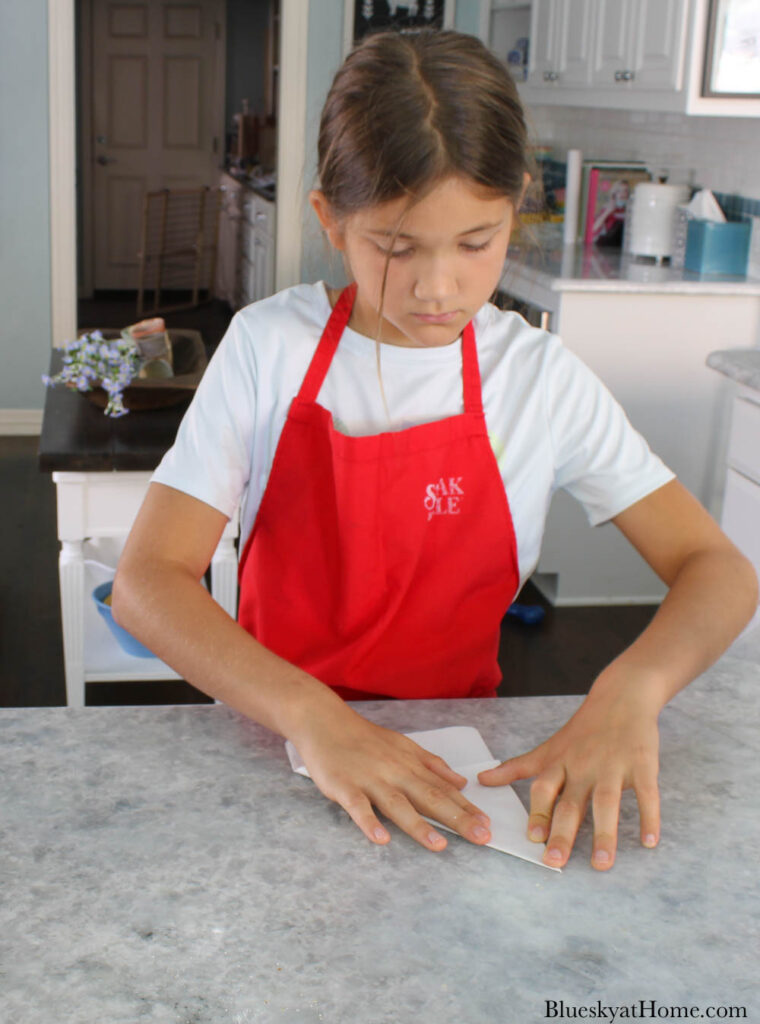
While Lilah and I added buttermilk and vanilla to the cake batter, Annabelle measured and cut out parchment paper to line the cake pans. She did a great job.
Here’s how to easily make round paper cake rounds from scratch.
When the vanilla cake batter is ready, we poured the batter into the greased and papered cake pans. Each pan held 1.7 ounces of batter.
TIP: Using parchment paper ensures that your cakes will come out of the pan without sticking.
TIP: Use a scale to weigh each pan (Culinary school tip) to measure the exact amount of batter.
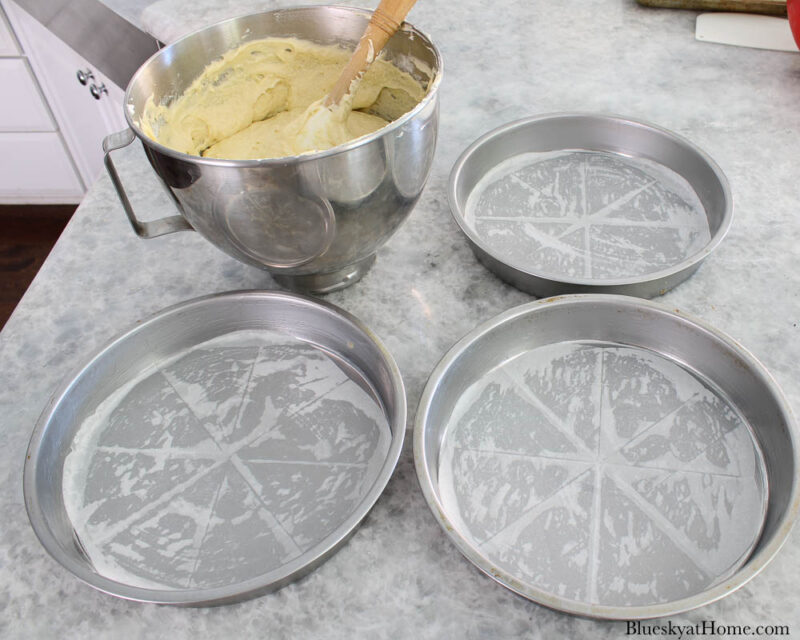
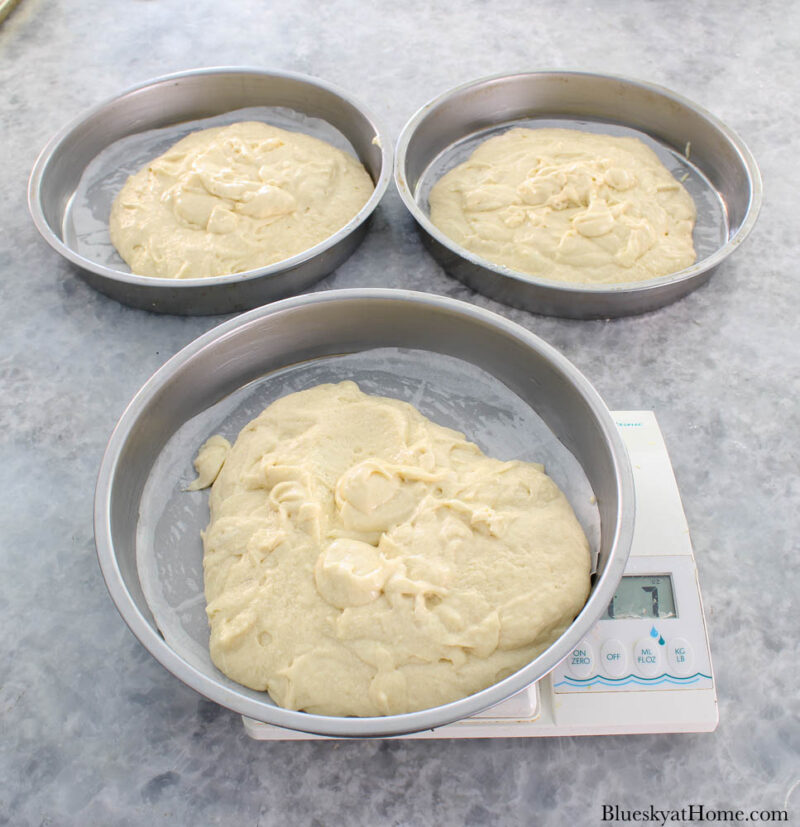
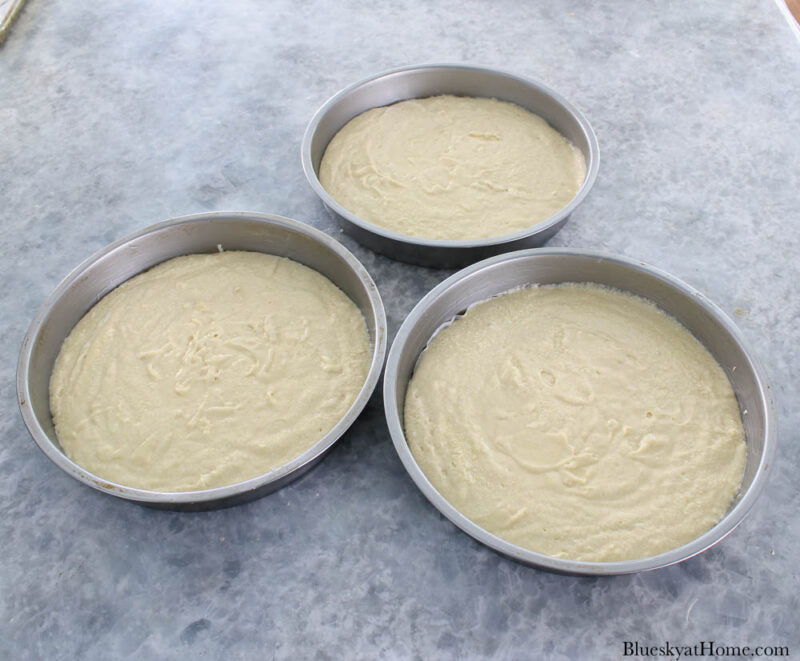
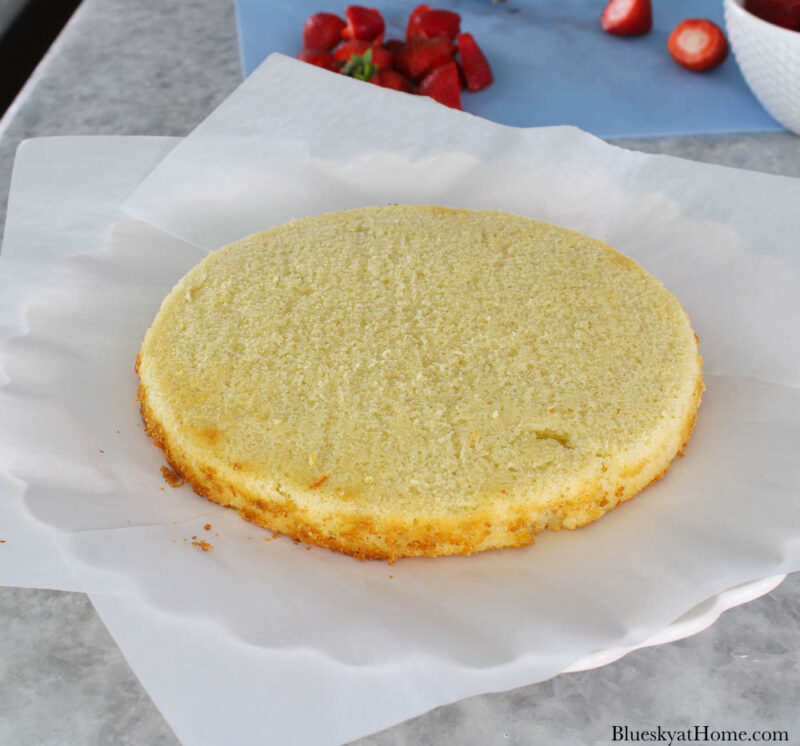
Since I used 9-inch cake pans, there was less batter in each pan. I set the timer for 35 minutes and the cakes were perfectly done. After 5 – 10 minutes, remove the cakes from the pans and allow them to completely cool on racks.
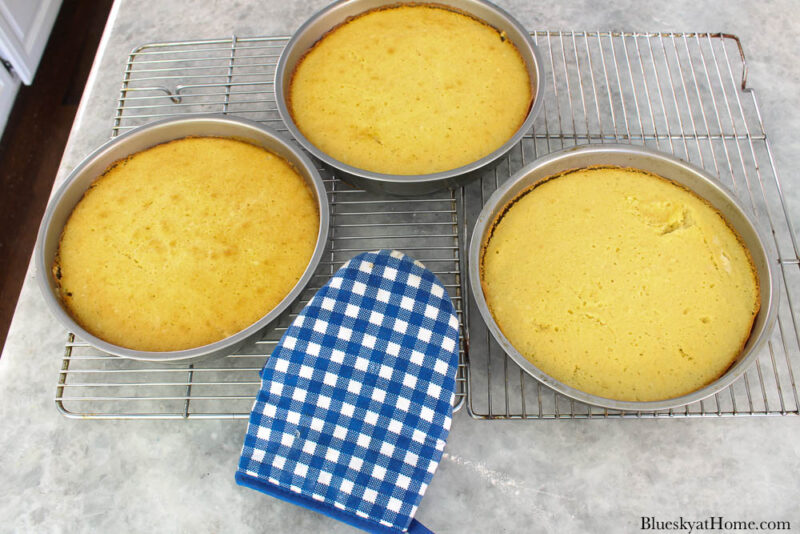

TIP: When you remove the cakes from the pan, brush on or squeeze on simple syrup for extra flavor and moistness (culinary school tip.)
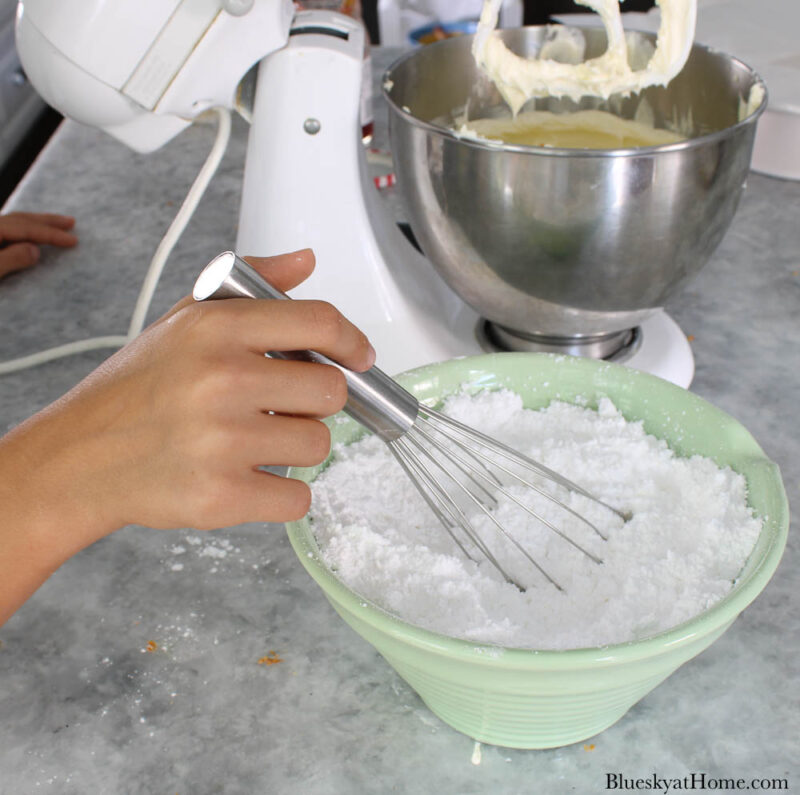
Yummy Vanilla Icing
While the cakes are baking and cooling, you can make the icing. This icing is so smooth with a definite butter and vanilla flavor.

With your paddle attachment, beat your butter to a light and smooth consistency, Add your confectioners’ sugar on low speed.
TIP: Make sure that your sugar doesn’t have lumps. You can use a fine mesh strainer or a flour sifter.
Assembling and Icing the Strawberry Vanilla Cake
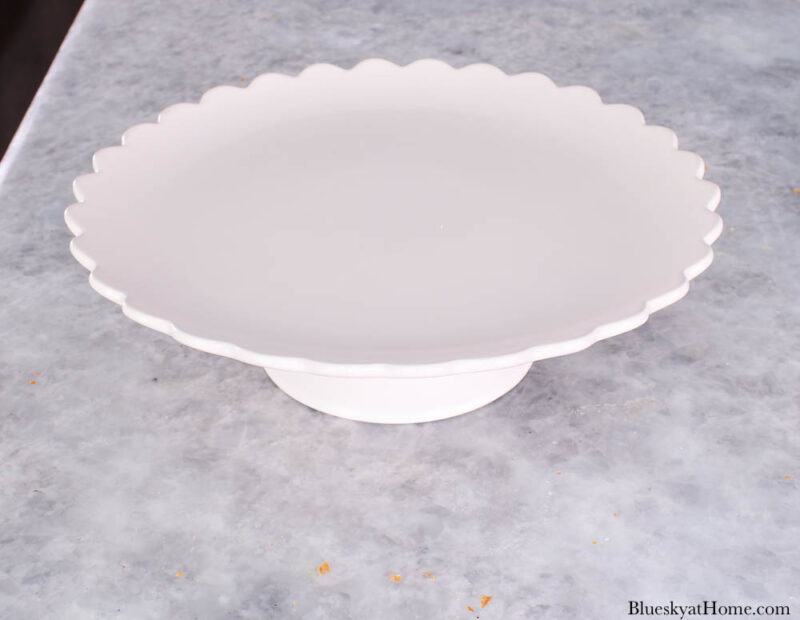
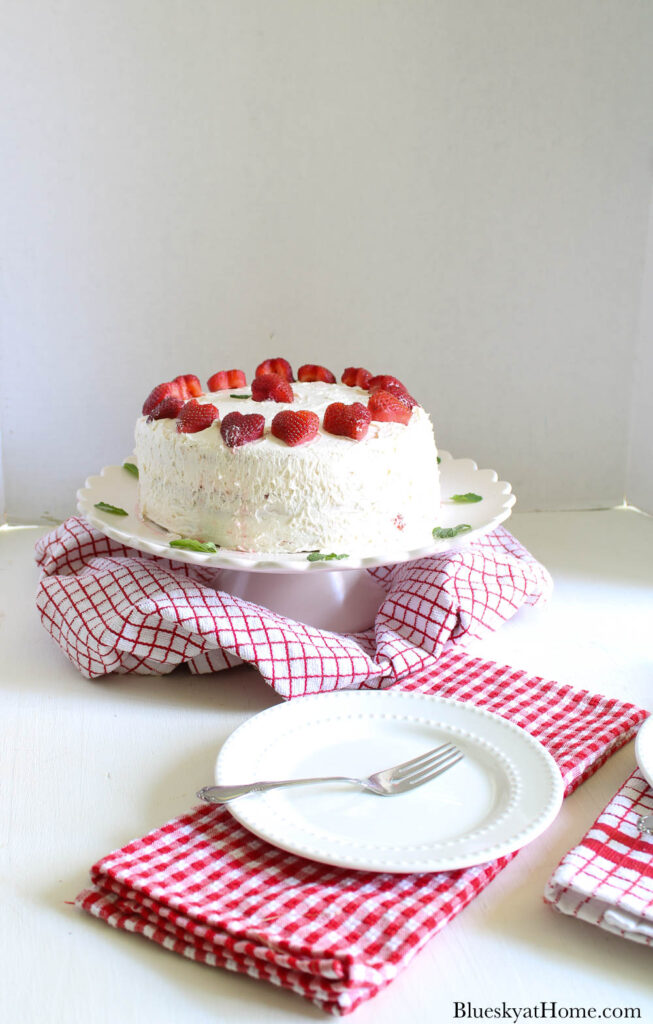
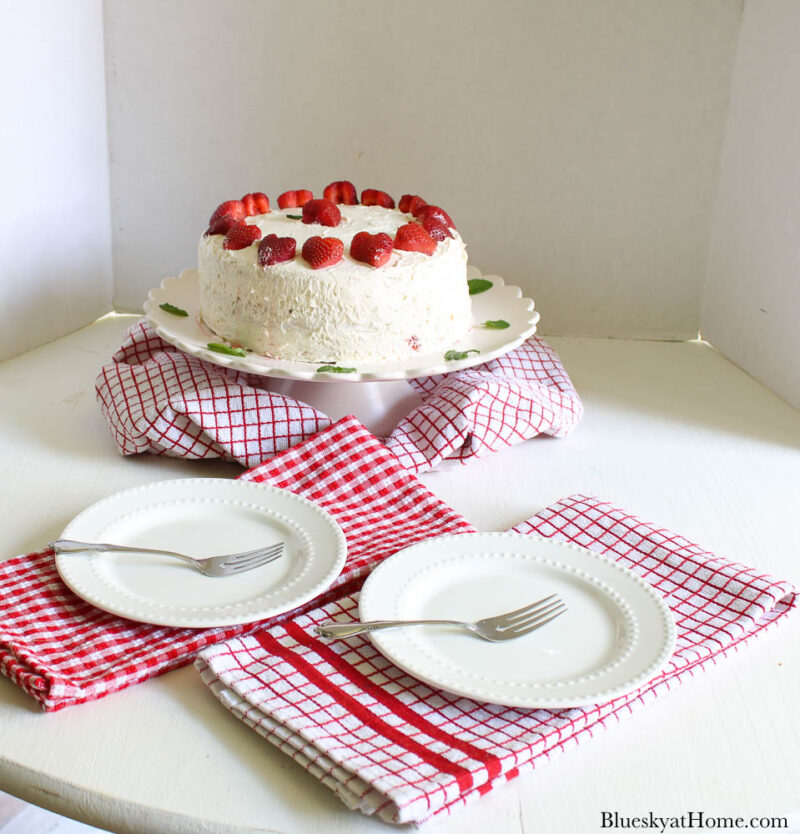
A few weeks ago, I found the prettiest pink (between blush and bashful) cake stand. Here is another similar pink cake stand. I knew it would be perfect for this cake.
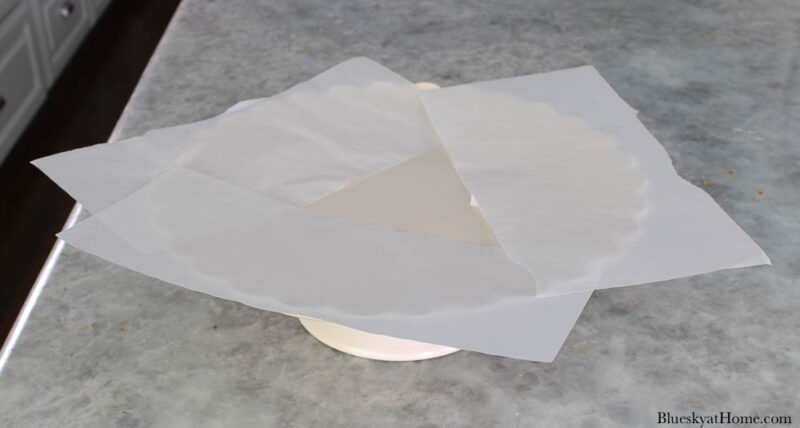
I placed 3 strips of parchment paper on the cake stand in a triangle. This makes it easier to ice your cake and keep the cake stand clean.
Assemble the cake:
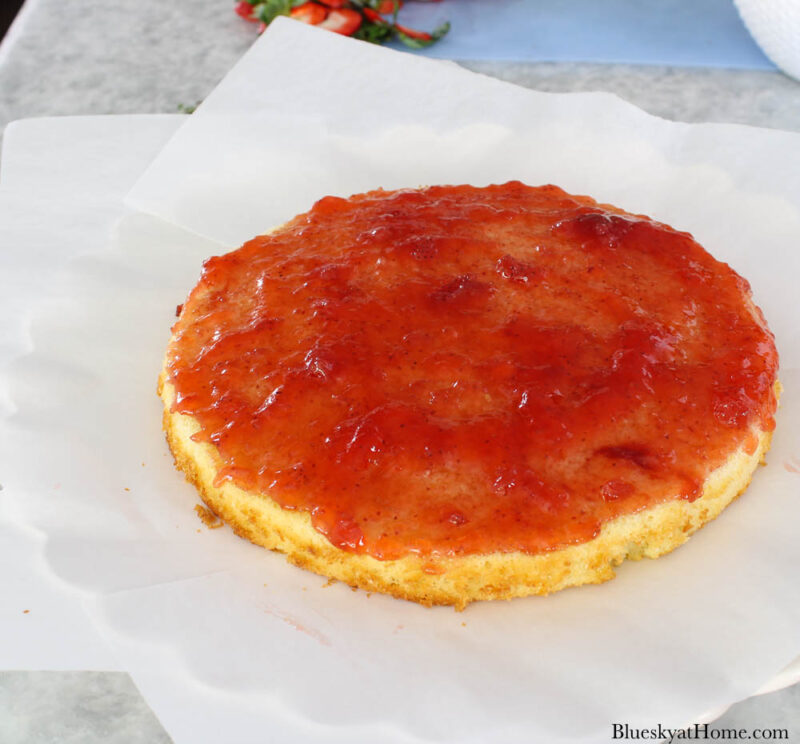
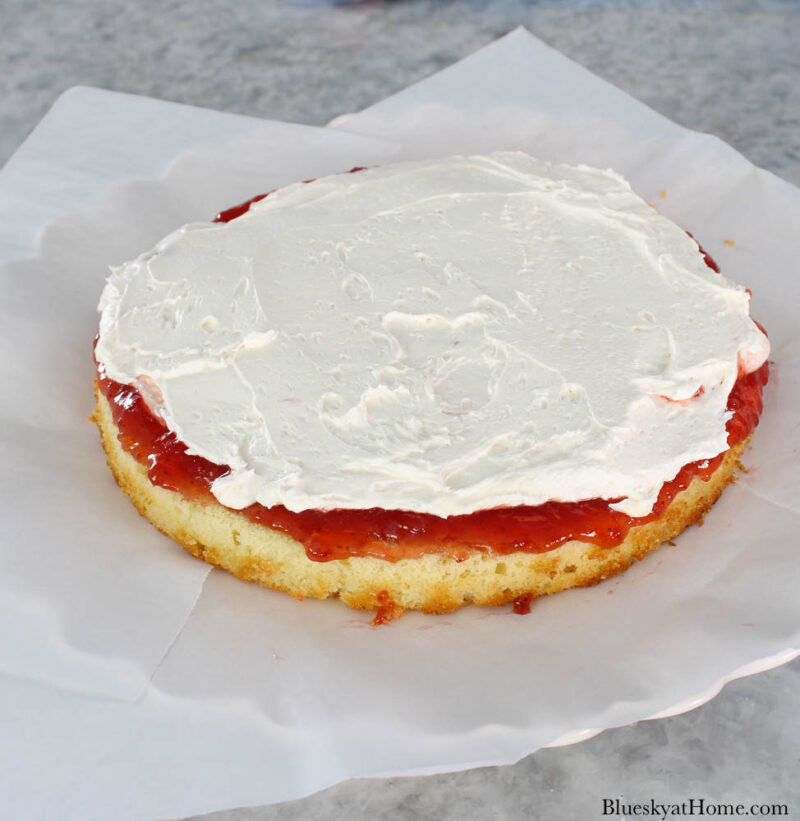
- place the first cake layer on the cake stand
- spread the strawberry jam* on the cake. The recipe calls for a 1/2 cup total, but I used 1/2 cup between each layer.
- use an ice cream scoop to place icing on the cake
- spread the icing with an offset spatula
NOTE: I used strawberry preserves because I had plenty on hand.
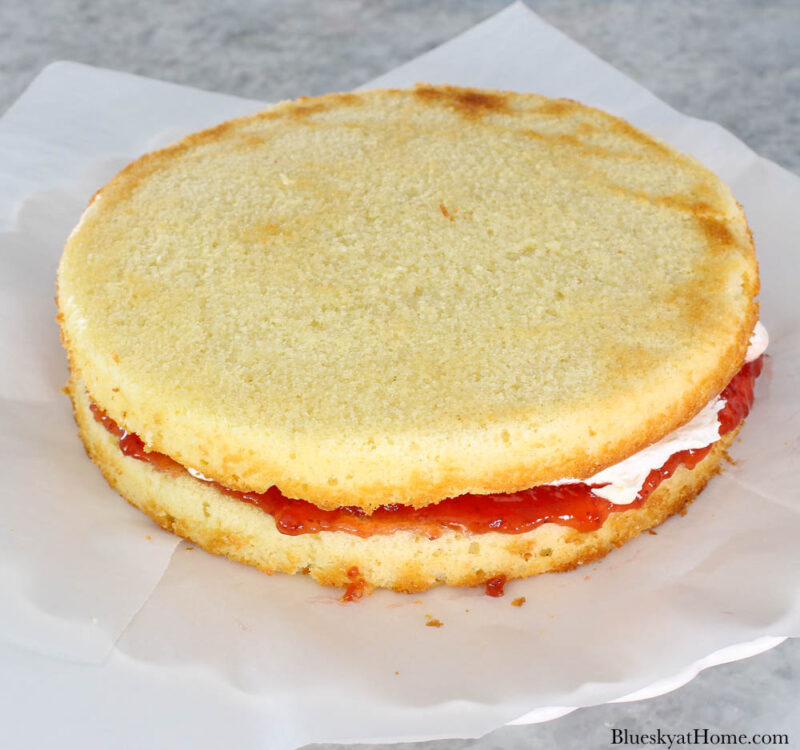
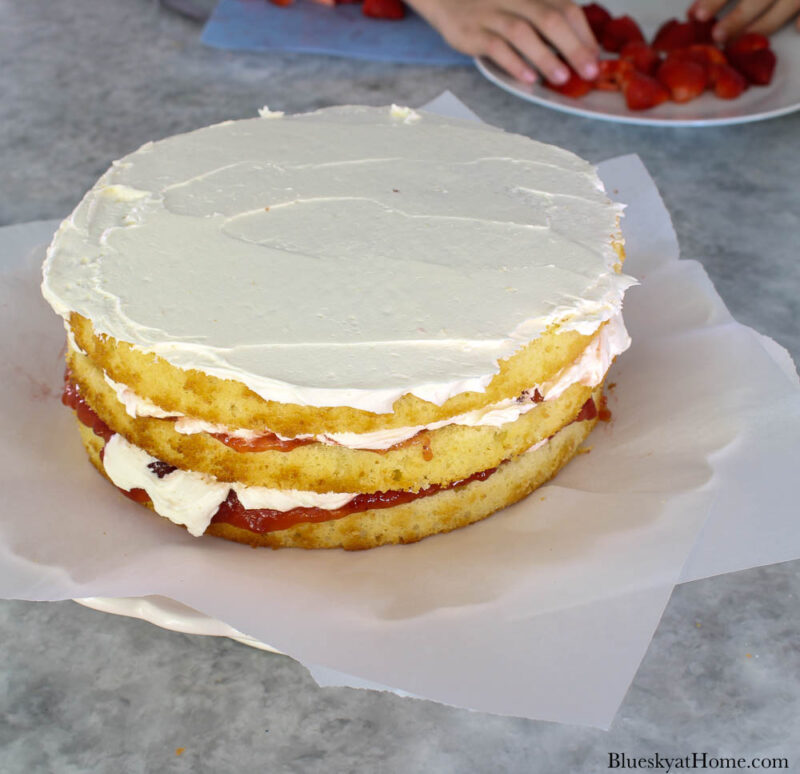
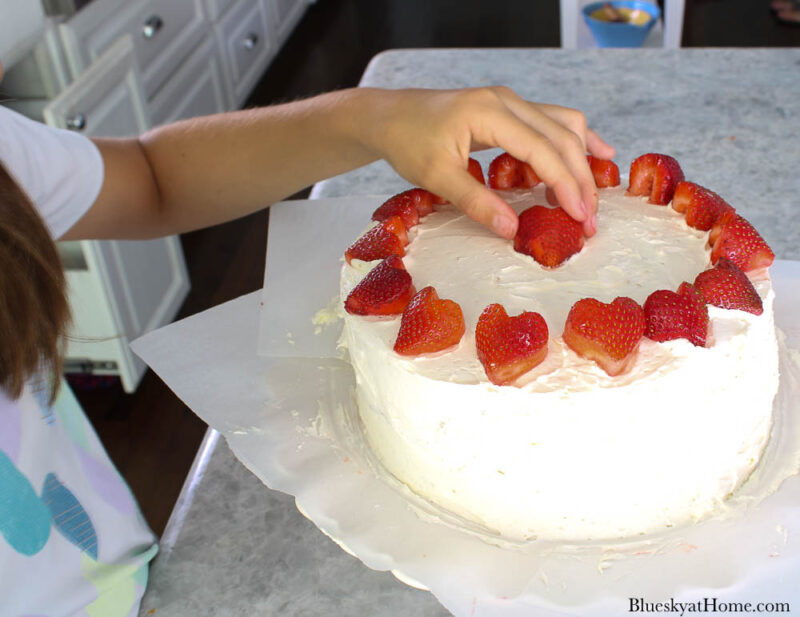
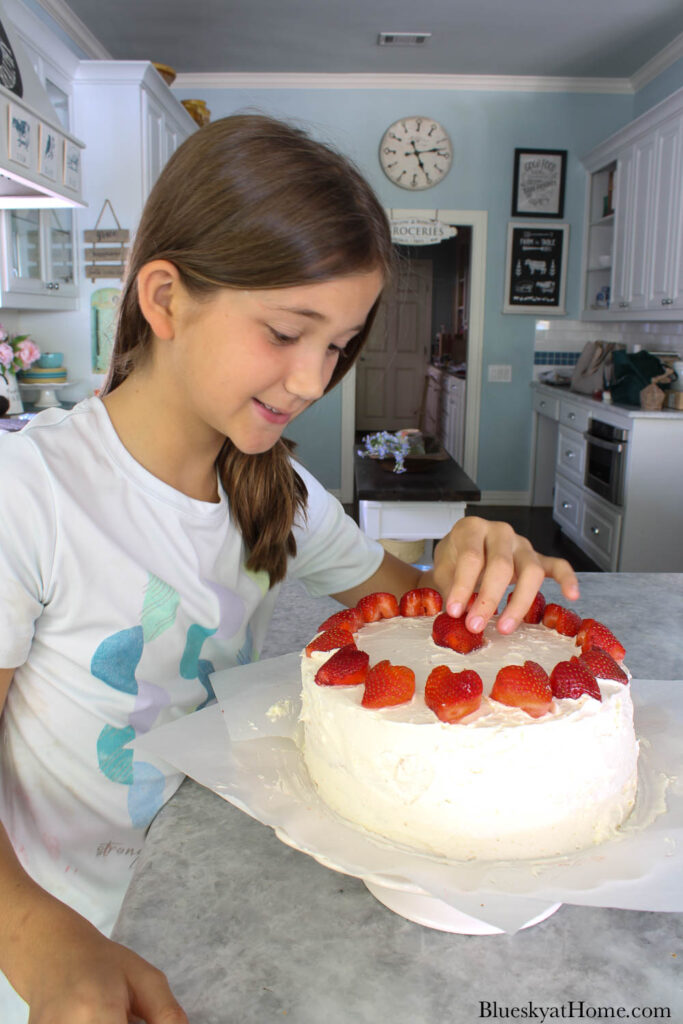
Repeat with the second and third layers, pressing each layer down. With your last layer, use a cake spatula to cover the top and sides with more icing. The girls each took a turn at icing the cake.
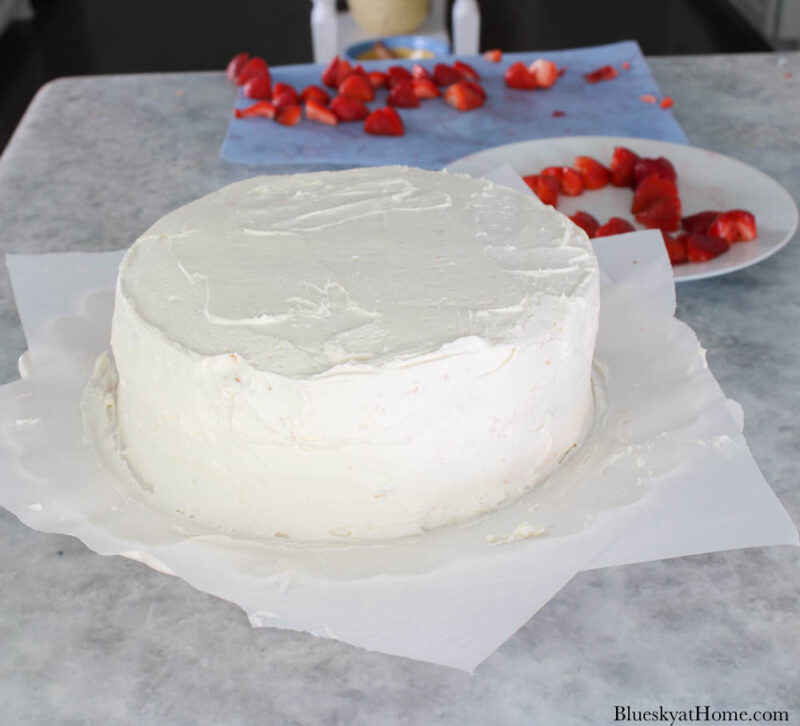
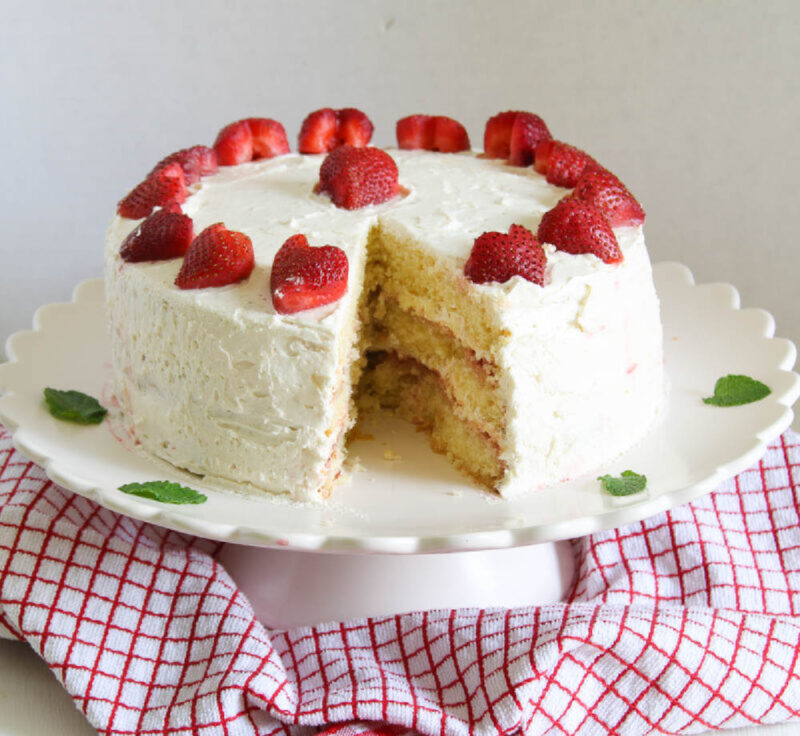
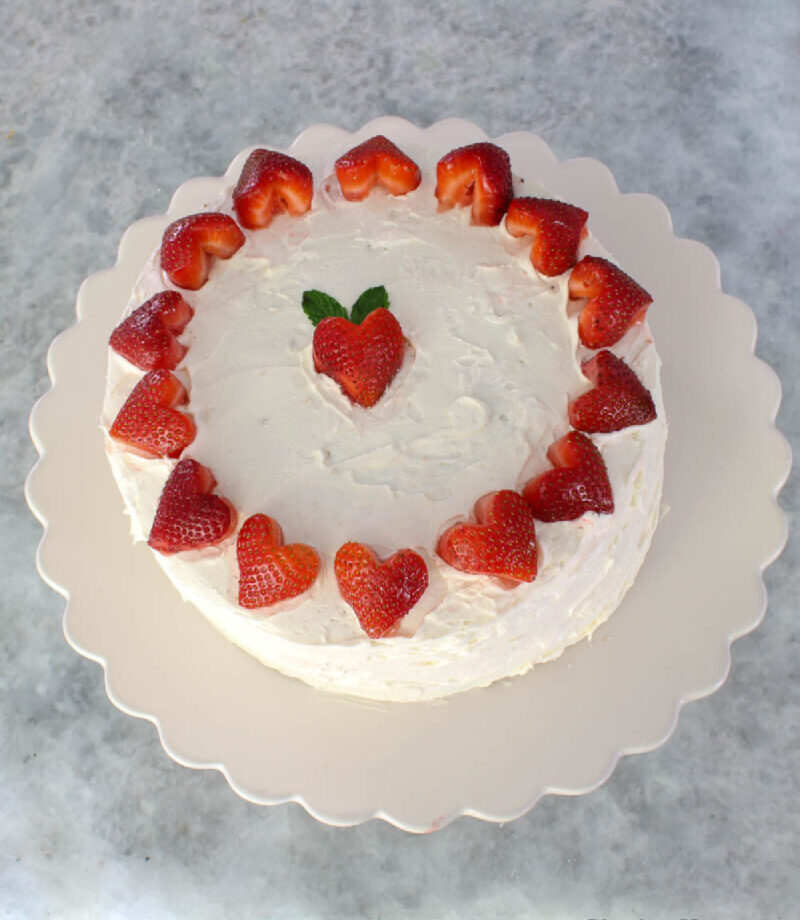
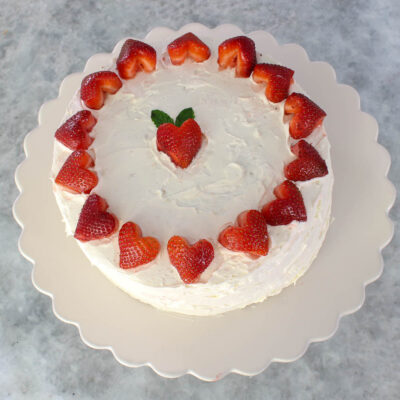
Garnishing the Cake with Strawberries
I have to give all the credit for the strawberry garnish to Annabelle. While Lilah took her turn icing the cake, Annabelle found one of my small heart-shaped cookie cutters. She made heart-shaped strawberries. They were perfect for the cake.
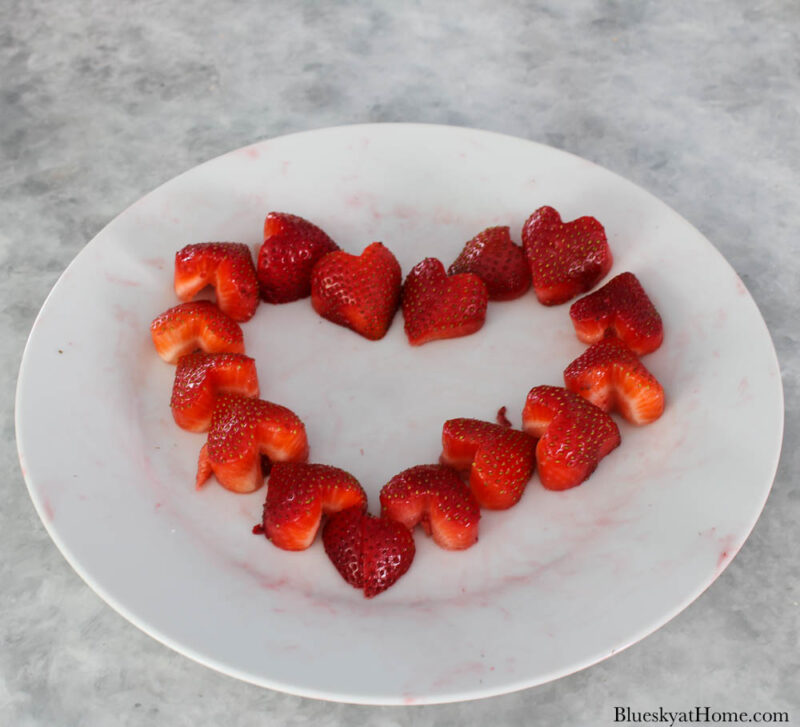
Then she decided that the center strawberry needed a little mint garnish. She sent Lilah outside to get some fresh mint leaves.
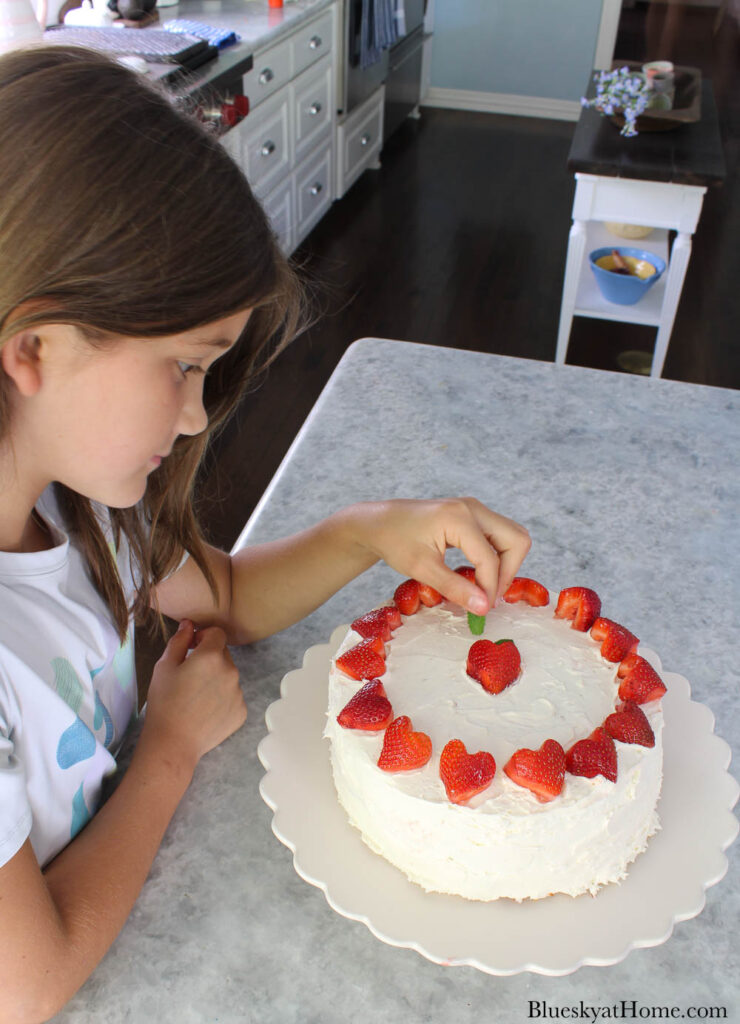
Now our Strawberry Vanilla Cake was ready for display. Little girl fingers did get some preserves on the cake stand and icing on the strawberries.
We placed the cake on the breakfast room table with plates for serving.
The girls were begging for a piece of cake. Cici wanted a piece, too.
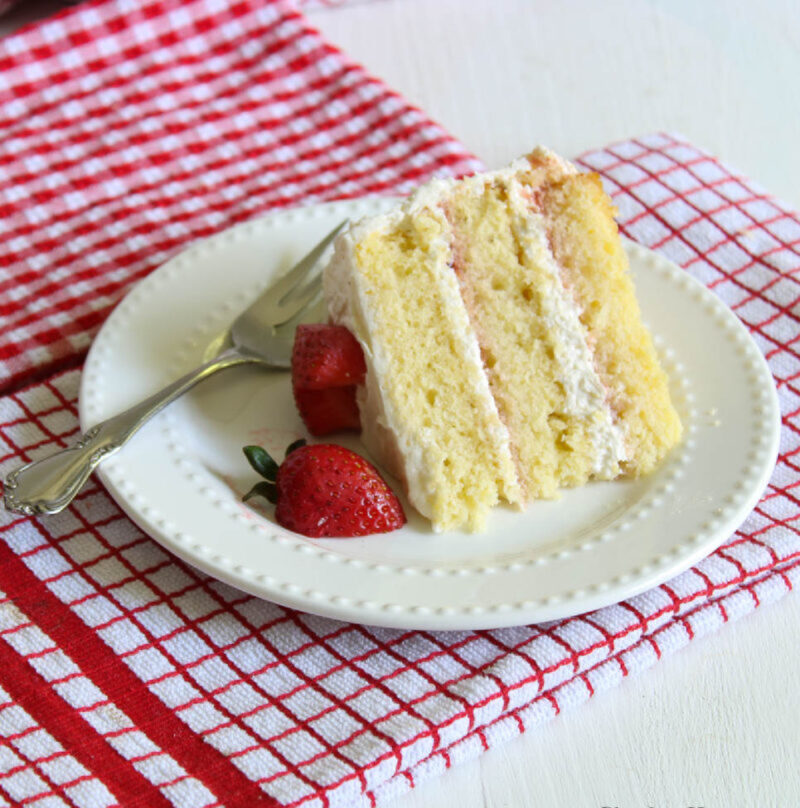
Everyone agreed that the cake was absolutely delicious. It was moist, tender and the strawberry and vanilla flavors were just sweet enough. The girls said that learning how to make a Strawberry Vanilla Cake was so much fun.
NOTE: Because strawberries are perishable, this cake needs to be refrigerated.
Here’s the recipe for you to print out.
Strawberry Vanilla Cake
Equipment
- mixing bowls
Ingredients
Vanilla Cake
- 2 ½ cups all-purpose flour
- 1 tablespoon baking powder
- ½ teaspoon salt
- 2 sticks unsalted butter at room temperature
- 2 cups granulated sugar
- 5 large eggs at room temperature
- 2 teaspoons pure vanilla extract
- 1¼ cups buttermilk
Vanilla Icing
- 1 pound unsalted butter at room temperature
- 6 cups confectioners' sugar
- 1 tablespoon pure vanilla extract
- 2 tablespoons whole milk
Strawberry Vanilla Cake
- 1 recipe Vanilla Cake
- 1 recipe Vanilla Icing
- 1 cup strawberry jam
- 1 cup fresh strawberries hulled and cut to a medium dice
Instructions
Vanilla Cake Instructions
- Preheat the oven to 350˚F. Grease 3 8-inch round cake pans with butter or nonstick cooking spray and set aside. (You can also use two 9-inch pans or 36-count cupcake pans.
- Sift the flour, baking powder, and salt in to a mixing bowl and set aside.
- Beat the butter in the bowl of a standing mixer fitted with a paddle attachment at high speed until it is light and fluffy, about 3 minutes.
- Add the sugar and mix on medium-high speed until smooth, about 1 minute. Scrape down the sides and bottom of the bowl with a rubber spatula halfway through to ensure that the butter and sugar are well mixed.
- Add the eggs, one at a time, mixing thoroughly after each addition. Again, scrape down the sides and bottom of the bowl to make sure the ingredients are fully combined.
- Add approximately half the flour mixture and mix on low speed just until the flour is incorporated, about 30 seconds. Add the vanilla and buttermilk and mix until combined, about 15 seconds.
- Add the remaining flour and mix until combined, about 15 seconds. Remove the bowl from the mixer and scrape down the sides and bottom of the bowl with a rubber spatula to make sure that all the flour is fully incorporated.
- Pour the batter evenly into the prepared pans. The batter should come about halfway up the sides of the pans.
- Bake for 40 – 45 minutes, rotating the pans once halfway through.
- When the centers of the cakes spring back to the touch, remove the cakes from the oven and allow to cool in the pans for 5 to 10 minutes. Run an offset spatula or dull knife around the edge of the cakes and the pans Transfer the cakes, right side up to a wire cooling rack to bring them to room temperature.
- Once the cakes are at room temperature, ice as desired.
Vanilla Icing Instructions
- Beat the butter in the bowl of a standing mixer fitted with a paddle attachment on high speed until it is light and smooth, about 3 minutes.
- Add the confectioners' sugar and mix on low speed until incorporated, about 2 minutes. (At this point, the mixture will be somewhat thick and pasty.)
- Add the vanilla and milk and mix on medium~high speed until smooth, about 2 minutes.
- Use the icing immediately, or keep it in an airtight container at room temperature for up 3 days. Before using, beat the icing in a mixer or stir vigorously with a rubber spatula for about 2 minutes.
Strawberry Vanilla Cake Assembly
- Bake the Vanilla Cake per the instructions.
- While the cake is baking and cooling, prepare the Vanilla Icing. Set aside.
- If necessary, trim the top of each cake layer with a serrated knife to make it even and flat.
- Place the first cake layer on your cake stand or cake plate. Use an offset spatula to spread a thin layer of strawberry jam across the top of the cake.
- Take a scoop of Vanilla Icing and spread it across the top of the jam, using a cake spatula and adding more as needed until it makes a layer about 1/2~inch thick.
- Center another layer of cake on top of the first layer and gently press it into the icing below. Repeat the process of spreading the jam and then the icing. Repeat with the last layer of cake.
- Finish the top layer with a crumb coat and more icing to cover the entire top of the cake and sides.
- Arrange the diced strawberries in a ring around the top edges of the cake.
- Serve the cake immediately or keep it refrigerated for up to 3 days. Bring the cake to room temperature for about 1 hour before serving.
Notes
I hope you loved how to make a Strawberry Vanilla cake. You can use the same recipe to make cupcakes.

We made the cake on a Thursday. Between the girls, Sweet Shark, Jennifer, and me, the cake was gone by Sunday.
Our Favorite
Spring and Easter Desserts
Be sure to PIN this Strawberry Vanilla Cake recipe for your future dessert needs.
A Stroll Thru Life – Worthing Court – StoneGable – Decor To Adore – Peacock Ridge Farm

White Arrows Home – Thistle Key Lane – Calypso In The Country – Eleanor Rose Home – A Pretty Life In The Suburbs
Whispering Pines Homestead – Our Southern Home – Thrifty and Chic – Bluesky At Home – CountyRoad407

It All Started With Paint – Bungalow 47 – Lyndale Drive – From Farmhouse to Florida – My Thrift Store Addiction
Pasha is Home – Follow The Yellow Brick Home – The House of Silverado – My Family Thyme – Rae Elizabeth’s House


I think that is a cookbook I would enjoy. Your helpers are adorable and I know the cake was delicious. #HomeMattersParty
This looks delicious, Carole, and your granddaughters are adorable!
This looks delicious. Thanks for sharing at Handmade Monday. I love he heart strawberries, a great finishing touch.
So when you’ve finished decorating, you just pull away the strips of paper? Is that right? I usually end up just wiping the stand as best I can, I’ve never tried this idea. I’ll give it a go next time. Thanks.
Julie, yes, just gently pull away the strips of parchment paper. If any icing is on the cake stand, wipe it off with a damp paper towel. Glad you liked the cake.
Yummy! Perfect summer dessert for sure.
This sounds absolutely delicious! I look forward to trying it! Pinned.
Carol, your cake looks beautiful and delightful! I love that you made it with your granddaughters. Those are special memories. Thanks for the culinary school tips. I learned some good nuggets!
Your cake looks beautiful and delicious. Looks like you had a sweet helper too! The strawberry hearts take the cake! Enjoy!
Pinning!
Such a pretty cake!!
Your assistants are just adorable Carol! It’s been a while (I hate to admit) since I made a three layer cake, but your recipe is motivating me to jump in and just do it! Pinning!
Thanks so much, Michelle. They are both really good in the kitchen. It was fun to bake with them. I think they liked eating the cake best.
Not only does this look delicious! But I love that your grandkids helped. Everything tastes better with love thrown in. At least that’s what the Hallmark movies say. 😉 Thank you for joining in. I’m looking forward to trying this since I’m a total cake-eater! Pinned
Lots of love went into that cake. And it definitely did taste better. It’s all gone now. When can we eat cake has replaced “when will we be there.”
Your cake looks delicious and even better, how fun that your sweet little granddaughter helped you.
I’ve pinned it AND followed you on Pinterest!
Niky @ The House on Silverado
Not sure which is sweeter ~ the cake or the kiddos. They are both gone now, the cake to our tummies and the girls back home in Atlanta. Boy, it’s quiet tonight!!
Your cake looks so pretty and you had the cutest little helpers!!
Thanks, Cindy, they are sweethearts.
HI Carol,
First, your granddaughters are beautiful. I totally see you in Lilah! Seriously!
The cake is gorgeous! Great job! Love it!
Laura, if you saw my baby pictures, you would definitely see the resemblance. That was when my hair really was blonde! Thanks for sharing this hop.
Your cake looks so good and I know it was fun to make it with your granddaughters.