How to Brine Your Turkey and Why You Should
Wondering if brining a turkey is worth the effort? The short answer: absolutely. A properly brined turkey delivers juicy, flavorful meat from edge to edge—no more dry breast meat while waiting for the dark meat to finish cooking. Stick with me as I show you how to brine your turkey and why you should.
When I taught cooking classes, “how do I brine a turkey?” topped the list of holiday questions every November. Students were curious but skeptical. (From a practical standpoint, I used a large roasting chicken to demonstrate how to bring the turkey. The chicken tasted more delicious, too.)
Then they’d taste the difference: meat so moist and well-seasoned that it practically melts in your mouth, with skin that crisps beautifully in the oven.
Brining isn’t complicated, but it does require some planning ahead.
The second-most-asked question was “Why should I brine a turkey?”
The science is simple: salt water helps the turkey retain moisture during roasting while seasoning it from the inside out.
While I no longer teach cooking classes since starting Bluesky at Home, I still brine every Thanksgiving turkey – and once you see how easy it is, you’ll make it part of your holiday tradition too.
Let me walk you through exactly how to brine your turkey, why it works, and how to fit it into your holiday timeline.
For years now, I have brined my turkey. After people taste the difference in a brined turkey, they understand why they should brine their turkey. It really makes a difference.
People seem to think this is a complicated process, but it’s not.

Once you’ve brined a turkey a few times, this method becomes so easy you won’t need a recipe or even an ingredient list. You’ll be a convert. I promise.
I recommend you read my post, 10 Safety Tips for Preparing Turkey. It’s really important. I would PIN it.
But let’s talk turkey – specifically, brining that bird.
This post contains affiliate links to products used to create this project. If you should order any item from this site, I may receive compensation, but you do not pay a penny more. Your purchase is greatly appreciated as it helps support the continued publication of this site.
Why You Should Brine Your Turkey
No one likes a dry turkey. We all want a juicy, moist turkey. That’s why we brine our turkeys.
Brining changes the structure of the meat’s muscle tissue, allowing it to swell and absorb water and flavorings.
It also breaks down the proteins, making the turkey more tender. This means that the result is a juicier bird despite the moisture loss during roasting and the long cooking time.
Preparing Your Turkey
The main logistical problem with brining is that you need a container large enough to submerge your turkey in brine, but that will fit in your refrigerator.
Furthermore, from a food safety standpoint, it should be stored on the lowest shelf of the refrigerator so that any spills won’t contaminate the food below.
You may use a stockpot, a bucket, or a roasting pan. The challenge is that most fresh turkeys are too big – and who has room in their refrigerator?
I discovered years ago that an ice chest (cooler) is ideal. And since it’s colder in the garage than in the kitchen, that’s where we put the cooler overnight.
Here are the steps to brine your turkey:
- Place a large turkey bag in the clean cooler.
- Place the turkey in the bag.

- Add the brining solution (see below), making sure that most of the turkey is submerged in the brining liquid.
- Secure the bag tightly (Use a strong twist tie.).
- Pack the cooler with ice. I buy a 10-pound bag at the grocery store.*

- Close the cooler and leave overnight, checking occasionally to see if you need to add more ice. (This depends on how cold it is in your garage; if you live in a warmer climate, bring the cooler inside.)
- Turn the turkey over once or twice.
- Remove the turkey from the brine.
- Rinse the turkey in cool water.
- Pat dry with paper towels.

- Place the turkey on a platter or in a large baking dish and place in the refrigerator until you are ready to roast it.

*TIP: Save any leftover ice for Thanksgiving Day drinks. Discard the ice from the cooler with the turkey.
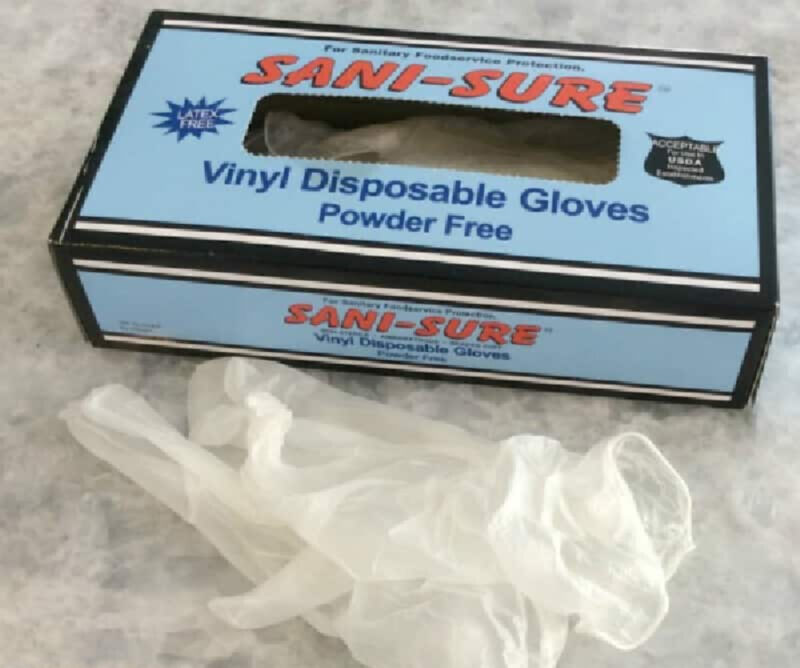
TIP: You definitely need to wash your hands before and after handling the turkey. But I encourage you to grab a box of disposible gloves at your local restaurant supply store or online to wear while preparing the turkey for brining. The gloves add an extra level of protection. Use them again for preparing the turkey for roasting.
You get a good night’s sleep while Tom Turkey absorbs all that awesome brining liquid and gets all moist and plump.
Brining Solution for Your Turkey
There are numerous turkey brine recipes for brining solutions. Scientifically, you only need water and kosher salt. You may add other ingredients to enhance flavor, but they are not necessary.
I always use good old Morton Kosher Salt.
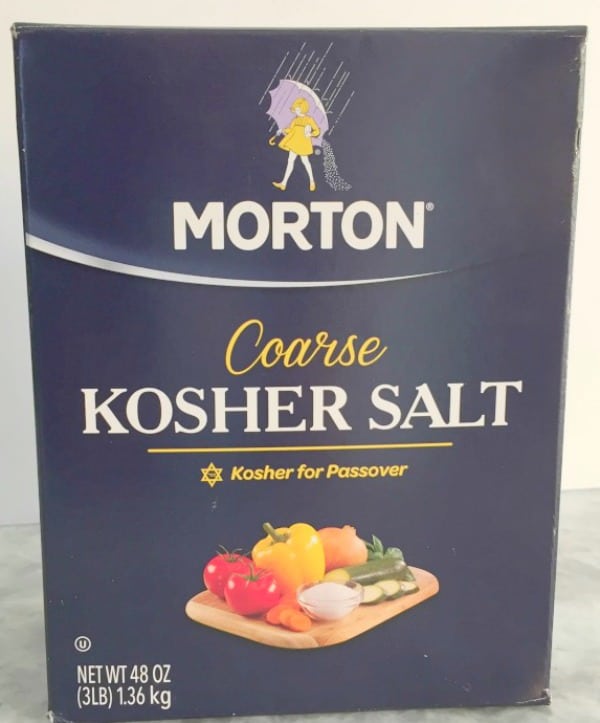
The basic ratio for turkey brine is 1/2 cup of kosher salt to two gallons of cold water. Some brine recipes include sweeteners or acidic ingredients (lemons) to balance the saltiness.
Trust me: you will not taste any saltiness in your turkey.
A couple of years ago, I decided to add sugar to the brine, just for fun. I added about a cup of granulated sugar. Sweet Shark thought it was the best turkey I had ever made.
*UPDATE: I made a sugar water combination (simple syrup) first by combining 1 cup of sugar with 2 cups of water in a saucepan. Stir over medium-high heat until the sugar is dissolved. Allow to cool (drop in a few ice cubes if you are in a hurry), then stir into the brine mixture.

Here’s the basic “recipe” with some flavoring options. Adjust the ingredient amounts based on the size of your turkey.
The equipment you need for brining your turkey is minimal.
Turkey Brining Recipe
Turkey Brining Solution

Ingredients
- 1 cup kosher salt
- 10 pound bag of ice
- 2 gallons cold water
Optional Flavor Additions
- 1 cup sugar, granulated or brown
- 2 lemons quartered
- handful herbs, such as rosemary, thyme, parsley, sage
- 3 bay leaves
- 5 garlic cloves peeled and smashed
Instructions
- In a large container, combine the kosher salt and water.
- Stir until the kosher salt is dissolved.
- If adding sugar, combine it with 2 cups of water in a saucepan. Stir over medium heat until the sugar is dissolved. (Drop in a few ice cubes if you want to speed up the cooling process.) Stir the sugar water into the brine mixture.
- Add the brine to the turkey in the trash bag set in the ice chest. Be sure that the turkey is completely covered. You can double the brining solution or add additional water.
- Tightly tie the trash bag closed and cover completely with ice. Close the ice chest and place it in a cool place. Periodically check the ice chest that it is still cold and add more ice, if necessary. You can turn the turkey over once or twice. Allow turkey to brine overnight.
- Remove the turkey from the brine solution and rinse thoroughly. Discard brine solution and trash bag and thoroughly sanitize the ice chest.
- Pat turkey dry with paper towels. Sit on a platter in the refrigerator uncovered (This will help make the turkey skin crisper.) until ready to cook.
Not much effort for an extra juicy, moist turkey on Thanksgiving. Try it and you’ll thank me.
If you want more cooking information and seasonal recipes, then check out these Pinterest Boards (and follow me on Pinterest): Cooking Lessons, Thanksgiving Recipes.

While your turkey is brining, you should make this amazing Pecan Rum Tart and toast the turkey with the Perfect Pumpkin Martini.
I hope that everyone has a wonderful Thanksgiving and safe travels. May your turkey be juicy and your pie sweet. So you don’t panic the day before Thanksgiving, PIN this information for later.


Hi Carol,
We have been featuring your very helpful How To Brine A Turkey this week at Full Plate Thursday, 769. Thanks so much for sharing with us and come back to see us real soon!
Happy Cooking
Miz Helen
THank you so much for featuring this post. It’s very helpful for folks who don’t know the process. Happy Thanksgiving to all your community.
My pleasure. I hope you had a wonderful Thanksgiving and your turkey was delicious.
This was the easiest brine recipe we have ever used.
Hi, you can buy 5 gallon buckets at Lowe’s and Home depot that are food grade. Don’t forget the lid.
Ken, that’s not a bad idea. But the cooler has worked so well over the years, it would be hard to change not.
How long to you leave it in the refrigerator after brining?
As soon as I remove the turkey from the brine and rinse and dry it, I begin the roasting preparation so normally don’t put it into the refrigerator. BUT, there should be any issue with leaving it in the refrigerator for several hours.
I’m giving this a try this year! But I’ve always cooked my turkey in an electronic roasting pan. How do you cook yours after it’s been brined? Breast side up and uncovered?
Chris, I’ve been brining my turkey for years. It makes a big difference in the moistness of the turkey. I don’t know what an electronic roasting pan is. I always roast the turkey, breast side up, basted with butter, uncovered. When the turkey cooks to a golden brown, the last 30 minutes, I cover it in foil. Hope that helps.
In one place you say 1/2 cup of salt to 2 gallons of water, then in the list its 1 cup to 2 gallons.
Rich the amount of salt is a range from 1/2 cup to 1 cup, depending on the size of your turkey. If it’s a really big turkey, you may need more water.
I can’t wait to try brining my turkey this year. You provided some good tips, I.e.,
putting the turkey in a plastic bag in a cooler etc. overnight sounds much easier!
Flo, you’ll love your brined turkey. The cooler is the ticket to easy brining.
I’ve done this for years as well. I use a paint bucket lined with a roasting bag to brine the turkey vertically. It fits in the frig, easier than you think, and with the top on you have a shelf for storing the pie overnight. I use less salt than your recipe as many turkey suppliers (especially of frozen turkeys) use added salt in their processing. However it is done, brining is the only sure fire way to ensure moist turkey for not only the holiday meal, but for leftovers too.
Carole, I always order a fresh turkey so I don’t think there is added salt, but that is a good idea. Love that we are on the same turkey page. Happy Thanksgiving.
If you google it about using a garbage bag they say do not use a garbage bag at all! So why does this recipe say you can?
Because I’ve done it for years with no negative effects. We use a new white bag. The bags at the grocery store are usually too small. Hope that helps.
thanks for sharing the great information I believe it will com in handy in the future
come see us at http://shopannies.blogspot.com
Angie, you are so welcome and I’ll definitely drop by.
We were just talking about where to put the turkey when brining it this year so thanks for the cooler suggestion. Happy Thanksgiving, Carol!
I didn’t realize the importance of brining. Love the idea of putting the turkey in a cooler. I never would have thought of that. Thanks for sharing at Inspired by You. I pinned it to our group board. Have a wonderful Thanksgiving and please check back on Friday to see if you have been featured and visit us again next Sunday.
Susan thanks for your feedback. Brining is easy and the results are so worth the little extra effort. I hope you have a juicy turkey.
Well, I have never done this but want to give it whirl. Should the turkey be thawed first? How many days can I wait to cook it after removing it from the brine and placing it in the refrigerator? Thanks!
Cecilia, first, year the turkey should be 90% thawed. It will finish thawing overnight on the brine. You could leave it uncovered in the fridge for 1 day at most. I put ours in the fridge as soon as it’s out of the brine and rinsed. It’s in there for a few hours. I take it out while the oven is preheating. Hope that helps. Happy Thanksgiving.
Can I put it in a large pot for brining and keep it in the refrigerator till it’s ready to be cooked?
Yes, as long as there is plenty of room for the turkey, brine and ice. Hope that helps.