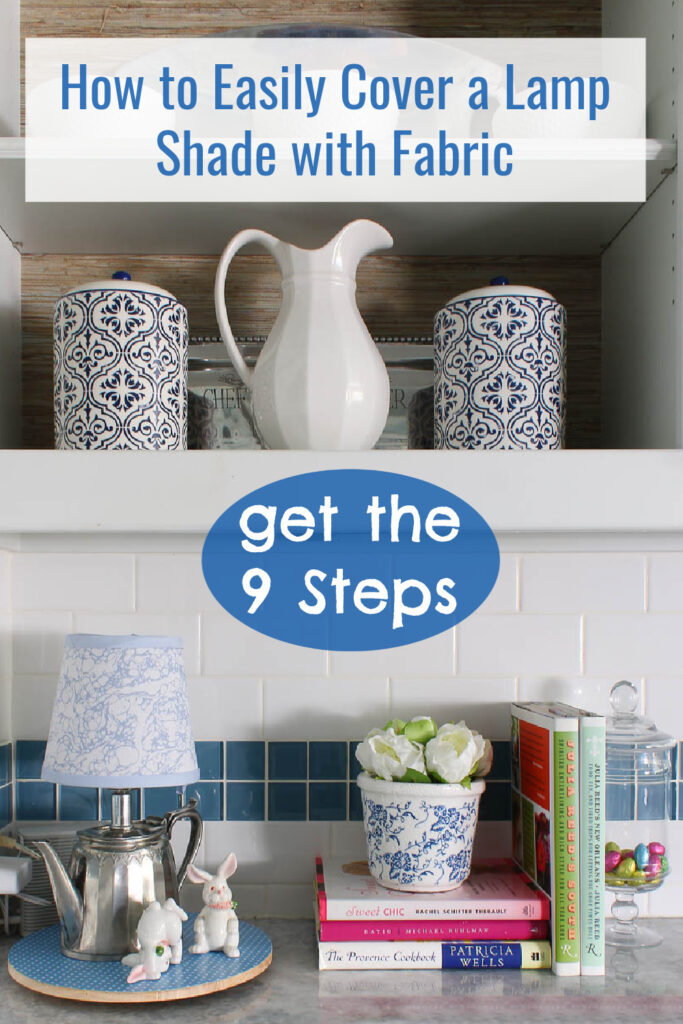
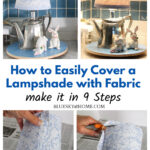
How to Cover a Lampshade with Fabric in 9 Steps
Accent lamps add interest and style to our homes. One way to add extra interest is to cover a lampshade with fabric. Use fabric. Here’s how to cover a lampshade with fabric in 9 steps.
I love a beautiful lamp to add light, ambiance, and warmth to any space. When you need more than just a plain white shade, a customized one adds so much style to your home decor.
How do you cover a lamp shade with fabric? There is more than one way. I’m going to show you I recently covered one for a special lamp in our kitchen.
A lamp in the kitchen? Yes. Like any accessory, a lamp adds a focal point. A little surprise. Color, pattern, and texture.
This is a project I’ve wanted to do for a long time.

9 STEPS TO COVER A LAMP SHADE WITH FABRIC
This post contains affiliate links to products used to create this project. If you should order any product through this site, I may be compensated, but you will not pay a penny more.
This isn’t the first time I’ve covered a lampshade with fabric. It’s so easy and impactful that when I have the right lamp for the right space, it is my go~to way to make a lampstand out.
Here are the steps I recommend. You can have a stylish lamp in a few hours.
Step 1 – Choose Your Lamp
The lamp comes before the shade. The height, width, and style of the lamp dictate the size and shape of the shade. The bigger the lamp the larger the shade. Also, the bigger the shade, the more it costs.
For this lamp project, my lamp was a small silver lamp that I’ve had for many years. I had a friend who had a business making lamps from silver containers, vases, and pitchers.
This lamp is about 7 inches tall and 9 inches wide.
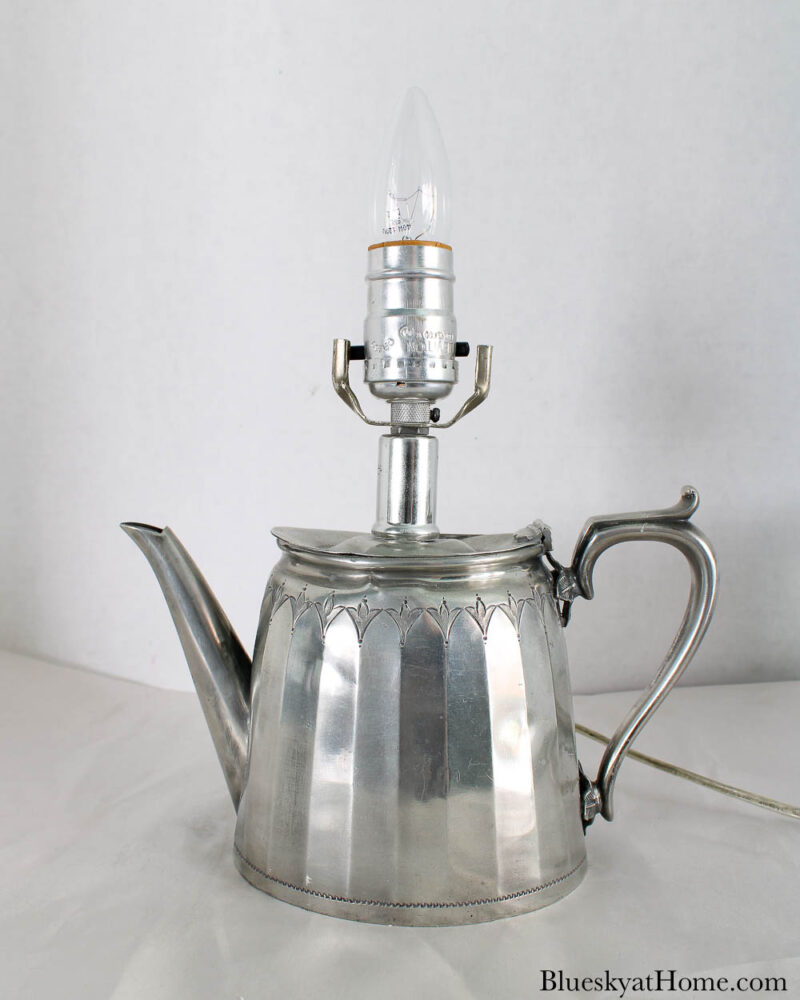
Although this type of lamp doesn’t tarnish, I thought it would be a good idea to clean it. As usual, I used my favorite silver polish wipes. I always buy three boxes at a time.
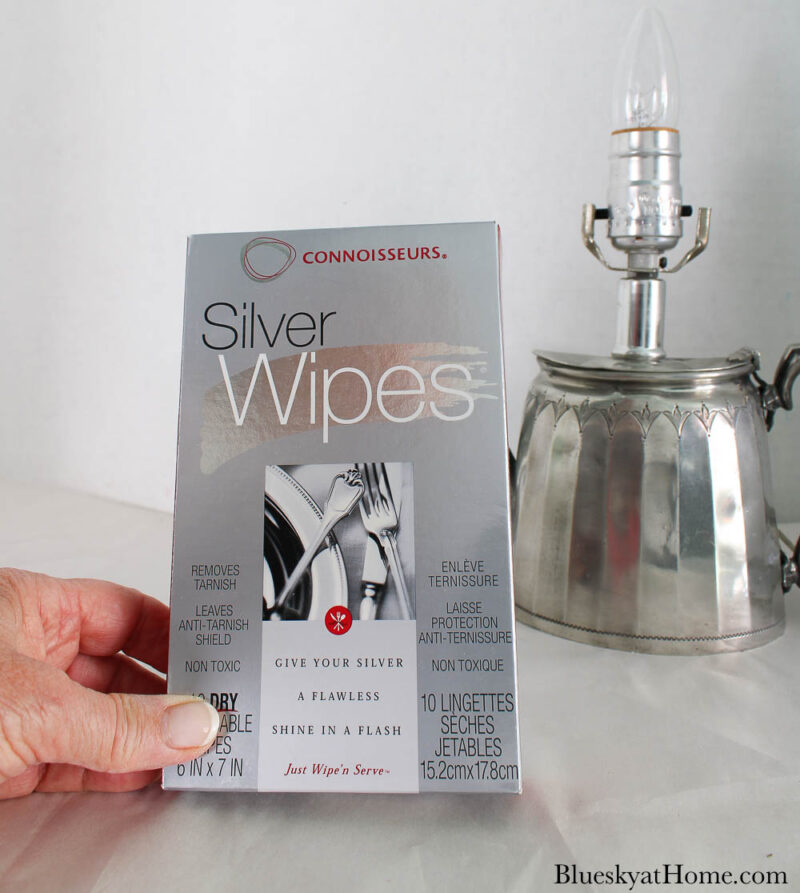
These wipes are the best thing I’ve found for cleaning silver. It did remove some tarnish and gave the lamp a bit of shine.
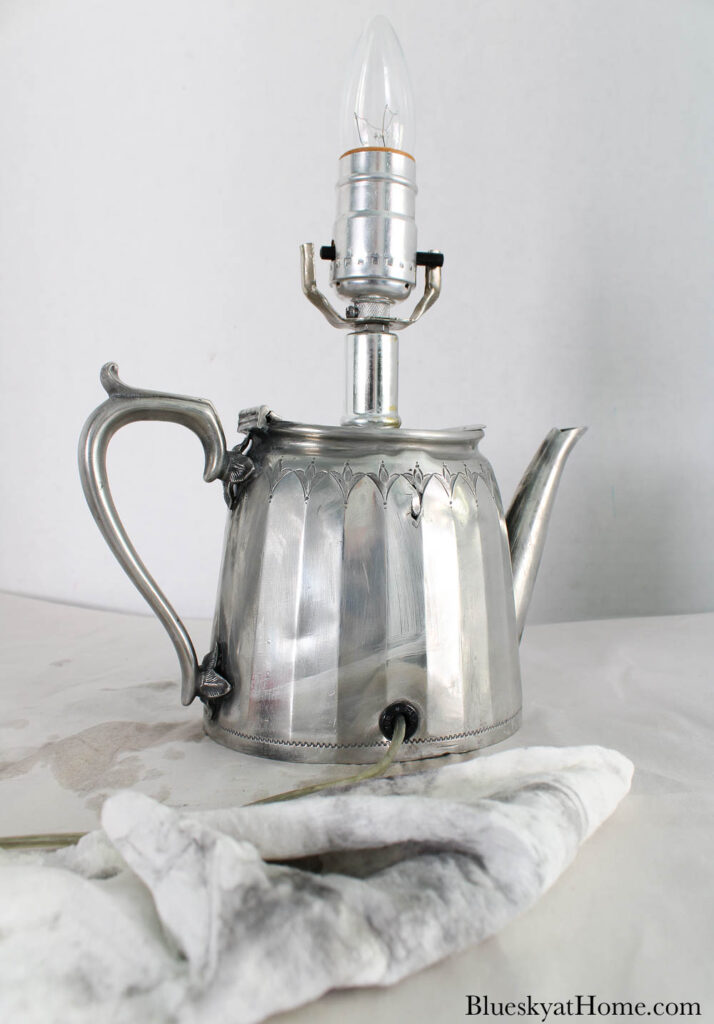
Whatever type of lamp base you use, I would make sure it is clean before proceeding with the lampshade.
Step 2 – How to Choose the Right Lamp Shade?
The size and shape of the lampshade should complement those of your lamp. You may have to try a few to get the right size.
REMEMBER: The bigger the shade, the more it costs.
As it happens, I have several lampshades that I’ve bought over the years. Several years ago, I bought a pair of these silver “silk” shades at an estate sale. The price sticker was still on it.
I’ve never used them. I thought the shape, height and diameter would work perfectly for this lamp.
- Lamp shades that are drum-shaped or fairly straight from top to bottom work best for covering with fabric.
- The shade should also have a smooth finish without ruffling or shirring.
- Fabrics such as cotton or those without any texture work best.
- Parchment paper lamp shades also work well for covering with fabric.
This lampshade is 6 inches tall. The top is 5 inches in diameter and the bottom is 6 inches.
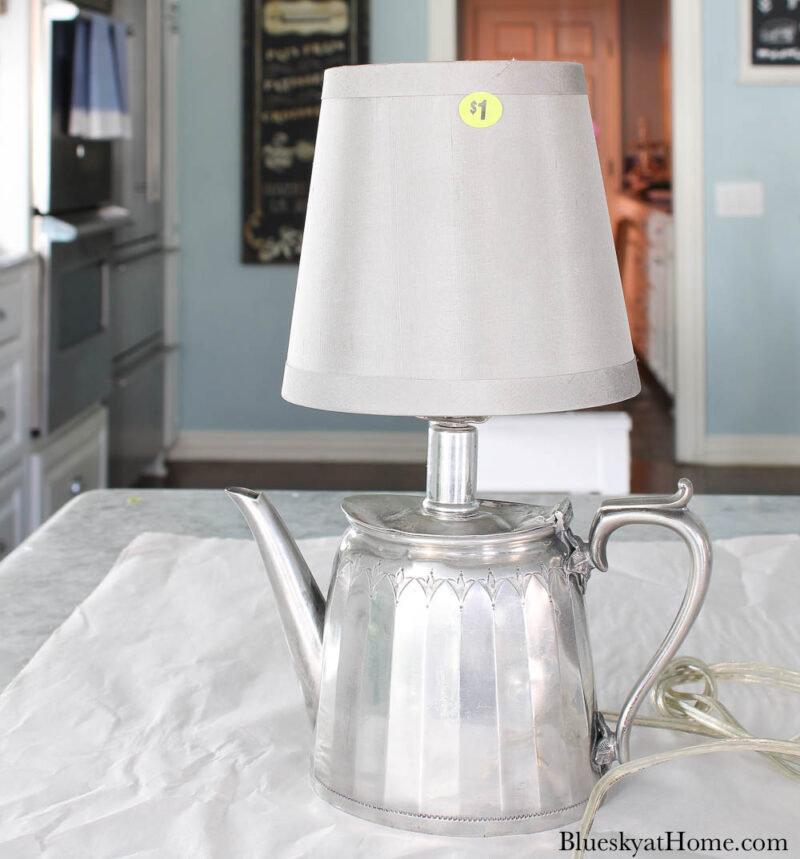
NOTE: Well-made lamp shades are not inexpensive. Unless you luck out at an estate sale like I did, focus on the right size, shape and dimensions you need.
Step 3 – Choosing the Best Fabric for Your Lamp Shade
REMEMBER: A drum shade or a straight-sided rectangular shade is the easiest to work with. The more slanted the shade, the more the pattern on the fabric becomes distorted.
Choosing the right fabric is not just about color. Pattern is very important.
Stripes on a drum shade will work, but on a very slanted shade, the stripes will be wonky.
These striped lampshades work well because they are round and straight-sided.
Best Types of Fabric for Covering a Lamp Shade
- Cotton, linen or even quilting fabric work well.
- Do not use fabric that is stretchy or has too much texture.
- Light upholstery fabric will work
- The best fabrics have smaller patterns with an overall design.
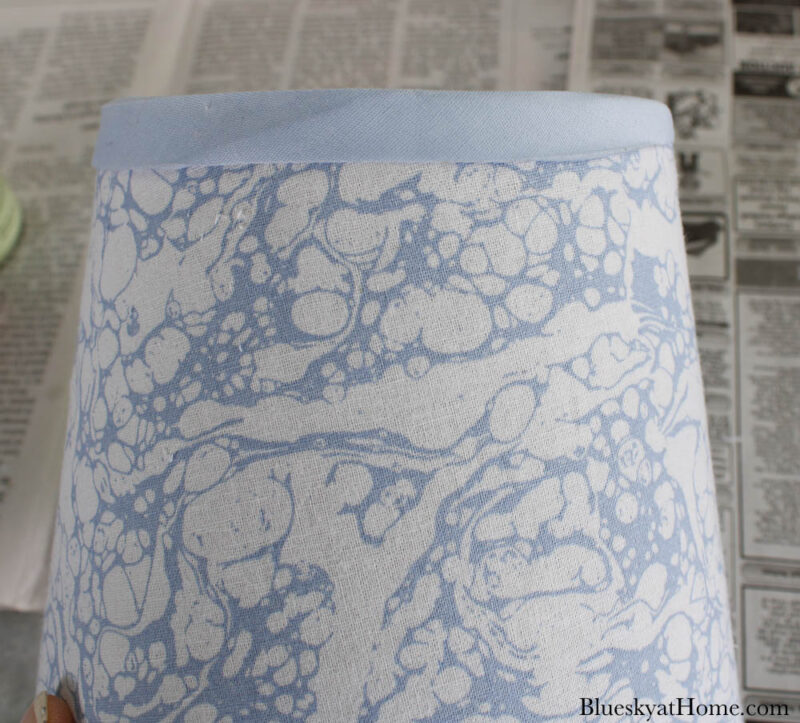
Since my lamp would go in my kitchen, I knew my fabric needed to be a soft blue.
I also wanted to find a small pattern or one with an abstract design. I found this one at Joann. I bought a yard for about $6.00.

This color would go well with the blue accent tile in our kitchen. The design would be easy to work with on my lampshade.
Step 4 – Cover Your Work Surface
Since you will be using an adhesive, cover your work surface with newspaper or craft paper to protect it.
Step 5 – Gather Your Supplies
- fabric
- adhesive of choice
- paper for making a pattern
- pencil
- straight edge
- regular scissors
- good sewing scissors
- quilt clips or pins for attaching the pattern to the fabric
- double bias tape –small very sharp scissors for trimming the fabric


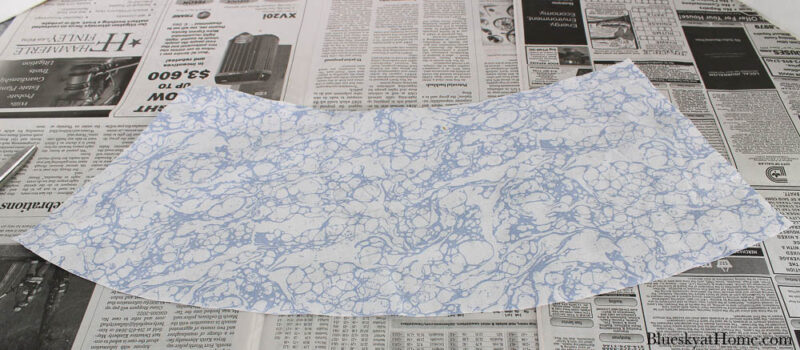
Step 6 – How to Make Your Paper Pattern
- Set your craft paper on your work surface. Place your lamp shade on its side.
- Using your pencil, draw a line at least 1 inch from the edge of the lamp shade. You can start either at the top or the bottom of the shade.
- As you roll the lamp shade, continue drawing the line.
- When you have completed the circumference of the lamp shade, remove the lamp shade.
- Draw a straight line from the top line to the bottom on both sides. On one side, give at least 1~inch extra in width.
- With regular scissors, cut out your paper pattern.
- Wrap the paper pattern around the lamp shade to make sure it covers the circumference of the shade and leaves an extra 1 inch on the top and bottom.
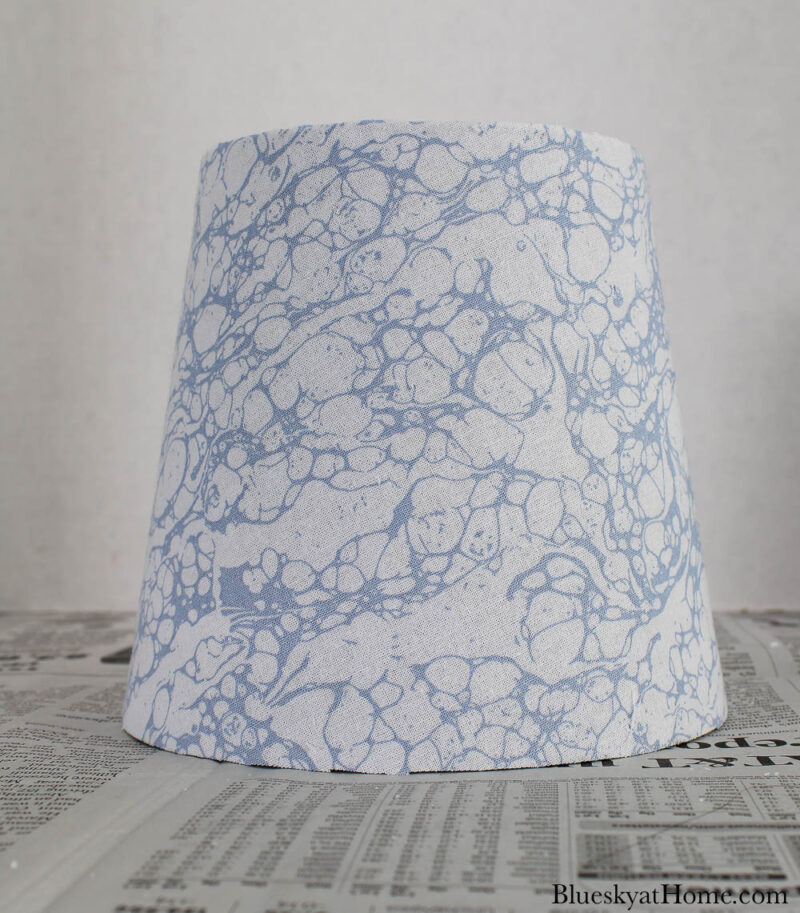
Step 7 – How to Cover the Lamp Shade with Fabric
- Place one layer of your fabric on your work surface. If necessary, iron the fabric first.
- Place your paper pattern on top of the fabric with one straight edge against one straight edge of the fabric.
- Pin or clip the paper pattern to the fabric. I used these quilt clips.

- Use your good sewing scissors to cut out your fabric.
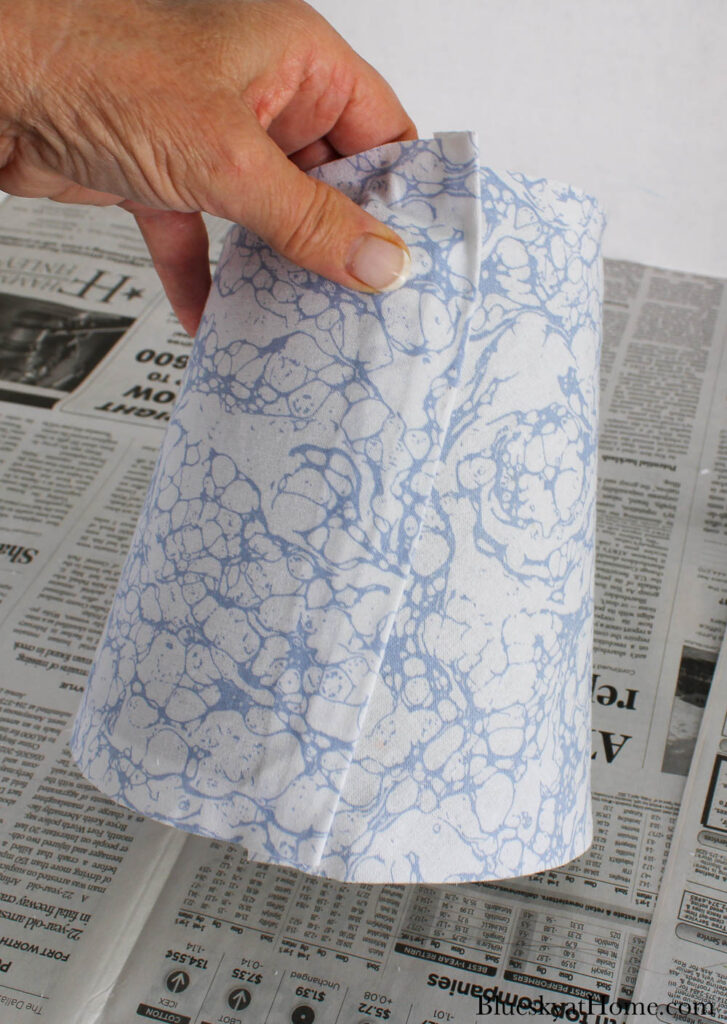
- Wrap the fabric around the lampshade to make sure you have cut it out correctly.

- Attach the fabric to the lamp shade. I have used Mod Podge for this step in the past. This time, I decided to use a spray adhesive.
- Holding the lampshade at the top, spray the fabric adhesive on about half the shade, from top to bottom.
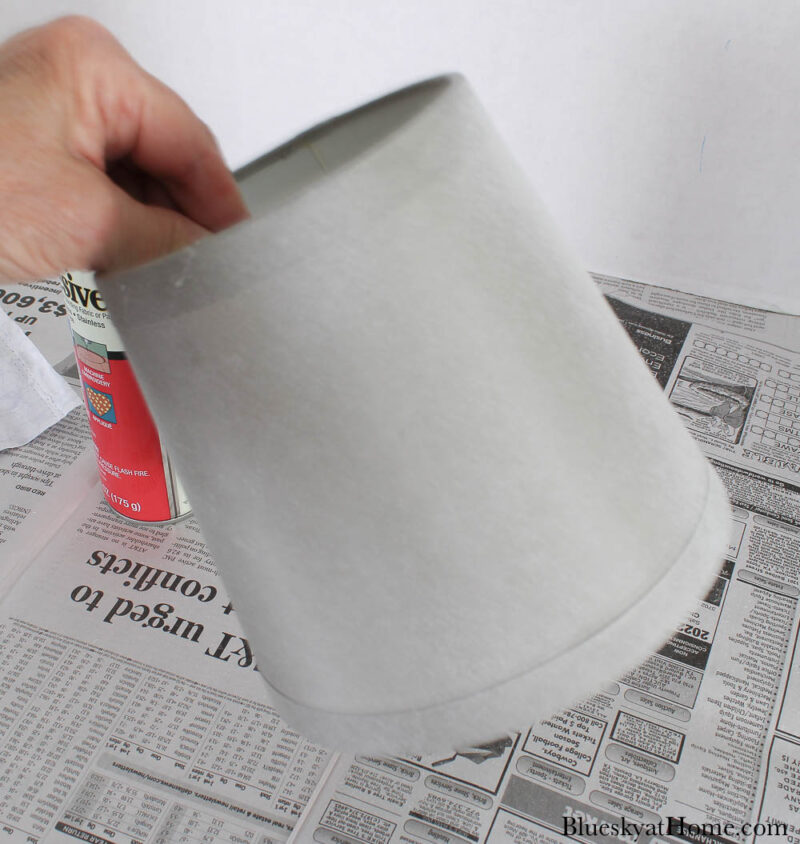
- Line up one of the fabric’s straight edges along the seam of the lampshade. Use your fingers to rub and press down on the fabric.
- Lay the fabric down on the lamp shade, turning the shade as you go. Use your fingers to smooth down the fabric.
- Repeat spraying the adhesive onto the rest of the lampshade. Continue smoothing down the fabric around the rest of the shade. Leave the last 1 inch of fabric unattached.
- Lightly spray the adhesive onto the straight edge. Fold the fabric over by 1/2~inch and press to adhere the “hemmed” edge.
- Lightly spray the adhesive onto the folded edge, then press the lamp shade down to cover the raw edge of the fabric.

- Run your fingers around the entire lampshade, smoothing the fabric.
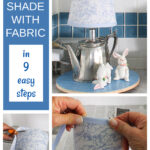
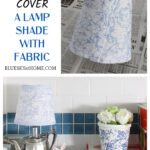
Step 8 – Trimming and Finishing Your Lamp Shade
- Using your small, sharp scissors, trim the excess fabric at the top and bottom of the lamp shade. Keep the scissors close the edge of the shade as you go around it.
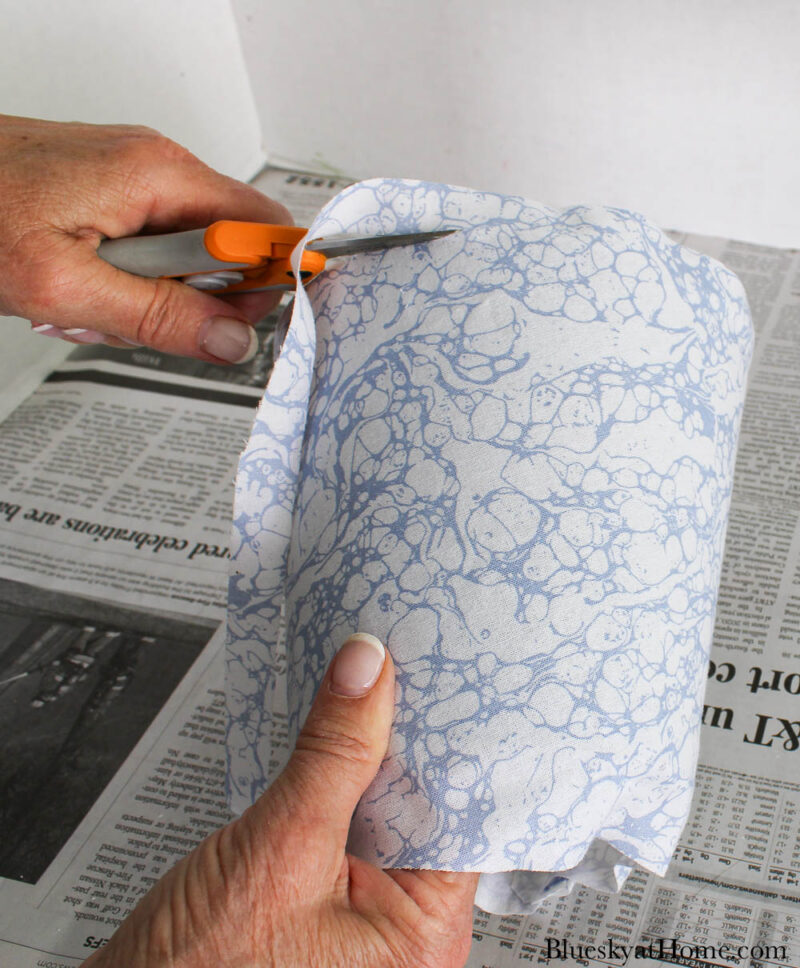
- Run your finger around the top and bottom of the lampshade to check for a smooth edge.
- If necessary, go back around the edges of the lampshade and clip off any extra fabric.
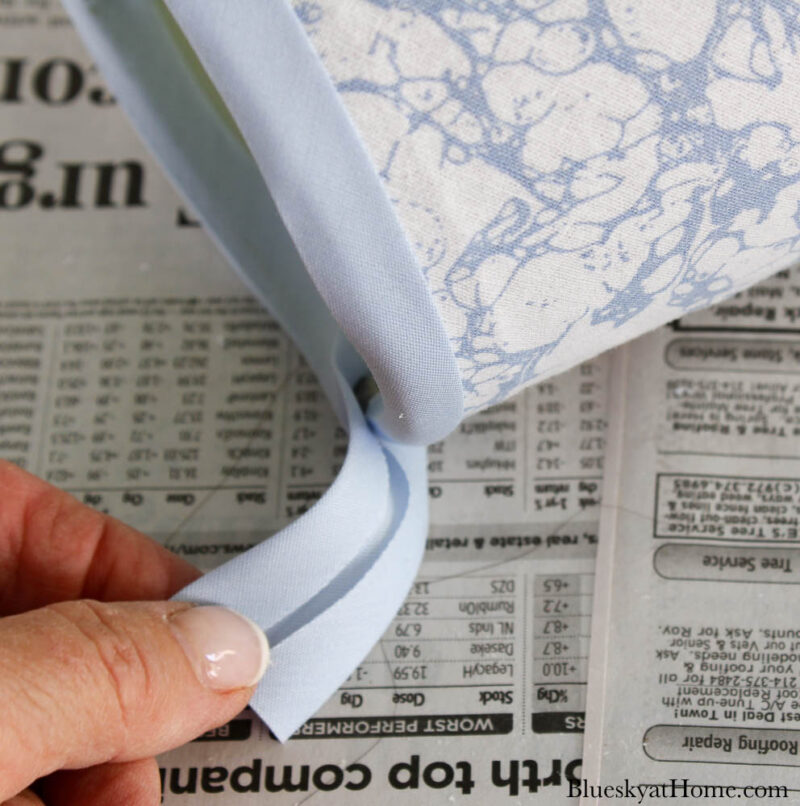
- Open your package of double bias tape. I chose a light blue color to complement the lampshade fabric.
- Don’t cut the bias tape. Lay it on your work surface, opening the folded edge.
- Lightly spray the adhesive on several inches of bias tape.
- Fold the bias tape over the edge of the lampshade (either the top or the bottom) at the seam.
- Use your fingers to press the bias tape on both sides of the shade.
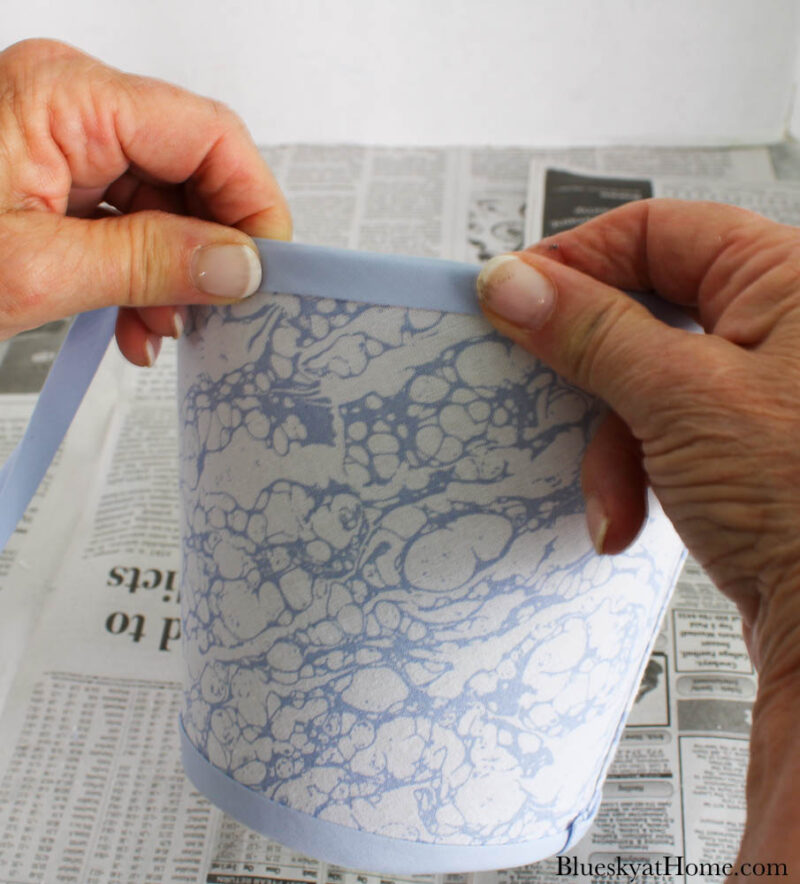
- Continue spraying and attaching the bias tape around the circumference edge of the lamp shade. Try to keep the folded edge on top or just inside the lampshade.
- Add more adhesive where necessary on the inside of the bias tape.
- Where the lamp’s wire support attaches to the shade, use small, sharp scissors to clip the fabric. Press the fabric down along the sides of the wire.
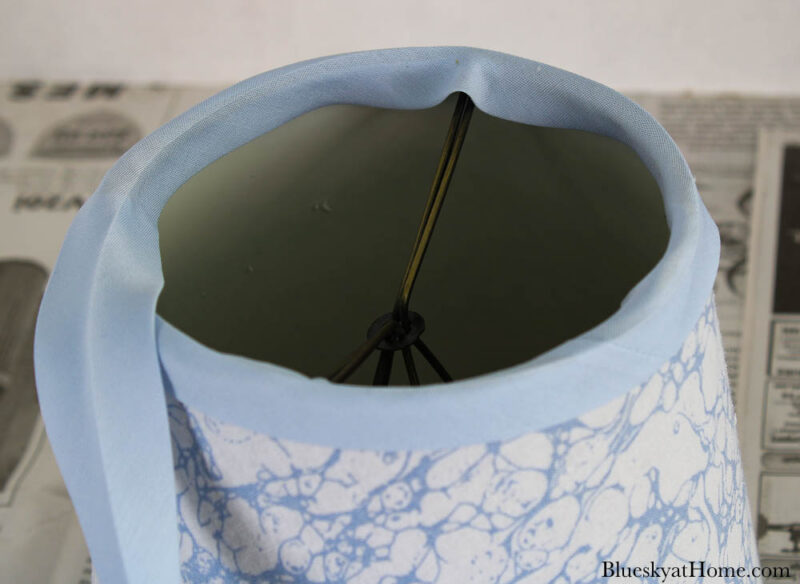
- When you have the trim wrapped around the lampshade, cut the tape, leaving about an extra 1 inch.
- Add a little adhesive to the cut edge, then fold over the tape. Press down. Then finish attaching to the lamp shade.
- Repeat on the other end of the lamp shade.
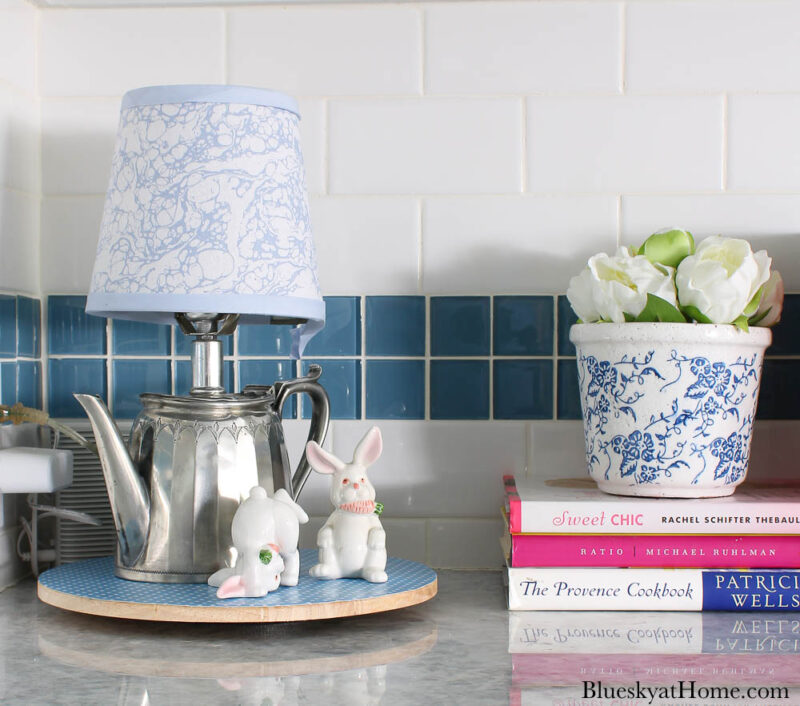
Step 9 – Display Your Fabric-Covered Lamp Shade
- Attach your lamp shade to your lamp.
- How you display your lamp is up to you. I placed the lamp on a new stand that I recently made. I’ll share that project in a later post.
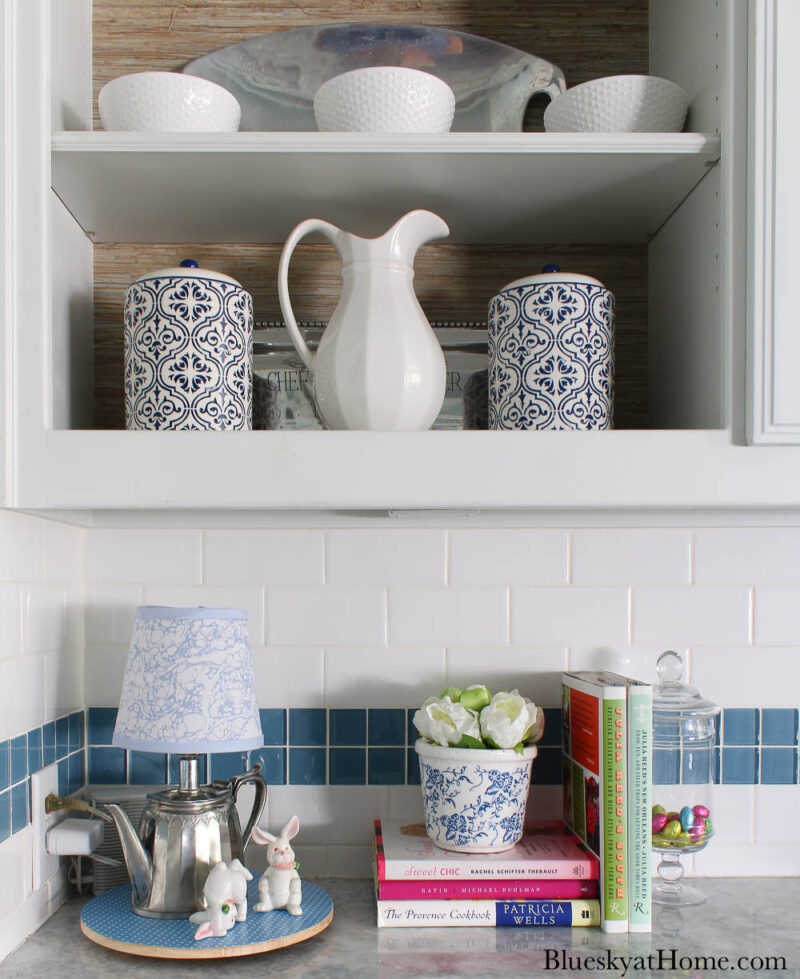
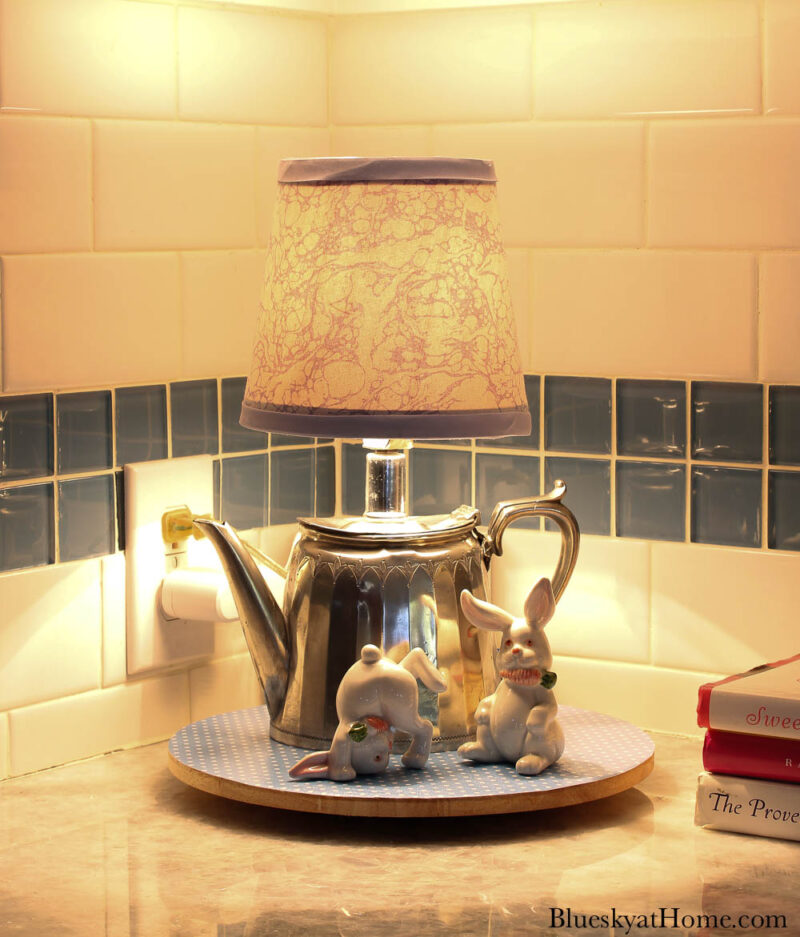
- I created a small vignette in the corner of our kitchen counter. Since it’s Easter season, for now I added a couple of bunnies.
- I added a stack of cookbooks and a pretty blue pot. I added some new faux flowers that I recently bought at an antique mall.
A few weeks ago, this apothecary jar was full of Easter candy.
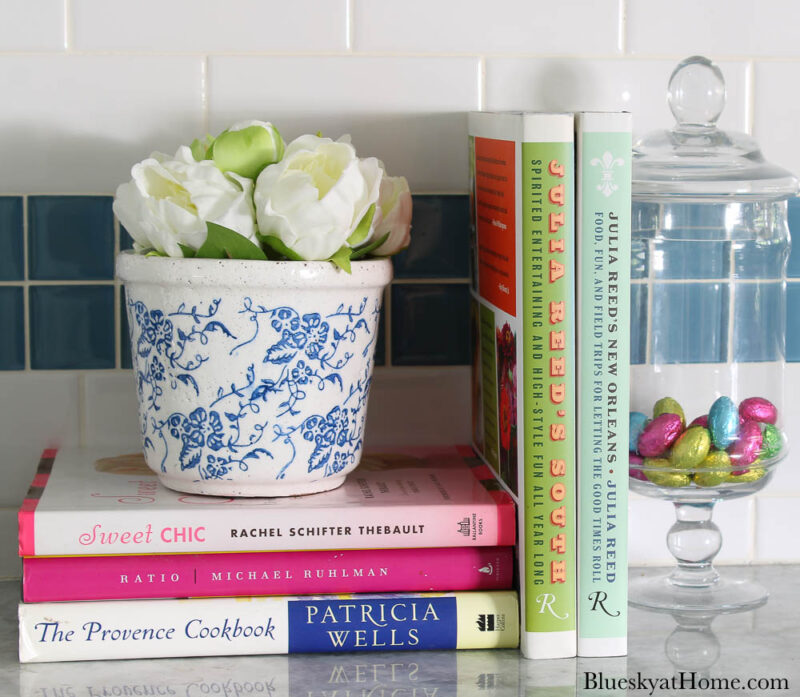
Along with the blue and white jars on the shelves, we now have a pretty new vignette in the kitchen.
A lamp lit at night is the pretty part, right? Here is the lamp at night.
In 9 easy steps, you can have a pretty new fabric-covered lamp shade. Wherever you use it in your home, it will add color, pattern, interest, and style to your rooms.
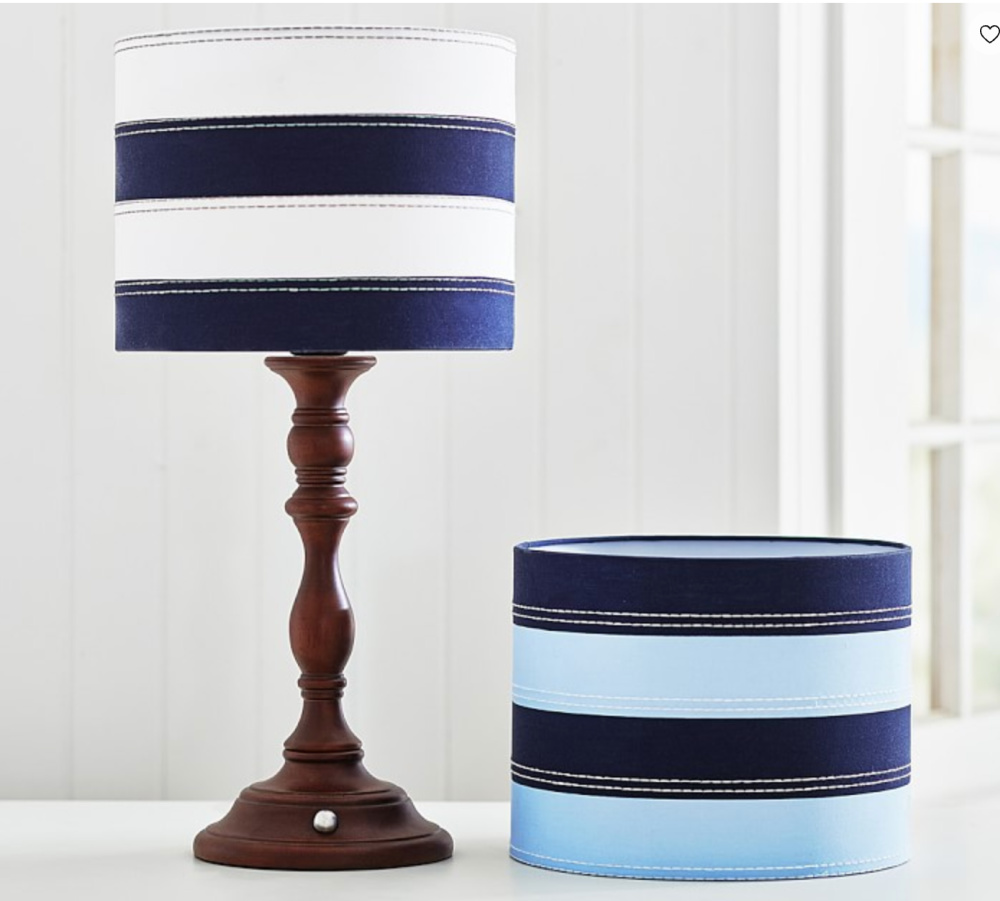
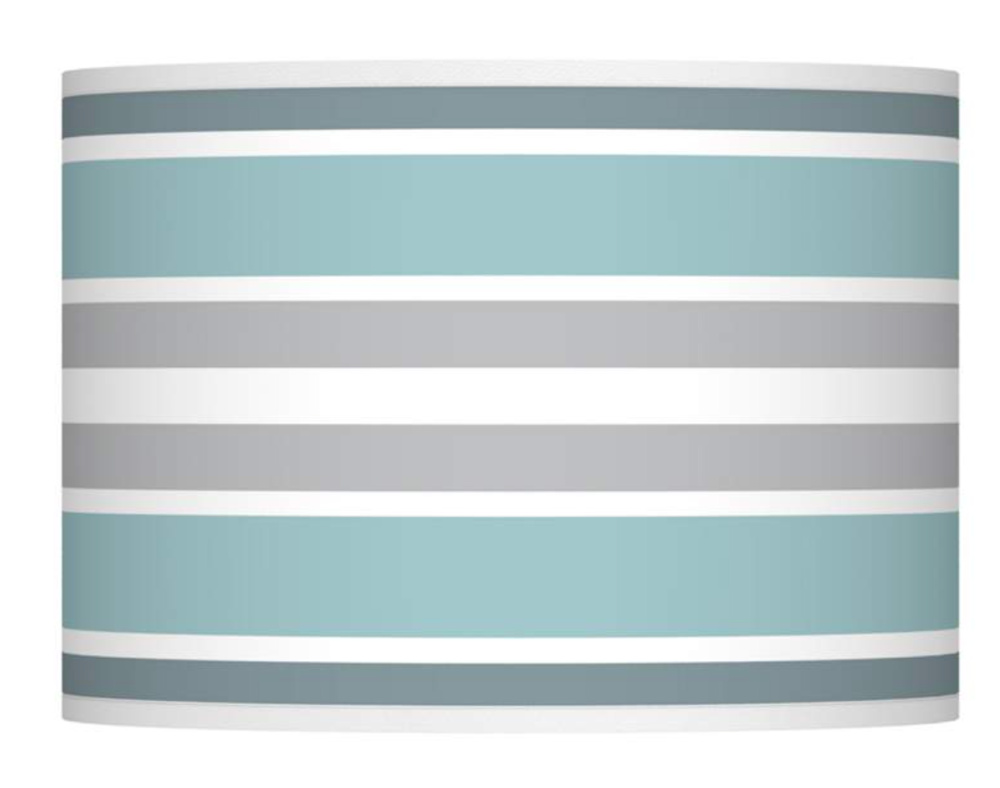
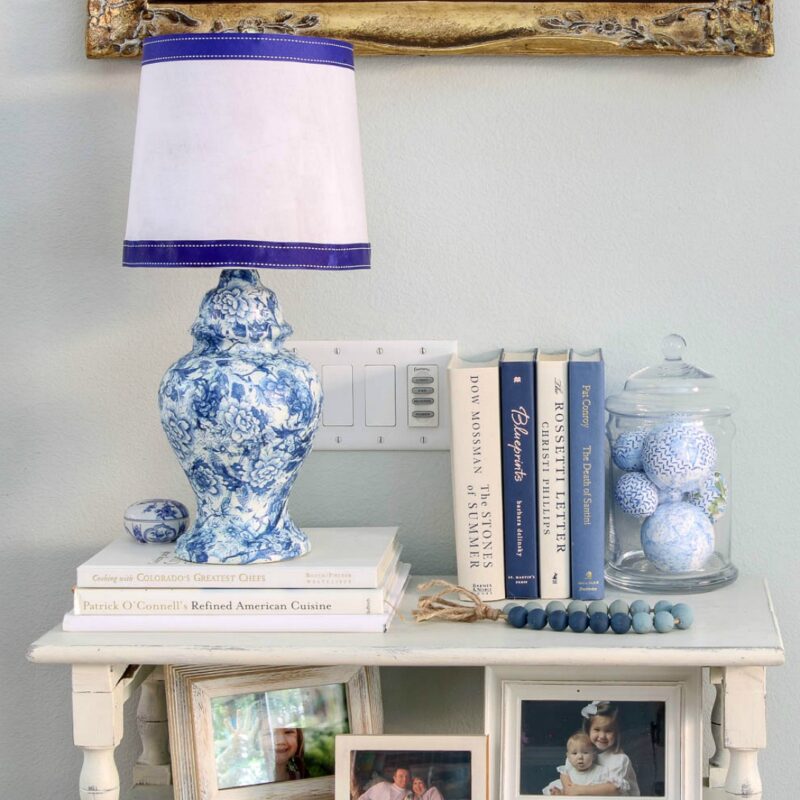
Here are other fabric-covered lampshades I’ve made over the years. Here are the DIY instructions for the lamp on the right.
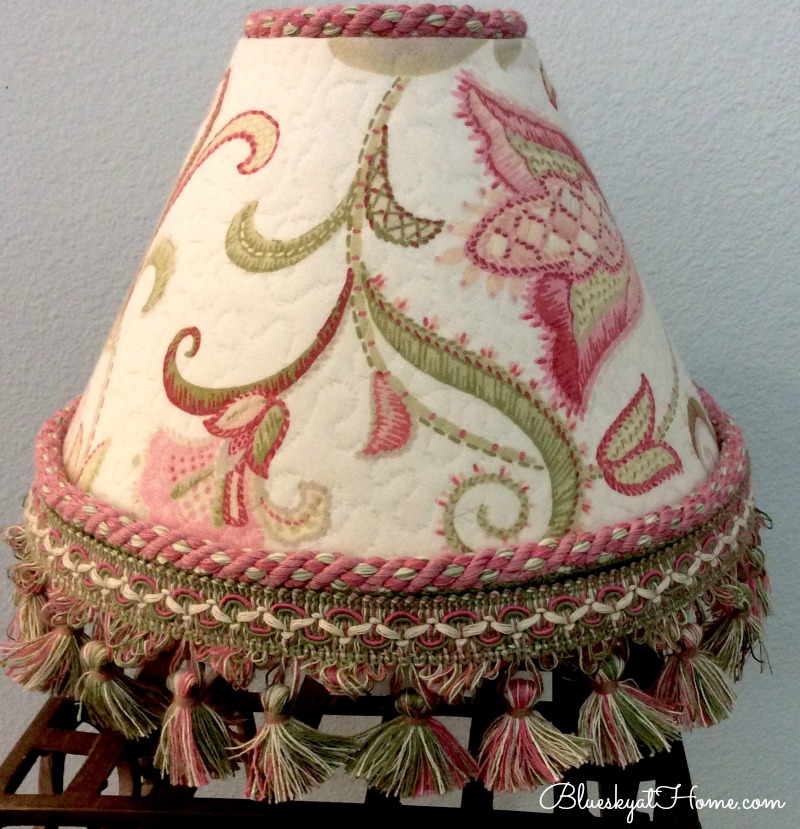
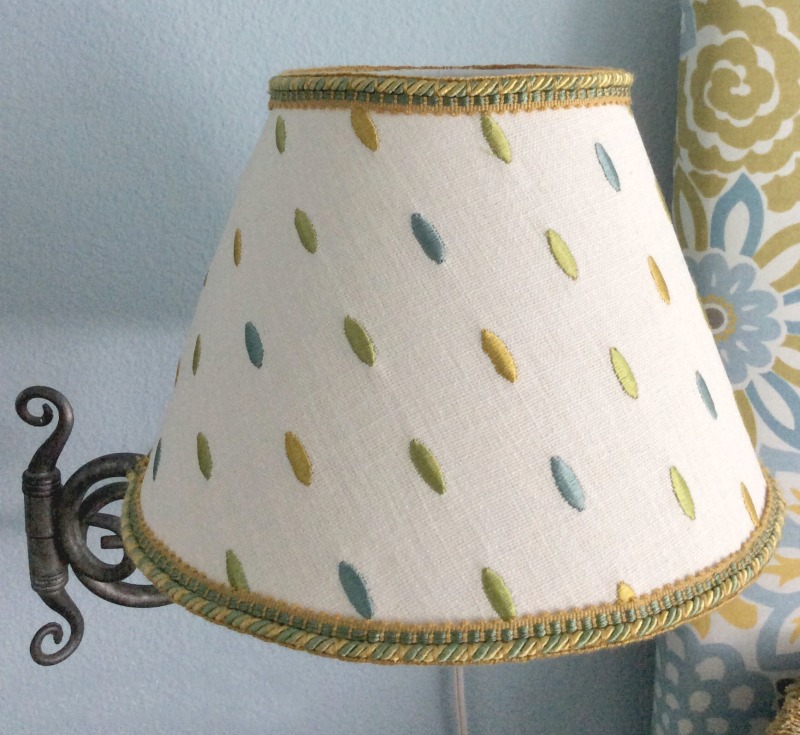
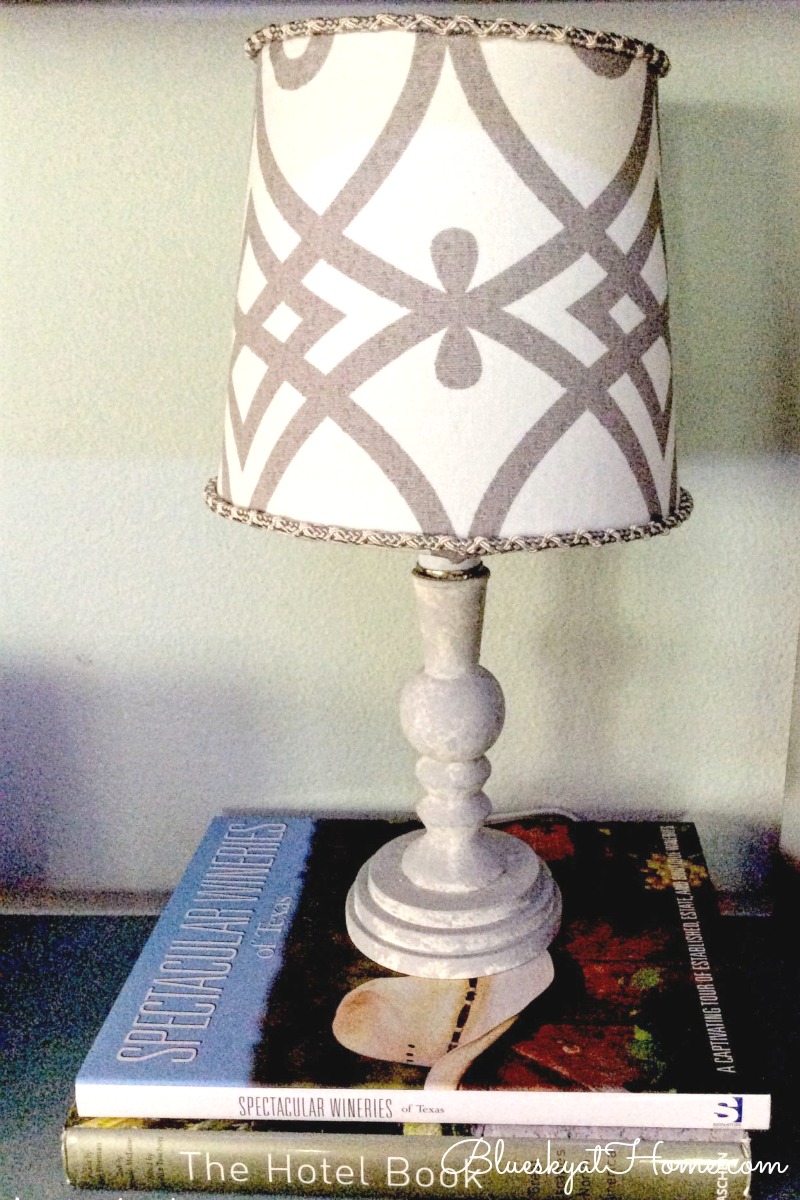
For this lamp shade, I just added fabric and trim to a lampshade for my DIY chinoiserie lamp.
Will you try to cover a lampshade with fabric? It’s so easy that you should try it. PIN this project so you will have it handy.

Now, take a look at the projects my friends have created. You will definitely be inspired.


This is a great project because if you shop much at thrift stores you will find a lot of ugly lampshades that just needs some TLC to be pretty again. Thanks for sharing all of the steps to do it. #HomeMattersParty
Such a beautiful shade! I love the soft blue pattern, it’s very calming. Thanks for sharing it #HomeMattersParty
Mel
Home Matters Party
You’re The Star Blog Hop
Happiness Is Homemade
Love your idea. You guide very detail. Thanks for sharing.
Thanks so much for the step by step Carol! Your tutorials are always spot on and they are so appreciated. Your shade turned out lovely and I’m pinning this to try next month. Thanks again and Happy Easter to you!
Thank you for proposing this idea and providing a detailed tutorial. It’s extremely useful. I used these suggestions and now have a new lamp look.
Your lampshade turned out so cute!!! And, I am completely loving that teapot lamp base! You always create such beauty!!! I love your style!
I love this idea. What a great way to add a little custom decor to a room.
Beautiful lamp. I love how you covered it 🙂
Perfect! I love how this came out. Very nice tutorial as well.
Your fabric choice is perfect for your kitchen. Love how it turned out. I need to do this with our pair of lamps in a guest room, thanks for the inspiration.
This turned out amazing!!
I also did a lamp for the challenge.
I used an old lampshade I had stored away.
But now you have me thinking of revamping my revamp… 😊
This is such a pretty way to totally customize a lamp to any area of your home, Carol! I know we’ve all said at one time or another – “I need to change that lampshade”! Thanks for sharing your easy to follow tutorial! You created a lovely cover!