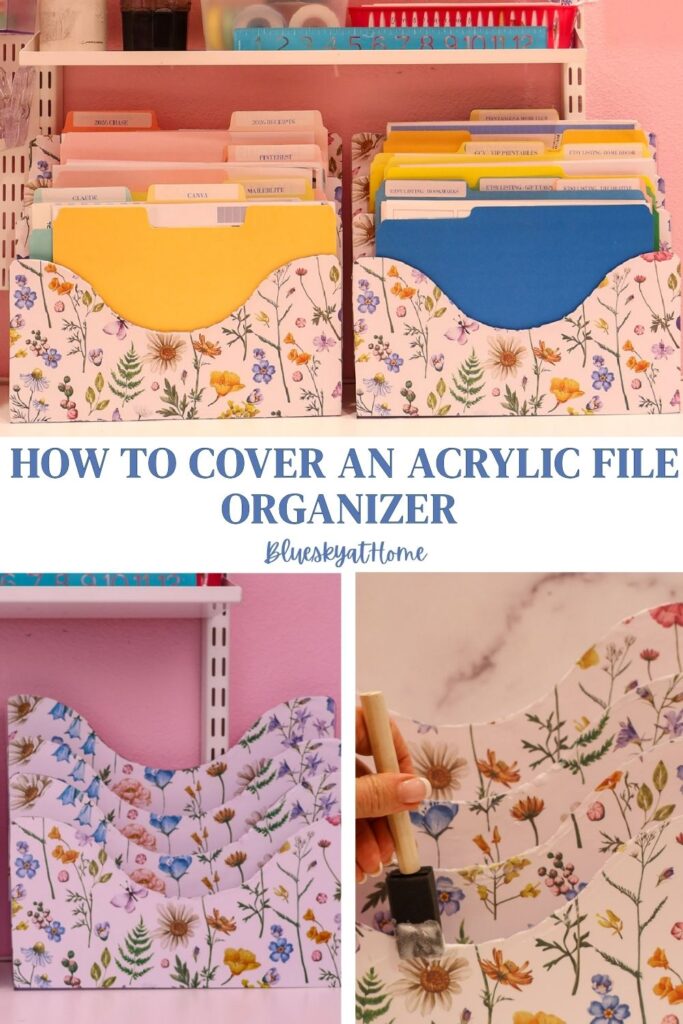
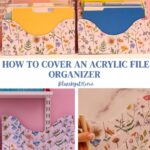
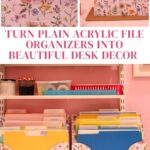
How to Cover an Acrylic File Organizer with Decorative Paper
If you’ve ever looked at a plain clear acrylic file organizer on your desk and thought, there has to be a way to make this prettier, you’re in the right place. This simple DIY project shows you how to cover ean acrylic file organizer with decorative paper – and it’s much easier than you might think.
Using decorative drawer liner paper, Mod Podge, and a few basic crafting tools you probably already own, you can cover all four sections of an acrylic file organizer with a pattern that adds real color and personality to your workspace.
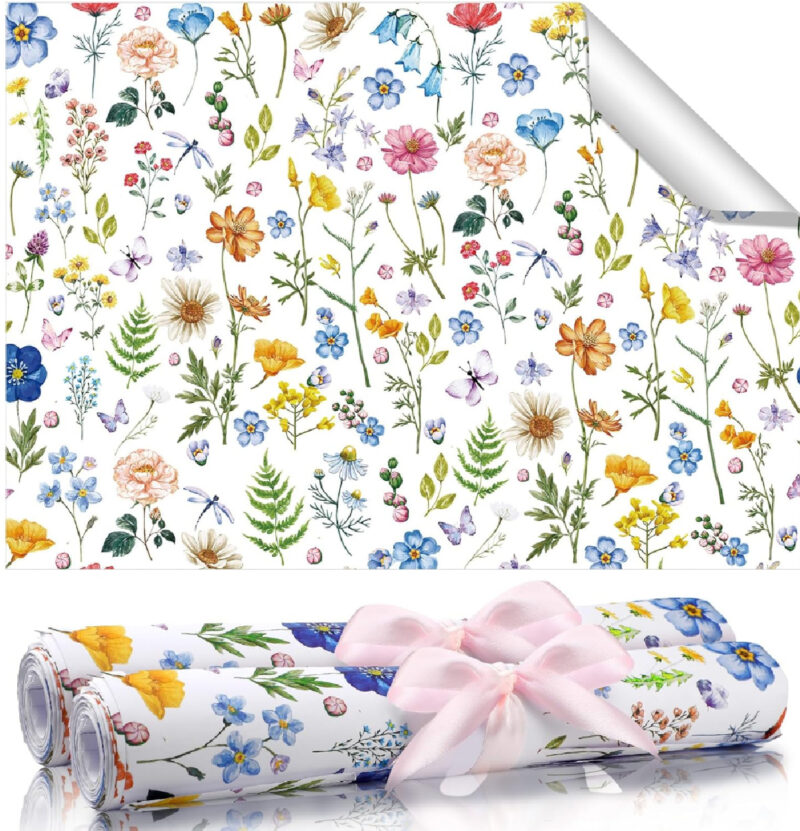
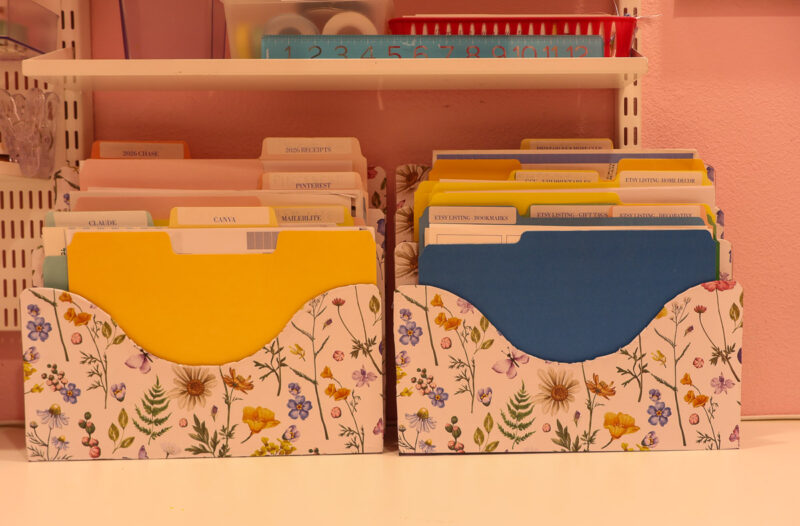
I used a spring wildflower print in shades of blue, pink, green, lavender, and soft yellow – and the finished result looks like something you’d find in a boutique stationery shop.
Here’s the best part: once you’ve made your paper template and refined your process, the second organizer practically flies together. My first one took about 35 minutes. The second? Just 15 – and I used less paper in the process.
Ready to upgrade your desk? Let’s get started transforming a basic three-tier acrylic file organizer into a beautiful, personalized piece of desk decor.

This post contains affiliate links to products used to create this project. If you should order any item from this site, I may receive compensation, but you do not pay a penny more. Your purchase is greatly appreciated as it helps support the continued publication of this site.
The Reason and the Vision for these DIY Floral File Organizers – A Pretty Desk Decor Upgrade
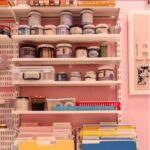
A couple of months ago, as I was working on launching my Etsy Shop, I realized I would need more space for file folders in my office. Now, my office is very small – 62 square feet to be exact. Organization is key to keeping everything within reach and easy to find. And, most of the time, it is.
I already have a two-drawer file cabinet, which is 75% full of recipes and class menus from my earlier career as a cooking instructor. The other 25% is related to blogging – another area that needs to be purged.
I also have two three-tiered file organizers hanging on the wall to the right of my desk. I love these tiered acrylic file organizers because it’s easy to see a file title and easy to pull it out.
But I tend to print off a lot of paper and let it stack up, taking up precious counter space. My solution was two-fold:
- Go through the piles of paper and throw away outdated and/or no longer relevant information.
- Organize the remaining papers by topic, such as Pinterest, Email, MailerLite, Etsy, etc.
- Make room for more file folders to hold relevant information and the extra files I needed to keep about Etsy.
As soon as I completed the task of cleaning out the piles of paper, I couldn’t believe how much counter space I had. At that point, I realized I had the perfect place for two more tiered file folders.
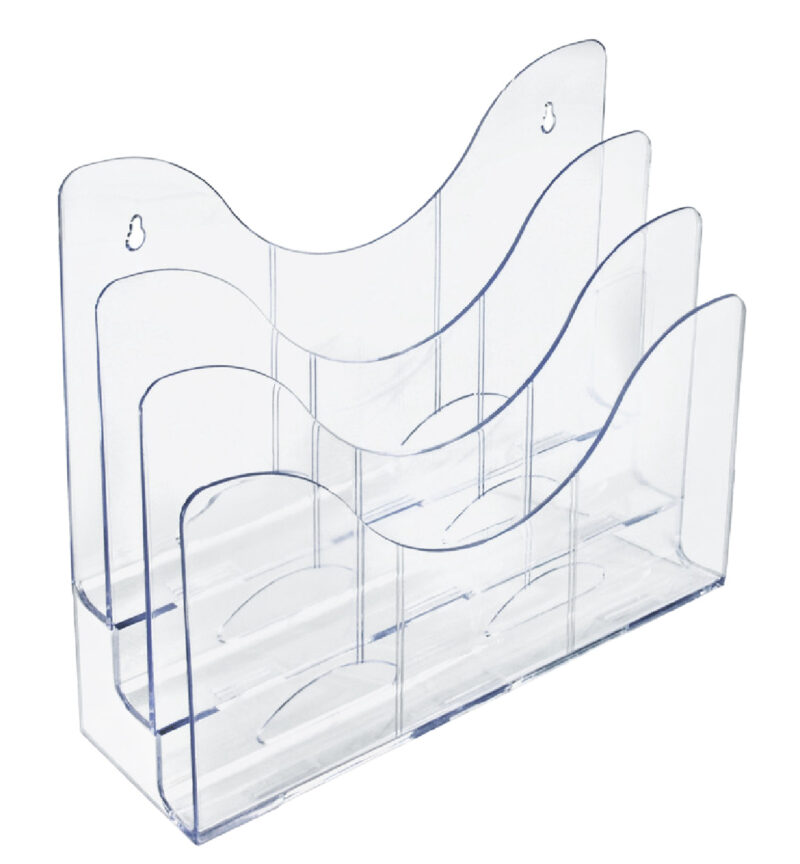
It’s kind of hard to see the clear acrylic file organizers. These are the three-tiered acrylic file organizers I ordered. Totally functional, but not very attractive.
I don’t know about you, but I want my office to be practical and pretty. It’s like a laundry room; we spend so much time in our home offices that they should be places that make us feel comfortable and inspired.
How could I make these file organizers more decorative?
Here comes the vision part.
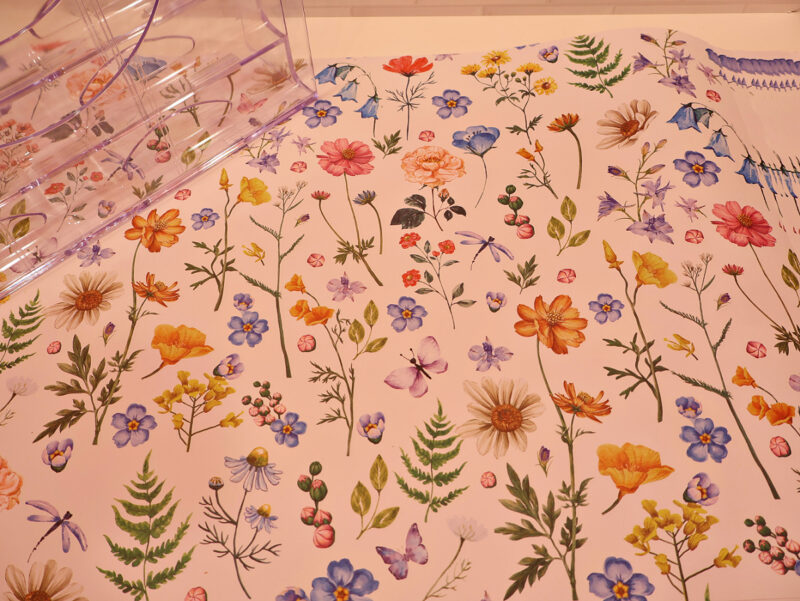
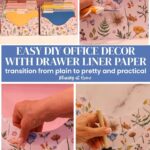
I remembered the new drawer liner paper that I bought to line drawers in my nightstand. I chose a pretty floral liner paper with a white background, a variety of wildflowers, and leaves. In fact, this pattern is called Wildflowers.
You know I love to decoupage. Why not use a variation of the technique and drawer liner paper to cover the acrylic file organizers? I had plenty of paper. I could easily visualize how lovely the pattern and the colors would look in my office. Just looking at them would make my office and me happy.
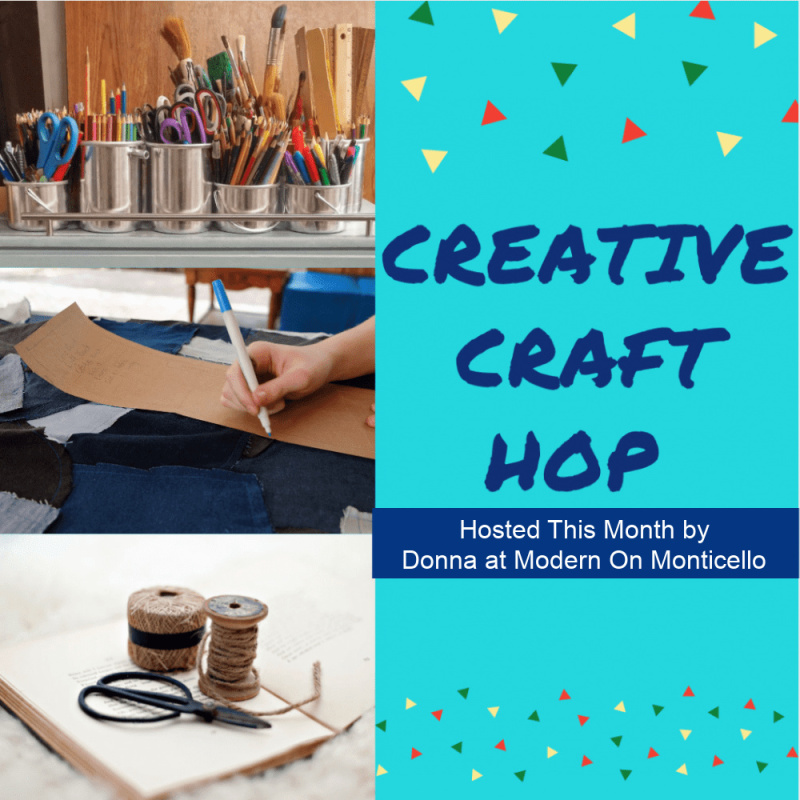
Creative Craft Blog Hop
I actually started this project three weeks ago, before we left for our two-week trip to France. When we returned, I was anxious to finish it, and today’s Creative Craft Blog Hop was the perfect reason to complete it.
Thank you to our host, Donna of Modern on Monticello, for hosting this month. We have six wonderful DIY crafts for you to check out. The complete list is at the end of this tutorial.
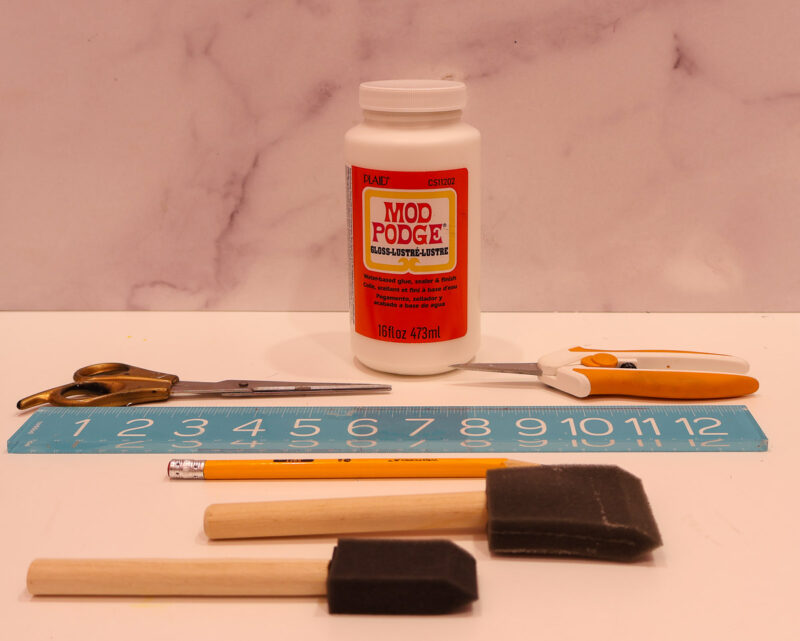
Supplies for this DIY Decorative Decoupage Project
This project is so easy, and the supply list is so short. The only thing I haven’t supplied is your own style. We could all make these decorative file organizers, and they would all look different, depending on your choice of paper color and pattern.
- tiered acrylic file organizer – these organizers (3.5″D x 13.37″W x 11.5″H) come in different styles. They are made of heavy-duty acrylic. The ones hanging on my office wall are different from the new ones I used for this latest project. Any style, size or configuration that meets your needs will do. I plan to cover the hanging files I already have with more floral drawer liner paper.
- drawer liner paper in your choice of pattern and color – I love the Wildflower pattern I chose, but FYI, this vendor offers several options. The great thing about drawer liner paper is that it is large (15.8″ x 22″), non-adhesive, smooth and thick, so you can use it for a multitude of craft projects. The paper is lightly scented since its main purpose is to line drawers. This product comes with 20 sheets, so you’ll have plenty for different projects and uses. I used four sheets for my project with leftovers. At about .95 per sheet, that’s a good deal.
- NOTE: Depending on the pattern, you might use fewer sheets. My pattern had a definite top and bottom, whereas if your pattern is one overall design, you might only need three sheets. (If you are a sewer, you’ll be familiar with repeats and direction of pattern.)
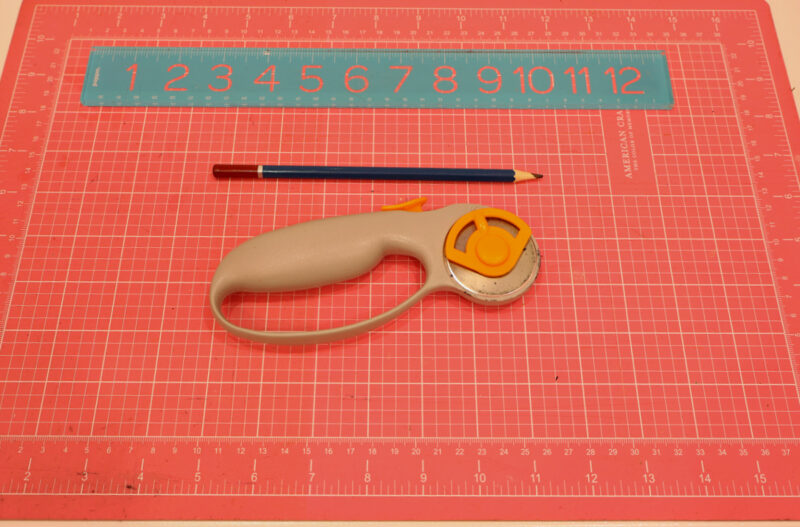
- basic craft supplies you may already have: cutting mat, rotary cutter (for straight edges), ruler, pencil
- Modge Podge (I used Gloss.), foam brushes, craft scissors, sharp pointed scissors.
The only things I bought specifically for this project were the two file organizers.
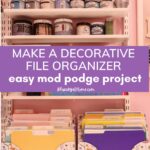
How to Turn a Plain Acrylic File Organizer into Pretty Desk Decor
I started measuring and cutting the liner paper for one file organizer before we left on our trip. I completed one organizer before starting the second one. As you’ll see, I took a different approach with the second organizer, which saved me time and materials. In this tutorial, I’m going to show you both methods.
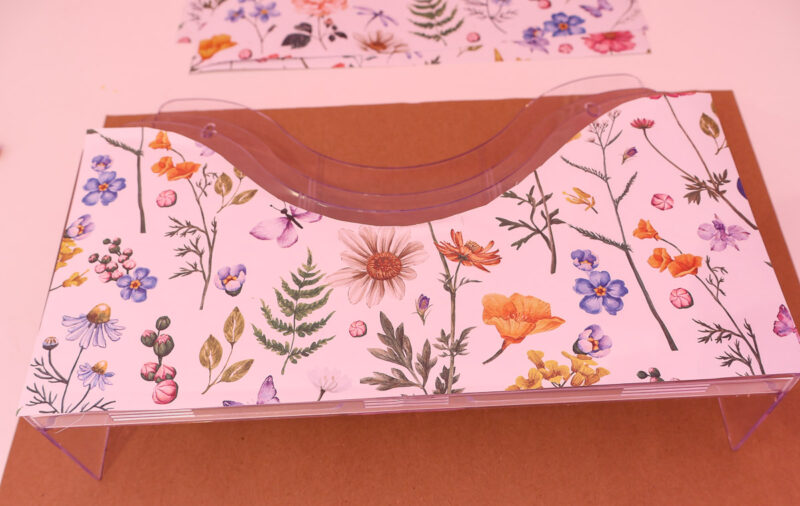
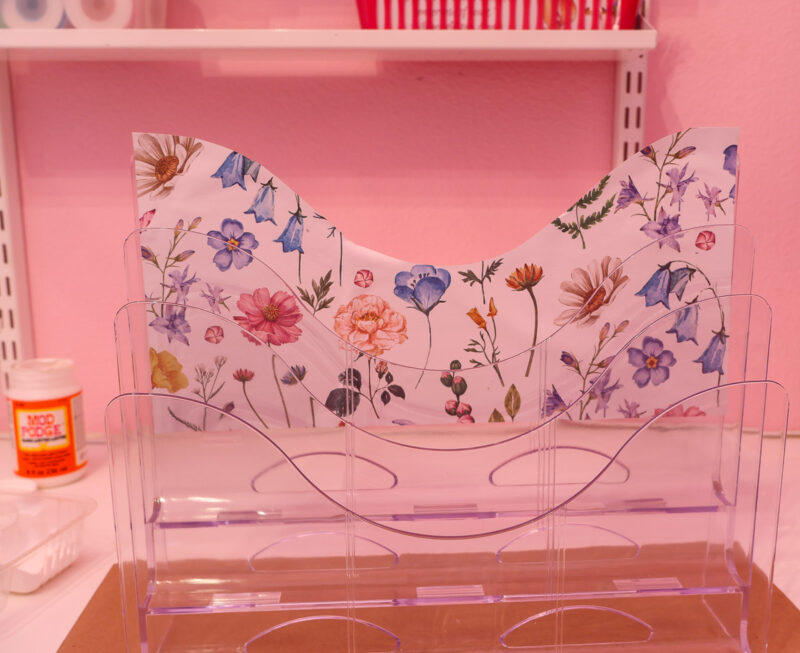
Remember – there are three tiers, but four separate sections to cover with the liner paper.
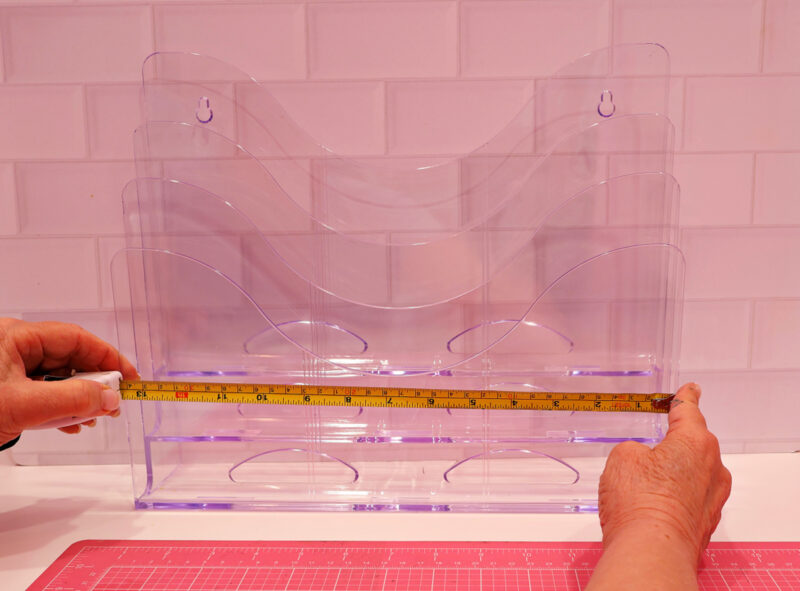
Method 1 – Measuring and Cutting
For this method, I measured each section separately.
Step 1 – Measure the width of your file organizer. Mine was 13 3/8 inches.
Step 2 – I assumed that each vertical section needed to be a different height. I measured from the top of the high point on each section to the bottom, I wrote down the measurements for each one. The width would be the same for all of them, but the height varied by about a quarter of an inch.

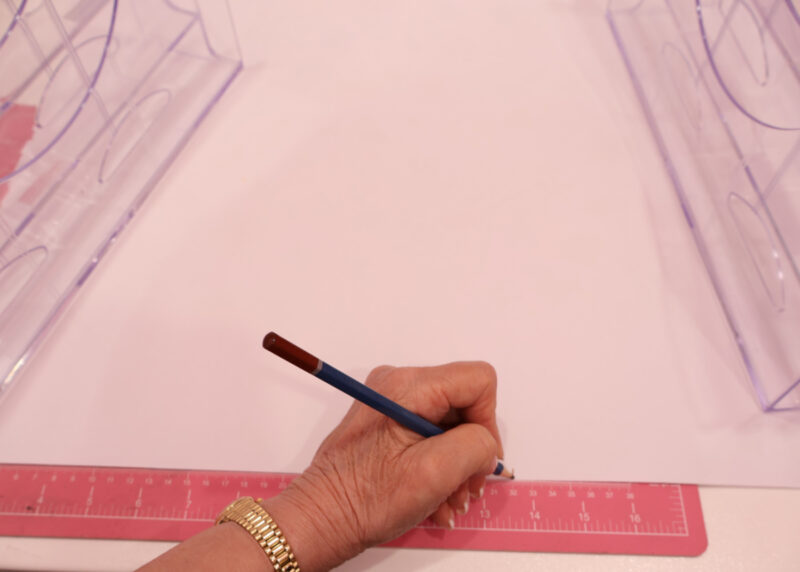
Step 3 – Before measuring and cutting your paper liners, take your first sheet of paper and roll it tightly backward with the white side facing outward. The paper has been rolled up and you want to flatten it to make the rest of the process easier.
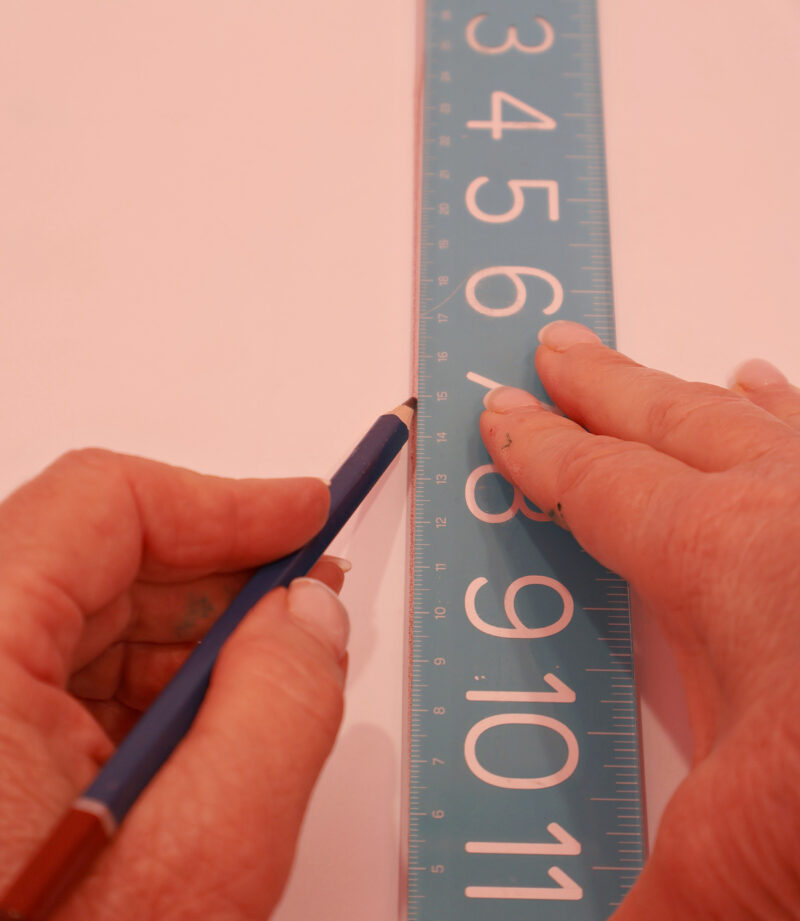
Step 4 – Using your ruler and pencil, measure the width of the paper for the first section, the one at the front. As you can see, I used the file organizers to hold the paper down flat.
Step 5 – Measure the sides of the paper for the height. Then connect the lines to make a rectangle. My measurement was 13 3/8 wide X 6 3/4 inches.
Step 6 – Cut the width and the two sides of the paper using the rotary cutter.

Step 7 – Lay the file organizer on top of the cut paper with the top of the organizer at the top of the paper. Think of it as your template. Then use your pencil to draw the curved part of the file organizer.
Step 8 – Using the small craft scissors or the small sharp pointed scissors, cut the curve away. You now have your first paper section, which will serve as the template for the other pieces.
Step 9 – Using the measurements you took for the other three sections, use the paper template to draw the curved side and the two sides. For each piece, add the extra height. Mine were 7 7/8, 8 1/4, and 8 3/8. Cut out all your pieces.
NOTE: I also cut another piece to fit the front of the second file organizer. This was as far as I got before we left for France.
Method 1 – Attaching the Drawer Liners to the File Organizer
Step 1 – I used Mod Podge to glue the drawer liners to the file organizer, but you can use any good paper glue. I would use one that you can pour into a container. Using a foam brush, apply the Mod Podge to the front section of the file organizer.
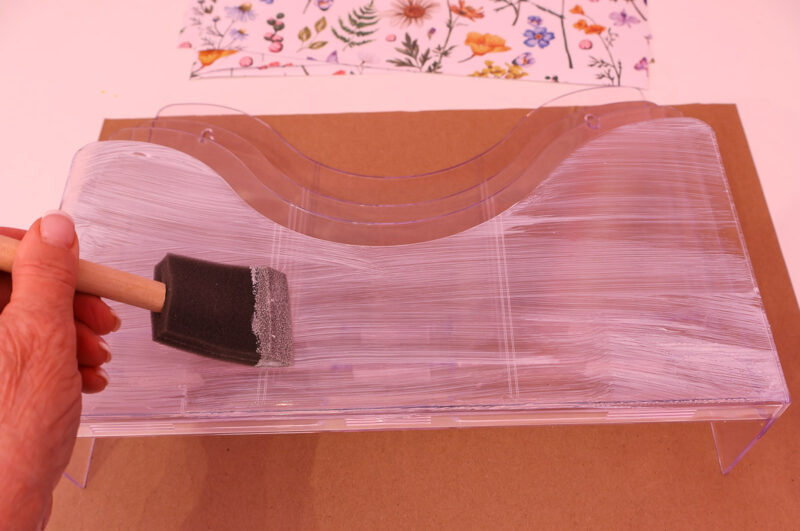
Step 2 – Place the paper liner cut out on the organizer, smoothing the paper down across the acrylic.
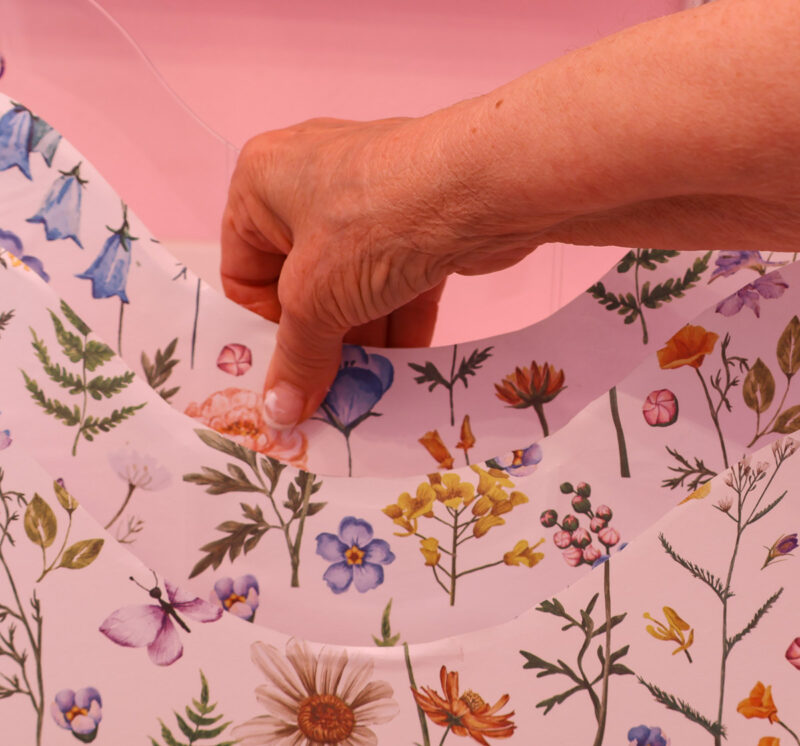
Step 3 – For the remaining three pieces of paper, add Mod Podge to the back of each. Then carefully place the paper on each section, with the curved part aligned with the curve of the file organizer.
Step 4 – Smooth out the paper to the file organizer. You can use a plastic scraper to push down on the paper. Repeat with the remaining pieces of paper liner.
Step 5 – Allow the paper to dry for at least 15 minutes.
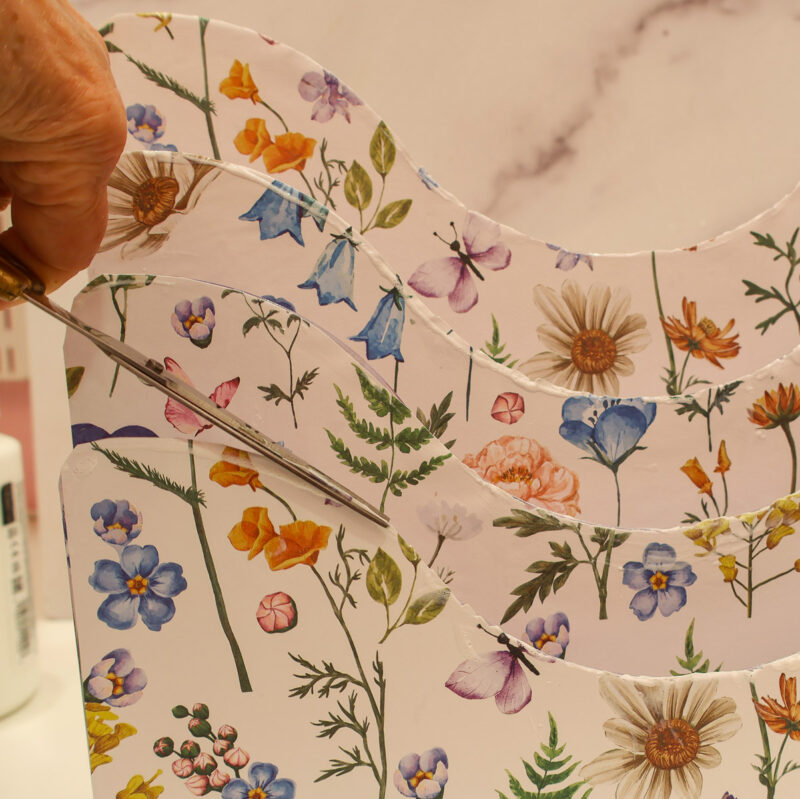
Method 1 – Trimming the Paper Liner
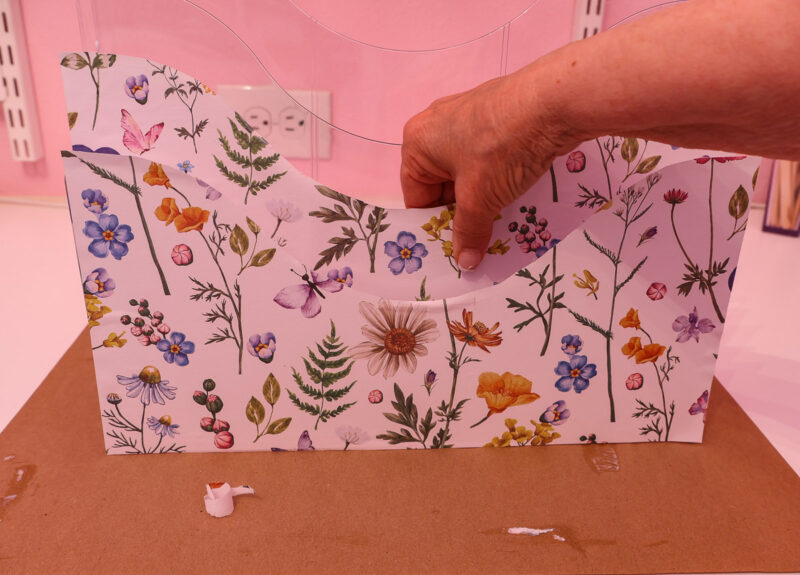
Using your small craft scissors, sharp-pointed scissors, or both, trim any excess paper from the sides and the curve of the file organizer.
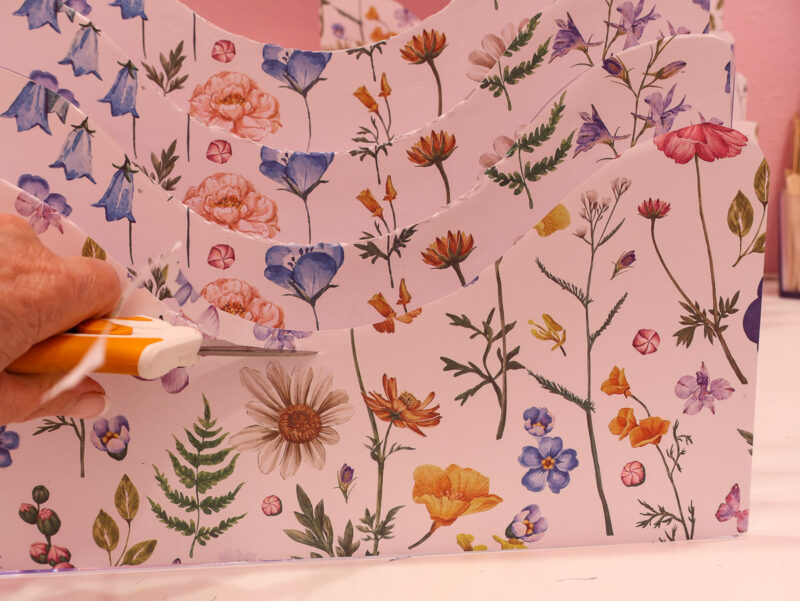
Sometimes, I cut from the front and sometimes from the back, whichever seemed easier. To be honest, this is the only hard part of the process.
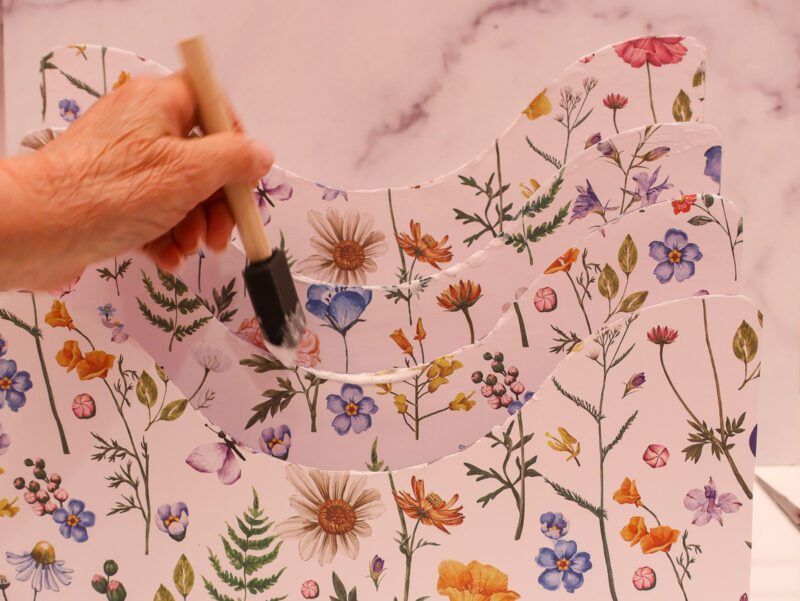
Finishing Touch
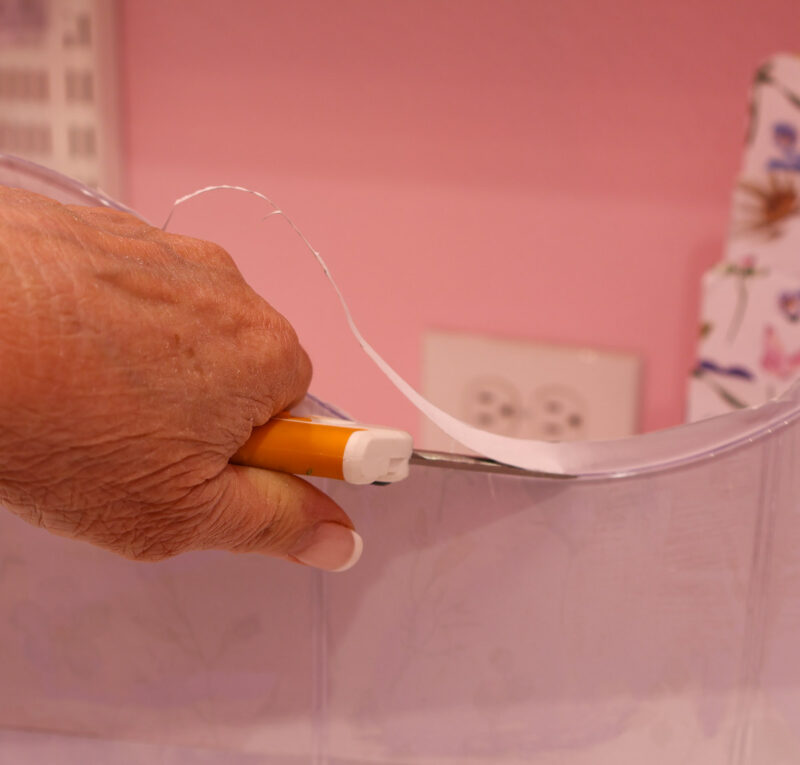
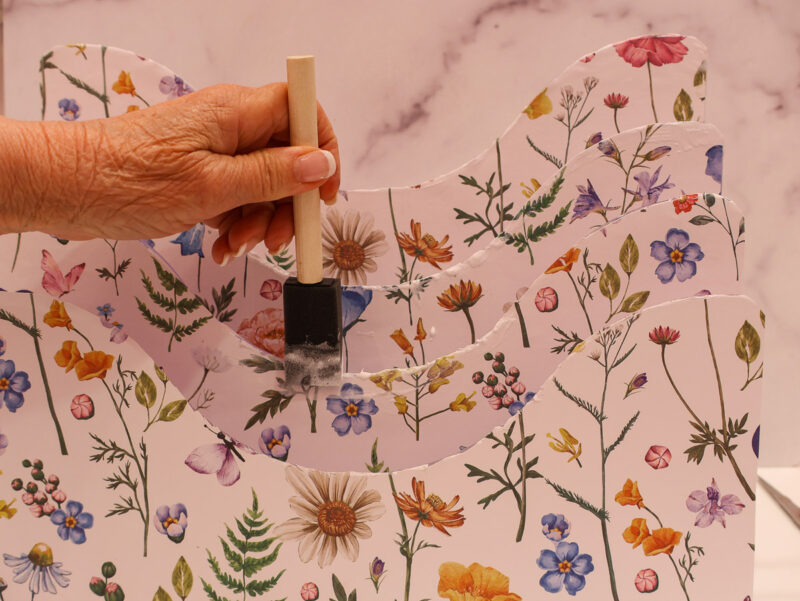
I thought it would be a good idea to seal the top edges of the paper and the file organizer, since that is where the file folders would be added. Again, set aside the organizer to dry before adding your file folders.
DIY Floral File Organizer – A Pretty Desk Decor Upgrade – Method 2
After finishing the first file organizer method, I learned some ways to make the process easier and faster. These are the steps I recommend you use.
Step 1 – I realized that the 2nd, 3rd, and 4th papers didn’t need to go all the way to the bottom of the file section, since they wouldn’t be visible. Instead, using the extra template for the front of the file organizer, I cut the other paper sections all the same size. This saved time and used less paper.
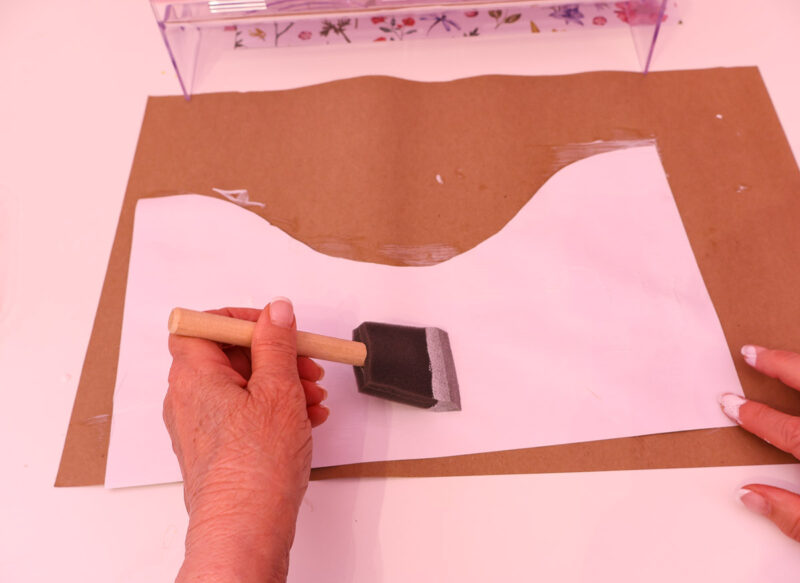
Step 2 – Applying the Mod Podge to the back of the paper worked best.
Step 3 – One of the challenges of the first method was adding the 2nd, 3rd, and 4th paper liners to the organizer. It was hard to see what you were doing. The solution? Start at the back section. Because you can now see where you are placing the drawer liners, this completely solved the problem.
Step 4 – Trimming the paper after gluing it to the file organizer was the hardest part of this project, especially the curved top edge. How to fix that?
When applying the liner paper to the organizer, place the top edge with the curve below the organizer’s top curve; even a 1/16-inch lower greatly reduces the need to trim excess paper.
Step 5 – I think it’s a good idea to seal the top edge of the paper and file organizer with Mod Podge for more “security”.
Using these new methods – lessons learned – saved about 15 minutes over the first method.
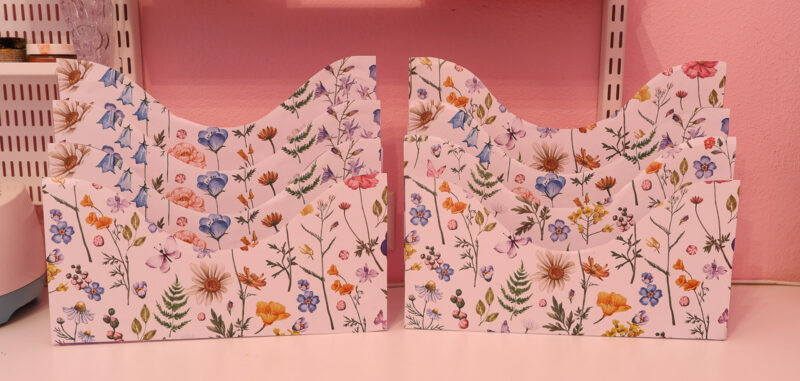
Acrylic File Organizer Makeover – Beautiful DIY Desk Decor
With the finished decorated file organizer, I could now add my file folders. I used Avery to make file labels (8366) which I already had on hand.
I love that I’ve gained so much file space and so much desk counter space.
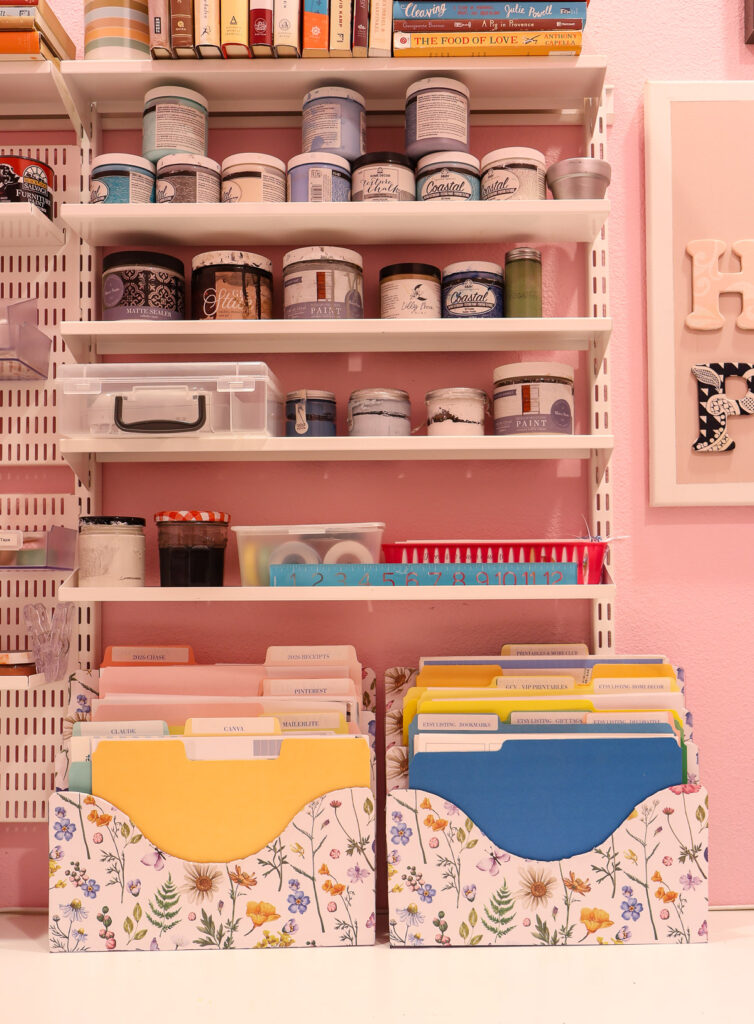
And, of course, using the drawer liners added a pretty pattern and color to my office. This project is such an easy way to add style and functionality to your office.
Here are some other unique ideas using Mod Podge:
- How to Make a Decorative Bunny with Cardstock
- How to Decoupage a Wooden Box
- How to Decoupage a Glass Platter
Other Office Accessories You Can Cover with Decorative Paper
Once you’ve mastered this technique, the possibilities for your home office are endless. Here are a few other accessories that would look beautiful dressed up with drawer liner paper and Mod Podge:
- Pencil cups and pen holders
- Magazine files and box files
- Desktop trays and letter sorters
- Bookends
- Clipboards
- Binder covers
- Storage boxes and lidded boxes
- Drawer organizer inserts
- Bulletin board frames
- Wastebasket or small trash can
- Tissue box cover
- Monitor riser or laptop stand
I’ve never used drawer liner paper on a decoupage project. I’ve used napkins and fabric. This project was so fun, and I loved trying out drawer liner paper. With the list above, I’ll be using drawer liner paper again in my office. What about you? Can you think of other ways to use drawer liner paper?
I hope you’ll save this DIY office decor project. Please PIN it to your favorite Pinterest Boards. Check out some of mine and follow along: Home Office Ideas, Organization Ideas, Decoupage Projects, Paper Crafts, and DIY Projects. You’ll find a wealth of ideas.
The list of participants is at the end of this post. Please visit their sites and projects.

Shop at Blu – How to Make Liquor Bottle Tags
Modern on Monticello – Painting Mini Chairs For Shelf Decor
Bluesky at Home – How to Cover an Acrylic File Organizer with Decorative Paper
Birdz of a Feather – Crochet Leaf Earrings
Purple Hues and More – Upcycle Picture Frames to Trays
My Thrift Store Addiction – How to Crochet a Cozy Tablet Case


I don’t currently have any of these, but I need them. When I do buy them for my desk I am going to remember your makeover idea. They look so much better this way!
Welcome Back… what a cute and clever idea. I have never decoupaged before but I have quite a few of these file folder containers. I’m gonna give it a try thanks for sharing.
This is a lovely way to elevate a plain-Jane organizer–it looks so pretty now! Blessings, Cecilia – My Thrift Store Addiction
Your file organizers are now quite beautiful, Carol! And what a lovely addition to your office!
These are so pretty Carol! Great tip about leaving 1/16″ at the top; a real time saver!