How to Make an Easy DIY Flower Centerpiece
Who doesn’t love an attractive flower centerpiece as the main attraction of a beautiful tablescape? Isn’t the centerpiece (I guess that’s why it’s called a centerpiece!) that is the first thing that guests notice on your beautiful table? So let me show you how to make an easy DIY flower centerpiece.
Centerpieces can be dramatic, whimsical, formal or casual, fancy or simple. They can either set the theme of your tablescape ~ everything revolves around it ~ they can be the icing on the cake, the piece that makes your tablescape glow and shine. Since it’s the flower centerpiece that grabs our attention, I want to show how to make an easy DIY flower centerpiece.

Flower centerpieces from a florist can get really expensive; that’s one reason I love to make them myself.
Grocery store flowers are so well priced and the quality is so good these days that it makes sense to try your hand at making a flower centerpiece yourself.
The great thing about a centerpiece is that there are no limits, no boundaries; whatever your imagination and budget allow. For my Sunny Summer Tablescape, one small thing inspired my flower centerpiece. And it turned out to be a really cute and attractive centerpiece made mostly with supplies I already had on hand.
How to Make an Easy DIY Flower Centerpiece
Regardless of the size of your centerpiece, for a DIY flower centerpiece, you will need just a few supplies:
- a container(s) for the flowers
- floral oasis OR
- floral tape
- cutting shears
INSPIRATION FOR THE FLOWER CENTERPIECE
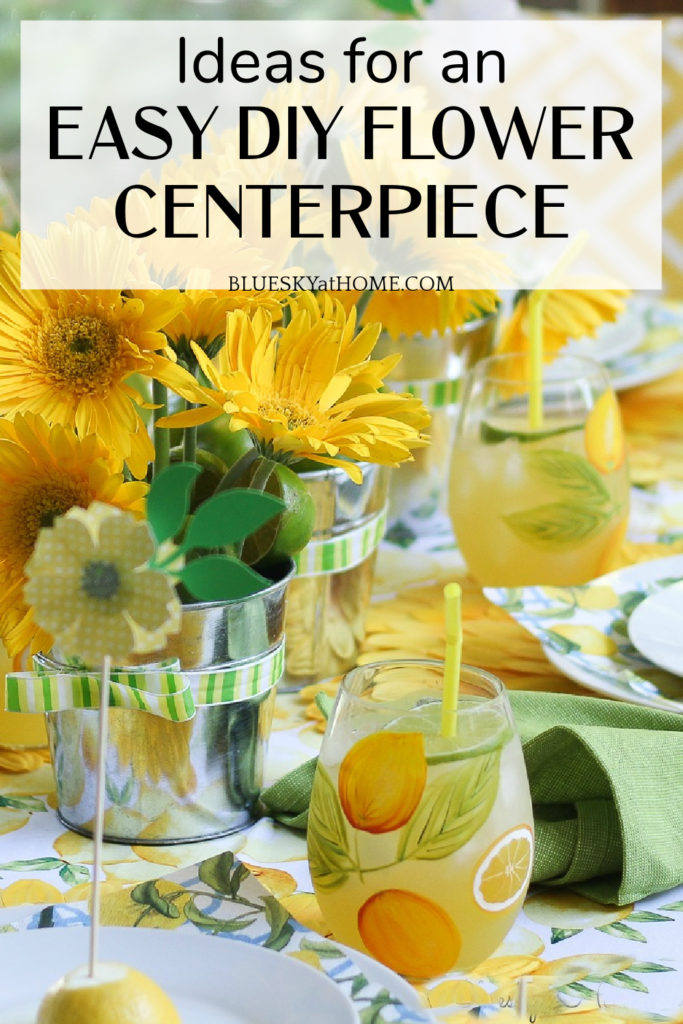
The inspiration for my flower centerpiece were the galvanized napkin rings that I bought at Pier1. When I bought them and the other items I used at Pier1, I didn’t know what my centerpieces were going to be, only that they would contain flowers.
I remembered that I had three small aluminum pails that used to have some herbs in them. The herbs died (do not put herbs or any plants somewhere you will forget to water them!), but I kept the pails, and they would work well with the galvanized napkin rings.
TIP: As we say in the home decor blogosphere ~ shop your home for containers for your flower centerpieces: baskets, boxes, jars, glasses ~ the possibilities are endless and free!
If you don’t have any galvanized pails, these are very similar to the ones I have.
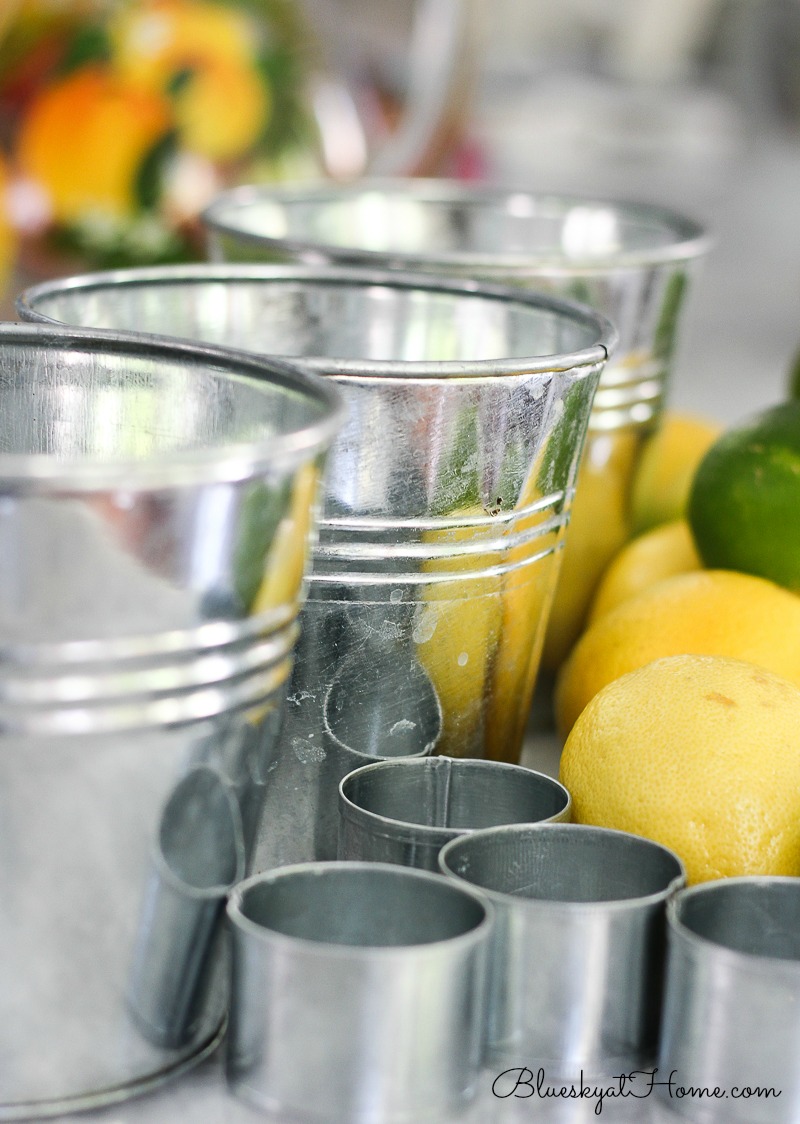
TIP: We all know the rule of using odd numbers in home decor, if possible. The three pails would fit down the center of my tablescape just right.
TIP: Repeat different elements (in this case, the galvanized pails and napkin rings) through a tablescape for impact and cohesiveness.
FLOWER CENTERPIECE STEP 1
I wanted to enhance both the napkin rings and the galvanized pails.
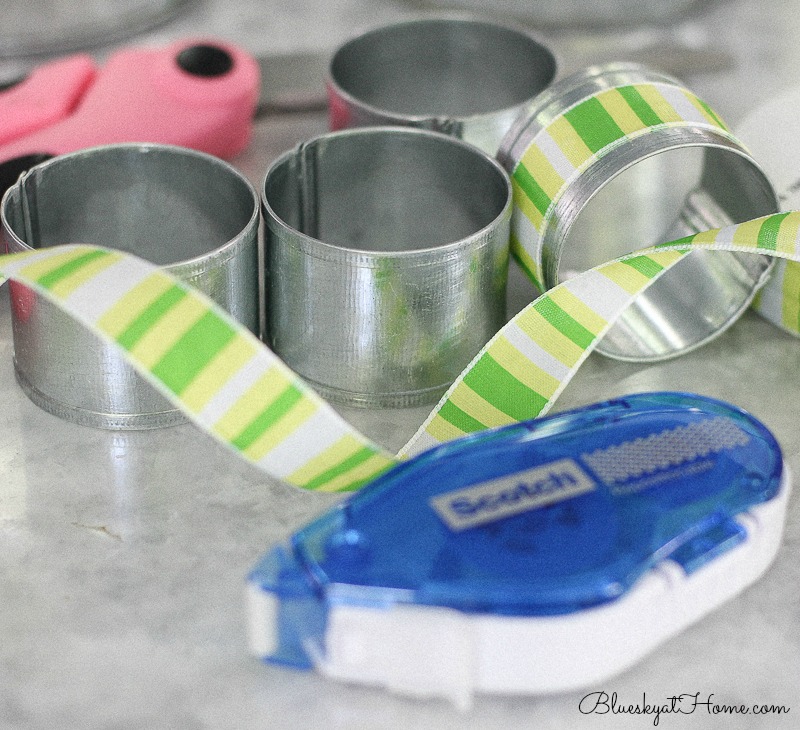
On a trip to Joann, I found some ribbon that would work beautifully both in color and pattern.
Since I wanted to remove the ribbon after my tablescape was finished, I used Scotch Repositionable Double~Stick tape. This stuff is wonderful for projects that don’t require a permanent stick.
I laid the ribbon flat on the counter and ran the repositionable tape down the length of the ribbon, about 5 inches for the napkin rings. Then I attached the ribbon to the napkin ring, stretching and pressing to make sure it adhered.
FLOWER CENTERPIECE STEP 2
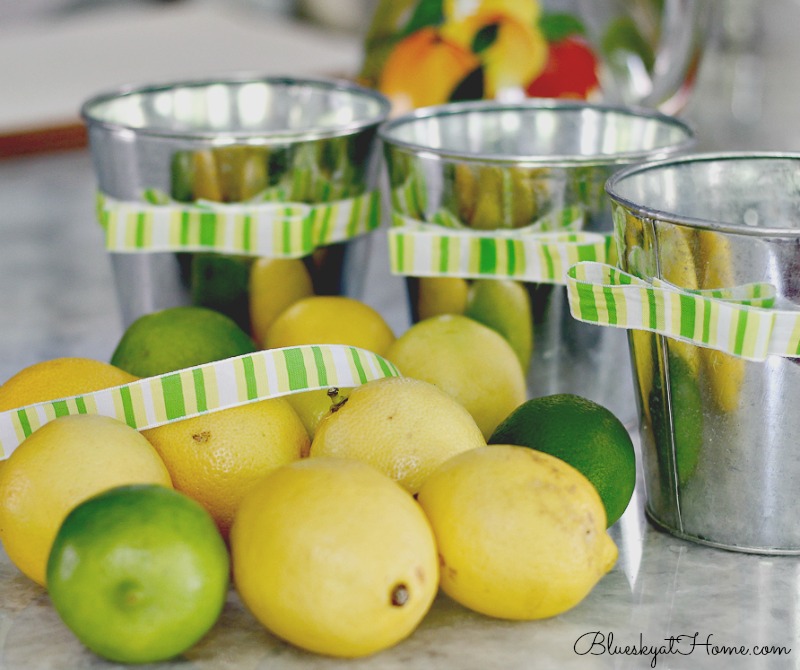
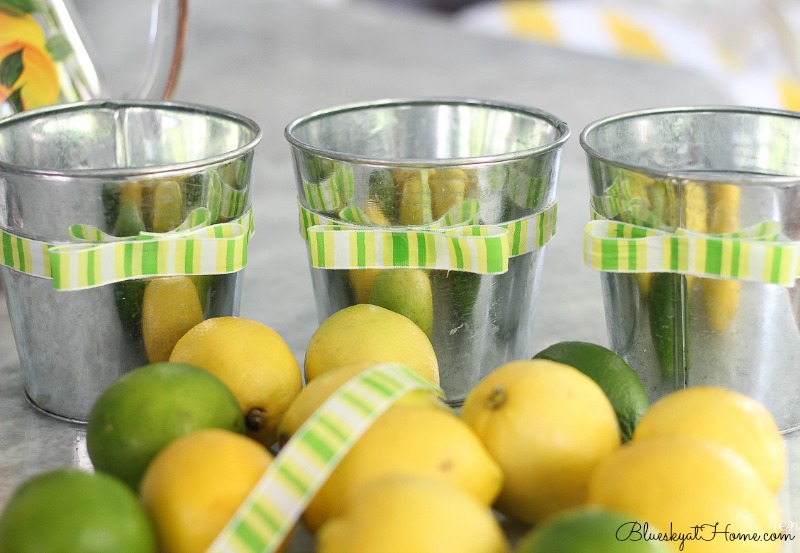
Next, I did the same process for the pails. I didn’t cut the ribbon until it circled the pail. Then I cut a piece about 6 inches and used the tape at the ends and in the center to create a bow. I stuck the bow to the ribbon on the pail where it came together.
TIP: Press and rub the bow on the ribbon to get a good seal.
FLOWER CENTERPIECE STEP 3
Next, you want to put a piece of floral oasis in each pail. This stuff is easy to cut with a serrated bread knife.
Fortunately, I already had some. “Oasis is a trademarked name for wet floral foam, the spongy foam used for real flower arranging. It soaks up water like a sponge and acts both as a preservative to prolong the life of the flowers and a support to hold them in place.”
TIP: Floral oasis can be used several times over by turning it or cutting off areas that get too “holey”.
SUPER COOL TIP: If the mouth of your container is too wide or is clear, you can use floral tape across the top of the container. Use the tape to make a grid ~ think of tic~tac~toe across the top of the container. Then place the stems in between the tape grid until the grid is even filled and full. I just discovered that clear floral tape is available which is good so it doesn’t show on your container. Floral tape does have an advantage over regular Scotch tape in that it is stickier and will stay put if it gets wet.
Here is a very good video about creating a flower grid to show you what I mean
This post shows you how I made a flower grid ~2 Easy and Pretty Tablescape Projects.
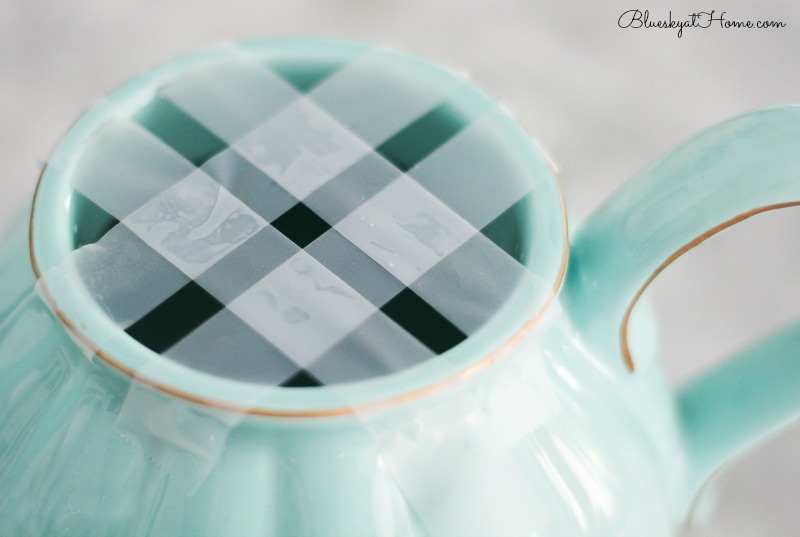
TIP: If you use floral tape, you might want to put your water in the container after you’ve created your grid.
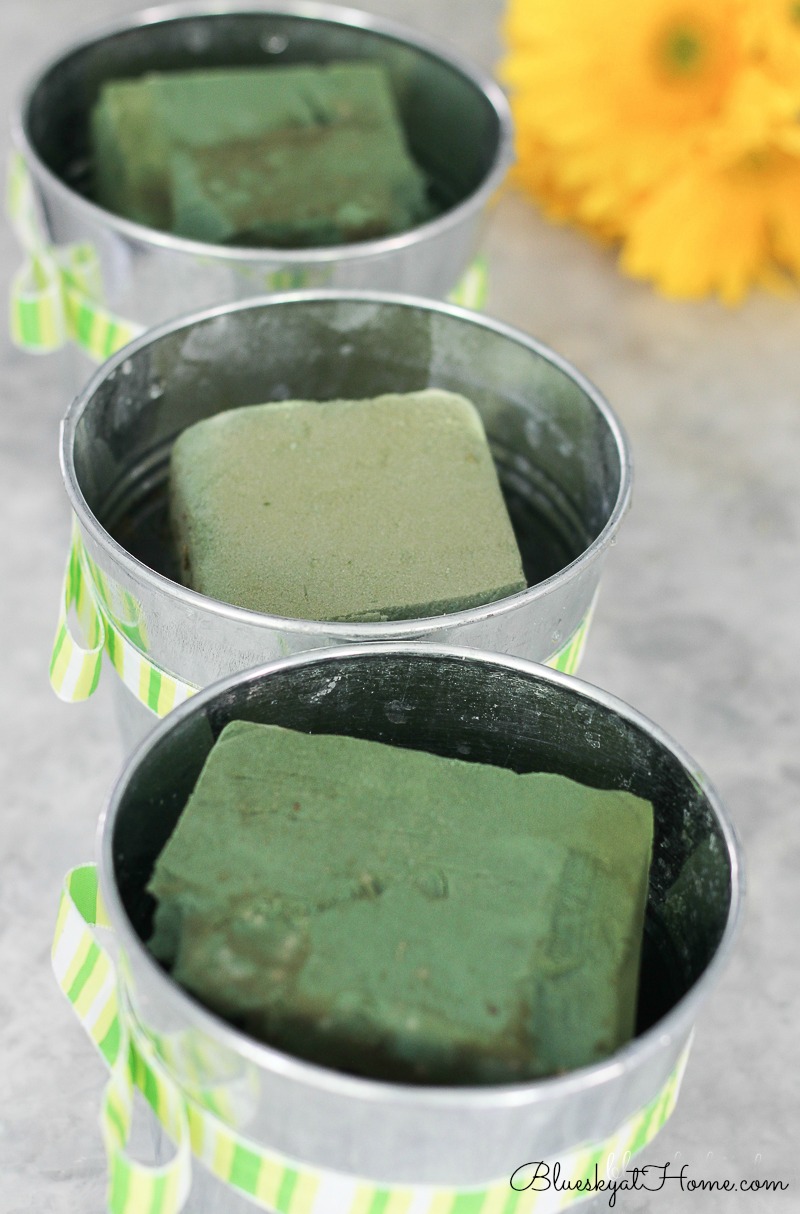
Finally, I filled the pails with water for the oasis to absorb as much as possible. Let it sit for about 30 minutes.
FLOWER CENTERPIECE STEP 4
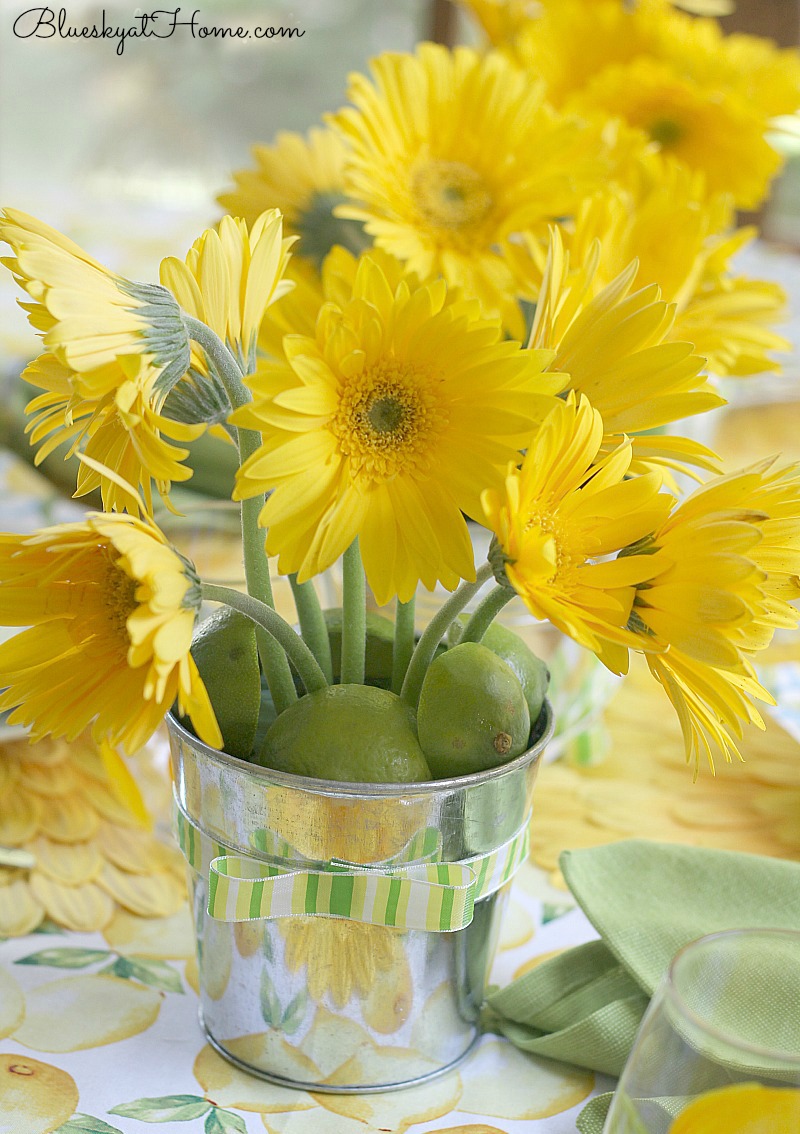
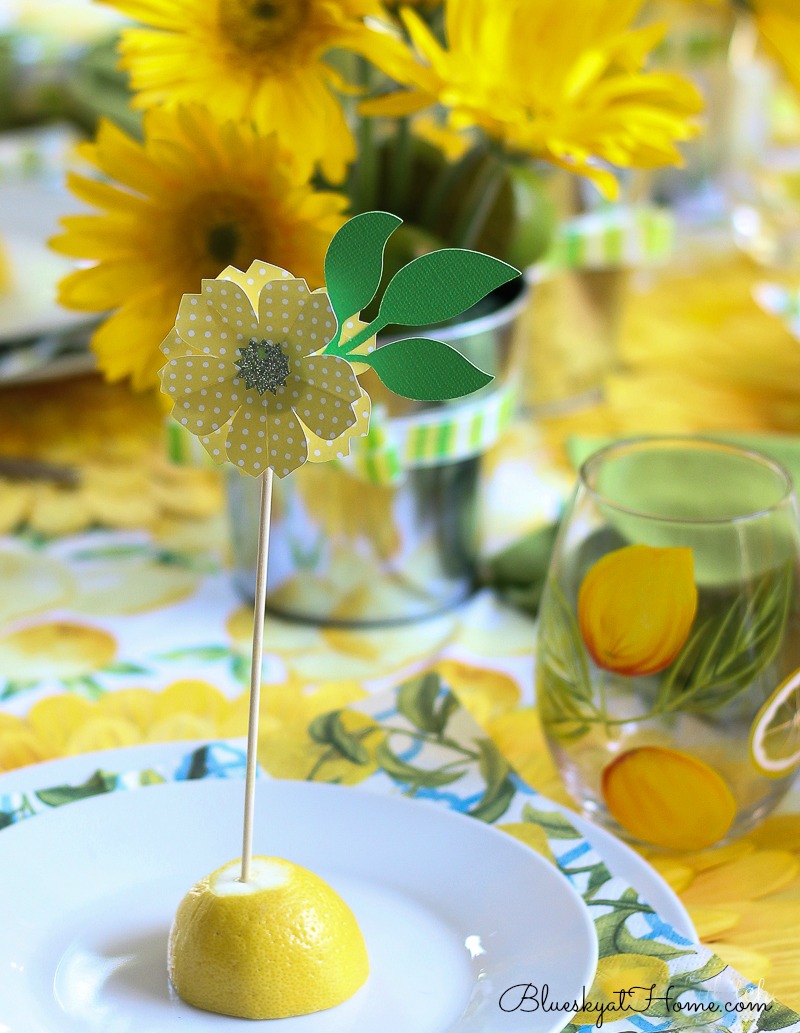
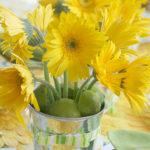
You will need flowers that have a fairly stiff, strong stem. I chose Gerber daisies for my flower centerpiece. Their color was just right and they have such as sweet, causal look which fit my theme perfectly.
I bought two bunches of ten stems each. I eye~balled how short I had to cut off the stems to fit in the oasis with the stems about 4 inches deep and about 4 inches above.
Then I carefully pushed the stems into the floral oasis. Two pails had seven stems and one had six and that just about filled the space and made for a lush flower centerpiece.
FLOWER CENTERPIECE STEP 5
Since the oasis was visible, I need something to cover it and give the flower centerpiece a finished look.
At first, I thought about moss, but then I still had a bunch of limes on the counter and I thought using them would repeat my lemons and limes theme and work just as well.
I cut the limes in half and placed them around and over the oasis. Each pail needed three limes halved to cover the oasis and give the centerpiece a finished look.
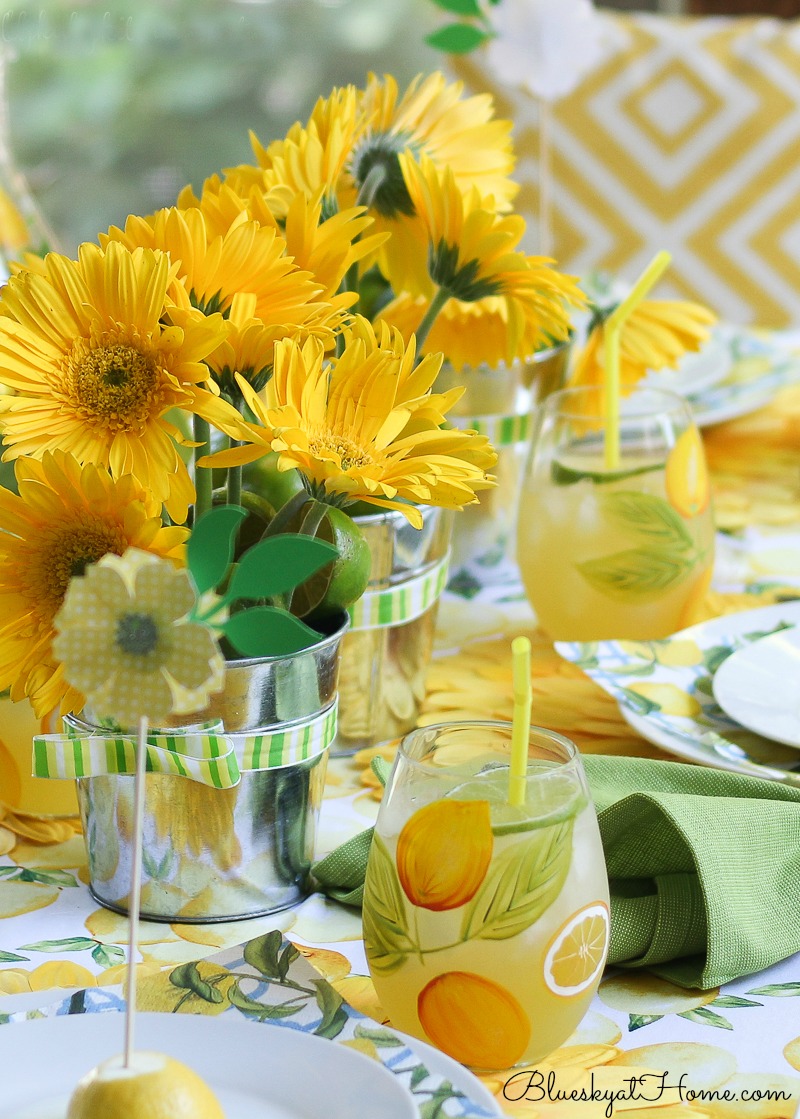
Finally, I set the pails in a line down the center of the table. My easy DIY flower centerpiece was finished!
The flower centerpieces looked so good on the lemon fabric that I found at Joann.
When I started adding all the other pieces ~ the plates, napkins, silverware, and glasses, the table looked just as I had envisioned it. The flower centerpieces were the perfect focal point in the middle of the table ~ not too high to obstruct guests’ vision.
It was after I took this photo that I realized that the ribbon in the center pail had fallen down. I just put it back on, pressed the ribbon to the pail, and this time it stayed on for several hours.
I did think the tablescape needed one more element and that’s when I decided to make the paper flower party decoration.
When I set the food out and poured the cocktails, the tablescape was so pretty ~ cheerful, happy and bright. The idea for the flower centerpieces that started with the little napkin rings really paid off.
COST FOR THE FLOWER CENTERPIECE
Pails ~ already on hand
Ribbon ~ $4.99 – 60%: $2.99
Oasis ~ already on hand
Scotch Repositionable Tape ~already on hand
Yellow Gerber Daisies 2 @ $4.99 each: $10.00
Total: $12.99
Each centerpiece: $4.33
I think that’s a pretty low-cost result for the visual impact, the time it took to create the flower centerpiece, and the happy delivery factor.
YOUR TAKEAWAY FOR MAKING FLOWER CENTERPIECES
- shop your home for containers ~ be open and think outside the usual suspects
- go with grocery store flowers or shop Sam’s or Costco
- potted plants can be just as lovely as colorful flowers
- use your own flowers from your garden if you are fortunate enough to have them ~ free and no trips to the store
- embellish your containers with ribbon, twine, burlap, washi tape, stickers, fabric
- NEVER throw away ribbon received on a gift. Organize it by color or pattern for future projects.
- keep repositionable double~stick tape on hand for attaching embellishments. That way they can be removed and used again and not mar whatever you are attaching them to.
- use sharp garden sheers, not scissors for cutting your flowers. You don’t want to crush the stems.
- if possible change out the water on the flowers every few days. If not, add fresh water as the flowers soak up the original water.
- keep oasis on hand and remember that you can reuse it
- floral tape is another good supply to have at the ready
You might want to check out this post on ways to keep your flower arrangements last longer.
I hope you learned some new lessons and inspiration for creating your next flower centerpiece. It’s been fun sharing. The flowers are waiting for you.


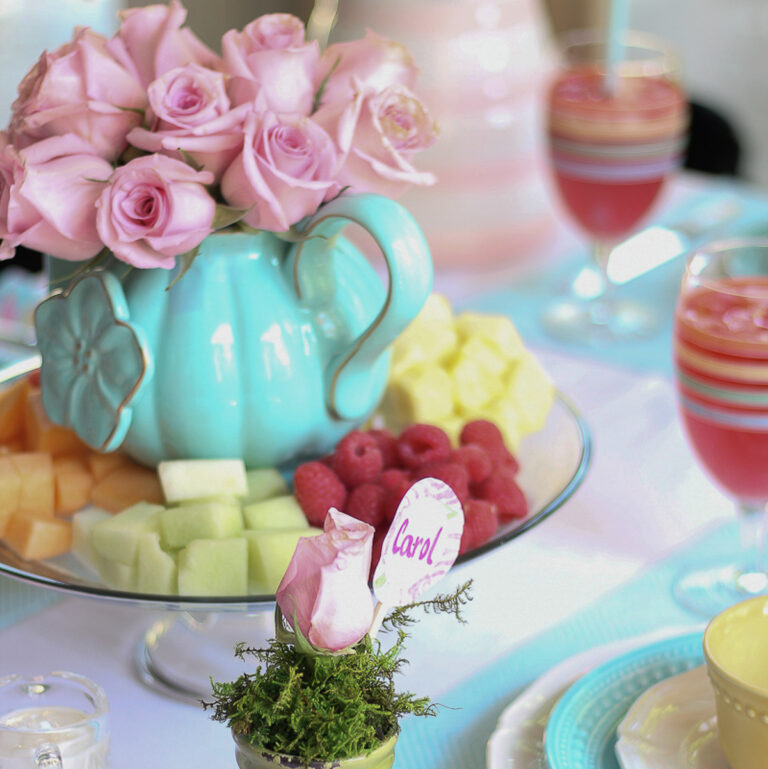
Carol,
Enjoyed your post! Found the use of limes very creative – the arrangements not only looked pretty they probably smelled wonderful!
Sandra, I’m so glad that you enjoyed the post. Using the limes was a last minute decision that worked out beautifully. I did have to throw them away when I was through with the tablescape. Fortunately, they are very inexpensive. Hated to lose all that good juice.
This is so pretty, Carol! Thank you for the inspiration.
Jill, you are so welcome. Maybe we can get down to Waco this fall.