DIY Fall Decoupage Chargers with an Autumn Leaf Design
Fall entertaining doesn’t have to break the bank to look beautiful. If you’ve been eyeing those gorgeous seasonal charger plates at home decor stores but can’t justify spending $15-25 per plate, I have the perfect solution for you. With just a few dollars in supplies, you can create stunning DIY fall decoupage chargers with an autumn leaf design that rival any expensive store-bought version.
This budget-friendly DIY project transforms plain, inexpensive glass or plastic chargers into elegant seasonal table decor that your guests will think you splurged on.
Whether you’re having friends over for a cozy fall gathering or hosting Thanksgiving dinner, in a few months, these handcrafted chargers will elevate your table setting without the hefty price tag. If you want to bring some autumn warmth to your everyday dining, these chargers will be a simple and budget-friendly solution.
The best part? You probably already have most of the supplies at home, and the entire project can be completed in just a few hours. Plus, you can customize the leaf colors and arrangements to perfectly match your existing fall decor.
Let’s dive into how you can create these beautiful, professional-looking decoupage chargers for a fraction of what you’d pay at the store.

Creative Craft Time
Today is our monthly Creative Craft Blog Hop. Here you’ll find a variety of DIY projects for different interests and abilities.
Thank you to Donna of Modern on Monticello for hosting this month’s crafty gathering, then welcome. I know you will enjoy this collection of creativity.
Benefits of Making DIY Decoupage Home Decor Accessories
Decoupage is one of my favorite craft projects. Creating decoupage home decor accessories offers numerous advantages that go beyond just saving money.
If you have never tried your hand at this easy craft, here are several reasons why you should.
Budget-Friendly Decorating – You can transform inexpensive, plain items into stunning decorative pieces for a fraction of the cost of store-bought alternatives. With basic supplies like Mod Podge, brushes, and decorative paper or napkins, you can create high-end-looking accessories without the premium price tag.
Complete Customization Control – You can match your exact color scheme, style preferences, and existing decor perfectly. Unlike mass-produced items, decoupage allows you to choose every design element, from colors and patterns to themes and textures, ensuring your pieces complement your space flawlessly.
Sustainable and Eco-Friendly You can breathe new life into items you already own or repurpose thrift store finds instead of buying new. This reduces waste while creating something beautiful, making it an environmentally conscious decorating choice.
Beginner-Friendly Craft – Decoupage is an easy DIY project. No special artistic skills required – if you can cut and glue, you can decoupage. The forgiving nature of the technique means even mistakes can often be incorporated into the design or easily corrected.
Seasonal Versatility – You can easily update your decor for different seasons and holidays without major expense. Create spring florals, summer themes, autumn leaves, or winter magic by simply changing your paper choices on the same base items.
Therapeutic and Relaxing – Like most craft projects, the repetitive, meditative nature of cutting, arranging, and layering provides stress relief and a relaxing focus. I think decoupage is calming activity that helps me unwind after busy days.
Unique Personal Expression You can create one-of-a-kind pieces that reflect your personality and style. Your decoupage accessories will be conversation starters that guests won’t find in anyone else’s home.
Gift-Giving Potential – Handmade decoupage items make thoughtful, personalized gifts that show extra care and effort. Your friends will appreciate the time and creativity that you invested in custom pieces made specifically for them.
Skill Building and Confidence – Decoupage is an excellent gateway craft for beginners. Success with simple decoupage projects builds crafting confidence and often leads to exploring more advanced techniques and larger projects.
Instant Gratification – Most decoupage projects can be completed in a single crafting session, providing quick results and immediate satisfaction. You can transform a plain item into something beautiful in just a few hours.
I hope you are now curious and ready to see how easy this project is and how little time it takes.
Supplies for Any Decoupage Project
One of the great things about decoupage is the small number of supplies you need – that helps you save money on this craft, too.

- Modge Podge – the glue that is the staple of decoupage. It comes in several varieties, such as Gloss and Matte, and ones for different surfaces.
- Brush – it can be a sponge brush or a designated Mod Podge brush.
- Paper napkins – the most common choice is 2-or 3-ply napkins. They are so popular because they come in 100’s of patterns, different sizes, and are inexpensive.
- Sharp craft scissors – indispensable for trimming napkins and cutting them when necessary. This pair is my favorite.
- A plastic cup – optional – but used to hold your brush in water between craft “sessions”.
- Plastic, disposable containers – for pouring your ModPodge into. I used those inexpensive plastic nacho ones.
- Surface to decoupage – any hard surface will do. I have decoupaged glass, ceramics, terra cotta, wood, and plastic.
I knew that we will be doing some entertaining this fall, so I wanted something new for the dining table. I immediately thought of chargers.
On a trip to Hoppy Lobby, I found a variety of plastic chargers. I chose one that was clear plastic with a gold trim. I bought just one as a trial.
When I went back a week later to buy seven more chargers, I saw a style I liked better – with gold bead trim. These chargers are a nice 15 inches in diameter.

Plus the price was great.

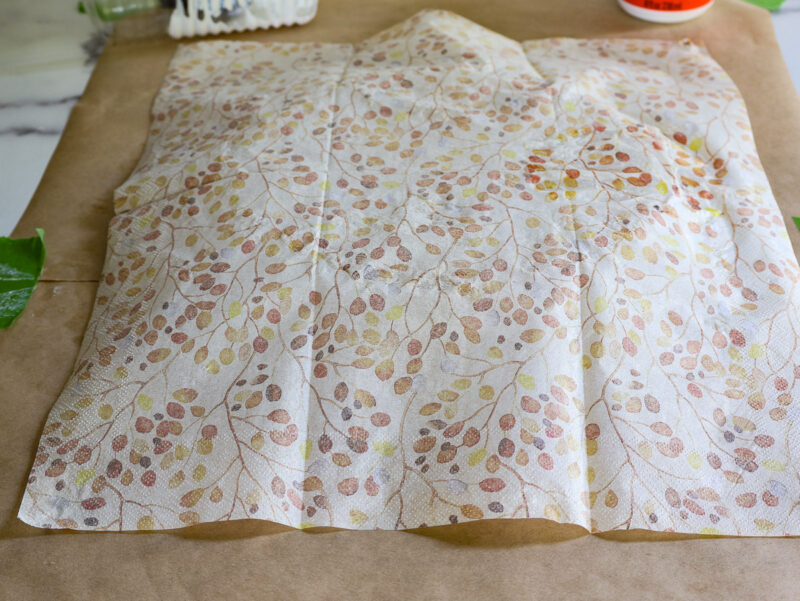
For this project, I wanted a fall design that was simple and “soft” fall, not pumpkins or bright colors. I found this subtle leaf pattern. To get the largest piece of napkin, I ordered the guest napkin size. There were 100 to a package!

How to Make DIY Fall Decoupage Chargers for Your Table
Step 1 – Remove any stickers or labels from your surface. If there is any residue, clean the stickiness with alcohol on a cotton ball.
Step 2 – Separate the back white layers of the napkin. The first one will be easy to “peel” off.

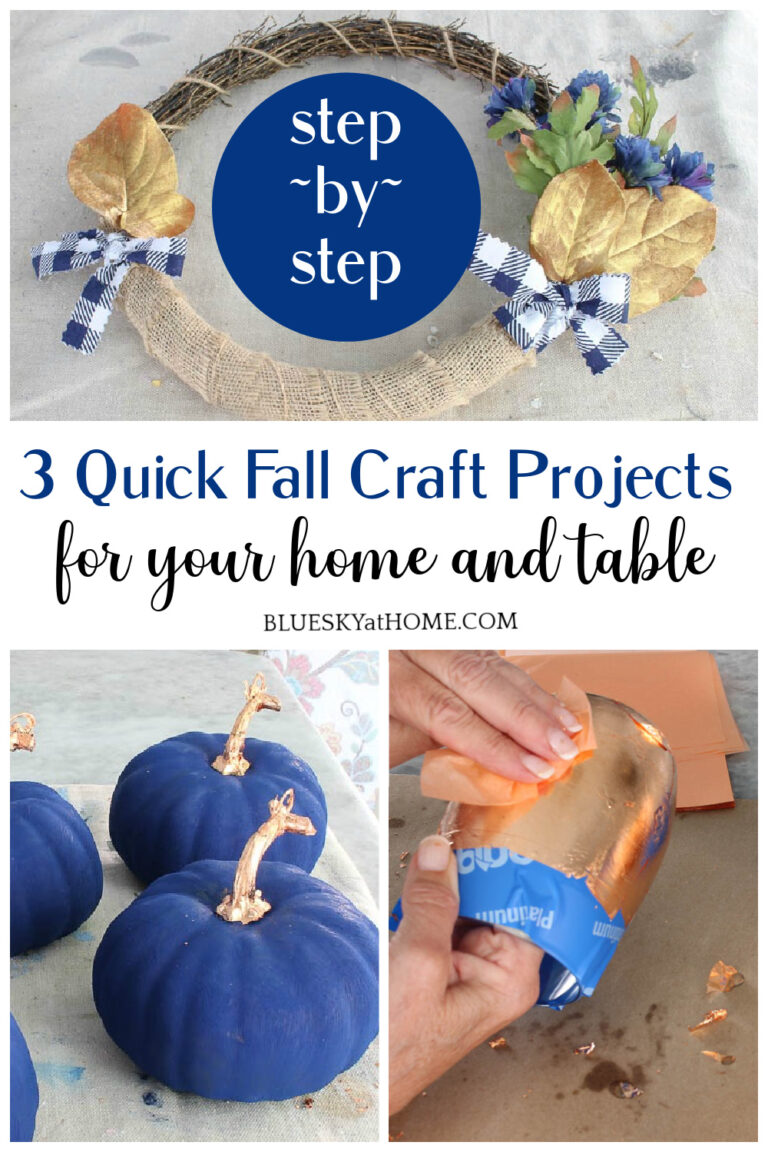
Separating the 2nd layer has always been frustrating for me. I went to YouTube and searched how to remove layers from a paper napkin. I found the perfect solution.
All you have to do is rub your fingernail over the back of the napkin at the corner until the little bumps flatten and the layers start separating. This method worked better than any I’d tried before.
And it saves a lot of time.


Step 3 – Set your charger on the napkin. Decide if you want the napkin on the top of the charger on the bottom.
I decided to place the napkin on the bottom of the charger so that a simple wipe with a damp paper towel to clean it up.

Step 4 – Turn your charger over and place the napkin with the design facing down on the charger. This napkin would cover the entire charger surface, which meant no cutting or tearing was needed.
Step 5 – Using your brush, spread the Mod Podge, on the back of the charger.

I spread the Mod Podge all the way to the edge of the charger

Step 6 – Gently place the napkin face down on the charger, making sure that it completely covers the charger.

Step 7 – Use the brush to smooth down the napkin, adhering it to the plastic, all the way to the edge of the charger.


Step 8 – Apply more Mod Podge in a thin layer to the back of the napkin, covering the entire surface.

Step 9 – Set the chargers, wet side up, to dry completely.

NOTE: To complete four chargers took about 1 hour.
NOTE: It will take a few hours for the Mod Podge to dry. Because I started this project late in the afternoon, I let the chargers sit overnight.
Step 10 – Trim the excess napkin from the edge of the charger. I use my small sharp craft scissors for this task. They work great. I start on one side, and then finish on the other side.

You’re finished. The entire project took about 1 and 15 minutes.
When I use the fall decoupage chargers for a fall dinner (probably in early October.), I plan to use these round woven placemats underneath the chargers.
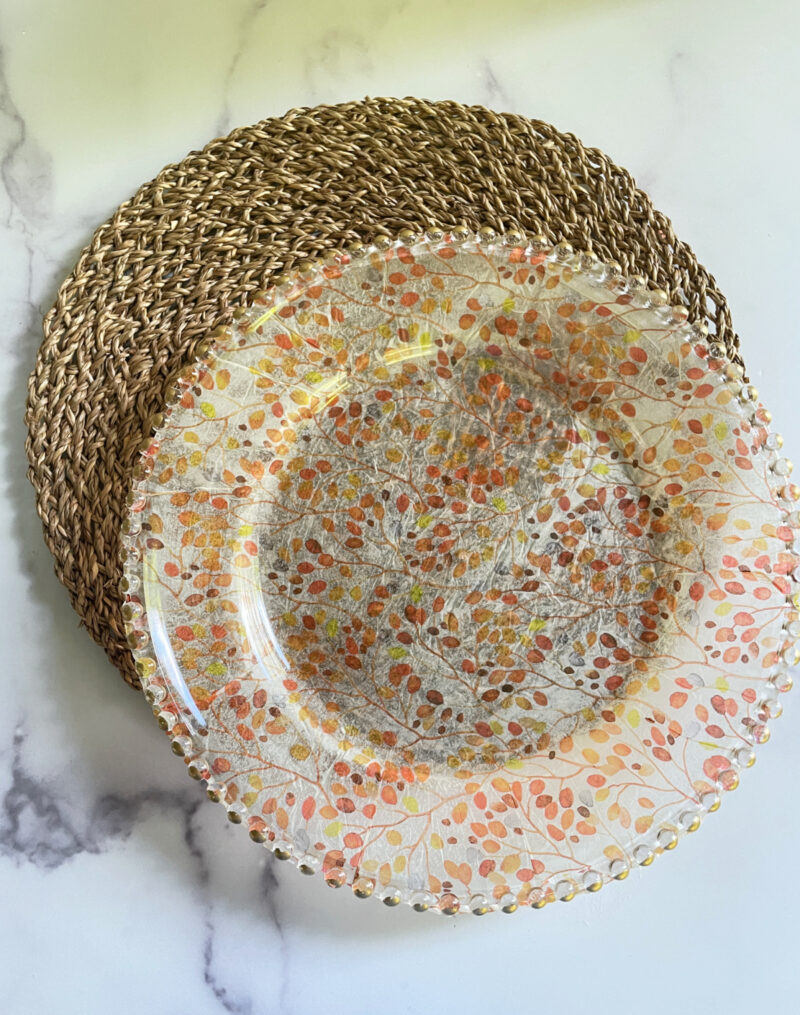

I love how these DIY fall decoupage chargers turned out. The only supplies I bought were the chargers for $16.00 ($1.99 each for 8) and the napkins for $16.00 for a package of 100. I will use some of the napkins for other DIy products and use others for guest towels in our powder bathroom.
Each napkin cost 16 cents so each charger cost $2.15 plus tax. Not bad for a nice fall charger that can be used over and over.
Since I have eight chargers, but only used four for this tutorial, I can make more fall ones when I know how many guests we will host.
DECOR TIP: One fall charger could also be used as a small tray on a side table, kitchen or bathroom counter to hold a small fall vignette.
Other Decoupage Projects
Want some other decoupage projects? Try these to be creative, save money, and get custom chargers.
- How to Decoupage a Glass Platter
- How to Make Decorative Chargers for Christmas
- How to Decoupage a Vase for an Updated Decorative Accessory
I hope that you will PIN this post to your favorite Pinterest Boards. You may not need fall chargers right now, but you can make them now and save them for your first fall gathering.
Here are a few of mine to check out: Decoupage Projects, Fall DIY Projects, DIY Accessories for the Projects.
Check out all the Creative Crafts ideas below. Cecilia of My Thrift Store Addiction is up next.


Birdz of a Feather – Coin Necklace
Decorate and More with Tip – Thrifted Candle Revival
Modern on Monticelloa – Easy To Make DIY Wood Biscuit Pumpkin Shadow Boxes
Bluesky at Home – DIY Fall Decoupage Chargers with an Autumn Leaf Design
My Thrift Store Addiction – How to Crochet Chenille Daisies
Purples Hue and Me – Twinkling Bling Floral Wire Pumpkin


Such a fun project Carol, and I’m loving the cute chargers and pattern on the napkins! Pinning for fall!
Happy you like them, Michelle. So fun and easy to make.
These are beautiful. I am glad you decided on the leaf pattern. It looks perfect with the gold trim on the chargers. I am sure you will enjoy these for several months this Fall.
Thank you so much, Donna for hosting. I’m ready to set a fall table with these chargers.
Your decoupaged chargers are gorgeous, Carol! What a lovely napkin pattern you chose! I can always count on you to give more than mere step by step instructions! I love how you go into great detail for every instance! The teacher in you really comes through!!!! You’re awesome and thanks!
Carol, your decoupaged chargers are beautiful! I love the pattern of the napkins you selected, and those clearance chargers were perfect for this project! Blessings, Cecilia @ My Thrift Store Addiction
These are gorgeous Carol! I love how you’ve created a high-end look without the high-end price tag. The autumn leaf design with that bit of gold bling on the charger looks elegant; it’s the perfect upscale fall decor on a budget.
I have seen those chargers and wondered if you could change them up. You have shown me just how pretty they can be on a fall table. What’s cool about this, you can custom the look with your decor style. Thanks for sharing.