5 Easy Steps to Make a Thanksgiving Wreath
The holiday season is upon us. Kick off the festivities and follow these 5 easy steps to make a Thanksgiving wreath that welcomes friends and family with a touch of handmade charm.
There’s something truly magical about crafting your own decorations to celebrate special occasions and holidays.
From the joy of gathering with loved ones to the warm, cozy atmosphere of your home, holidays are a perfect time to express your creativity through DIY projects.
With Thanksgiving a few weeks away, you’ll want to make your home full of fun Thanksgiving decorations for a warm welcome to greet guests.
Thanksgiving is a time for gratitude, reflection, and the appreciation of life’s blessings. Your DIY Thanksgiving wreath can serve as a wonderful symbol of all these sentiments.
The fun of crafting your own wreath is that you can tailor it to your unique style and preferences. It’s the perfect addition to your holiday decor.

Whether you’re a seasoned DIY enthusiast or a beginner, crafting a Thanksgiving wreath is not only enjoyable but also an excellent way to add a personal touch to your holiday decor.
Today is Creative Craft Blog Hop Day, when a group of bloggers create fun DIY projects for readers to enjoy and try for themselves.
Sara of Birdz of a Feather is back as our hostess. If you are joining Bluesky at Home from Allison of Southern Sunflowers, then welcome. I hope you have fun checking out my Thanksgiving wreath project.
Choose Your Thanksgiving Theme
Usually, the first thing when making easy DIY wreaths is to pick a theme.
When it comes to the theme for your Thanksgiving wreath, the possibilities are as diverse as the different colors of fall foliage. You can draw inspiration from the autumn season, with its rich, earthy tones and harvest motifs.
Here are some DIY Thanksgiving wreath ideas:
- For an elegant wreath, use bright fall colors of faux flowers for a traditional look.
- For a natural look, use colorful fall leaves, mini pumpkins, pine cones, gourds, Indian corn, and acorns for a traditional fall look.
- You can opt for a more rustic or farmhouse-style wreath with burlap, twine, and vintage accents.
- For a modern twist, explore minimalist wreaths that incorporate metallic hues or geometric shapes.
- For a personalized theme, create a thankful wreath where you and your guests can jot down what you’re thankful for, turning it into a meaningful interactive piece of art.
- Pick a symbol of Thanksgiving for your Thanksgiving theme: cornucopia, turkey, harvest, pumpkin or pecan pie.
What Prompted My Thanksgiving Wreath?
Interestingly, the idea for my easy wreath wasn’t a theme, but the supplies that I had in my office. Sometimes supplies spark the inspiration for a project.
I wanted to use up several supplies and that’s when the idea for this wreath hit me. And my theme?
Originally, it was a Halloween wreath, but then I switched to a Thanksgiving turkey wreath!
You may remember my fall paper leaf fall wreath. It was cardstock that led to that wreath.
Supplies for my Halloween/Thanksgiving Wreath
Going through my office several days ago, I found all these DIY supplies and I thought I needed to clear out space and use them in a project.
To be honest, this wreath didn’t start as a Thanksgiving wreath. After I found all the supplies, I intended to make a Halloween wreath. But halfway through the process, I discovered something that changed my mind. I’ll explain as we go through the process
Whether it is a Halloween wreath or a Thanksgiving wreath, it was the perfect way to use these supplies.
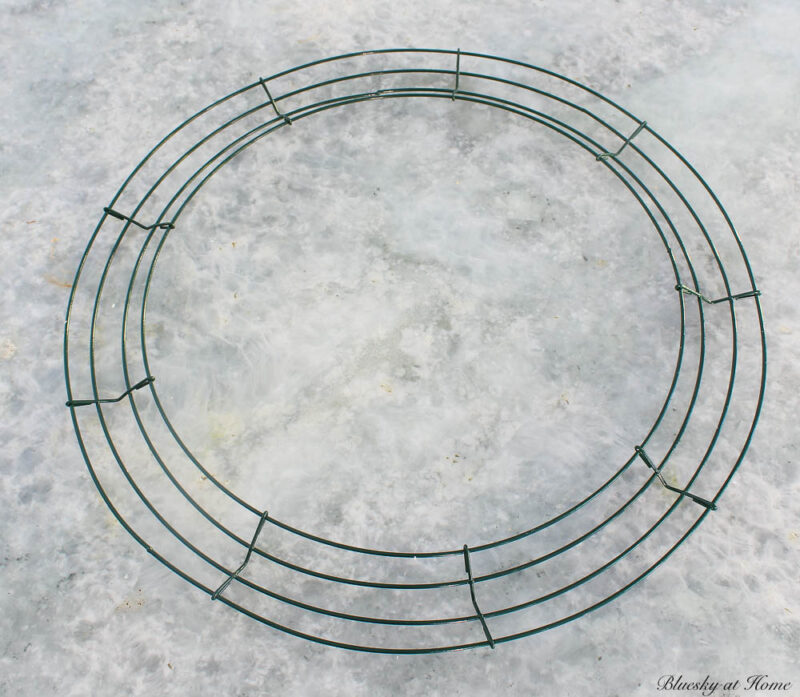
- a wreath frame: you could use a foam wreath form, a straw form, a wire wreath form, or you could even make a wreath base from a heavy piece of cardboard or wood. I had an 18-inch wire wreath from Dollar Tree on hand. That’s what I used.
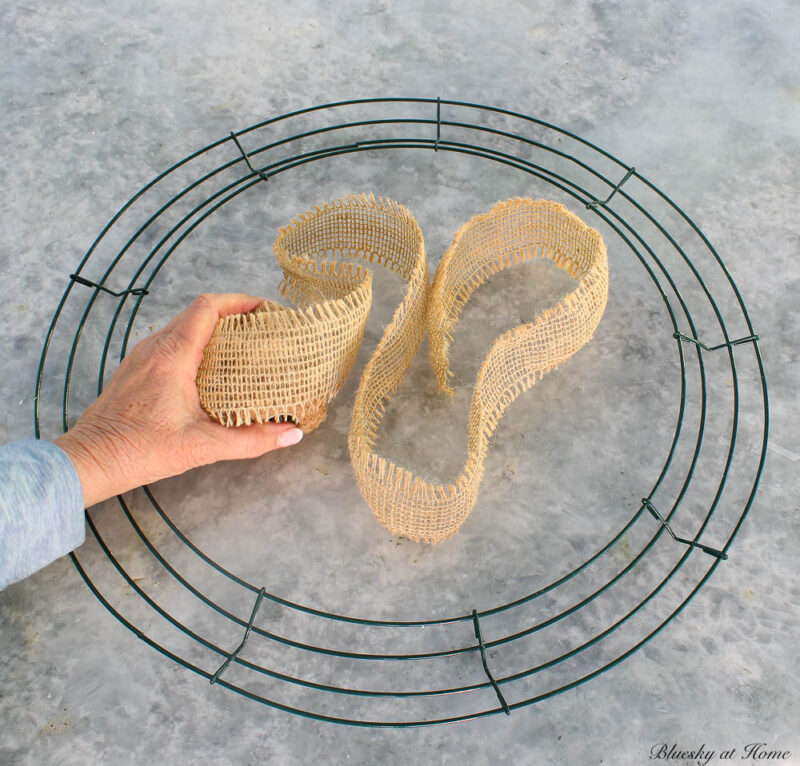
- burlap ribbon: I had a 2-inch wide burlap ribbon on hand that would work to wrap my wire wreath form.
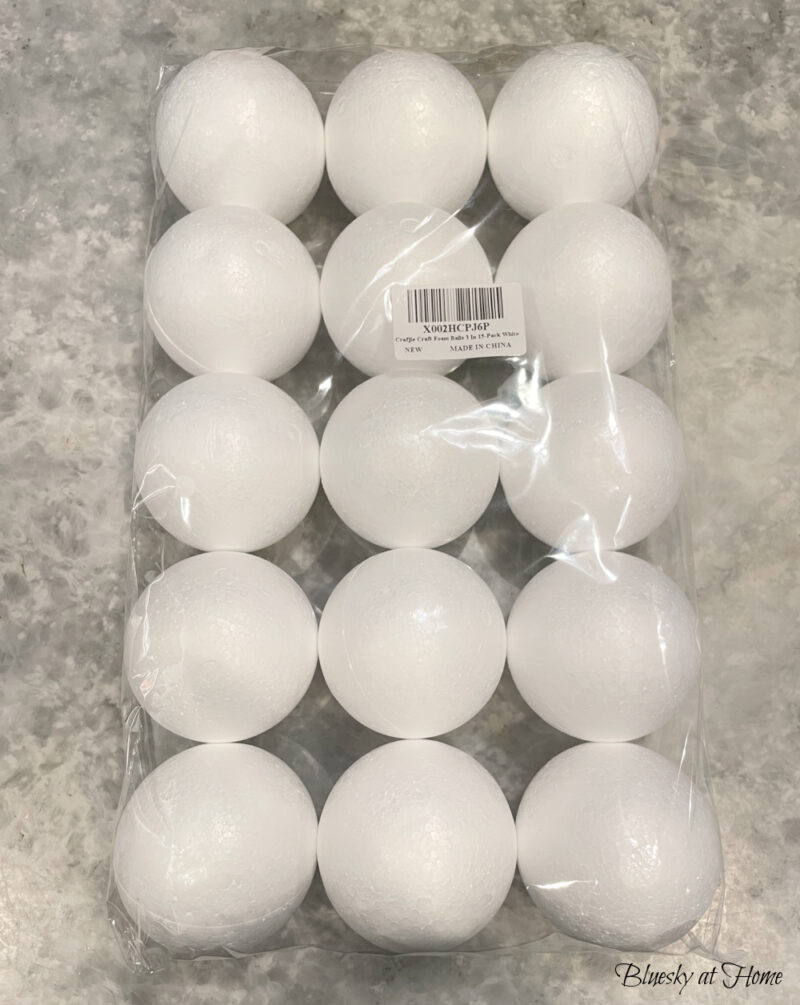
- styrofoam balls: I had a few 3-inch size balls left over from my yarn pumpkin project. I did order another package of 15. Make sure that you order the smooth finish balls. We are going to use Mod Podge to attach napkins to the balls.
- orange napkins: I bought a package a week ago that I used in my fall tray vignette for our coffee table. It was the orange napkins that made me think of a Halloween wreath. My original idea was to use them with the styrofoam balls to make little jack-o-lanterns. Then I decided most people already have a Halloween wreath and I switched to a turkey wreath.
- cardstock: I had several pieces of brown cardstock and scraps of cream and orange/cream stripe scrapbook paper. This is when the idea to use turkeys as the theme of my Thanksgiving wreath.
- ribbon: I had orange and white plaid ribbon in wide and thin widths.
At this point, the entire Thanksgiving wreath project came together in my head. I would need a few other supplies, and I had all of them on hand:
- an electric cutting knife – that’s not a typo
- Mod Podge
- adhesive tape or glue dots (You could use a hot glue gun, but I went with something that wasn’t permanent
- sharp scissors
- sticky double-sided heavy duty tape
- foam brush
- a Cricut cutting machine – what really made me switch to a Thanksgiving wreath was some cute turkey shapes I found on Cricut Design Space.
If you don’t have all these supplies, you can find them all at your local craft store or online.
Making My Thanksgiving Wreath in 5 Easy Steps
Before I show you how to make this wreath, I should tell you that my intent was to make a wreath that I could easily take apart and reuse all the elements.
I’m going to take you through the steps as I made the wreath. Several steps are interchangeable. Then I’ll tell you what I would recommend instead.
In this tutorial, I’ll guide you through five simple steps to create a beautiful Thanksgiving wreath that reflects your style and the essence of the season.
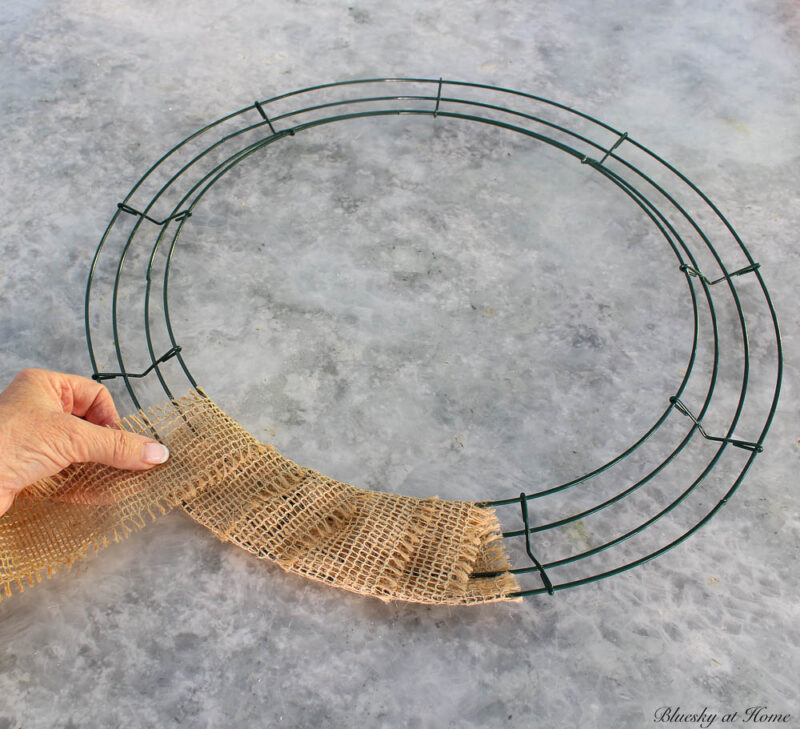
Step 1 – Wrap Your Wreath
Wrapping your wreath form with burlap ribbon doesn’t require any glue or adhesive. Since I was using a wire wreath, I just wove the end of the ribbon through the wire before starting to wrap the ribbon around the wreath.
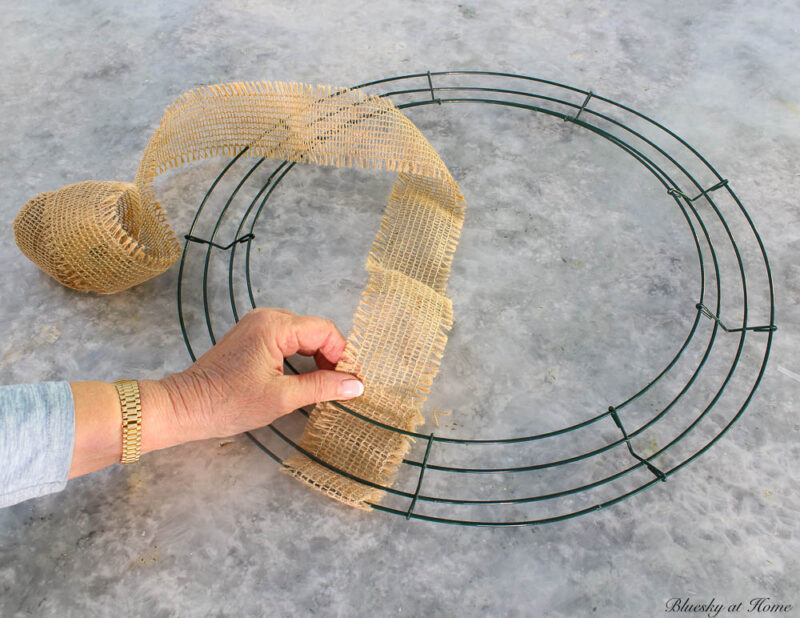
Overlap the ribbon to cover the wreath. When you get to the end of your ribbon, tuck the end through the wires of the wreath.
I ran out of the burlap ribbon and had to finish with a different type. I knew it wouldn’t show when I was done with the wreath.
The top – rounded side – of the wreath will become the back of the wreath.
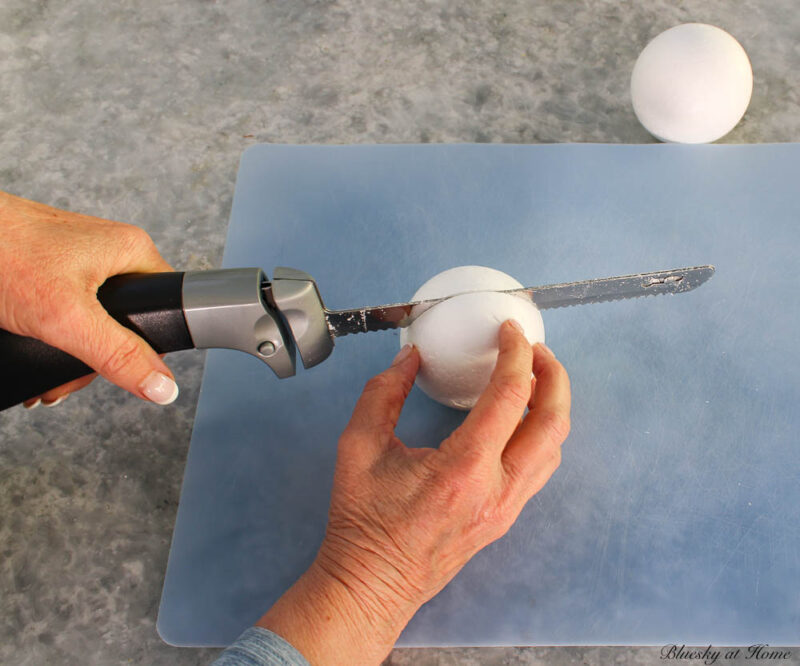
Step 2 – Cut Your Styrofoam Balls in Half and Decoupage Them
I needed the styrofoam balls to have a flat side. You can order half balls, but I couldn’t find any in 3-inch size.
To determine how many half-balls you need, use your 8th-grade math. My wreath was 18-inches in diameter. Multiply the diameter by 3.14 to get your circumference = 56.52 inches. I determined that I would need about 16 half-balls, so I cut 8 balls in half.
To cut them in half, the easiest way is to use your electric knife. I used the electric knife when I made the yarn pumpkins. It was quick and easy.
Use a plastic cutting board. Place your ball on the board and hold it firmly. Press firmly down on the knife and gently “saw” through the ball.

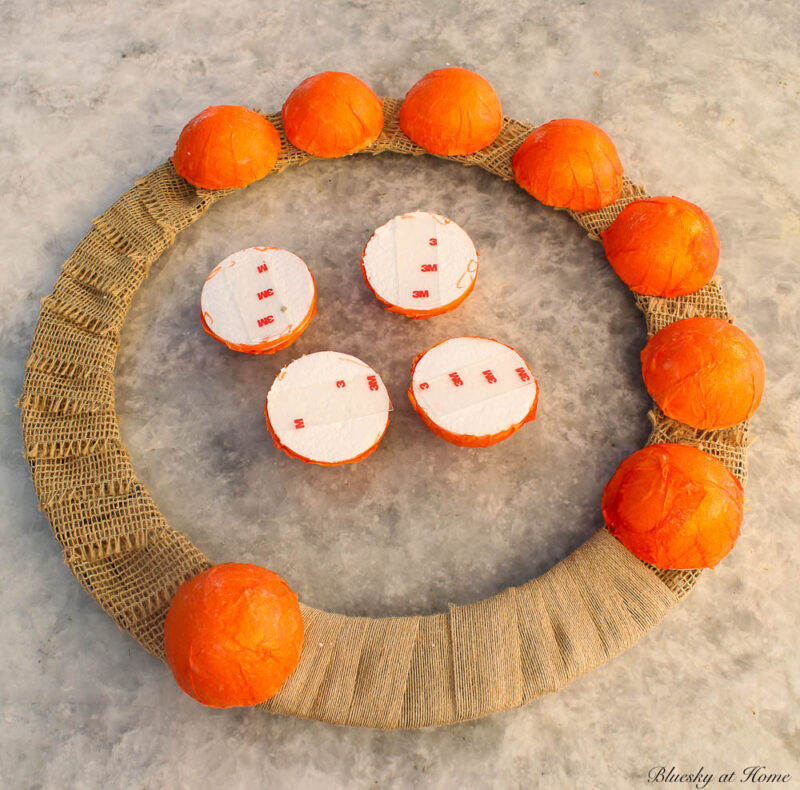
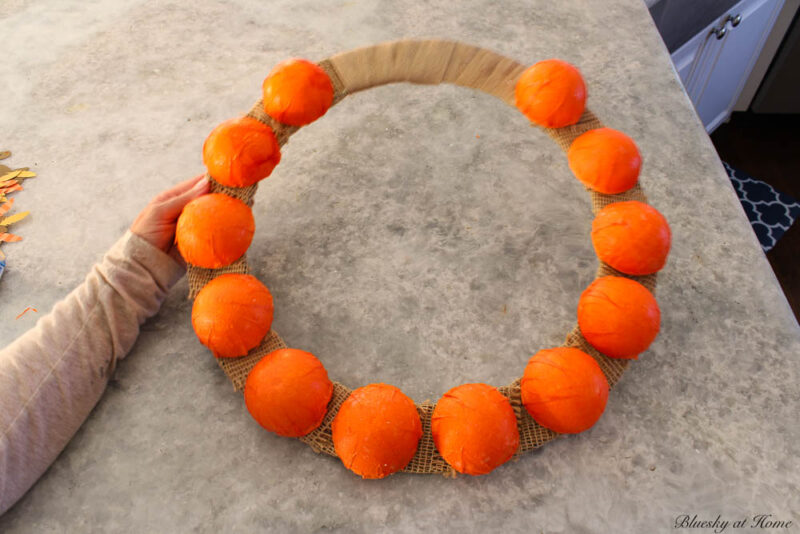
I laid out the half-balls on the wreath. Leaving room for a bow at the top, I determined that I only needed 12 half balls.
Now I was ready to decoupage them.
Normally when you deoupage napkins, you have to separate the layers of napkins since you only want the layer with the design.
The solid orange napkins only had one layer, so there is nothing to separate. I cut 5 napkins into four pieces.
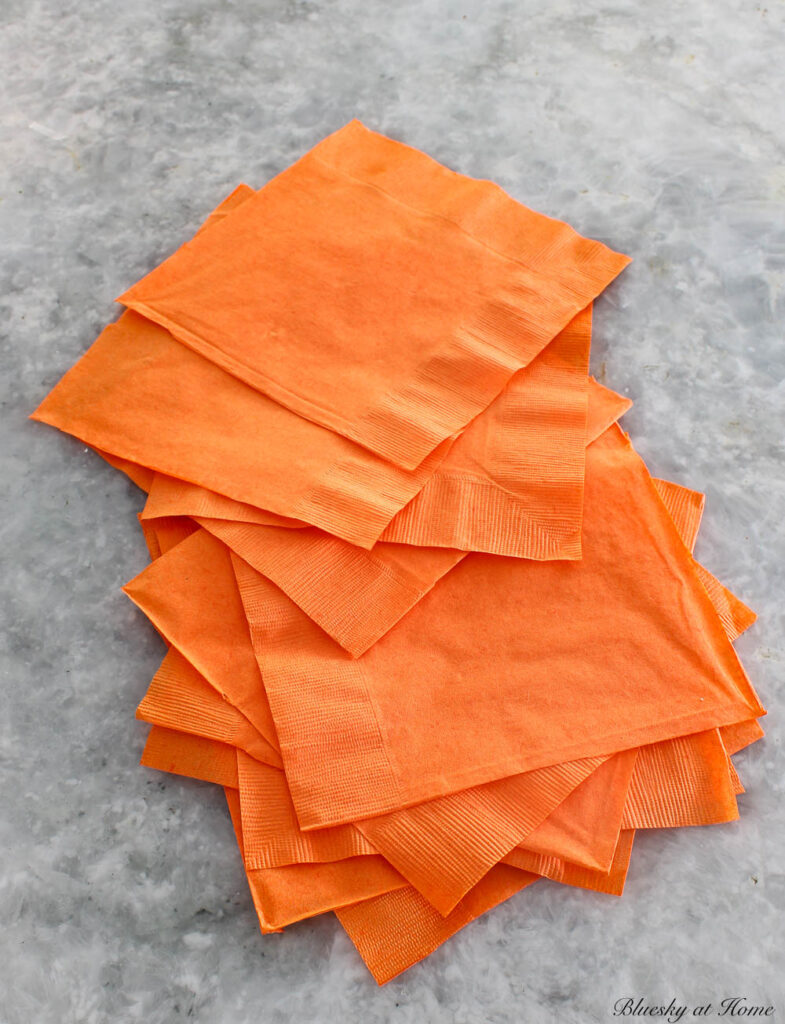
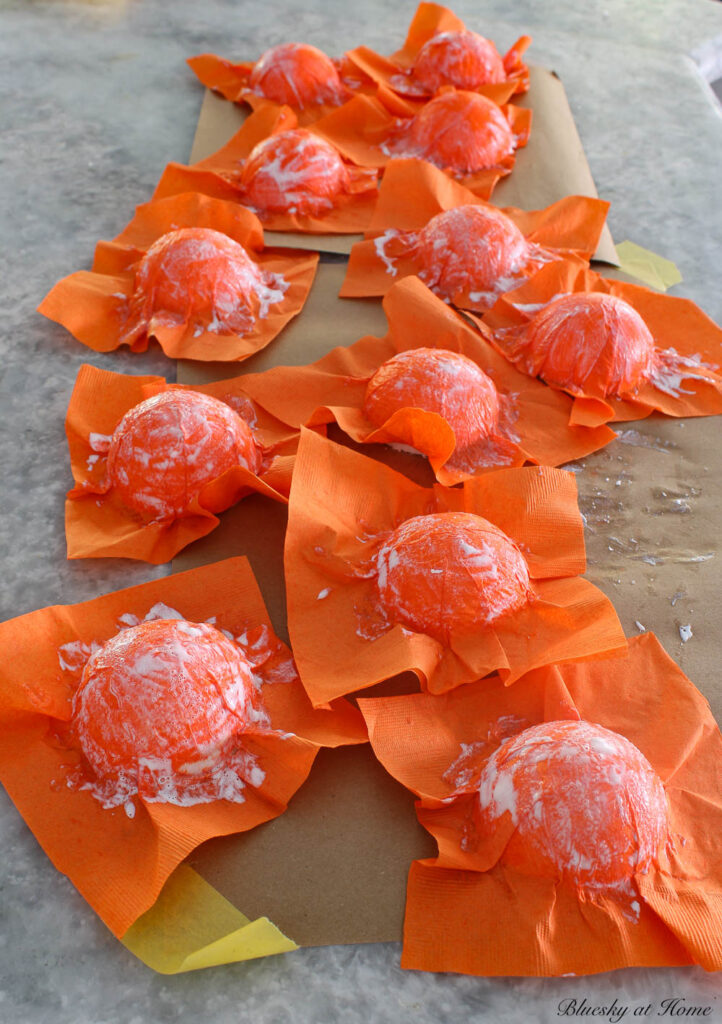
I used Gloss Mod Podg, a plastic container, and a foam brush.
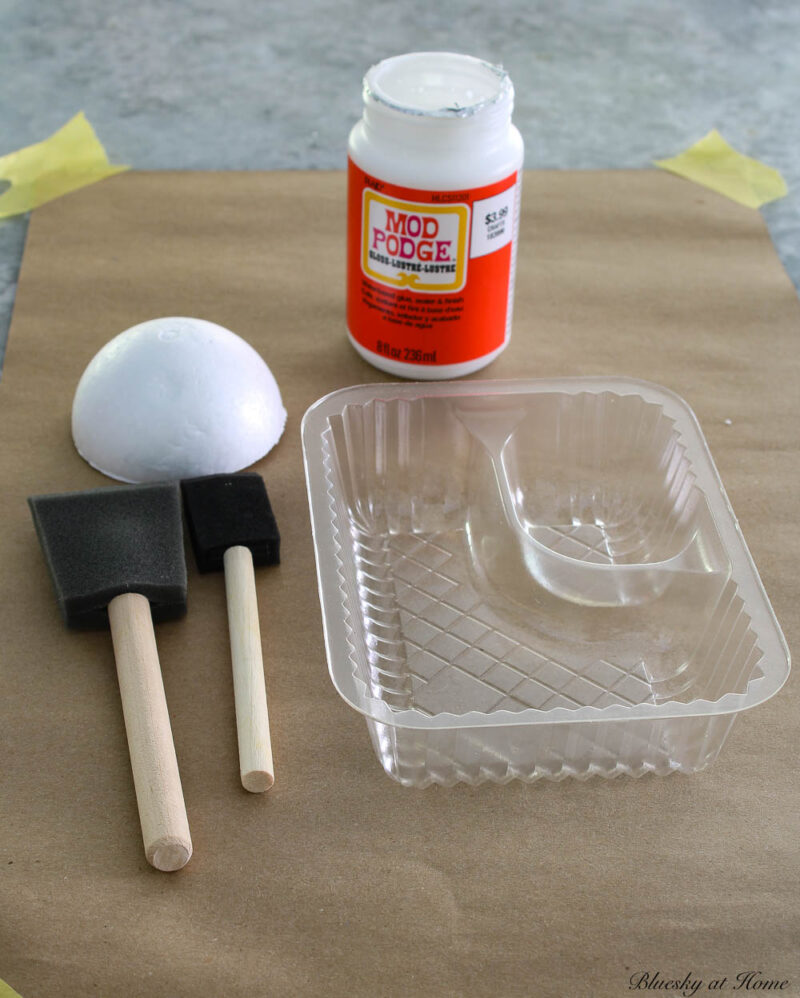
Brush the Mod Podge all over the round side of the styrofoam half-ball.
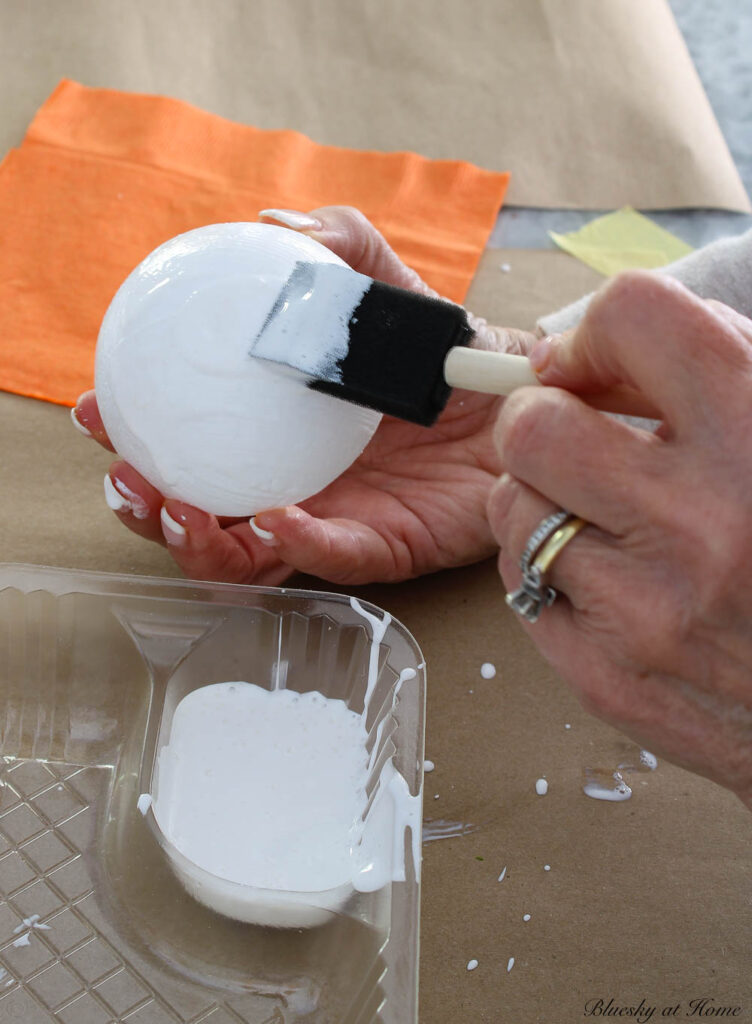
Place a square of napkin over the half ball and press down with your hands to cover the ball.
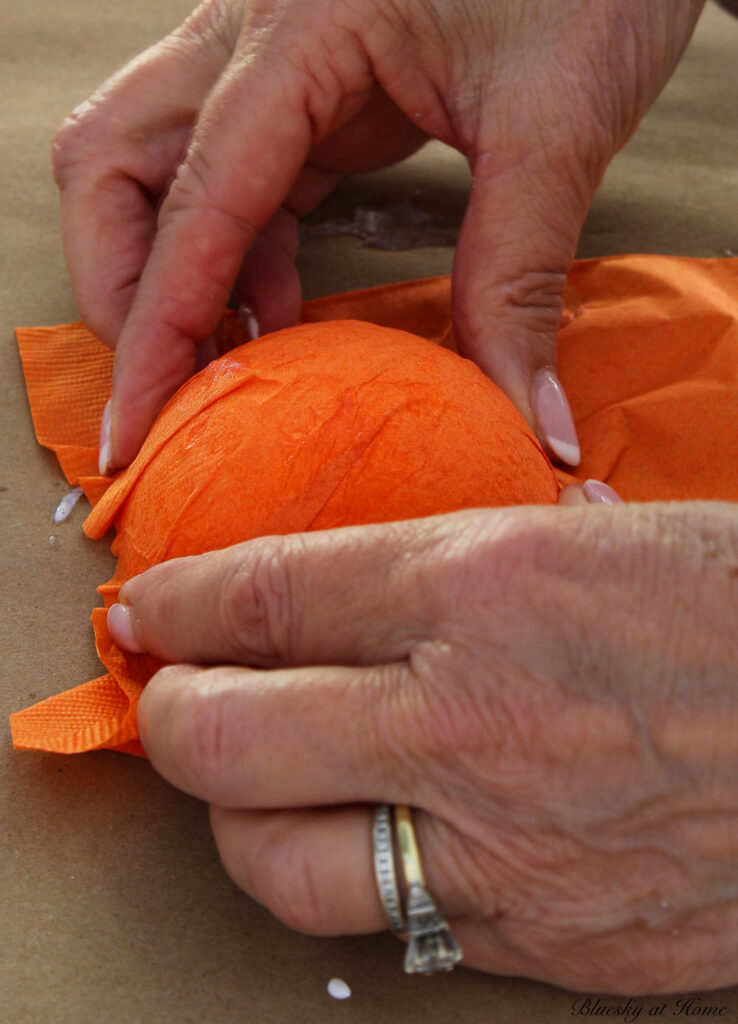
Brush a layer of Mod Podge over the napkin and set aside to dry. Repeat with your remaining balls.
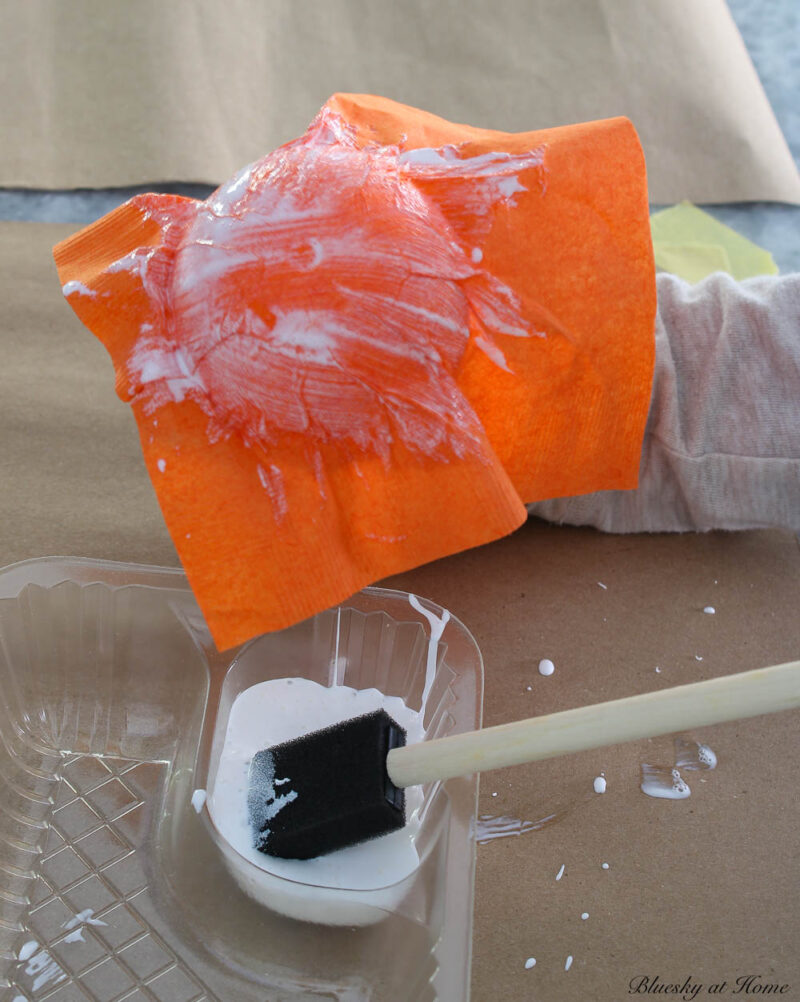
NOTE: It will take at least an hour for them to dry completely.
Step 3 – Attach Your Styrofoam Balls
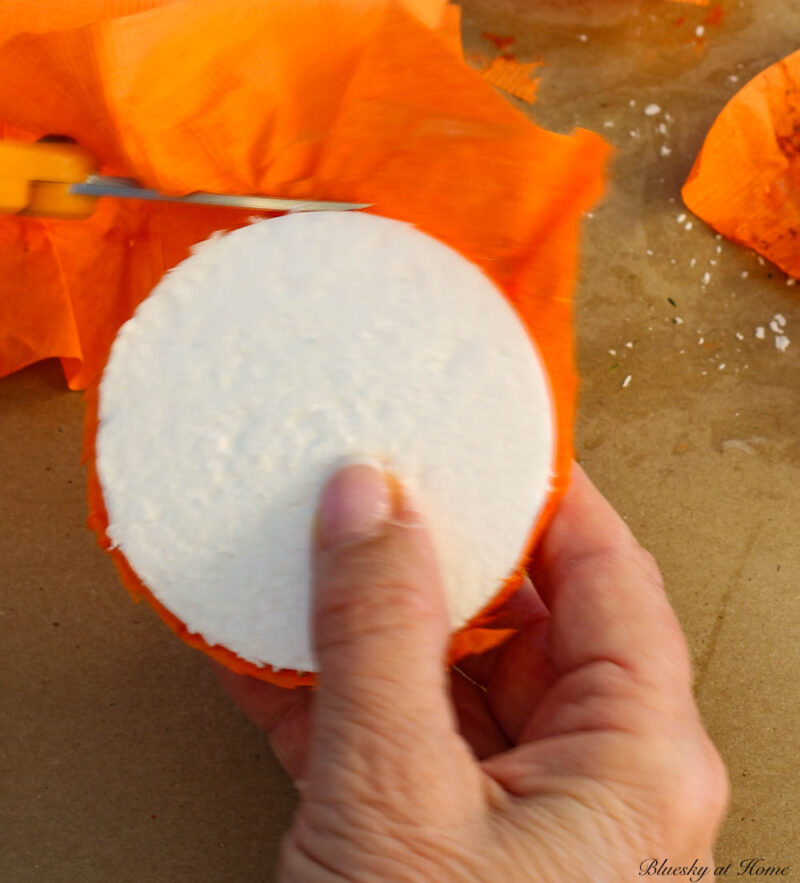
Once your styrofoam balls are dry, trim the excess napkin off with small sharp scissors.
Next, I cut a piece of double-stick tape and placed it on the back of the styrofoam ball.
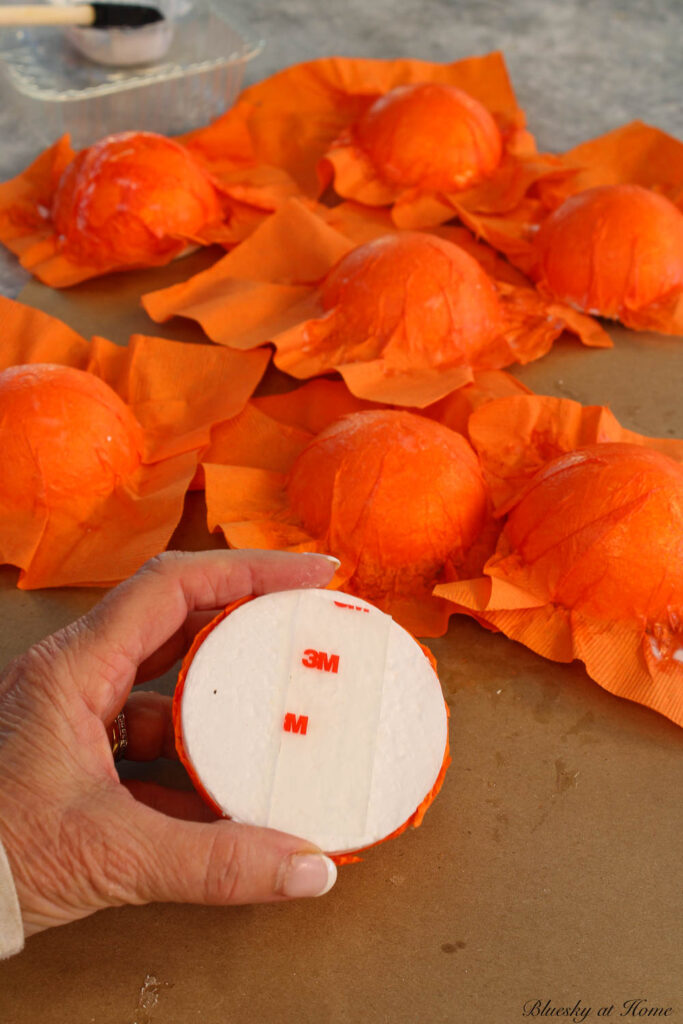
Lay out your balls and press down on them to make them stick to the wreath.
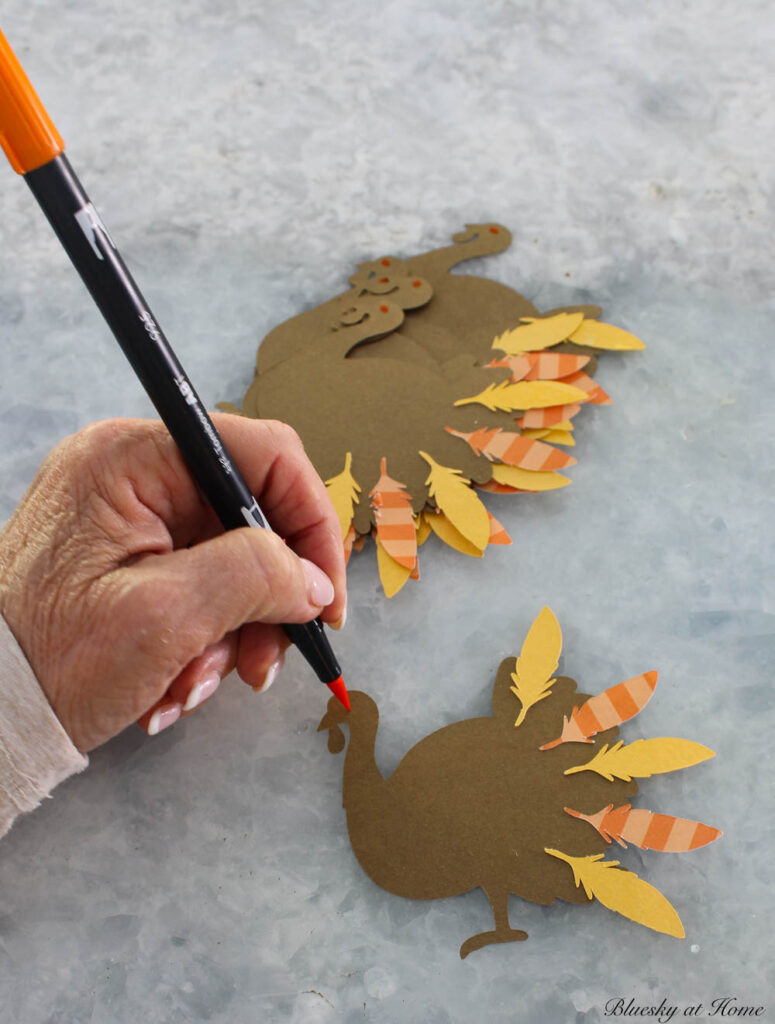
Step 4, Part 1 – Make Your Turkeys
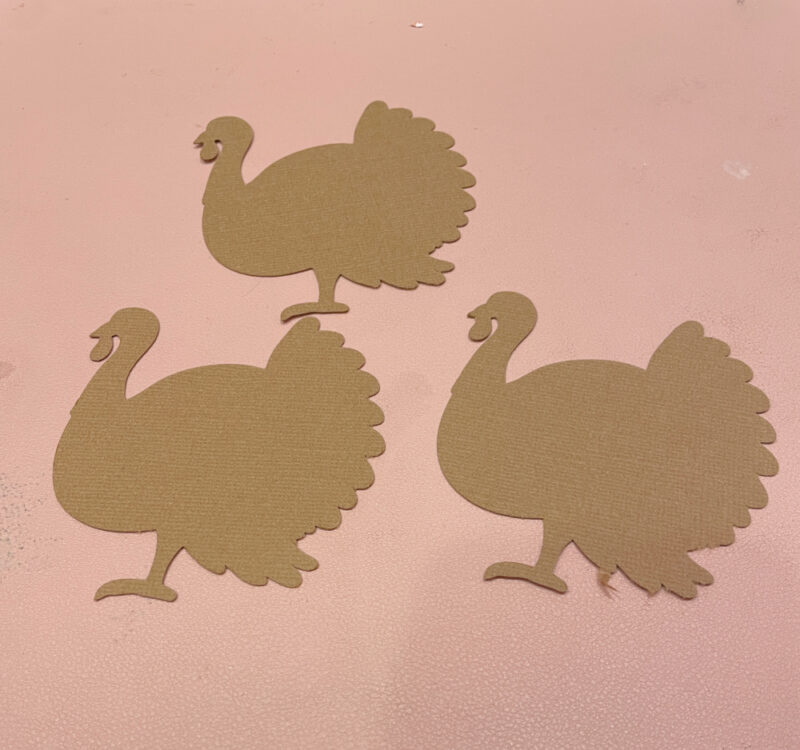
I wanted to use the sheets of brown cardstock that I found in my paper stash. I looked through Cricut Design Space and found several turkey designs.
I picked one and resized them to fit on the top of my decoupaged balls at 3 inches. I cut out 18 turkeys. I have an idea for the ones I didn’t use.

For a more detailed tutorial on using Cricut Design Space, see my post on making fall paper leaves.
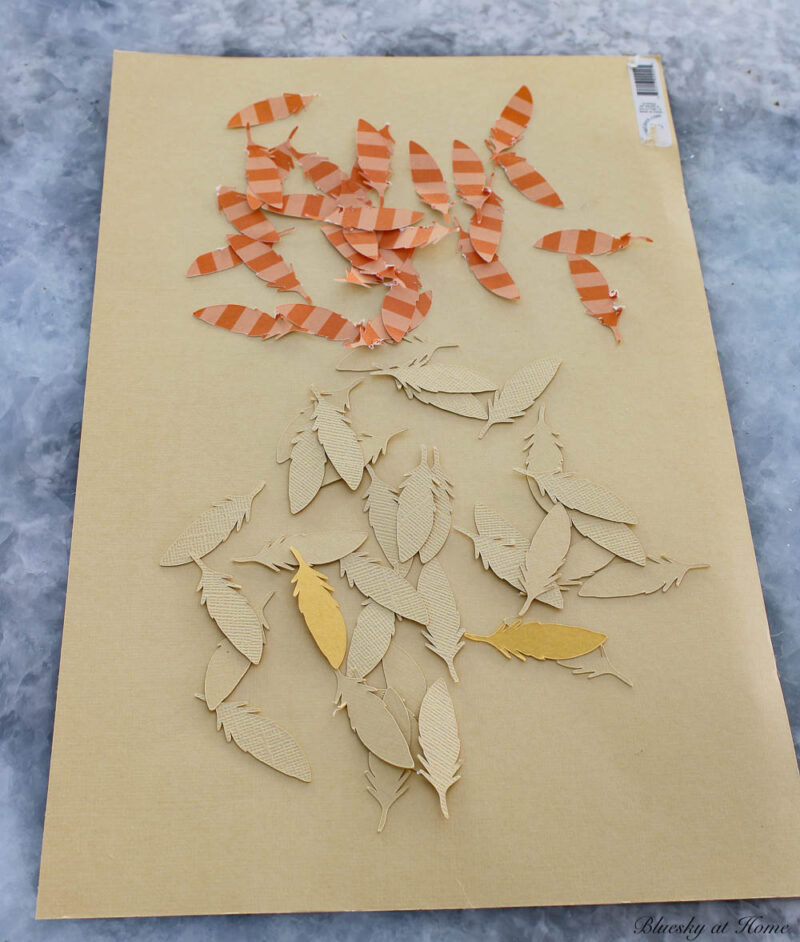
I decided the turkeys need some embellishments, so I looked up feathers and found a design I liked.
I cut out the feathers in two colors – one a cream and the other a pattern left over from the fall paper leaves project.
I used permanent adhesive to attach the feathers to the turkeys.
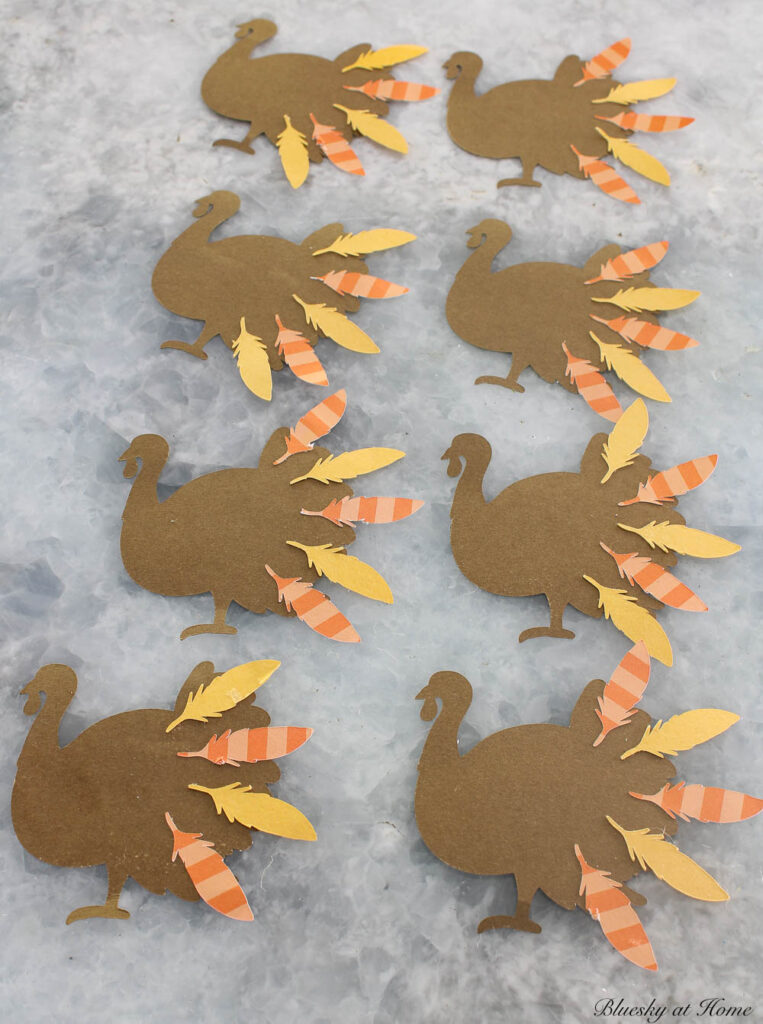
I gave the turkeys an eye with my orange Tombow pen.
I decided to wait until the end to attach the turkeys to the wreath.
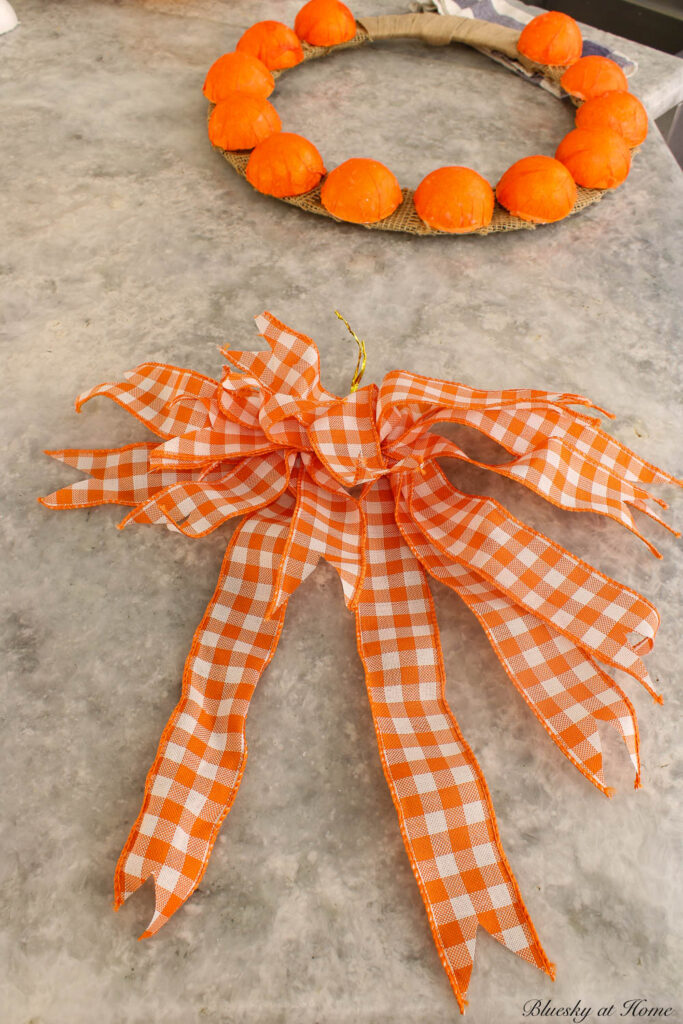
Step 5 – Make a Bow and Attach it to Your Wreath
To make my bow, I cut wired orange and white plaid ribbon in different lengths.

Using a long twist tie I found in a kitchen drawer, I attached the pieces of ribbon together and to the wreath.
Then I used a piece of thin ribbon to make a hanger for the wreath.
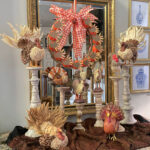
Step 4, Part 2 – Attach the Turkeys to the Wreath and Hang the Wreath
To attach the turkeys to the orange half-balls, I used permanent adhesive tape.
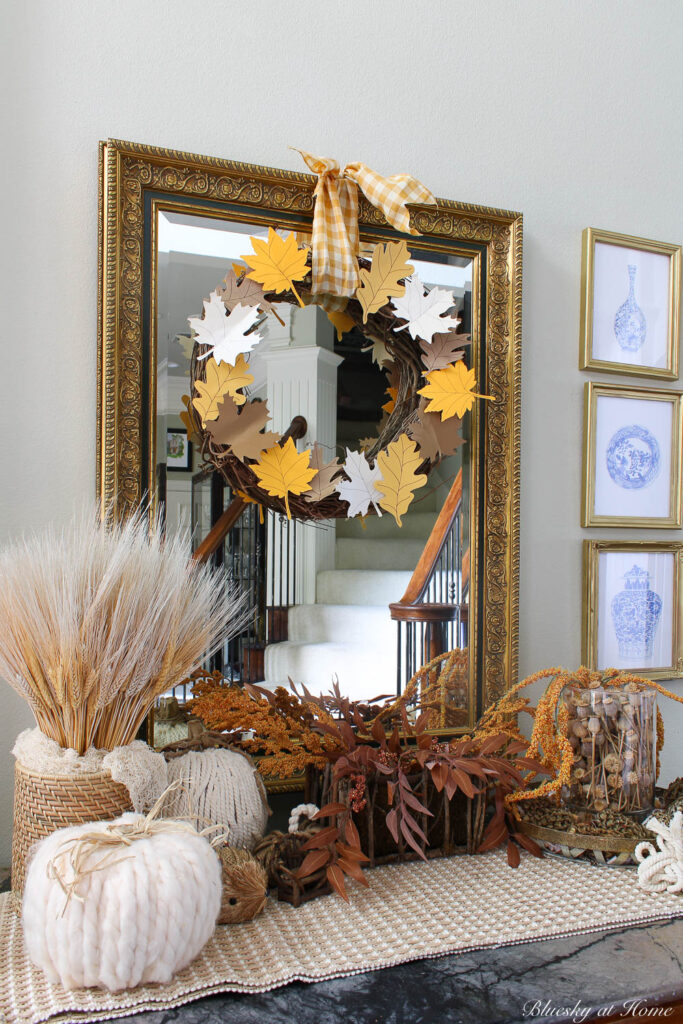
I hung it on the little nail in the top of our framed mirror.
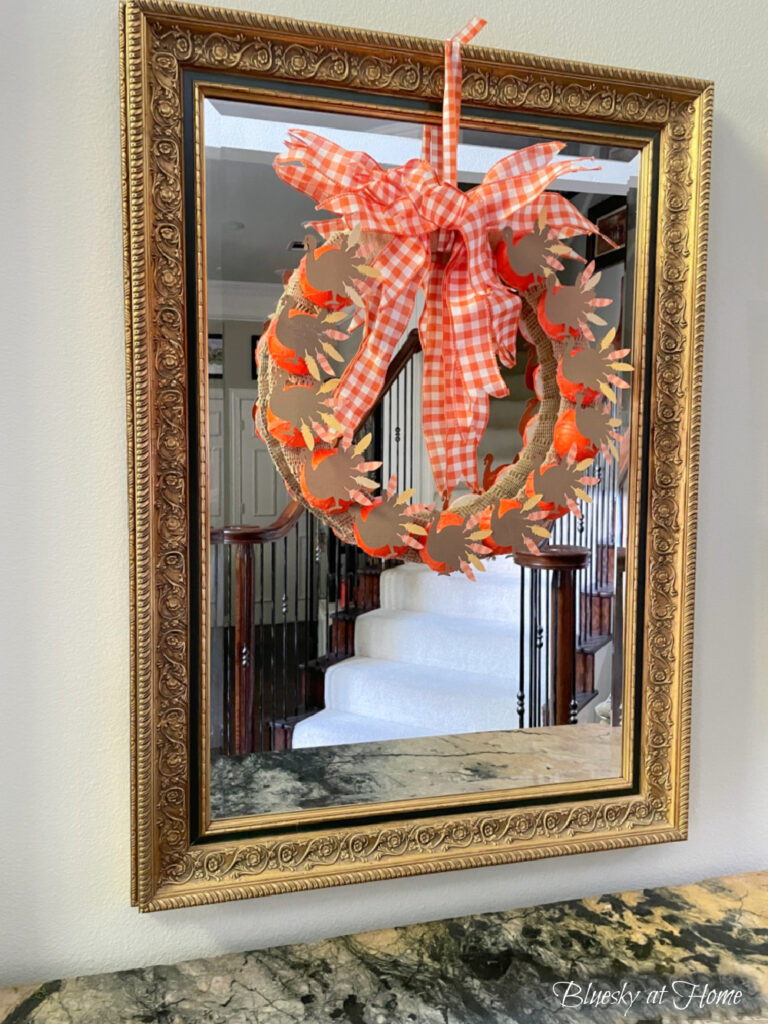
I wouldn’t recommend hanging this wreath outside. I knew that it would be the first thing to decorate our entry for Thanksgiving.

Although there are several steps to make this Thanksgiving wreath, each one is easy.
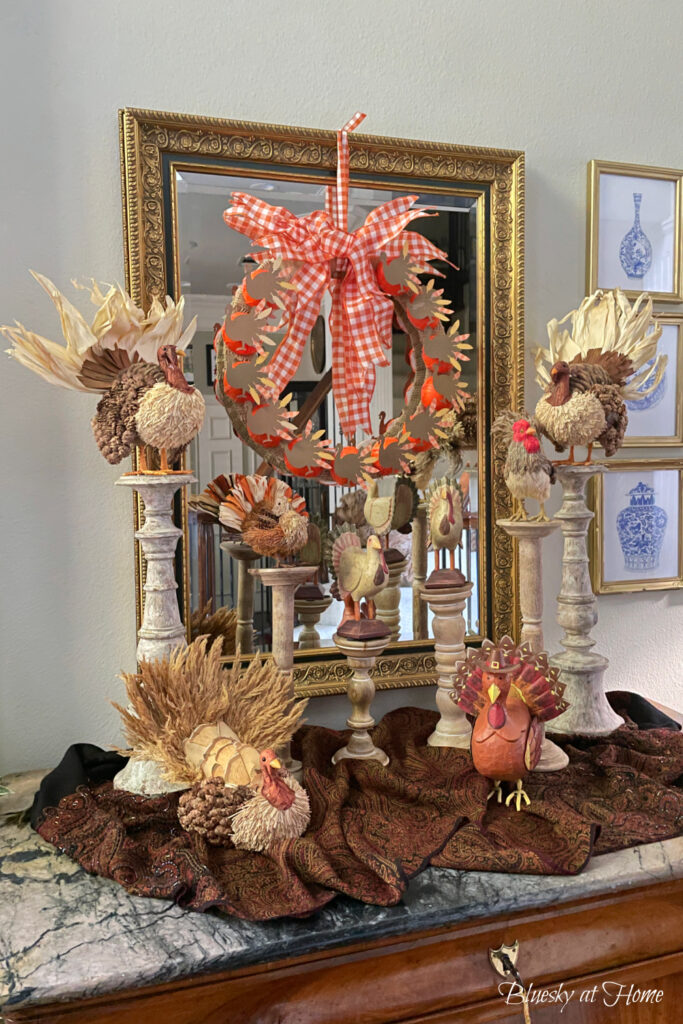
Next, I decorated the entry with more Thanksgiving decor. I brought in a fall colored shawls, wood candlesticks, and some of our turkey decorations.

What Changes I Would Make with the Thanksgiving Wreath?
I realized that the process of making the wreath could have been easier with a couple of adjustments.
- If I had known from the beginning that I was going to make turkeys instead of jack-o-lanterns, I would have used a flat piece of wood and painted it or left it natural.
- I would have decoupaged the styrofoam balls in the first step. Then I could have wrapped the wreath, made the turkeys, and the bow while the decoupage dried.
- I could have spray-painted the styrofoam balls which would have been faster.
I still loved making this Thanksgiving wreath. It was fun combining different crafts into one coherent end product.
I hope that you’ll PIN this 5-step Thanksgiving wreath. Or make it a Halloween wreath.
Now I hope that you will visit my crafty blogger friends and see what projects they have created. You can begin with Cecilia of My Thrift Store Addiction.


The Painted Apron – Winter Wine Glasses
Apple Street Cottage – Candy Corn With Pom Poms
Southern Sunflowers – Fall Wreath Using Fabric and Burlap
Bluesky at Home – 5 Easy Steps to Make a Thanksgiving Wreath
My Thrift Store Addiction – Wickedly Whimsical Salvaged Chandelier Centerpiece
Purple Hues and Me – Upcycled Plastic Cup Vase
Life as a Leo Wife – DIY Dollar Tree Halloween Candleholder
Birdz of a Feather – How to Make a Scrap Robot


Carol, your Thanksgiving wreath is so cute! I love the colorful feathers and your assortment of gathered turkeys. Blessings, Cecilia @ My Thrift Store Addiction
What an adorable Thanksgiving wreath! Little touches like the feathers really add personality. So cute and festive.
So cute! This would be a fun wreath to make with the kids for Thanksgiving. I like your idea for writing what you & your family is thankful for this year on the turkeys. It’s great hopping with you! Pinned.
How cute Carol! The turkeys are adorable, I love their feathers!! I also like the way you made the bow, I have to remember that, thank you. The orange checks are so happy and festive! Your tutorial was very thorough, thanks for the info and inspirations!
Your turkey wreath turned out really lovely, Carol! I’m sure your family and friends will love seeing it in your home! Happy Turkey Day!
Cute wreath for Thanksgiving, Carol. I love the colors!
Love how your Thanksgiving wreath turned out and the symbology behind it. So interesting that it turned into what was meant to be! Even better is how you constructed it so you can take it apart and re-use it. So smart!