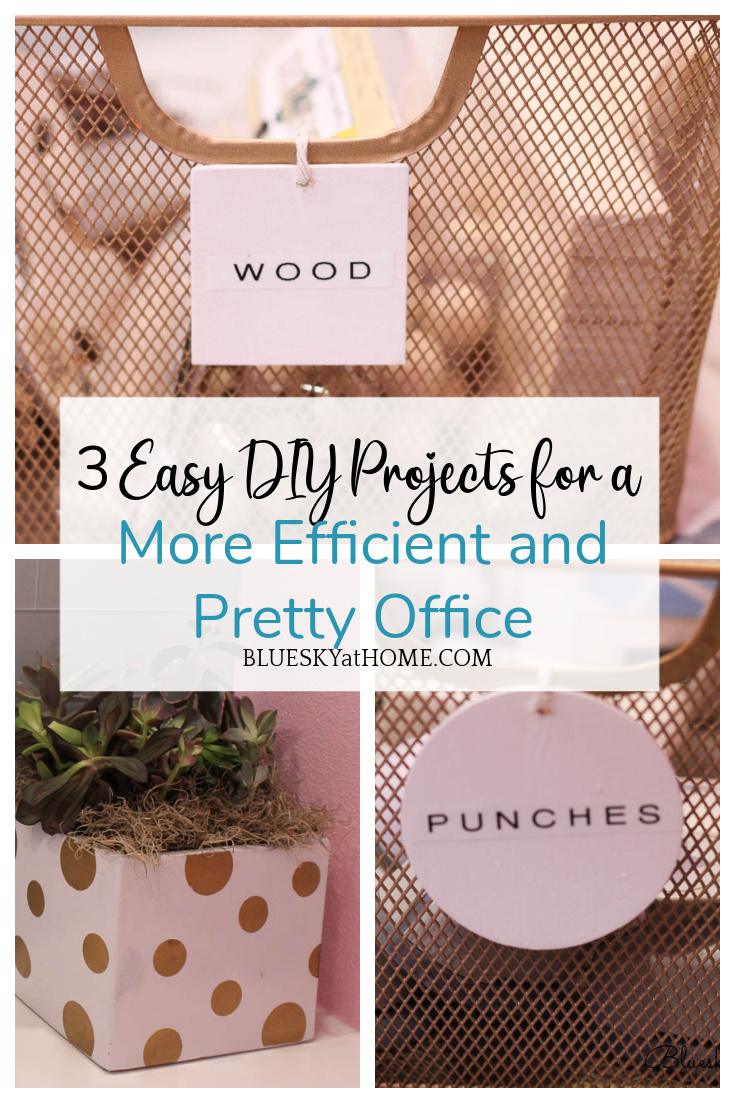
3 Easy DIY Projects for a More Efficient and Pretty Office
I recently purged and redid my file folders to get more available workspace in my very small office. I made 3 easy DIY projects that helped make the new and improved office more efficient and prettier.
Did you read my last post about my home office reorganization (the second one this year)? To get the improved office space I wanted, I made 3 easy DIY projects.
Regardless of the size of your office, storage is always top of the “I need this” office list.
- First, storage should look nice and make your office look really cool.
- Second, you want to label your storage so you know what’s in your drawer or basket.
- And finally, it’s always nice to add something pretty and green, a little organic addition to what is usually an all~business space. So, it comes down to stylish storage, cute labeling, something pretty and green.

I incorporated all of those elements by creating 3 easy DIY projects for my office. You can do these too. With just a few supplies. In a short amount of time. Like right now.
More Efficient and Pretty Office: 3 Easy DIY Projects
This post contains affiliate links to products used in this project. If you should order any product from this site, I may receive compensation, but you don’t may a penny more.
Do you have a few hours? You can create all 3 of these office projects in one morning of afternoon.
Painting Storage Baskets
Storage can be found in so many places:
- drawers
- bowls,
- baskets (wire, wood, wicker, canvas)
- shelves
- jars
- glasses
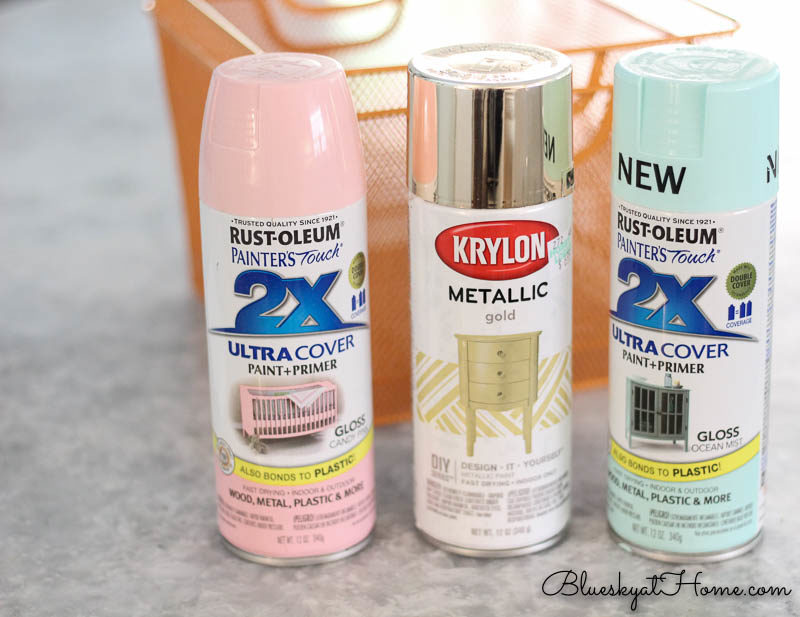
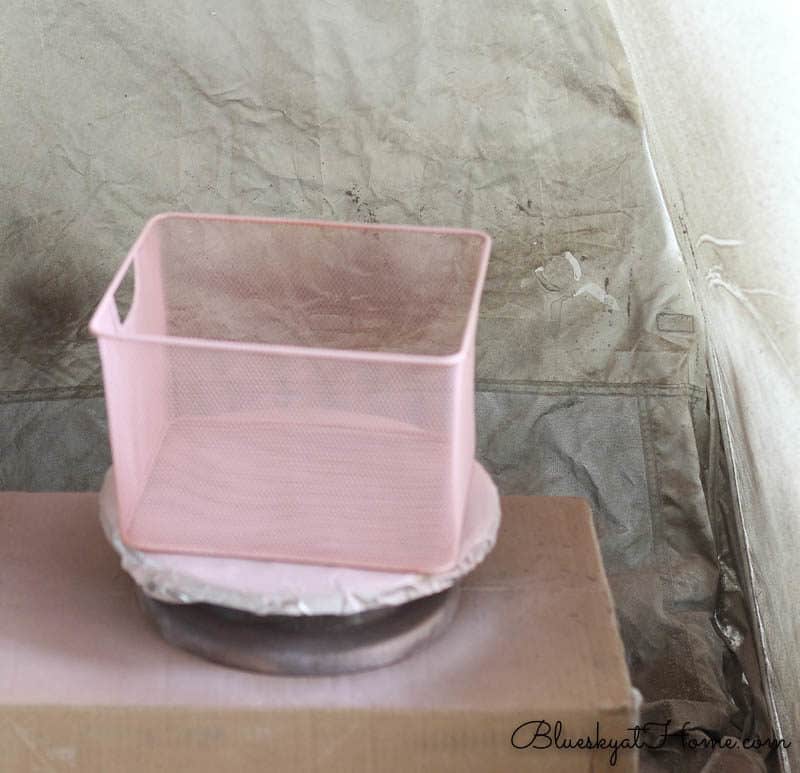
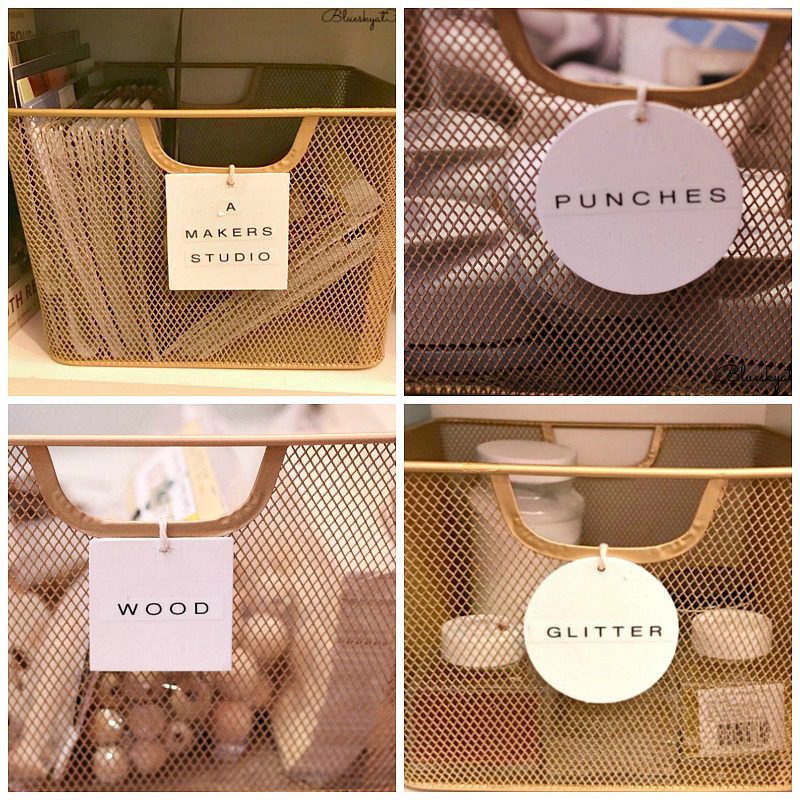
I had several DIY supplies that needed to be corralled and organized. For this latest office update, I found these cute wire baskets in the dollar section of Target. At $3 each, they were the perfect size for my office bookcase. It was either orange or green, which are not my ideal colors. But have no fear, like all good DIYers, I knew what to do.

I already had spray paint in 3 of my office colors: pink, blue, and gold.
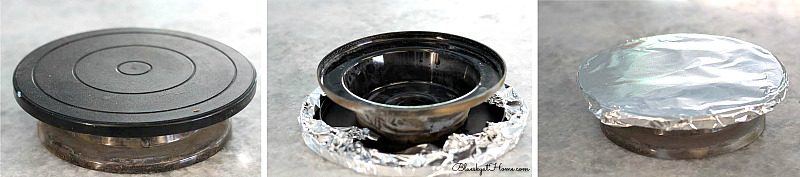
When you spray paint, do you have a problem rotating your subject to cover all sides, even inside and out? How do you move the piece around without getting paint on your fingers? I have a solution.
TIP: Use a TV turntable. I have an old turntable that I used for a small TV in the kitchen or our previous home. That little TV is now in our master bathroom and doesn’t need the turntable. If you have one, don’t throw it away or if you see one at a garage sale, grab it.
Because I don’t want to cover it in spray paint, I wrap it in aluminum foil. When you are done painting, you just throw away the foil. You are so welcome for that little tip.
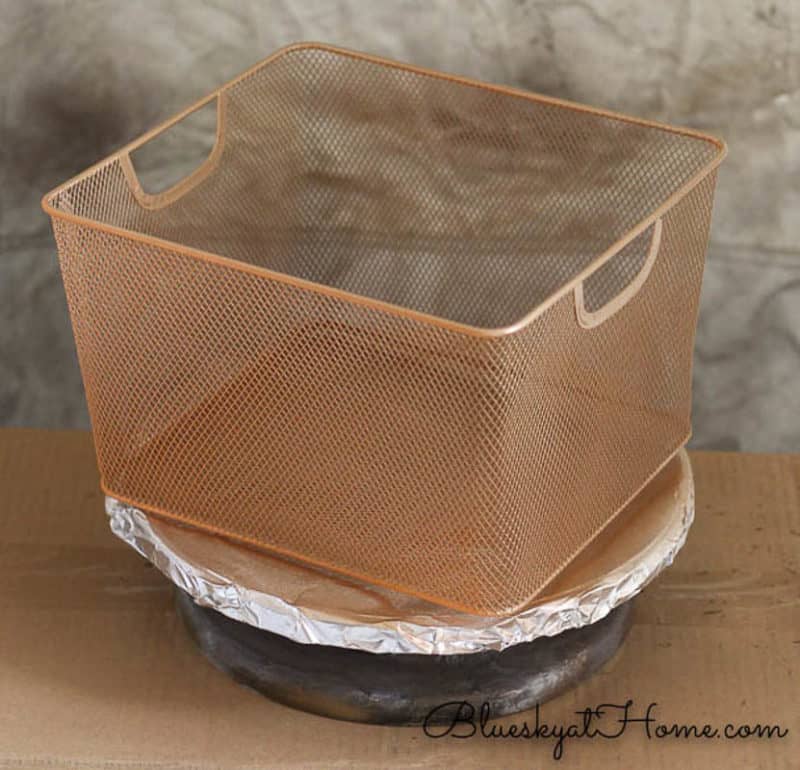
I set up my HomeRight Small Spray Shelter (now Wagner) in the garage. I found an empty packing box to use as a stand and placed the turntable on top and then on one of the wire baskets.
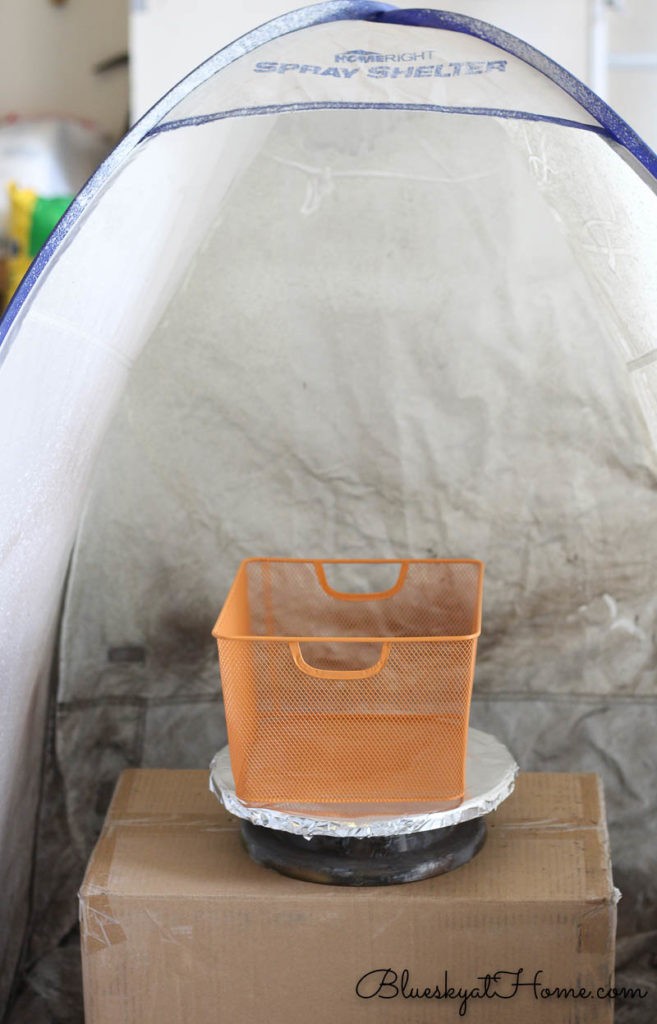
And started spraying. First blue.
Then pink. Each basket got 2 coats inside and out.
And finally gold.
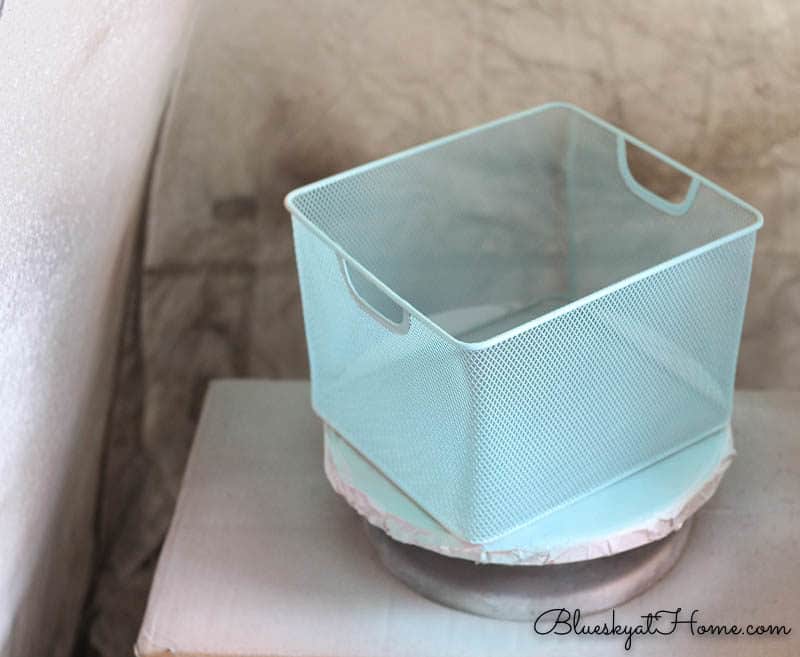
Pretty little baskets in a row.
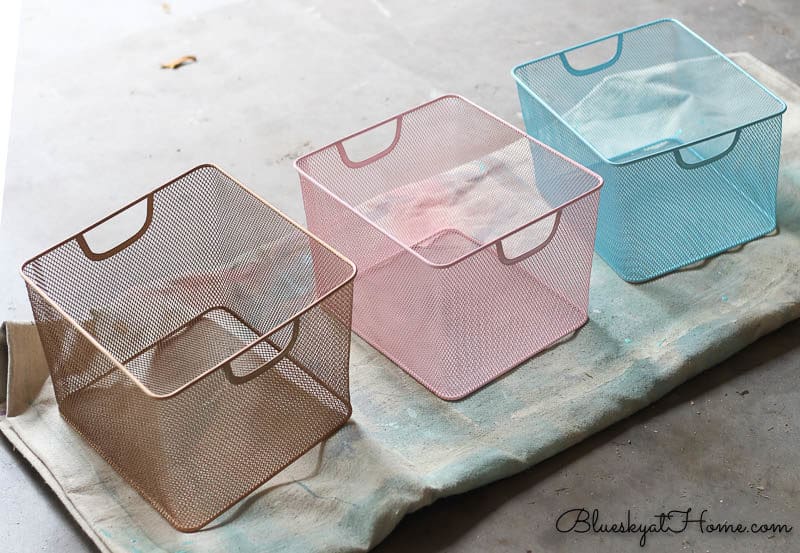
Now I had to decide which color to paint the 4th basket. I went with gold. And then I decided I wanted them all gold. Fortunately, I had enough gold spray paint to finish repainting the pink and blue baskets.
Cute DIY Labels for the Wire Baskets
Now that I had an additional 4 feet of workspace in my office, I set up a painting station by laying down my drop cloth.
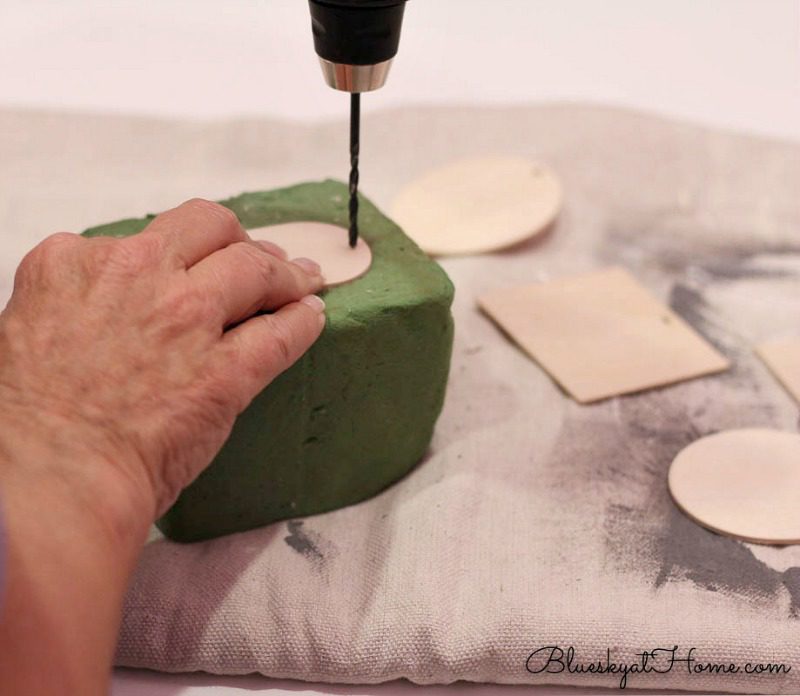
I was determined to make use of things I already had on hand to make labels for the baskets. I remembered these wood tags that were leftover from some earlier project. I had 5 shapes and I picked the 4 that were the largest, all about 2 ~ 2 1/2 inches wide. (I bought the wood tags in a package of different sizes and shapes at Joann.)
They had holes for attaching string or twine, but they were way too small.
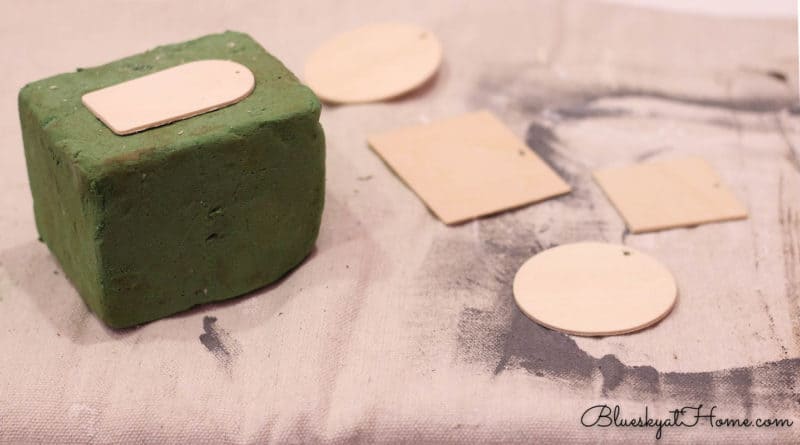
Another TIP: I used my electric drill to make bigger holes. The piece of florist foam was perfect to use as a base for drilling new holes.
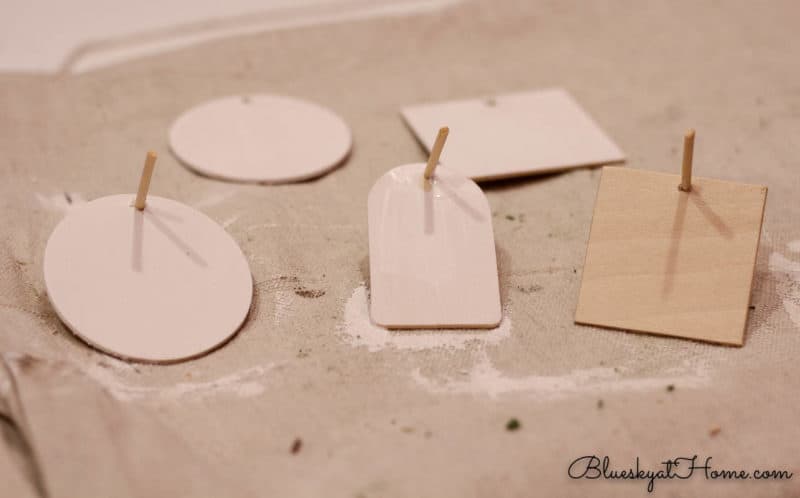
Now I could paint my wood tags ~ you could definitely leave them as raw wood. I had some Amy Howard One Step Paint in Bauhaus Buff, which is a pure, neutral white. I used a small 1~inch synthetic brush to paint the tags. To keep any paint from filling up the hole I drilled, I stuck a piece of a wooden skewer through the hole, which also held the tag off my drop cloth.
Just FYI, I painted my wood tags in between spray painting the wire baskets. While the baskets were drying, I painted tags.
After the tags were dry, I needed a way to label them. I didn’t want to free hand in case I messed up, so I once again used my label maker from The Container Store. Here is a very similar label maker.
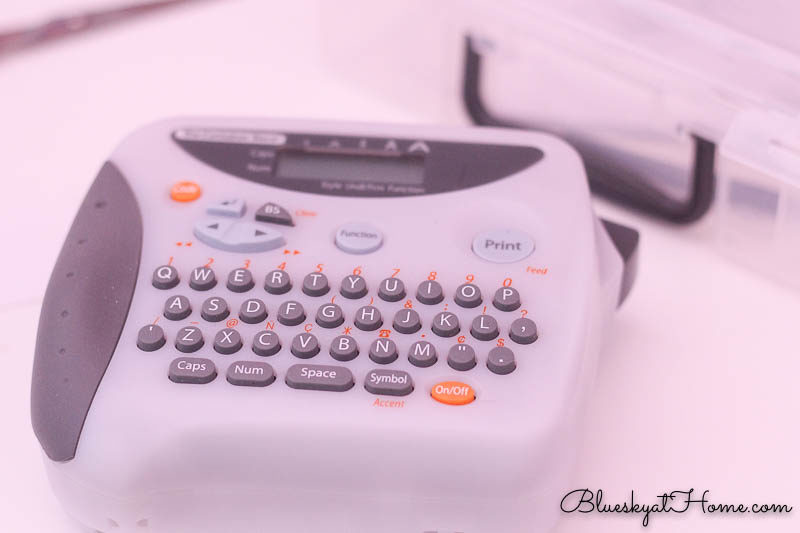
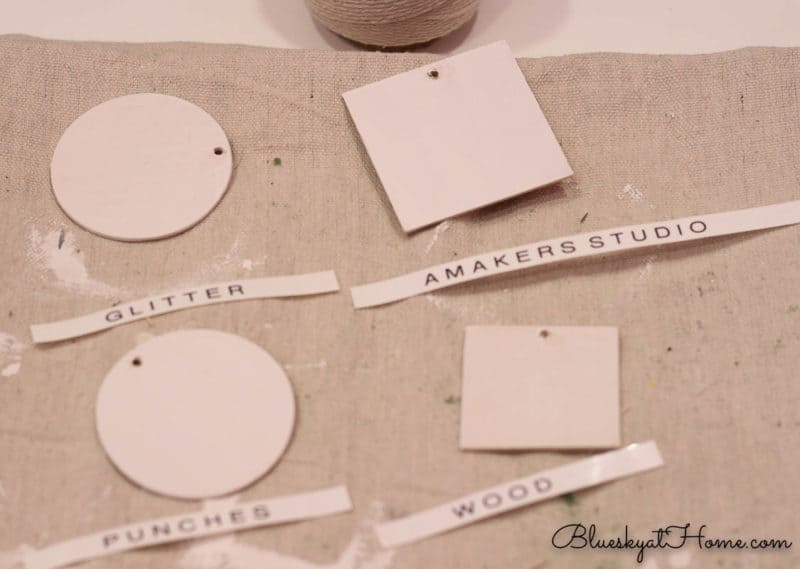
I entered a space between each letter to give the label a more farmhouse look. I used kitchen twine to attach the labels to the wire baskets. Super easy and keeps with the simple style of the wood tags.
Add A Little DIY Greenery to Your Office
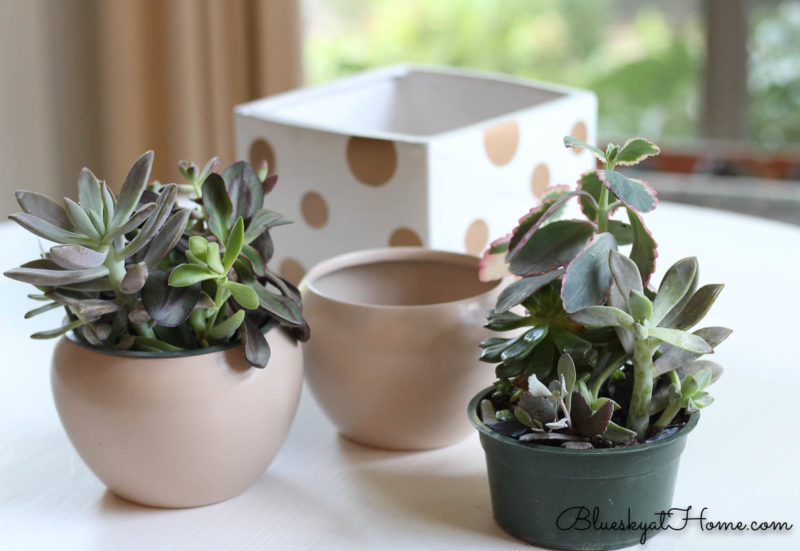
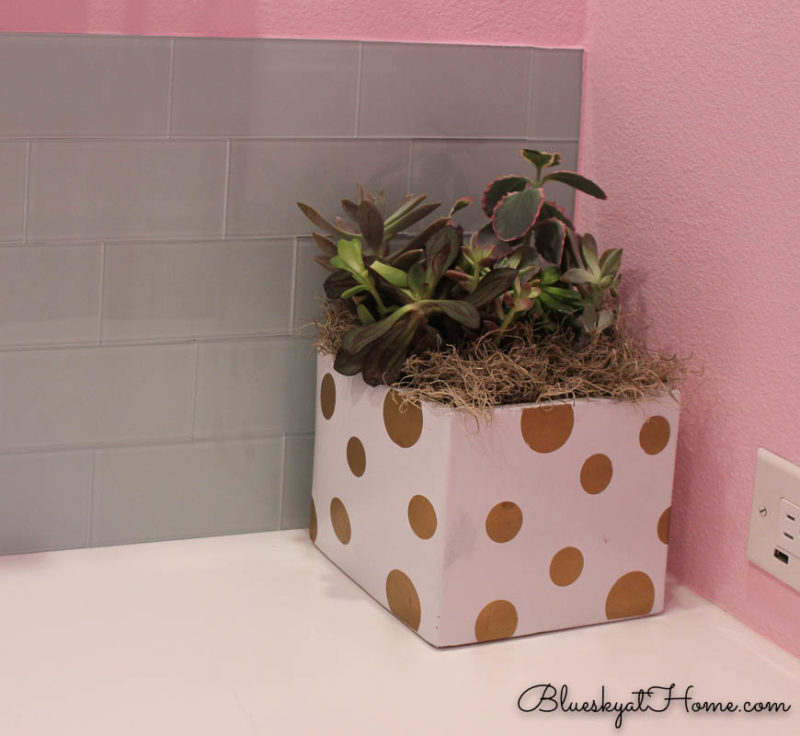
It’s so nice to have some greenery or something floral to your workspace. It doesn’t matter whether it’s real or faux, it’s the thought that counts. Until this most recent office reorganization, I didn’t have room to use the pretty gold polka~dot planter that I made when the office was first completed. Now I did.
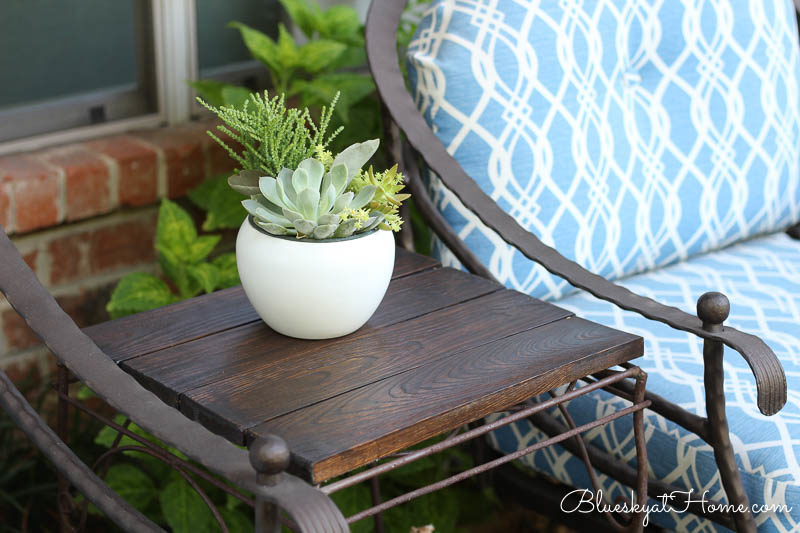
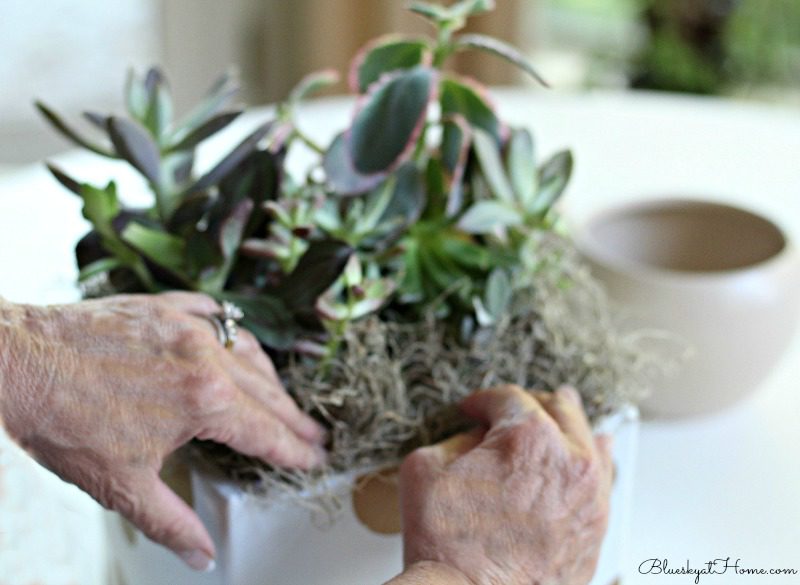
I decided I wanted a real plant, but one was very low maintenance. I thought succulents would be a good option, so I made a quick trip to Trader Joe’s. I bought 2 of the same succulents I used for our new outdoor patio table tops.
I took the plants out of the white outer container (I will save them for another project).
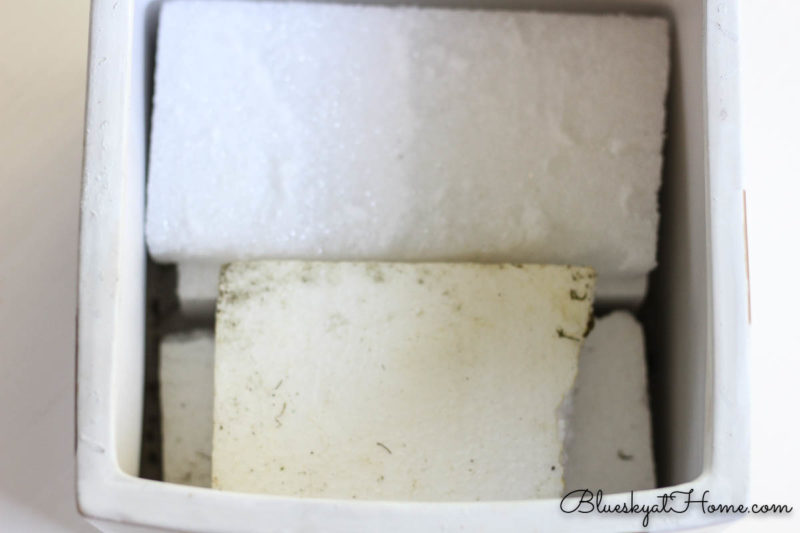
I used pieces of styrofoam (another good packing leftover to keep on hand) to fill in the bottom of the planter to raise the plants.
After fitting the 2 succulents in the planter, I used tissue paper to fill in the spaces around the plants. You can also use packing paper. This will support the moss used to finish off the planter.

I love to use either green moss or Spanish moss around plants for a professional look. I find that smaller pieces are easier to tuck in around the plant to cover the container and dirt.
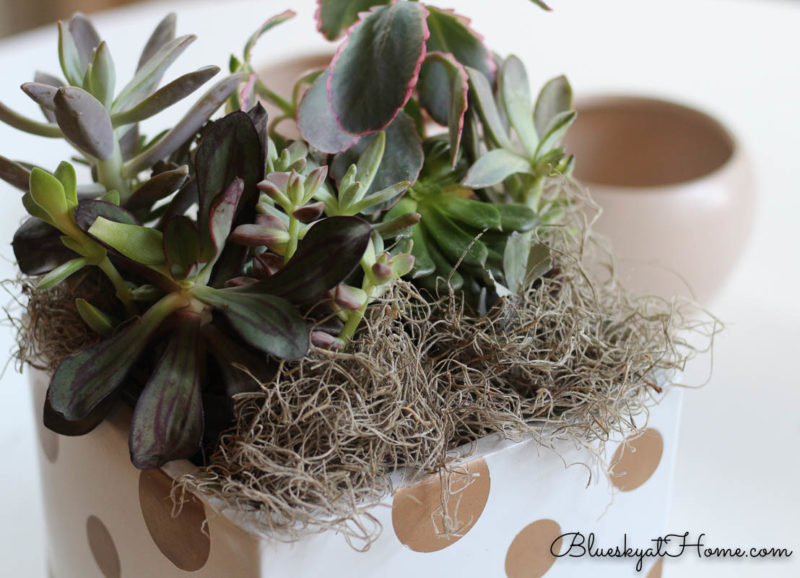
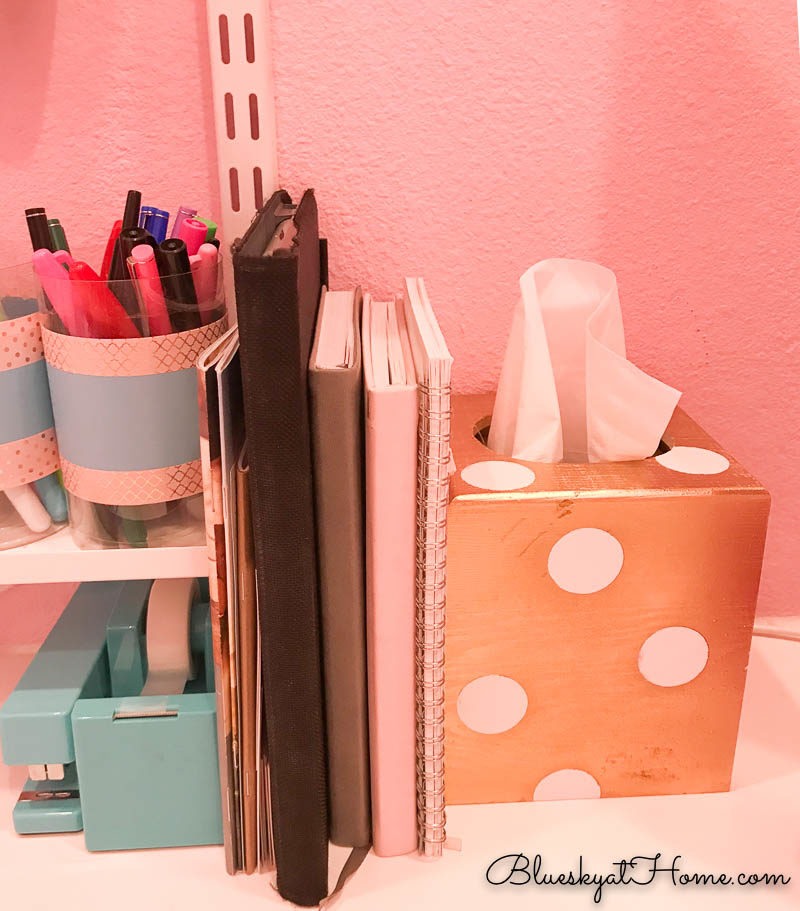
I love having some greenery in the office. The gold polka dots on the planter add to the gold wire baskets and my white polka dot and gold tissue box.
These new 3 DIY projects add to the pretty factor in my office, but the wood labels and gold wire baskets provide the extra storage that I needed.
I’m not quite done with the office. I have 2 more DIY projects to complete so check back later this week.


The baskets are adorable. I love the gold. Thanks for linking to Keep in Touch. I think I need to clean up my little craft closet. Thanks for linking to Keep in Touch.
Thanks, Katie. I thinking I’m switching my alliegence from silver to gold!
All great ideas, Carol! I’ve organized and reorganized my studio many times over the years, the only problem is keeping it looking nice! Now if only someone would come up with a pill for that LOL Thanks for sharing at Vintage Charm! xo Kathleen|Our Hopeful Home
I love how pretty those baskets are after being spray painted!
Beauty and function!
Thank you Kippi, gold is so much better than orange!!
Love the turntable trick!
It was by a happy accident that I decided to use it.
Great ideas, Carol. The turntable is a good one. I usually just spray what I can and wait for it to dry, then turn the item and go again.
Buy one at Target or Best Buy. Not expensive at all and so useful.
You are SO clever. Thanks for sharing these tips. I love your home office!
Cheryl
Clever!! Thanks Cheryl.
Turn table tip,pure and simple genius
I use the foam to prop up my plants
Lots of good tips. Thank you
Gail, thanks for the feedback. You have made my day.