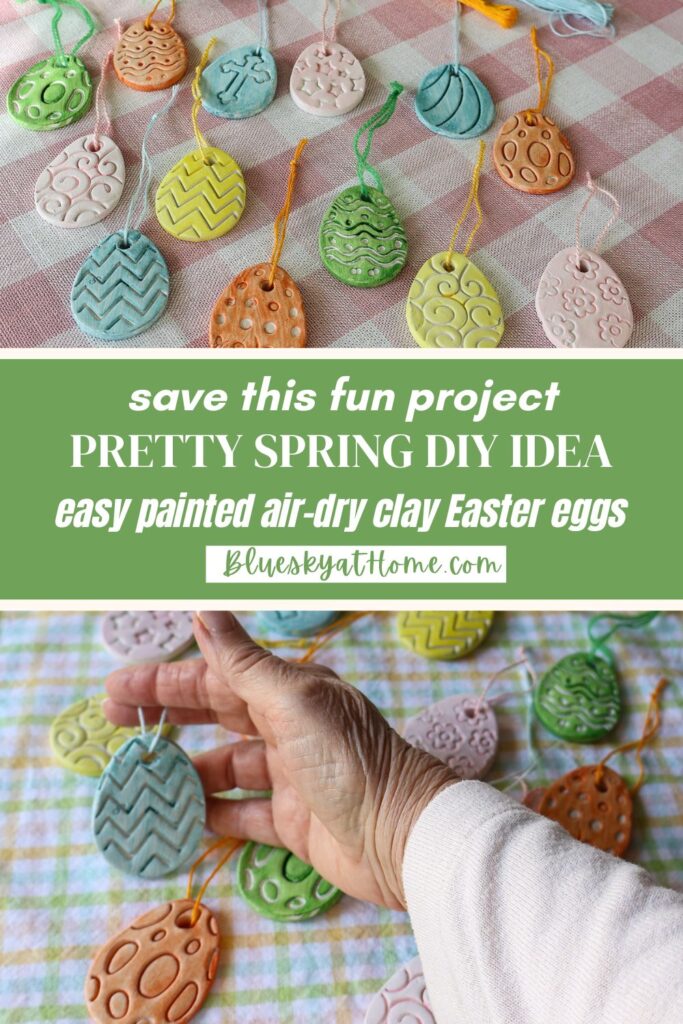
How to Make the Prettiest DIY Air-Dry Clay Easter Eggs
Are you so happy it’s almost spring? And then there is Easter. Would you like a sweet little project that you can make now and use into Easter? Here is how to make the prettiest DIY air-dry clay Easter eggs.
Easter eggs are one of the most iconic symbols of spring and Easter. They reflect renewal and birth.
As a decoration, Easter eggs can be 3-dimensional and flat. They can be made of different materials. They can be any size and any color you desire.
I love spring colors, both in pastels and brights. They are the happiest colors in the world. They reflect the colors of nature this time of year.
I’ve used both pastels and bright versions of pink, blue, green, yellow, even orange and purple. For this project, I used soft, pale, barely there pastels.
These Easter eggs are so cute and easy to make. They aren’t expensive at all.
Best of all, you can use them in several ways for spring and Easter decorating.

It’s Creative Craft time. Crafty creators are sharing ideas for you to make. Thanks to our hostess, Sara of Birdz of a Feather.
If you are joining me from Terri of Decorate with Tip and More? I’m happy you are here at Bluesky at Home.
This post contains affiliate links to products used to create this project. If you should order any item from this site, I may receive compensation, but you do not pay a penny more. Your purchase is greatly appreciated as it helps support the continued publication of this site.
Inspiration for This Easter Egg Project
My younger granddaughter’s birthday is April 8th. It’s always during spring break – lucky for her. She will be eleven. She’s a straight A student and a fabulous softball player who plays rec ball and select.
She also loves to bake. Last year I gave her a requested cookbook and a monogrammed apron.
This is her several years ago making cupcakes at my house for 4th of July. Isn’t she the cutest? (Enough bragging for now.)
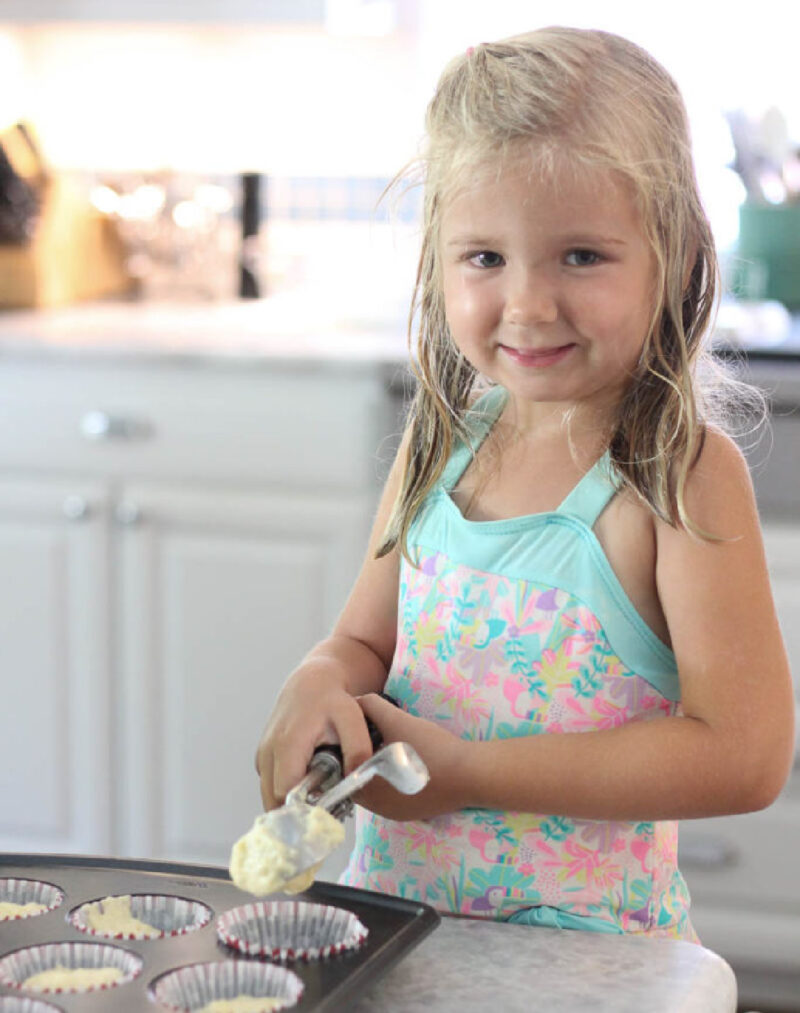
O.K., back to what inspired this Easter egg project. Lilah requested another cookbook this year. I wanted some more baking tools to go with it. So I started browsing and found a set of the cutest cookie cutters with a egg mold and 10 adorable Easter egg stamps.
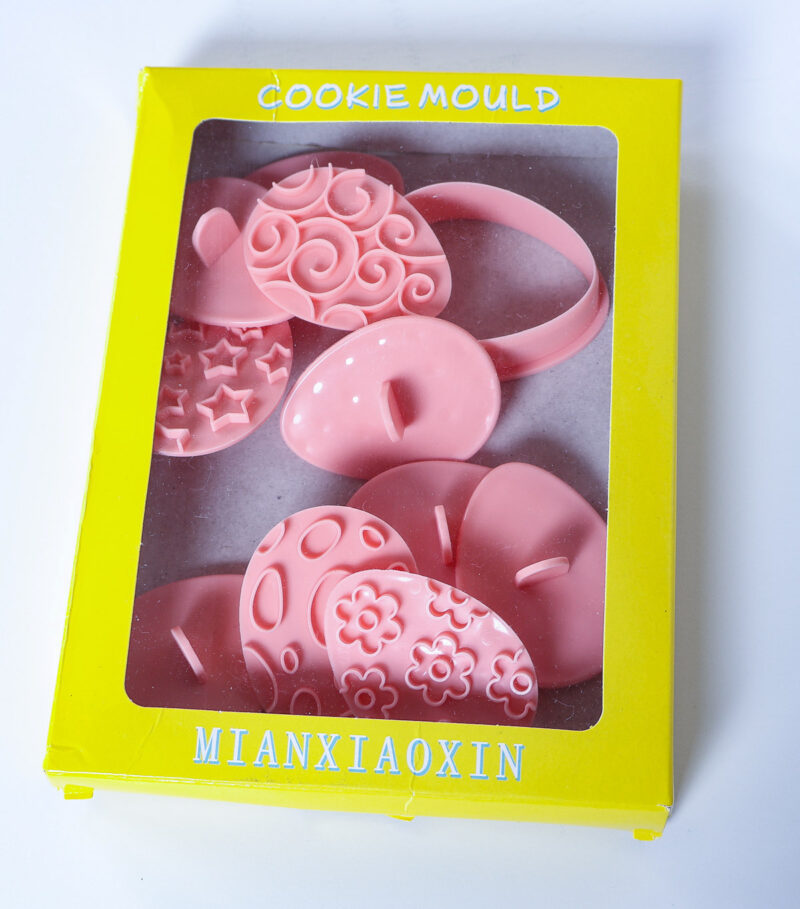
I knew Lilah would love them (and keep her busy one day during spring break). I see a big batch of decorated sugar cookies.
Lilah may use her cookie cutters to make cookies, but I saw them as air-dry clay Easter eggs for decorations.
I immediately bought a set for myself. They worked perfectly and now I’ll show you how easy it is to make air-dry clay Easter eggs.
Then I looked at a few ways to decorate Easter eggs online. I like mine best.
And guess what? You can still use them to make cookies!
Supplies for Your Decorated Air-Dry Clay Easter Eggs
I’ve become addicted to making accessories with air-dry clay. You only need a few supplies to make the eggs:
- air-dry clay – Das is my clay of choice. No oven required. It will last as long was you keep it securely covered in the original wrapping, plastic wrap, a zip-lock bag or foil.

- plastic cutting board – for your work surface and to move your clay around, if necessary. I’ve used the thin type before, but for clay projects. For this project, I tried an old white plastic board. It’s sturdier and can easily be cleaned afterwards.
- a roller of some sort – I tried a rolling pin, but I prefer to use a slim glass bottle. It’s easy to handle and easy to clean.
- sharp craft knife – for cutting off pieces of clay. I love this one.

- cookie cutters of choice – this plastic egg mold comes with 10 different stamp designs.

- chopstick or pencil – for adding a hole to the top of the Easter egg
- sand paper – 220 grit – for smoothing any rough edges. I really like this type of sander.
- a cooling rack – don’t laugh. I’ll show how this baking tool helps your project.
- paint of choice – any acrylic or metallic paint will do. I’ve used these metallic paints and loved them. For this project, I used Art Gel Ink from A Makers’ Studio because I had five pastel colors on hand. This paint is so versatile and covers beautifully.

Steps to Making Your Air-Dry Clay Easter Eggs
Step 1 – Preparing the Clay
Open your package of clay. Mine had been used and was in a zip lock bag.
Pull the wrapping away from the clay. Using the craft knife, cut a 1 – 2-inch piece off the block of clay.

You may have to cut that piece in half. Roll the clay into a ball with the palms of your hands. This makes the clay warm and easier to roll out.
TIP: If you have ever made homemade biscuits, it’s exactly that motion.
I like to wear plastic gloves to keep my hands clean.

Step 2 – Rolling Out the Clay
Flatten the ball of clay with the palm of your hands, one on top of the other.
WIth your rolling pin or glass jar, begin to roll out the clay. It’s just like rolling out pie dough or cookie dough.

You can roll the clay into a circle or a rectangle, whichever you prefer for the shape of the cookie cutter. For this project, I rolled the clay into a circle. The clay should be between 1/8 to 1/4 inch thick.

Step 3 – Using the Egg Mold to Cut Out Eggs and Make the Designs
First, place your egg mold on the clay. I start at an edge where I can get as many eggs as possible on the piece of clay. I started with a small piece of clay to “test” this cookie cutter.
Press down on the egg mold until you know it has gone through the clay. Lift up the mold and remove it from the clay.


TIP: Just like cutting out biscuits, don’t wiggle the mold. You want as clean a cut as possible.
As soon as you have cut the piece of clay into eggs, remove the excess clay from around the eggs.
Reroll the excess clay into a ball and place it in the zip lock bag.
Next, quickly take a stamp and press it firmly and evenly into the clay egg, just enough to imprint the design on the clay.

Remove the stamp from the egg.

Now, take your chopstick or pencil and make a hole at the top of the egg.


Place the eggs – you can pick them up with your hands or use a metal spatula – on the cooling rack.
WHY THE COOLING RACK? I’m not sure if I read this or it came to me in a dream: One of the things that takes the longest with using air-dry clay is the dry time. I’ve waited at least 24 hours, but usually it’s 36 – 48 hours to make sure the clay is completely dry.
I’ve seen people use a hairy dryer, but I wanted something easier. Just like we place cookies on a cooling rack to cool faster, what if placing the air-dry clay on a cooling rack would make the clay dry faster? I wanted to try it.
Repeat these steps until you have made all the eggs you want. You will need to cut off more clay from the block. Reuse the excess clay by rerolling it as many times as you can to get get more eggs.


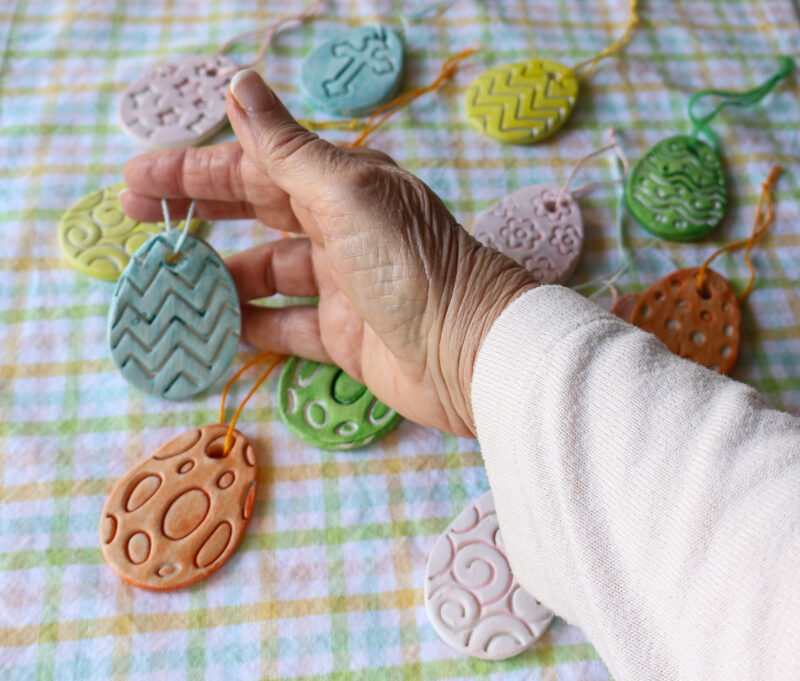
I ended up with 13 eggs – a baker’s dozen! All the eggs will fit on the cooling rack.

Step 4 – Drying the Eggs
There is really nothing to do here, but wait. It’s like waiting for a hen to lay her eggs. Haha!
I set the cooling rack on the kitchen counter, out of the way. I finished these at 11:30 in the morning. Because I wanted to see if the cooling rack made a difference in drying time, I check them every few hours to see if the top was dry and it was time to turn them over.

About 4 o’clock, I checked and the tops were completely dry! Usually, it takes until bedtime before that happens. I turned the eggs over to dry the bottoms. This time, the clay was completely dry on the bottom by bedtime, about 10:00. That cut off about 6 hours of drying time.
It was too late start the next phase of the process, but I know I could start first thing in the morning.
TEST RESULTS: Using the cooling rack definitely speeds up the drying process.
Step 5 – Sanding the Clay Eggs
You will always have edges that need to be smoothed down. I place a piece of wax paper on my work surface to collect the dust.
The clay is soft and easily sanded. Using a 220-grit piece of sandpaper, sand the edges of the eggs.


Then, wipe the eggs to remove the dust with a cloth. I like to use a piece of flour sack towel.

Gather up the wax paper with the dust and throw it away.

Place a new piece on the work surface for the next step of the project.
Painting the Clay Easter Eggs
This is the fun part.
Here are the 5 colors plus white that I chose in Art Gel Ink from A Makers’ Studio:
- Pale Pink – Pretty as a Picture
- Yellow – Over Yonder
- Blue – Hey Y’all
- Orange – Lord Have Mercy
- Green – Grass is Always Greener
- White – Well I Declare
I wanted a soft, barely there, almost translucent look to the paint. I wanted to make sure that the designs showed through.
Except for the pale pink, I thought would have to mix the colors with white to lighten them. Fortunately, I found an easier way.
I found that if I moistened my foam brush with a little water, the paint color was very sheer, just the look I wanted. I painted the back of the eggs first.

TIP: Wear plastic gloves to keep your hands clean.

It didn’t take the paint long to dry. I turned the eggs over and painted the top side.

Final Step to Making the Easter Eggs
I have several ways to use these air-dry clay eggs that I will share in a later post. For now, the eggs will need a way to hang. That’s what the hole you made at the top is for.
You can use jute twine, colored kitchen twine, or skinny ribbon to hang your eggs. You can use one color or mix the colors to match the color of the eggs.

I wanted colors to match the eggs. The only material I had on hand was embroidery thread. Fortunately, I had just the right colors – pink, blue, yellow, green, and orange – to use with the eggs.

I cut about 10 inches of thread and cut 13 lengths to match the eggs. I used a simple loop knot to secure the embroidery thread.

That completed these pretty air-dry clay Easter eggs. My next step is to use them in several decorative ways.
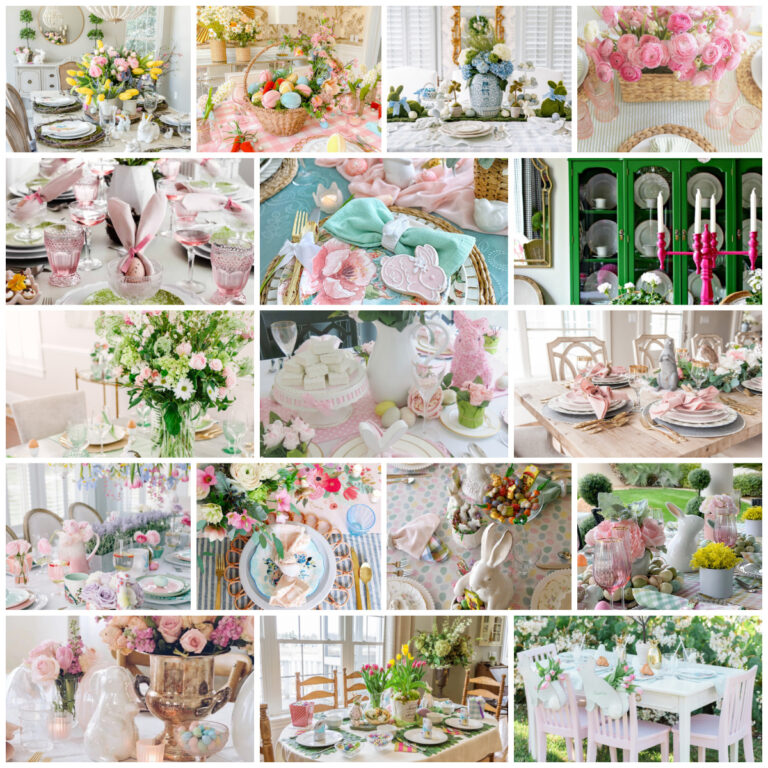
Want to see some fun ways to use these Easter eggs in your spring and Easter decor? Here are 5 ways to use air-dry clay Easter eggs in your home. Need a variety of Easter DIY projects? You can’t go wrong with one of these adorable crafts.
Here are more projects using air-dry clay so you can see how versatile this material is:
For even more inspiration, check out and follow these Pinterest Boards: Air-Dry Clay Projects, Spring DIY Projects, and Easter DIY Projects.
Ready to see what projects my blogger friends have to share? Start with my Texas friend, Cecilia of My Thrift Store Addiction.


Thrift Store Addiction – Egg-cellent Rustic Easter Garland Wreath
Patina and Paint – Dress Up Flocked Bunnies
Tea and Forget-Me-Nots – Pretty Paper Easter Egg Craft with Free Template
Purple Hues and Me – Decorative Foam Noodle Crystal Vase
Modern on Monticello –DIY Bunny Crafts With Dollar Tree Mini Foam Bunnies
Birdz of a Feather – DIY Felt Craft
Decorate and More with Tip – How To Make An Easy Spring Throw
Bluesky at Home – How to Make the Prettiest DIY Air-Dry Clay Easter Eggs


These are so pretty and look fun to make. Featuring when my link party opens. Happy Spring!
Thank you so much! I really appreciate it.
How cute, featuring you at Wednesdays in the Studio!
Thank you so much, Jennifer. I made a 2nd batch because I loved them so much.
Such a FUN way to make Easter eggs, Carol! And so very colorful! Thanks for sharing! Creatively, Beth
Thank you, Beth. They were fun and very easy to make. I made another batch so I would have more to use in decorating.
I love this idea. Might have to make some myself to hang in the trees in my garden
Natasha, thank you so much for your nice comment. I hadn’t thought of using them outdoors. Be careful if it rains!
These are so pretty, Carol and it looks like you had a cute little helper, too! Blessings, Cecilia @ My Thrift Store Addiction
Thanks so much, Cecilia.
Thanks, Cecilia. It’s a fun and easy project for spring and Easter decorating.
These are just precious. And a great keepsake to bring out each year for a Easter tree. Pinned and thanks for the idea.
Thank so Donna. Another fun and easy project for springtime.
You are so welcome, Donna. I already made a second batch for more Easter decorating.
Carol those are gorgeous. They would be great on an Easter tree, as a gift tag or even an embellishment on a gift. What a fun project. Thank you so much for sharing.
Using cookie cutters is such a great way to easily make pretty designs. I can imagine these as little gift tags Thanks for sharing, Carol.
Love these, Carol! What an unusual but pretty way to make clay Easter eggs! You certainly had your thinking cap on when you saw and bought the cookie cutter egg molds and stamps! Your clay eggs are very unique and colorful! A fun way to decorate for Easter!
Your craft is adorable Carol. I have our grand daughter today and this will be a fun craft to do with her. Thanks for sharing.