How to Make an Easy Valentine’s Day Wreath
Wreaths are iconic holiday decorations. Why not make one for the Valentine’s season? Let me show you how to make an easy Valentine’s Day wreath for your home.
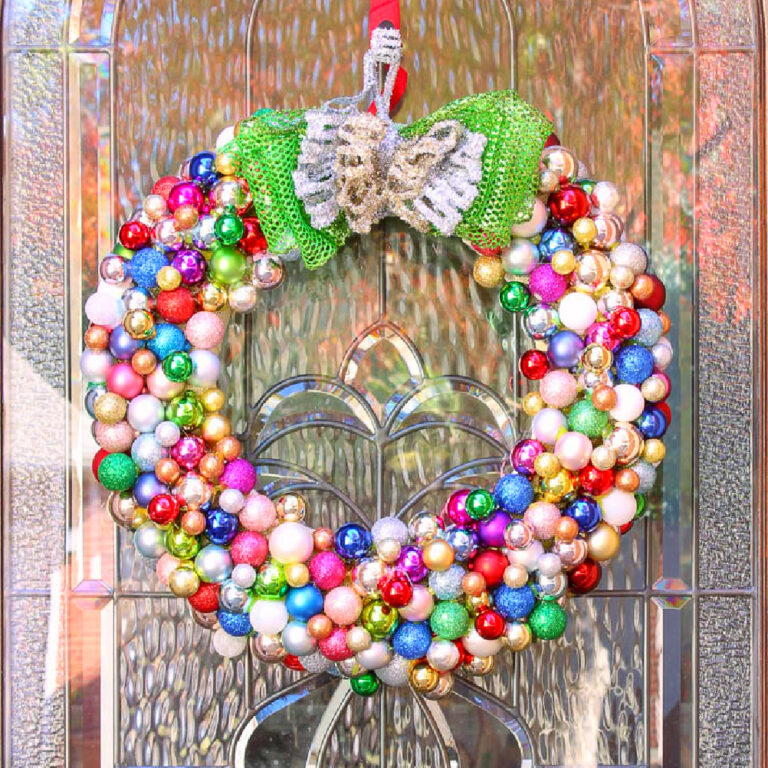
This Valentine’s wreath is the perfect “pretty in pink” Valentine’s Day decoration.
It’s soft, feminine, and definitely girly.
This DIY wreath doesn’t use a heart shape, but there is no doubt it is a Valentine decoration. In fact, I think it’s the perfect Valentine’s Day craft.
If you love Valentine’s Day decorations, DIY projects, and pink, you’ll love making your own DIY Valentine wreath.

This post contains affiliate links to products used to create this project. If you should order any item from this site, I may receive compensation, but you do not pay a penny more. Your purchase is greatly appreciated as it helps support the continued publication of this site.
Supplies for a Valentine’s Day Wreath with Ribbon and Rabbit Tail Grass
There are so many different ideas for making a Valentine’s Day wreath. This type of wreath requires just a few supplies.
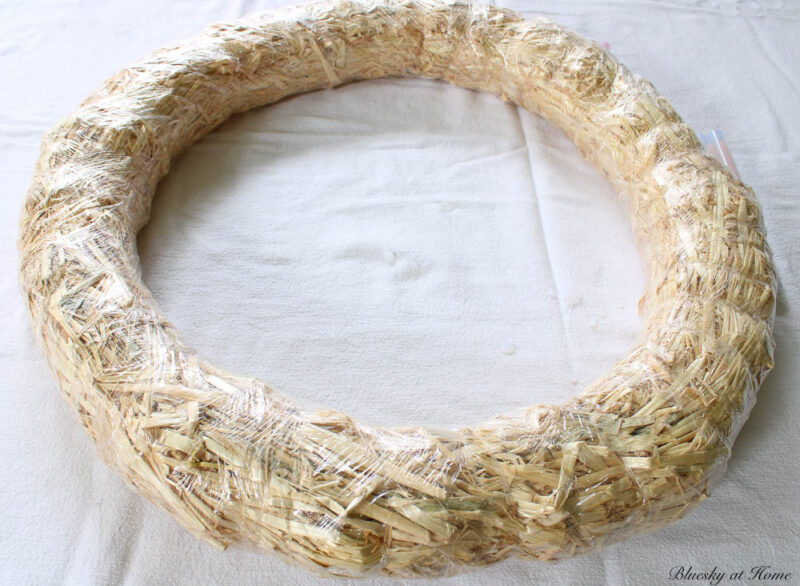
- wreath form – I used an 18-inch straw wreath because that is what I had on hand. (You could also use a styrofoam round wreath or a styrofoam heart-shaped wreath form.)
- pink rabbit tail grass – more about that in a minute.

- pink satin ribbon – I used the prettiest shade of 3-inch wide satin ribbon.

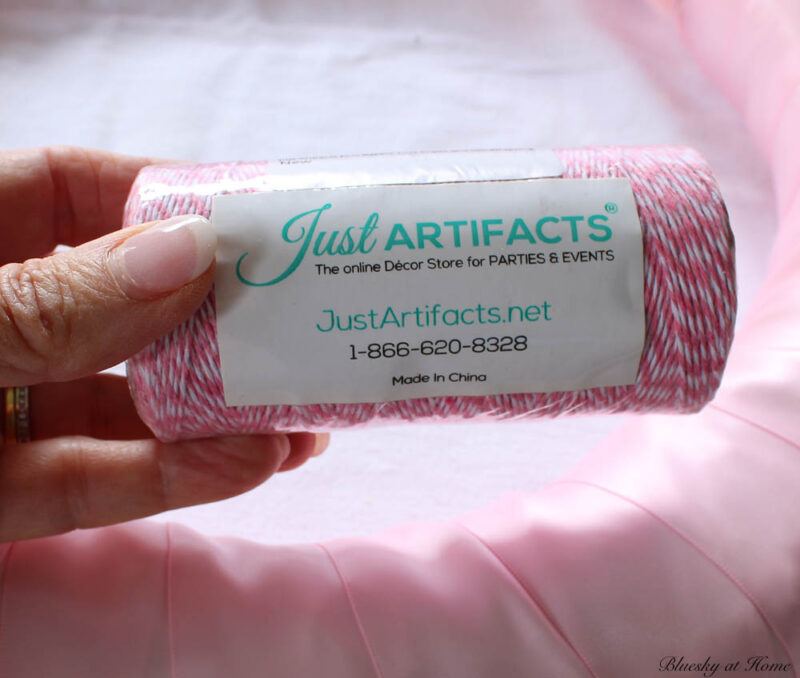
- baker’s twine – I used this pink and white twine.
- scissors – one for cutting the ribbon
- clippers – for cutting the rabbit tail grass stems
- optional – faux flowers
To make your own wreath, you could use a different shade of pink ribbon or even red ribbon. If you use red ribbon, I would order the rabbit tail grass in white.


Covering the Wreath Form
The first step to making this cute wreath is to cover it with your ribbon. Whether your form is straw or styrofoam, the pretty ribbon provides a base and adds color to the wreath.
TIP: If you are using a straw wreath, don’t remove the plastic covering. It keeps the straw in place and prevents a mess.
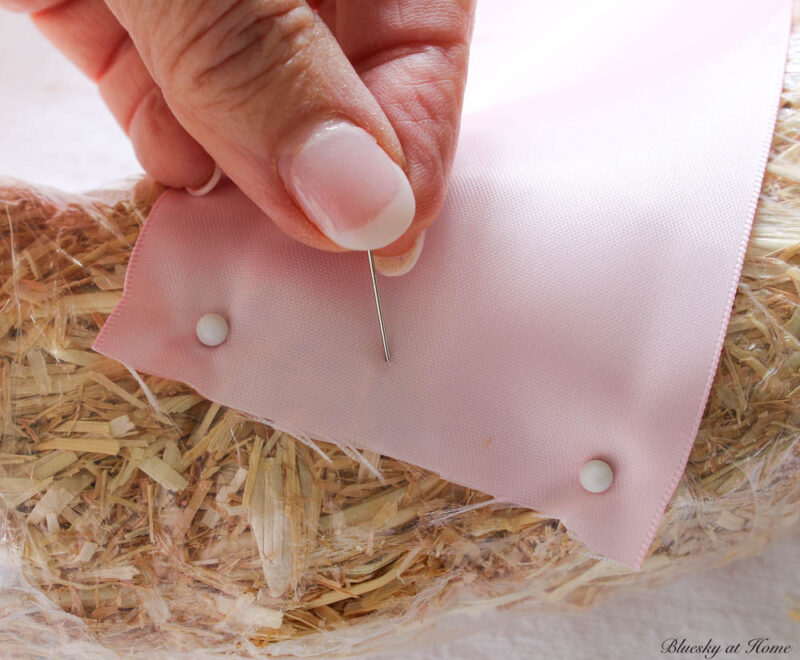
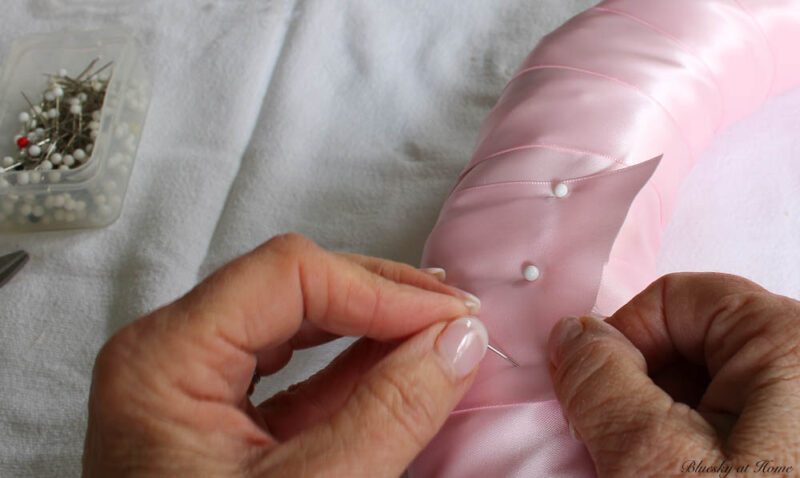
I didn’t want to glue the ribbon to the wreath form in case I ever wanted to take the wreath apart and reuse the ribbon.
To the back of the wreath, I attached the ribbon to the wreath using 3 dressmaker pins.
Then I wrapped the wreath tightly with the pink ribbon. Give yourself plenty of slack with the ribbon. Overlap the ribbon and wrap it in a diagonal, covering the entire straw wreath.
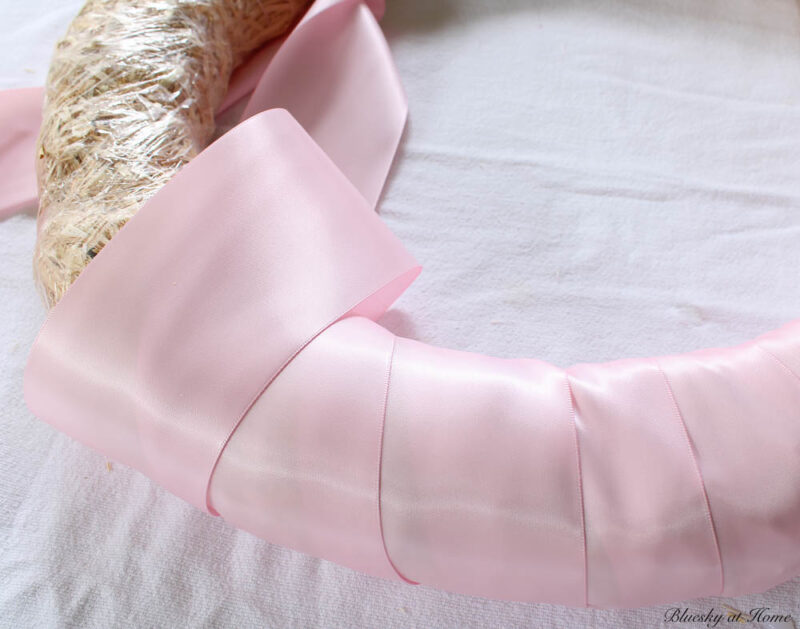

When you get back to where you started, cut the ribbon, allowing about an extra 8 inches.

Wrap the ribbon tightly one more time until you are on the back side of the wreath. Use three more dressmaker pins to secure the ribbon.
I promise the ribbon will be securely in place.
Adding the Pink Rabbit Tail Grass
Have you ever heard of rabbit tail grass? I had not until last week when I was scrolling through Pinterest. I clicked on a link to Amazon and there it was. It was so pretty, I couldn’t resist and I ordered two packages.
When the packages arrived, the pink color was more beige. That wouldn’t work for this wreath project I had in mind.
I searched again and found this rabbit tail grass which was the perfect pink color. This time I ordered 4 packages. Each package contains 100 stems.
First, I cut the stems, which are about 18 inches long down to about six inches.
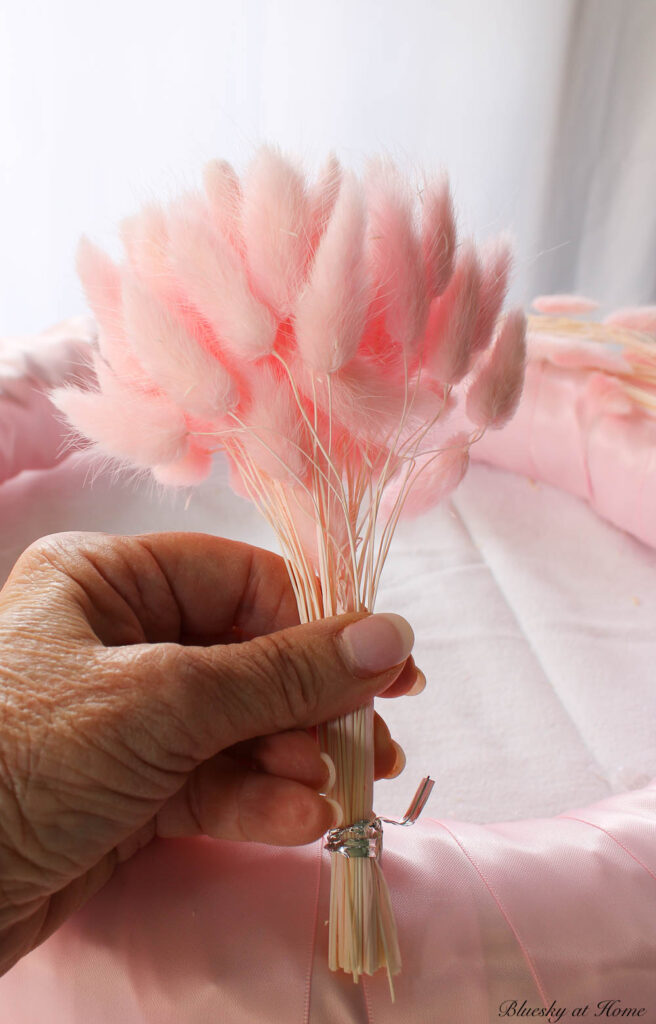
Then I divided each package into about 4 sections. You have to carefully separate the stems.
I thought I could just push the stems in between the layers of wrapped fabric, but that method didn’t work very well. The stems got stuck and I couldn’t push them far enough under the ribbon.
I needed to find a better way to attach the rabbit tail grass to the wreath.
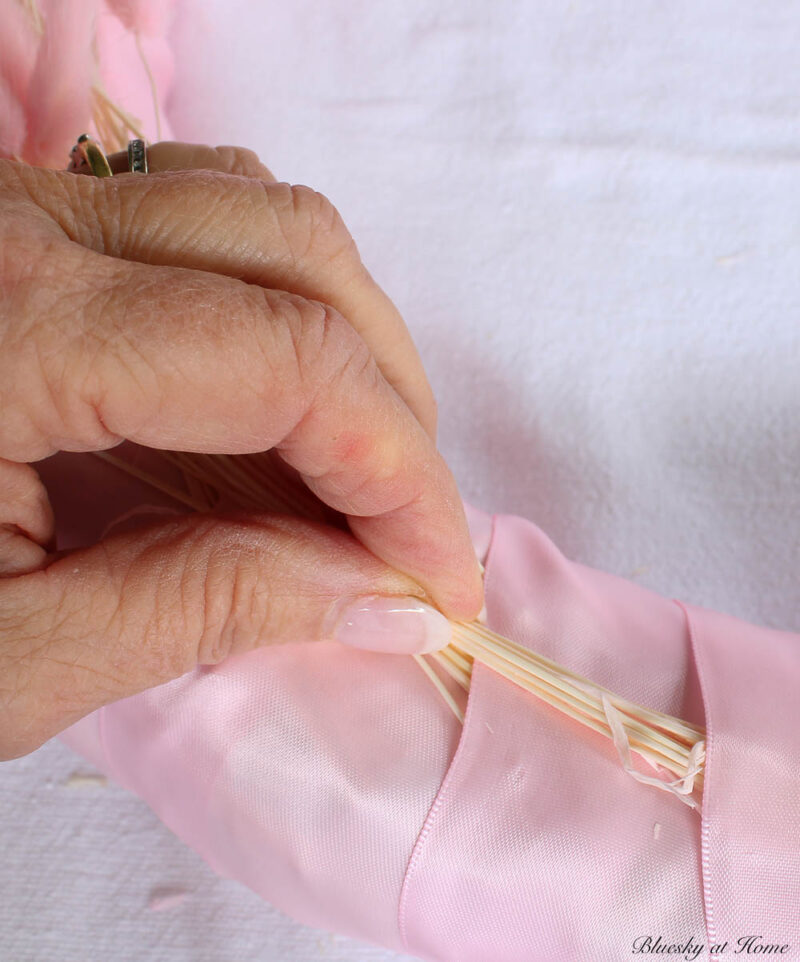
To Plan B.
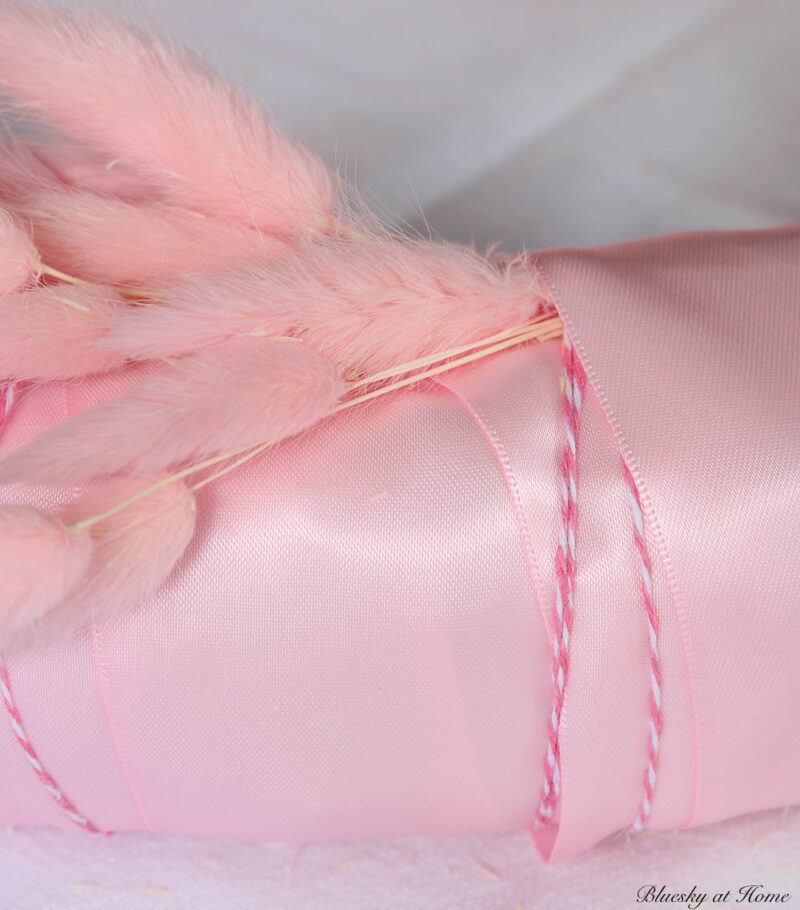
I remembered the pink and white baker’s twine that I had ordered – just because pink and white baker’s twine is really cute.
I placed a small group of grass – about 12 – 15 stems – on the wreath. Then I wrapped the twine tightly around the wreath and the stems, tied the twine and cut off the excess.

Fortunately, this method worked perfectly to hold the grass stems in place.
I went around the wreath until I used all the grass, covering most of the wreath. I wanted to leave an area to add more Valentine’s decorations and ribbon.
Cover the last section of stems with a piece of ribbon using the dressmaker pins.
NOTE: If you don’t have baker’s twine, you could use skinny ribbon. It really doesn’t show on the wreath.
Adding the Paper Hearts and Ribbon
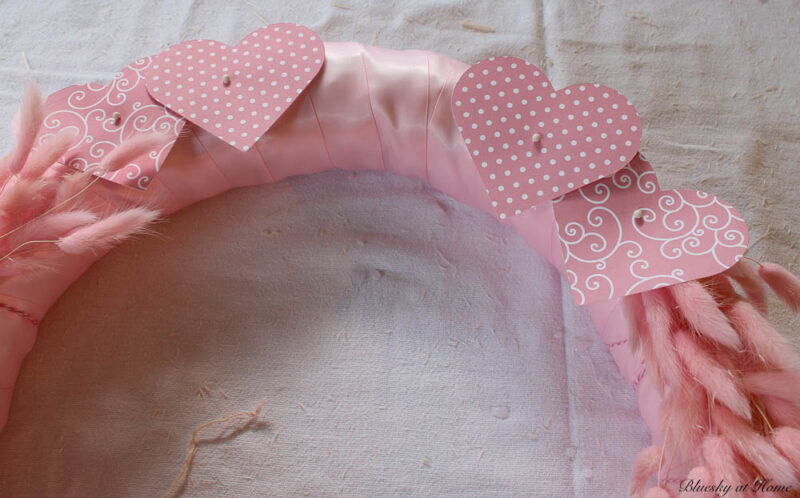
The next step was to fill in the space at the top of the wreath, I used paper hearts that I cut out with my Cricut.
Luckily, I had plenty of pink Valentine’s scrapbook paper. I picked two patterns and made 4-inch hearts.

NOTE: If you don’t have a Cricut, you can hand-draw and cut out hearts from scrapbook paper.
Not wanting to use a hot glue gun to attach the paper hearts, I again used dressmaker pins to hold the hearts on the wreath. It worked like a charm.
TIP: You could use some faux flowers instead of the paper hearts.
The final step was to add a bow with my pink satin ribbon. I chose to made two loops of the satin ribbon around the top of the wreath.
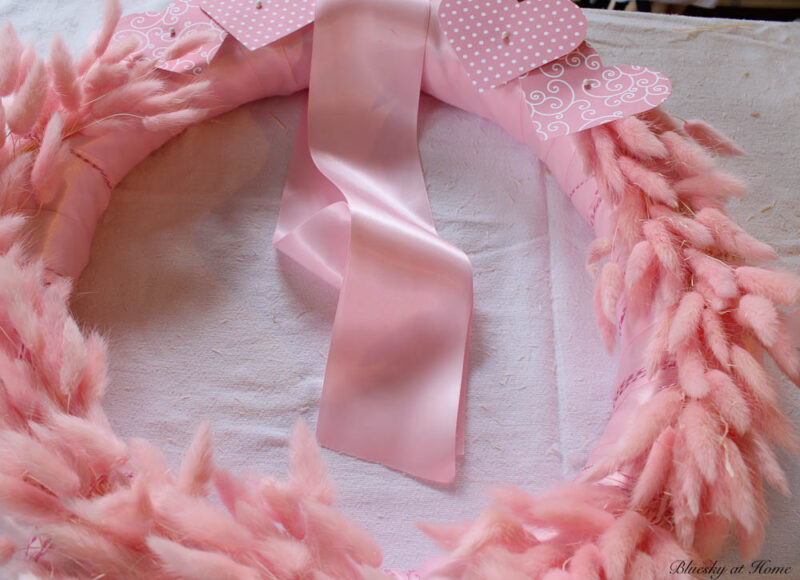
I made two long tails and notched the ends.
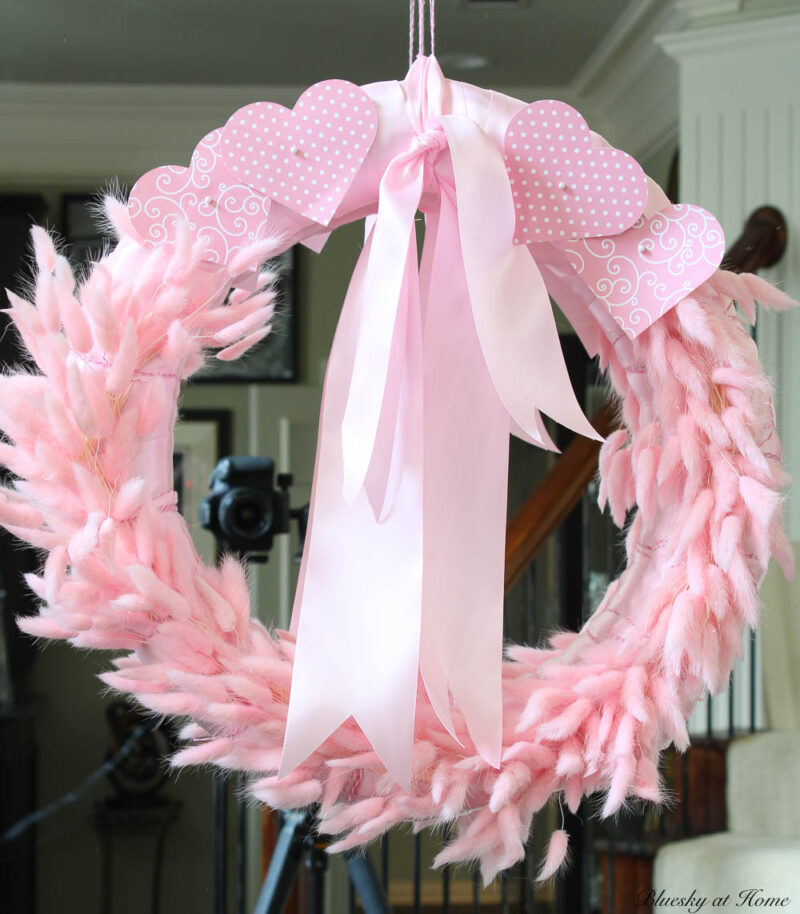
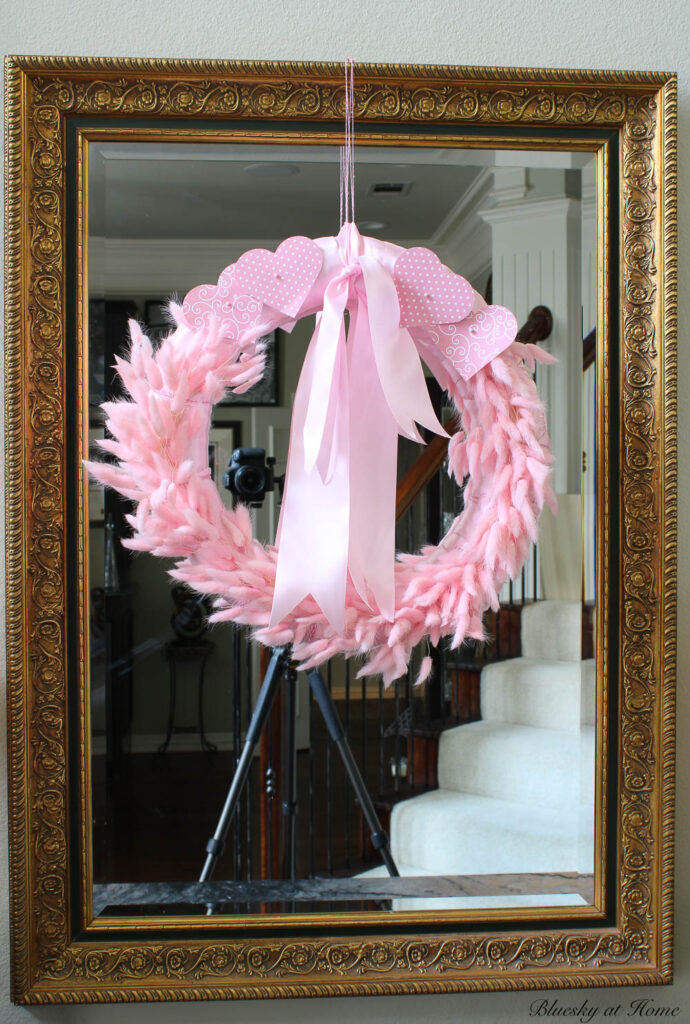
The final step was to add a hanger to the wreath. I made a loop of baker’s twine through the ribbon and hung it on the mirror in our entryway.
Can you see the reflection of my camera in the mirror?
This wreath took an adjustment (attaching the tail grass to the wreath) to get it right. The good news is that I figured out the best way to add the grass (and saved you the challenge). It was an easy Valentine’s wreath to make.
I love the pretty pink color and the softness of the tail grass. There are different textures (the grass, the ribbon, and the paper).The paper hearts add pattern and the ribbon adds color.
This wreath could be hung anywhere indoors. Since February can be cold, rainy or snowy, I wouldn’t advise hanging this wreath outside. The tail grass is too delicate.
It’s the perfect way to add a Valentine’s decoration to your home at this sweet time.
If you would like a few more Valentine’s Day DIY projects, try one of these:
If you want a beautiful wreath that is easy to make, then PIN this Valentine’s Day wreath to your Pinterest Boards.
You could make it this weekend.
You can get more ideas at Valentine’s Day DIY Ideas and Projects and Valentine’s Day Ideas.


I just loved the pale pink color. How softly feminine! I wanted to reach through the screen and pat the rabbit tails. Wouldn’t take too much to change it up for Easter either!!! Or just plain old spring! I have used pins to hold stuff–usually til glue takes hold, but it is great if you are going to upcycle the wreath again. Great project!
What a cute wreath, Carol! Thanks for the great instructions! You always have such great ideas and your instructions are written so well. You really do make things easy for us to do! We have no excuses for not making this pretty wreath.
This is so pretty, Carol! I love those pink feather-y stems! What a feminine and soft wreath to use for the holiday!