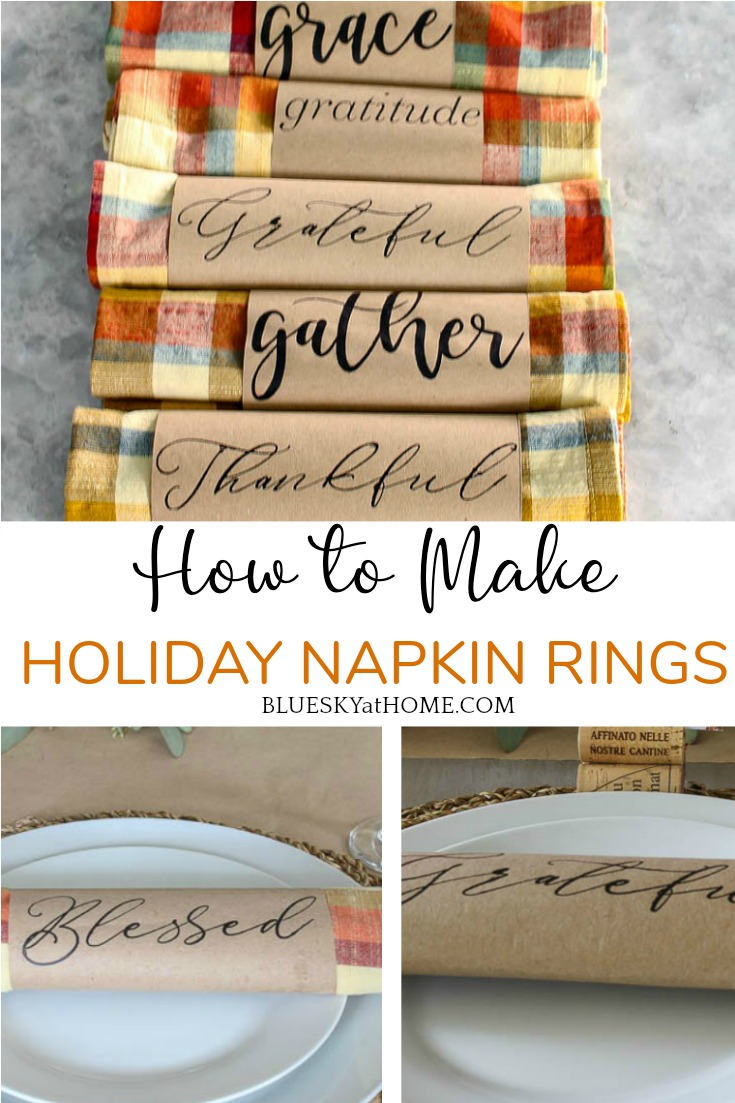
How to Make Napkin Rings for your Thanksgiving Table
When I create a tablescape, one of my favorite elements to include are napkin rings. So let me show you how to make napkin rings for your Thanksgiving table.
Napkin rings are another little detail that gives you an opportunity to continue your table theme. Napkin rings allow you to bring out your most creative ideas. The best part? Learning how to make napkin rings is easy.
Napkin rings come in all shapes, sizes, and materials. When I designed last year’s Thanksgiving tablescape, I wanted a simple and natural look. So my napkin rings had to continue that idea. They had to be simple, made of natural materials and convey the spirit of the occasion.

I knew that I wanted to include words that conveyed the spirit of Thanksgiving, words that we all think of at this time.
Kraft paper is a natural material and writing words on paper is about as natural a practice as you can find. So let me show you how you can use words and paper to make napkin rings for your holiday table.
Easy Thanksgiving Napkin Rings
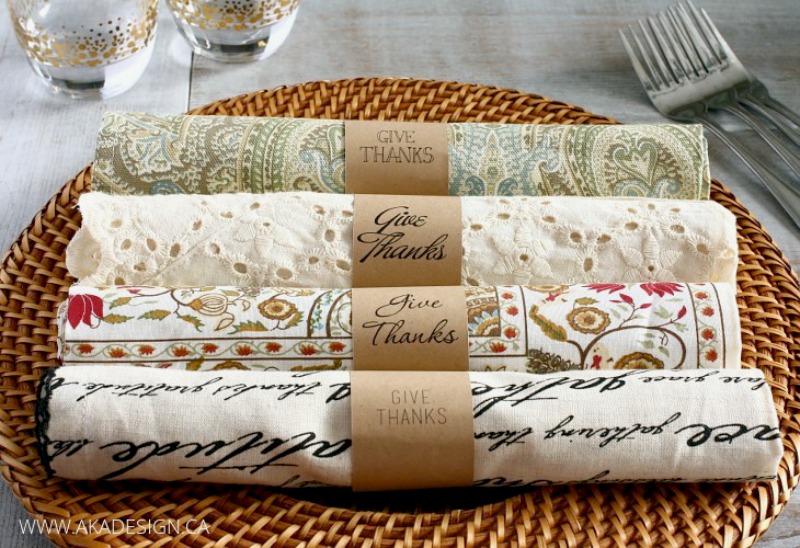
The idea for these napkin rings came when I was searching for Thanksgiving DIY projects. Here was my inspiration.
When I speak of your holiday table, right now I’m referring to Thanksgiving, but these napkin rings could be made for any holiday ~ you just change the words to fit the occasion.
Supplies to Make These Napkin Rings
The original napkin ring project used a cutting machine, but I wanted a simpler, less expensive approach. Just a few supplies are needed for this type of napkin ring:
- kraft paper
- stencils
- Gel Art Ink
- scissors or paper cutter
- Scotch tape
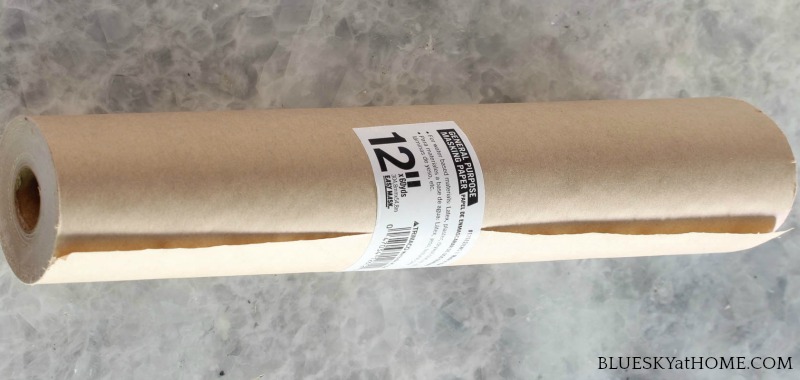
You probably already have Scotch tape, scissors or a paper cutter on hand. Maybe even kraft paper. I already had a large roll of thick kraft paper on hand which I did use for this project.
Later I found a roll of 12~wide masking paper at Lowe’s in the paint aisle that I used for my table runner. In the future, I would use this roll of kraft paper that is only 12 inches wide.
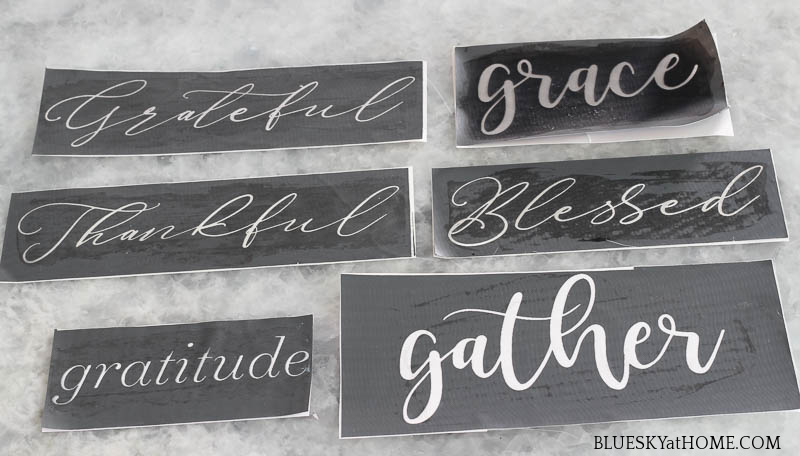
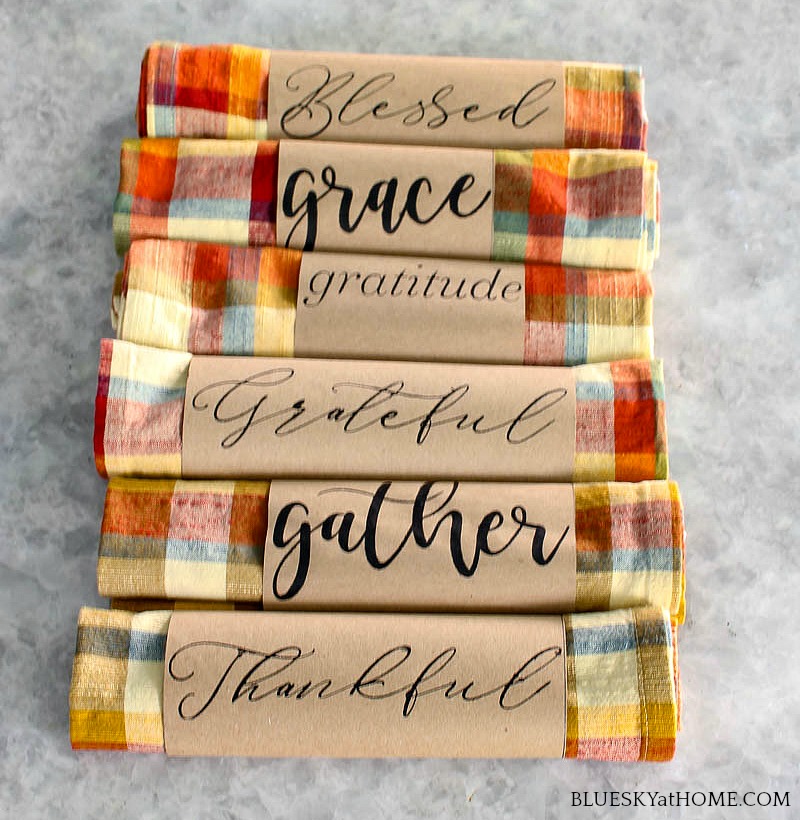
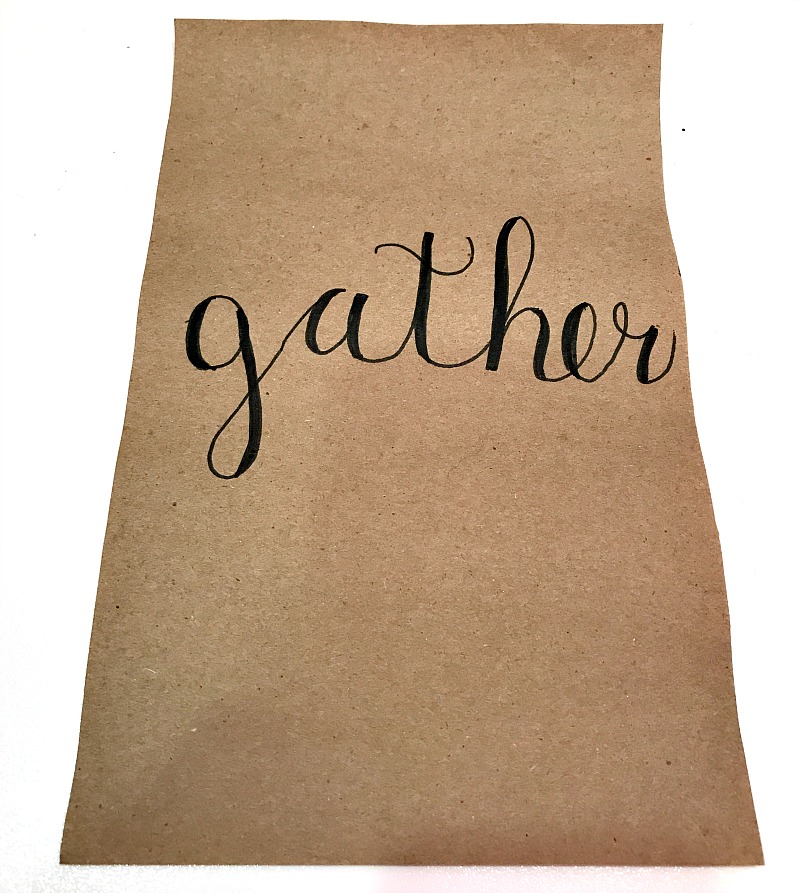
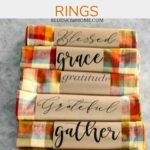
For my stencil words, I, of course, used stencils from A Makers’ Studio. These words are from 3 different stencils which I have previously used: Be Still, Grace, Gather, Grateful, Blessed, Grateful and Thankful.
Obviously, you would use any words that you like for the occasion.
For painting my stencils on, I used Gel Art Ink in Can’t Never Could, which is black. Gel Art Ink is meant for use on fabric, paper, ceramics or glass. It’s very easy to use.
Making the Napkin Rings
First, pick your napkins and roll 1 up. Measure the circumference with a cloth tape measure. I needed pieces 8 inches long to wrap around my napkins.
Then measure the width of your stencils. You will have some different widths. I used my paper cutter to measure my 8~inch lengths. Then I used a ruler and pencil to mark the widths, then cut those.
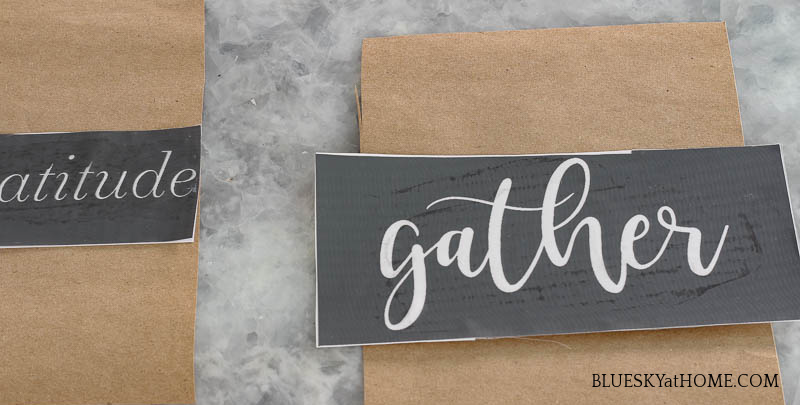
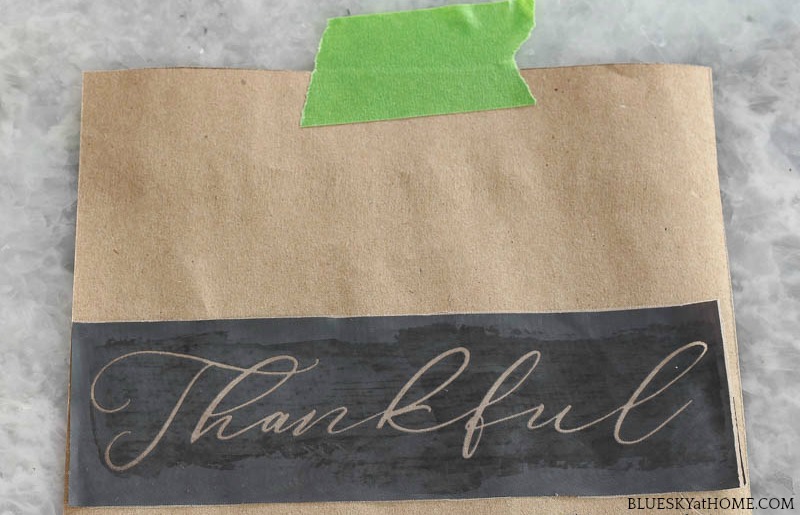
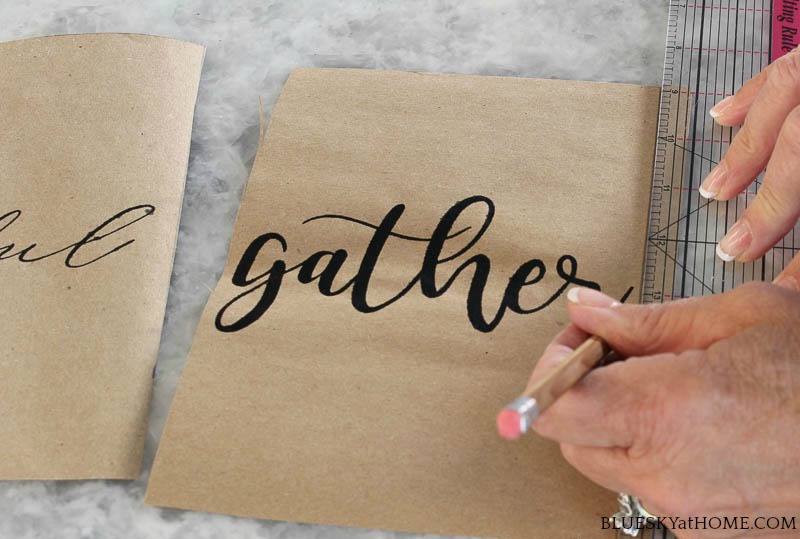
Center your stencils on the kraft paper.
You don’t want your kraft paper to move around while you are working on the stencils. I found it easiest to tape the paper to my kitchen counter.
Remove the paper backing from the stencils and press the stencils down on the kraft paper. Since the stencils have an adhesive backing, one of my favorite features, the stencils won’t move around and the paint won’t bleed underneath the stencil.
Also, if there is a letter on your stencil that is close to the edge, I place a piece of painter’s tape there also. This gives you some breathing room around the letter.

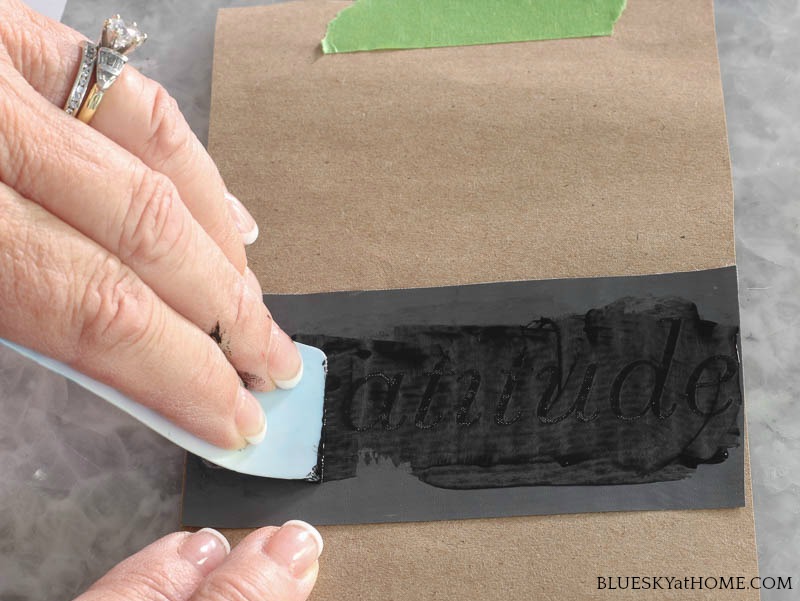
Next, put a small amount on Gel Art Ink on your plastic scraper and press and slide across to cover the stencil. It doesn’t take much GelArt Ink.
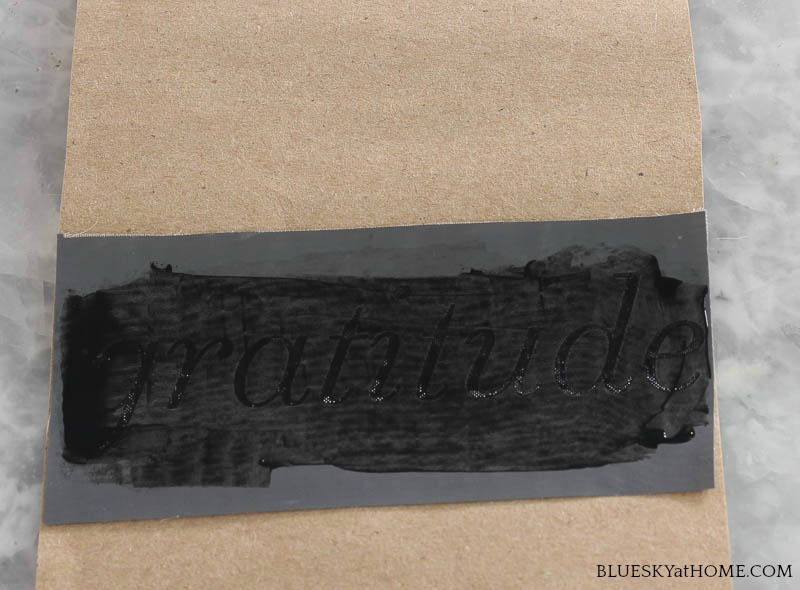
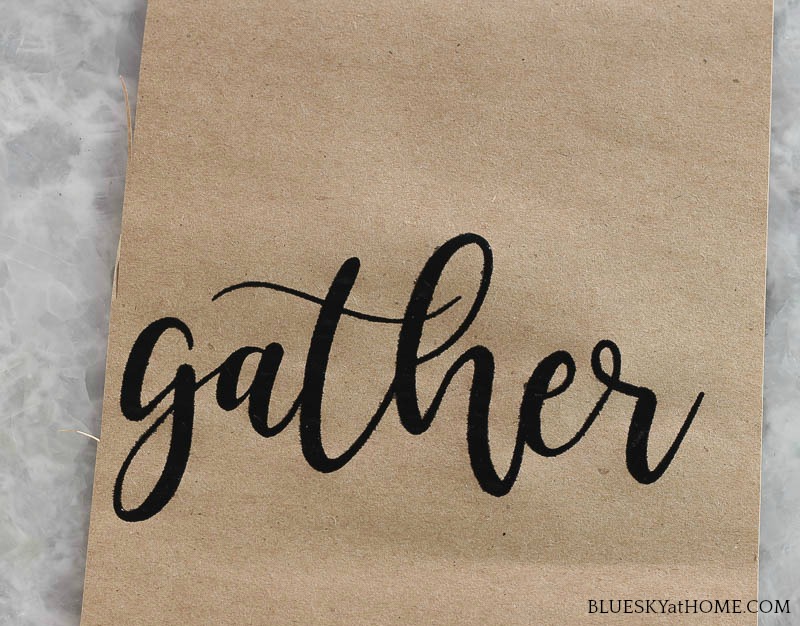
Gently remove the stencil by lifting a corner. And there is your pretty word.
TIP: After you remove the stencils, put them in a shallow pan of water. Then, when you have finished all the stencils, you can wash the GelArt Ink off the stencils. Place the stencils on a paper towel with the adhesive side up to dry. Return the paper backing to the stencil and place back in the plastic envelope until you use them again.
On a couple of the stencils I add excess paper, so I cut it off.
When you are done with all your stencil napkin rings, place them on your napkins and use Scotch tape to hold them closed.
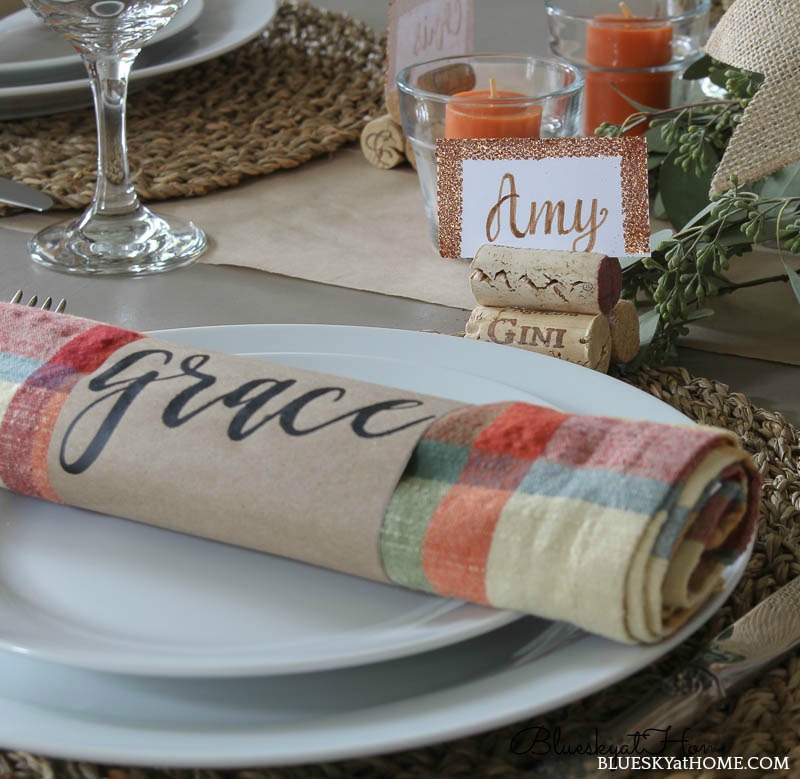
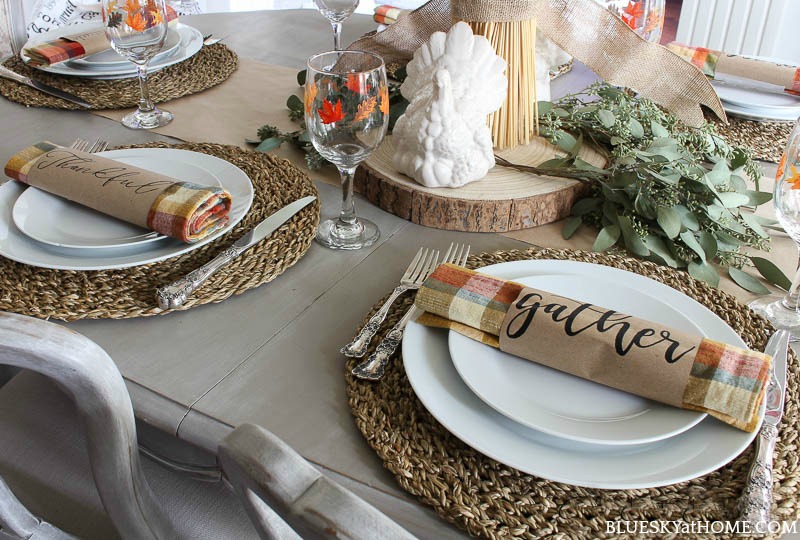
Here is how they looked on our Thanksgiving table, along with the place cards and place card holders that I made.
I can tell you that the napkin rings were a big hit with our dinner guests. I did keep all the napkin rings after everyone removed them from the napkins. I’ll probably try to reuse them in another way., too.
Now, if you don’t have stencils or GelArt Ink, you could use hand lettering for a similar look. Not quite the same, but still nice.
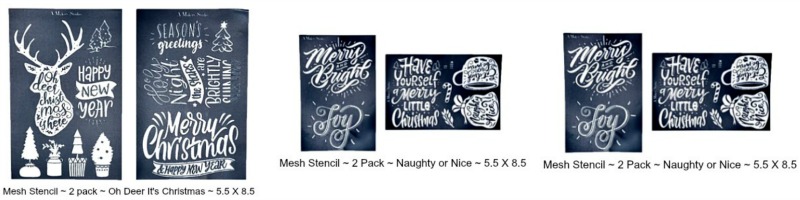
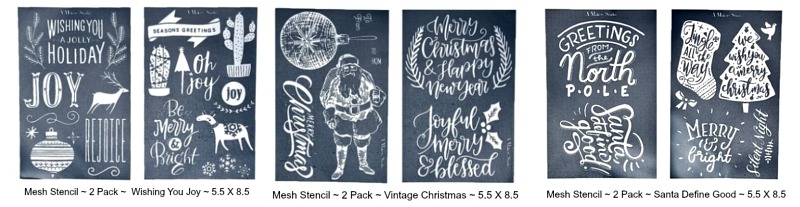
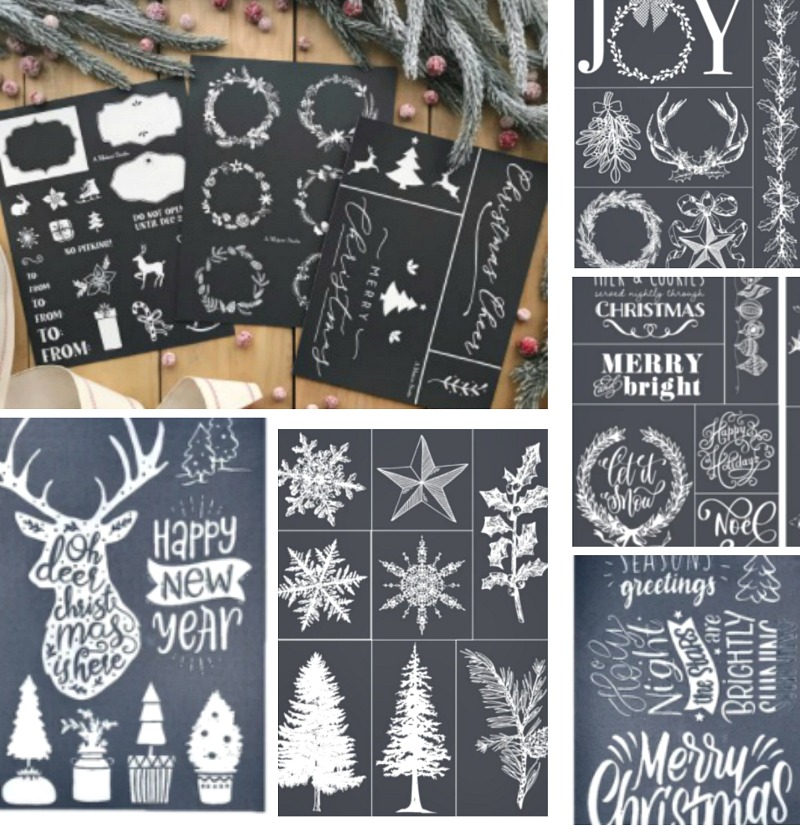
Besides using the stencils and the GelArt Ink to make napkin rings for Thanksgiving, you can make them for Christmas, using one of these last year’s darling new Christmas stencils.
This year’s Christmas stencils are just as cute.
If you would like some more ideas on how to use stencils, check out this post on 9 Great Tips to Make Signs with Stencils.
Hope you have fun making DIY projects for the holidays. I hope you will give this one a try. Please PIN.


They are lovely Carol, a beautiful reminder of the meaning of Thanksgiving. They’ll be featured on Handmade Monday this week 🙂
Thank you so much Julie. I appreciate the feature. Happy Thanksgiving.
Carol,
Thanks for allowing me to share this idea on my first week of Dirt Road Adventures. Here is a link to the post that will be live tomorrow morning.
https://www.thepondsfarmhouse.com/dirt-road-adventures/
Rachel
Carol,
I love this so much. I’d love to share your project on my Blog Sat. I’m starting a new feature on Sat. Called Dirt Road Adventures where I do a round up of creative ideas I’ve found during the week. You would get full credit.
Can you email me at [email protected] if this is ok.
Thanks
Rachel
I was thinking you had superhero calligraphy skills till I got to the stencil part! Adorable!
Such a cute craft. I love it. TFS
Love these napkin rings Carol! I mean LOVE them! Pinning. And thanks for the reminder to get a stencil! I am soooo behind. What is your recommendation on stenciling the back of glass plates? I’ve changed my mind and want to do glass plates instead of the pillow. At least that’s what I’m saying today. 🙂
What a good idea. Thank you. These napkin rings are so very pretty. I’ve pinned this.
Thank you so much Lea. I loved that you Pinned it.
Those are lovely! I have some stamps that could be used in a similar project.
Great tutorial! I love how these turned out, Carol! Pinned!
Shelley