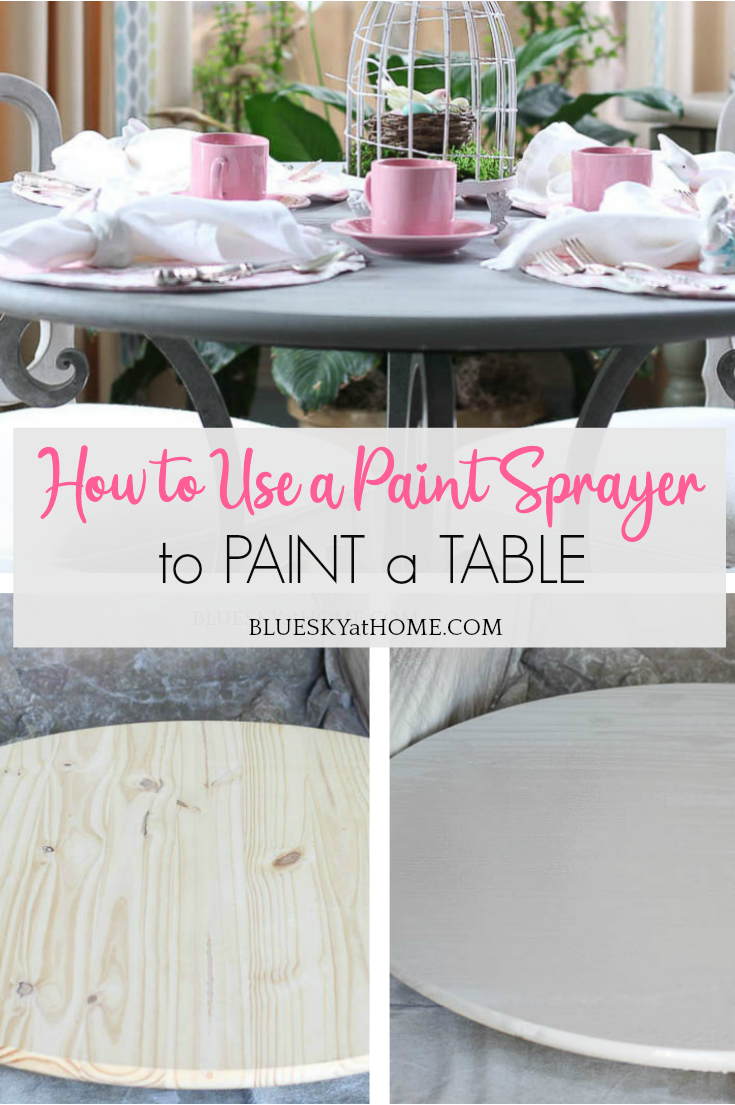
How to Use a Paint Sprayer to Paint a Table
Have you ever wanted to know how to use a paint sprayer for a DIY project? I have and I had just the project in mind. We needed a new breakfast room table for better flow and efficiency.
One of the things friends ask me at our home was where did we get our breakfast room table. I tell them we needed a new breakfast room table and they seem amazed when I tell them I painted it myself ~ with a paint sprayer. So I thought I would share again how to use a paint sprayer to paint a new table or any piece of furniture.
I felt really guilty. Our original table in our breakfast room was a gift when my son was born. We had used the table for years, first as a game table in our den for 13 years and then as our breakfast room table for the past 5 years. It just wasn’t working anymore.
As much as I loved this antique pub table with the barley twist legs that could transform from a square to a rectangle in 2 minutes, I knew it wasn’t the right table for our breakfast room. I finally came to the decision to make a change. We needed a round painted table for a fresh look in our breakfast room.

I came to realize that it wasn’t just the stained finish of the tabletop that didn’t work ~ it was also the size and the shape. Our kitchen/breakfast room/living room area has straight lines and diagonal lines. We needed something softer to break up all the sharp lines. We needed a round painted table that would fit our space and give it a lighter look.
I decided to paint it myself using my trusty HomeRight Finish Max Paint Sprayer.
How to Use a Paint Sprayer to Paint a Table
This project is gratefully sponsored by HomeRight, but all the opinions and comments are my own. This post contains affiliate links to products that I love, use, and highly recommend.
You know how it is when you have a treasured piece of furniture that has sentimental value? It could be your grandmother’s hutch, your aunt’s once~expensive rug that no longer looks right in your home, your mother’s beloved headboard. Sometimes you just have to make the hard decision that nothing will make it work ~ not even a coat of paint.
I actually painted the base of our dark~stained pub table turned breakfast room table when we moved into our present home 7 years ago. I was trying to give it a lighter look to fit in with the lighter, coastal colors of our new home.
We put our Christmas tree in our breakfast room, which means that the pub table goes out to the garage for December. After Christmas, I decided not to bring in the pub table back in the house. As it turns out we have a round, glass~topped table with a pewter base that has always been in our bedroom. Just to try out the idea of a round table in the breakfast room, we moved it from the bedroom to the breakfast room.
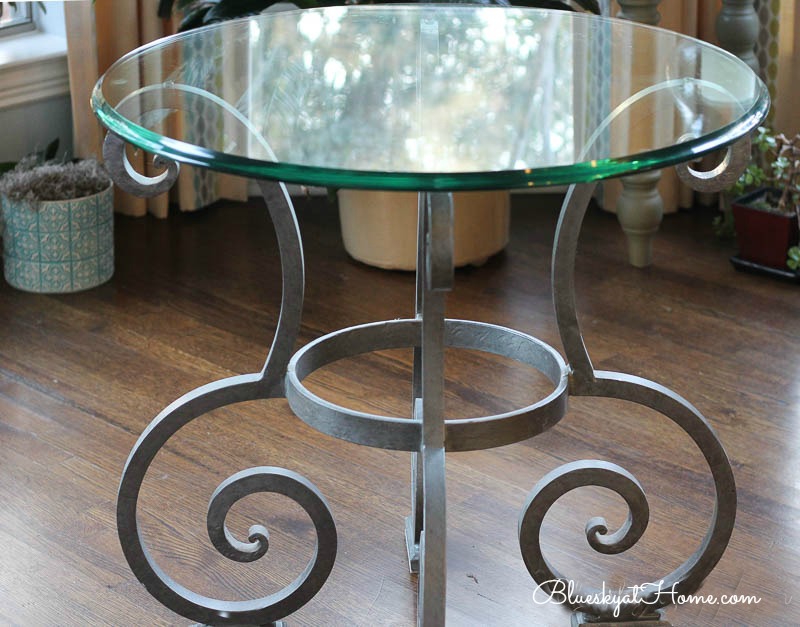
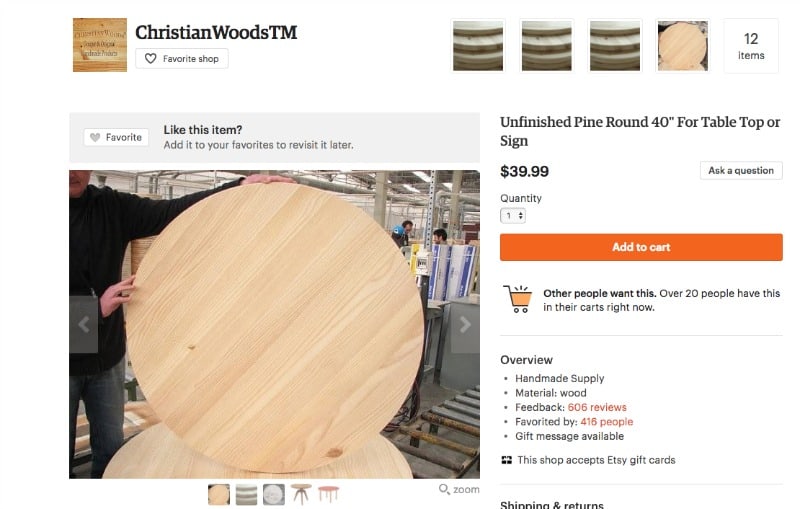
After living with the round table for a few months we decided that it definitely was the right shape. But the glass top was too small at 32 inches. After measuring, we decided that 40 inches would be just right for our new round table ~ big enough to seat 4 comfortably, but not too big to overwhelm the available space. I loved the pewter base and wanted to keep it. I also wanted a tabletop that was heavier and more natural~looking. Wood was the ticket. A Google search brought up several options for wood tables in all sizes. I chose this one and ordered it.
When it arrived, we set it on top of the glass and were relieved that it was a perfect size. Now we had the right shape and the right size.
The next decision was the type of paint and color. As it turned out, I had already signed up for a class with Melanie Alexander of Lost and Found Decor. Melanie was teaching a class on Fusion Mineral Paints, which I have never used. We had a great time at the class and I learned all the features of Fusion Paint. I decided it would be a great choice for our new round painted table. And I found the perfect color to pair with the pewter base ~ Little Lamb, a soft pale grey. I couldn’t find this color currently, but Sterling looks very similar.

Setting Up the Tent and Paint Sprayer
I wanted as smooth a finish as possible for my new round tabletop. Melanie said that I could use my HomeRight Finish Max Extra to apply the Fusion Paint. Since I have used my Finish Max Extra several times, I knew that would be the best way to apply the paint for fast application and an even coating.
After laying down one of my drop cloths on the garage floor (Thank goodness the weather is now warm enough to spray paint outside.), I set up my HomeRight Spray Tent. If you do any amount of spray paint projects, I can’t recommend it enough to keep overspray from spraying things you don’t want to be painted. I realized my raw wood tabletop would stick out a bit, but I knew from experience that I could control the spray of the Finish Max Extra.
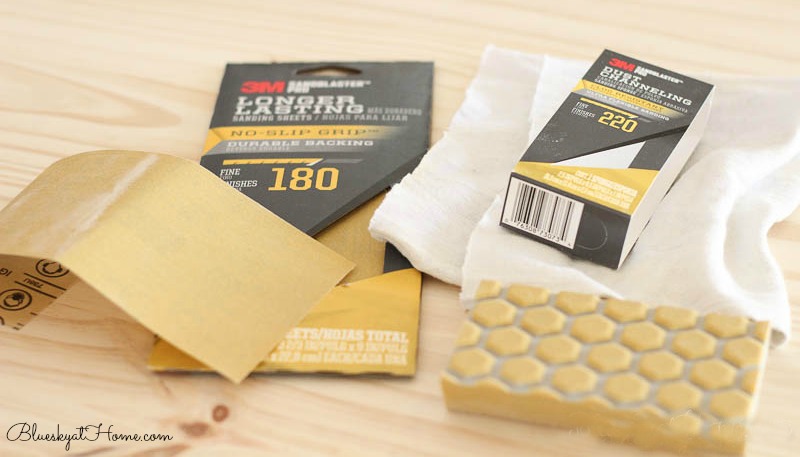
Sanding the Tabletop
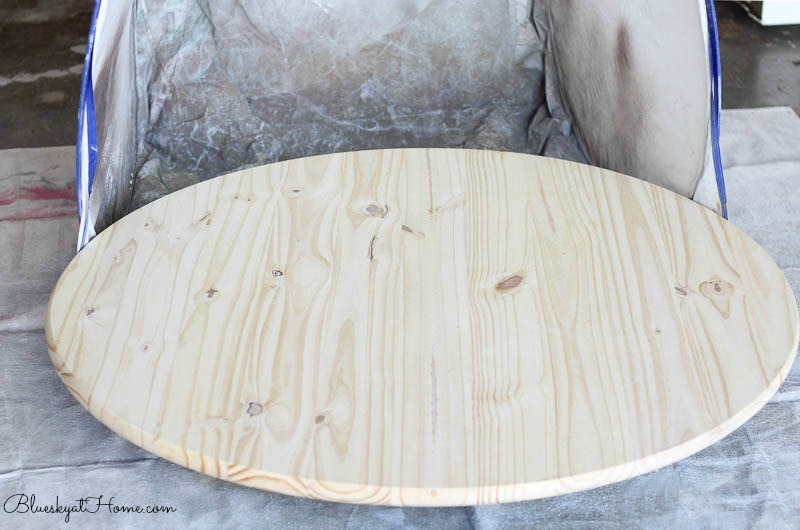
Although the raw wood of the pine tabletop was very smooth, I decided to give it another sanding, first with 180 grit and then 220 grit sandpaper on both sides and the rounded edge. Then I wiped it down with a lint~free painter’s rag to remove the dust. That step definitely made it smoother.
Painting the Round Table Top
One great thing about using the Finish Max Extra is that you can use just about any paint you want ~ latex, chalk paint, and now Fusion Paint. Another plus is that you have to dilute the paint, according to the directions and the tools that are included with your Finish Max. And that means that you use less paint to get the same coverage. So I diluted the Fusion Paint about 25%.
Because I would be painting the tabletop in a slightly downward direction, I place my feed tube in a forward position.
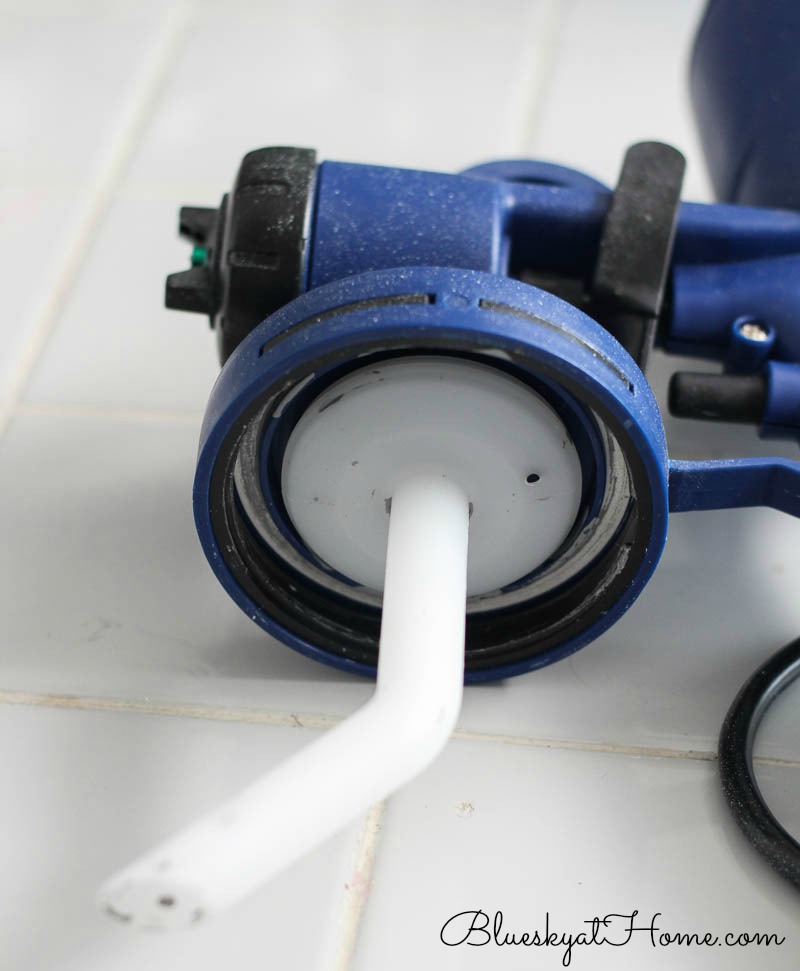
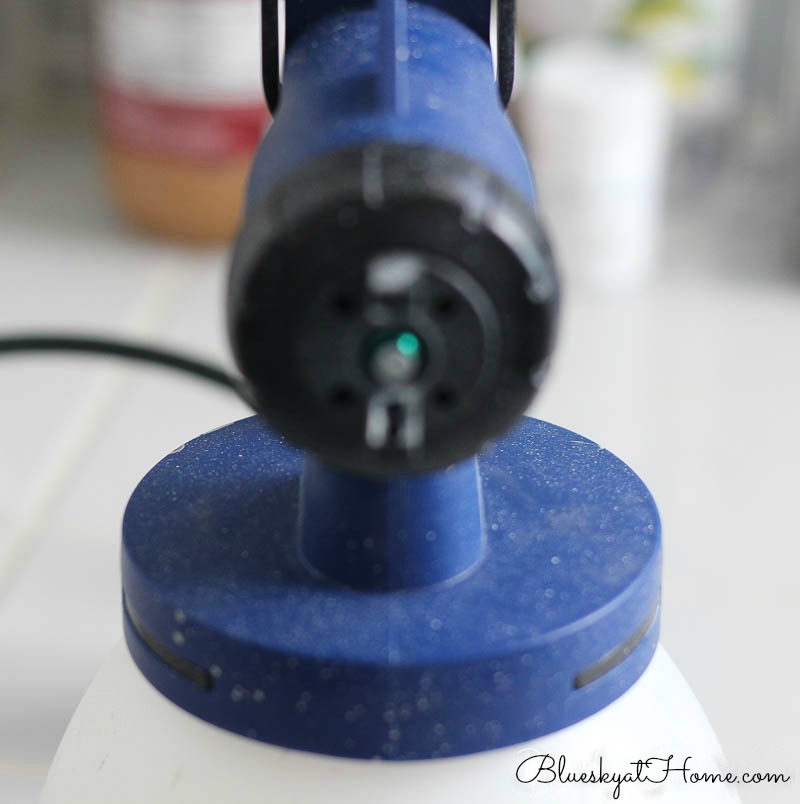
Here’s another great feature of the Finish Max: you can adjust the nozzle to how you want the spray to come out ~ either vertical or horizontal. Since I would be painting with the grain of the wood, I would be painting in a horizontal direction. That means that the nozzle is turned to a vertical position. I know it’s a bit hard to tell from this photo, but the white spots are the top and bottom of the nozzle.
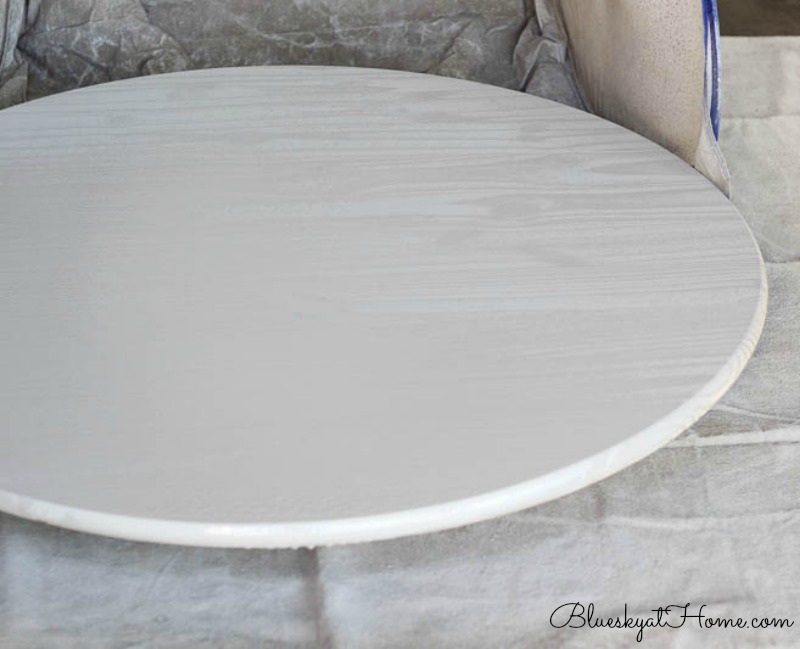
Now I was ready to paint. Literally, I kid you not, painting one coat took about 1 minute. Next to how fast the paint can be applied, is the fact that the paint spray is concentrated so you don’t have overspray. I loved that the paint covered the tabletop and that the grain of the wood came through. I let the paint dry for about an hour while I worked on other things. Then I gave it a second coat. Obviously, painting takes a fraction of the time as the drying.
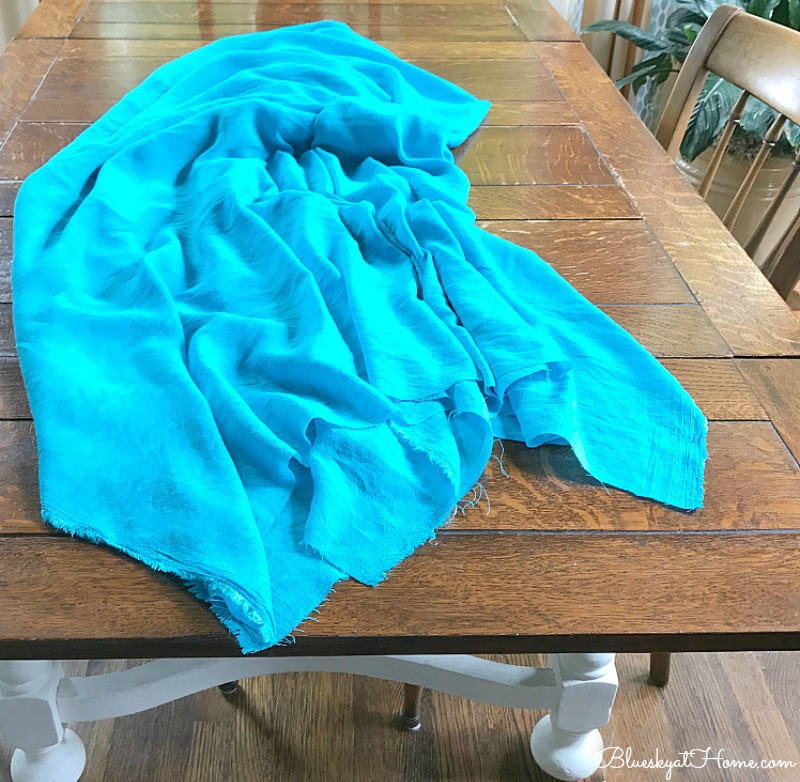
After the second coat was dry, I turned the table upside down and I went around the edges and painted those by hand.
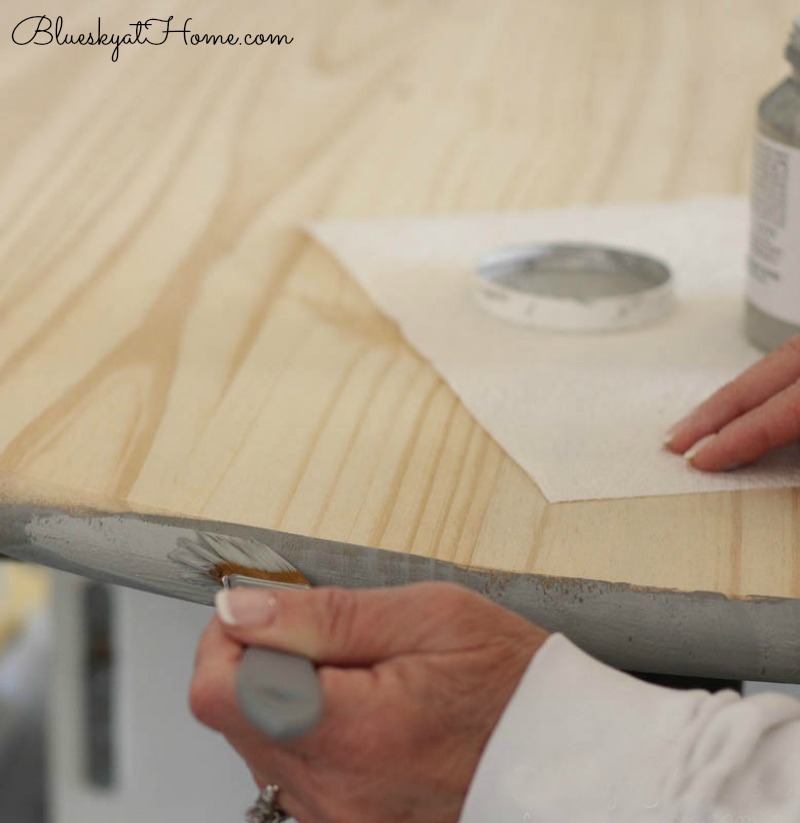
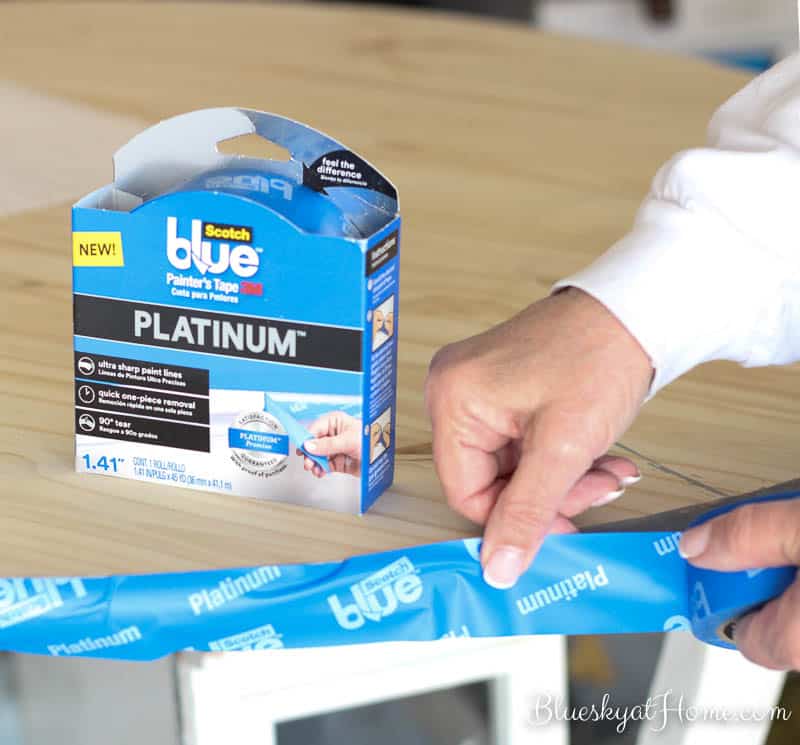
At this point, I decided to paint the bottom of the tabletop a different color. I had also purchased a Fusion Mineral Paint called Casement. It’s a neutral white with no visible blue or yellow undertones. So my nice grey edges wouldn’t get messed up, I covered them with painter’s tape. I used Scotch Blue painter’s tape because it stretches and bends.
I had cleaned the Finish Max Extra after using the Little Lamb. It was so easy, just use warm water and a little Dawn. Next, I followed the same procedure with the Casement. I also diluted it by 25%.
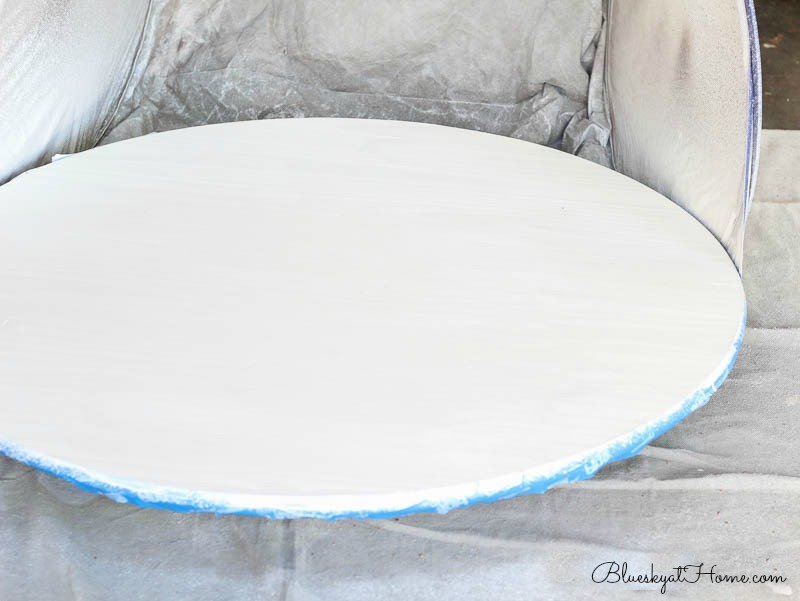
After painting the second coat, I removed the painter’s tape and let it completely dry.
Finishing the Round Painted Table
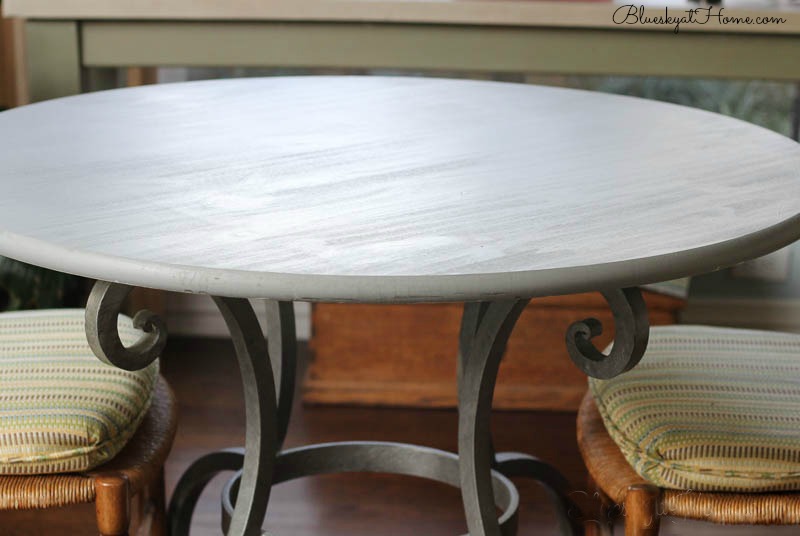
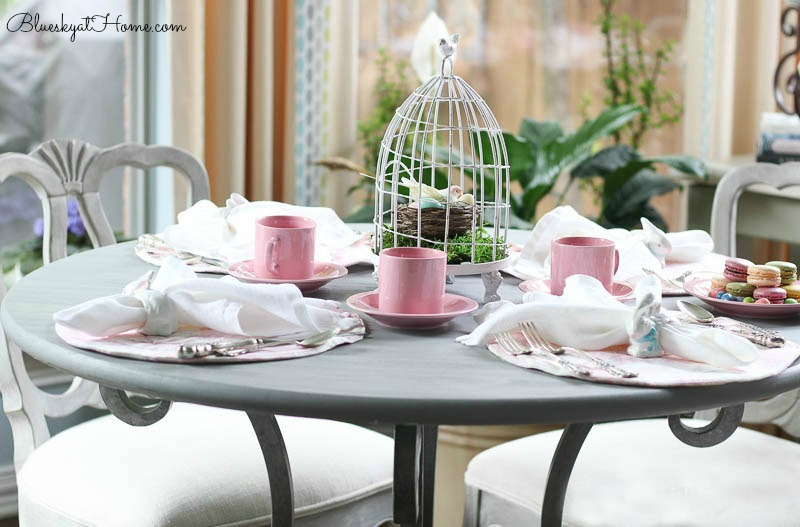
Now it was time to place the round painted tabletop on the pewter base. I loved how it looked ~ the grey tabletop with the pewter base.
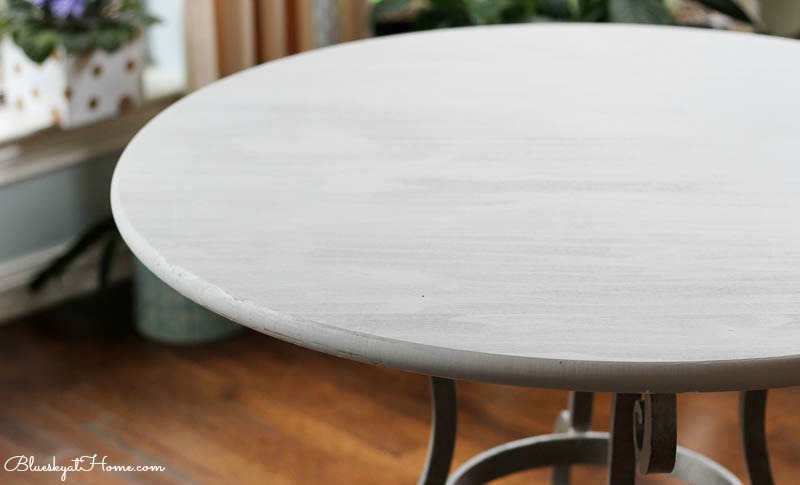
Fusion Paint doesn’t have to be waxed or sealed. I knew that the top would see a lot of wear so I decided it wouldn’t hurt to give it a coat of wax for protection. I had a bottle of Mind Your Own Beeswax from Amy Howard that I had never used. Besides the wax, you will need a clean cloth for applying the wax and a cloth or buffing pad for buffing. (Today I would recommend the Light Antiquing Wax from A Maker’s Studio. It’s very similar in texture and usability.)
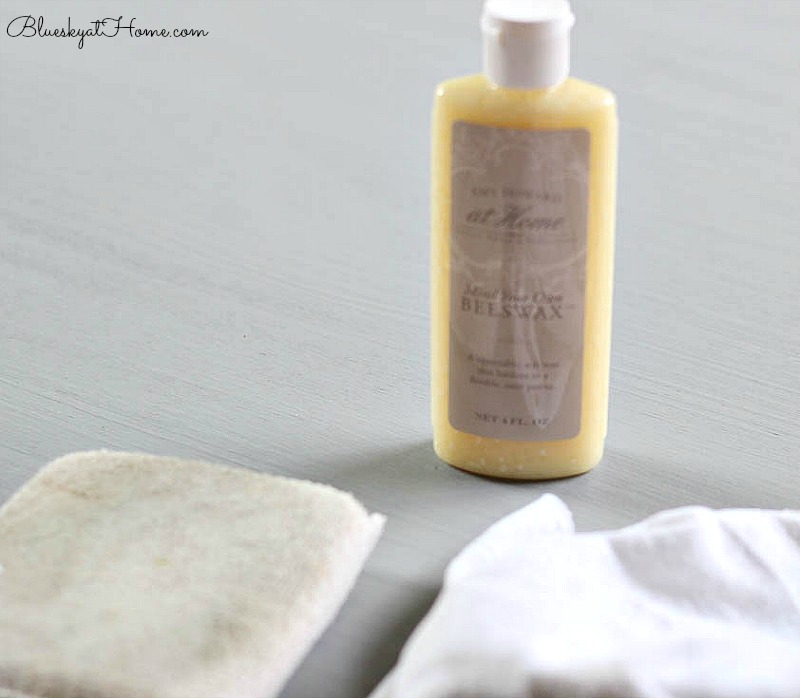
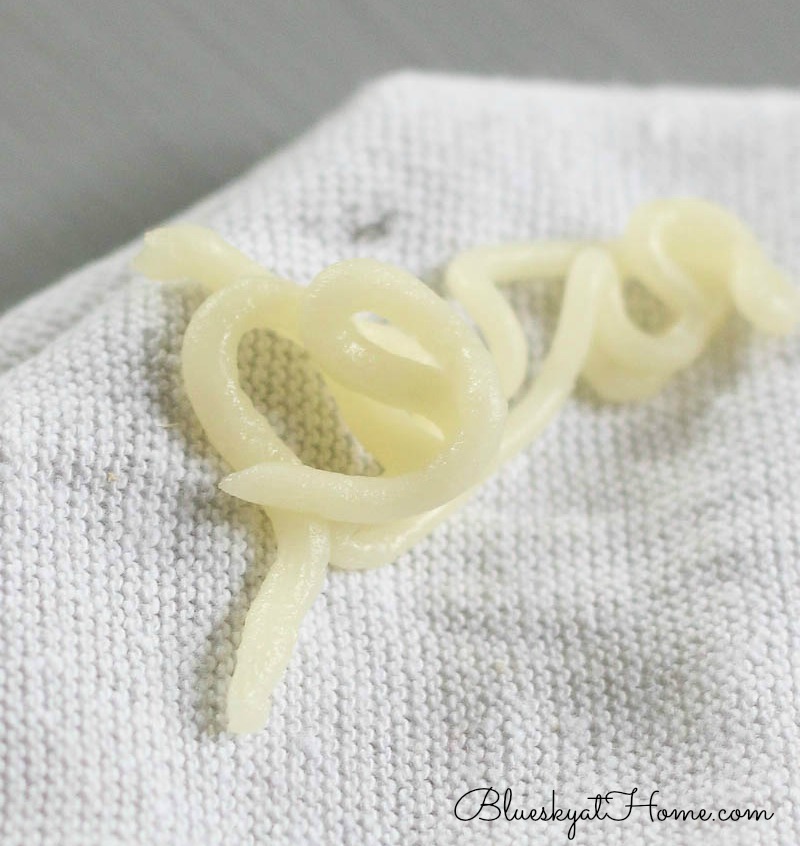
Wow! This wax is so easy to apply. You just squeeze it on to a lint~free cloth and rub on the surface in a circular motion. It sort of just melts into the wood. Let it dry for at least 30 minutes (the longer the better) and then use another clean cloth or buffing pad to buff the surface to a sleek finish.
The Beeswax gave the table a little bit of shine. I let the wax dry for a couple of hours. Then I used my buffing pad to give it a good seal. I pulled up our 2 vintage chairs (another inherited gift from Sweet Shark’s grandmother.) which I’ve never stained. The cushions match the ones on our kitchen counter stools.
The Finished Breakfast Room Table
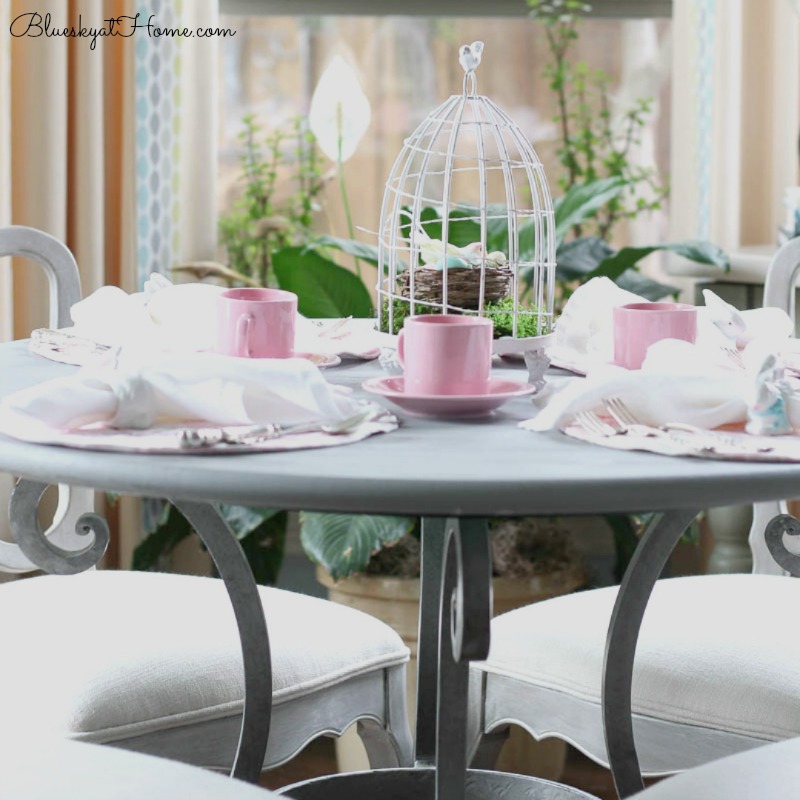
We now have a round painted table that fits so much better in our breakfast room. I love the grey painted top with the metal pewter base. The entire project took less than a day. I did let the table sit for a couple of days before I decorated it for Easter. This time I added 4 of our dining room chairs. The grey of the chairs look awesome with the grey table.
I am thrilled with the result of our round painted table. The HomeRight Spray Tent and Finish Max Extra Paint Sprayer made the job so easy. I was happy to try a new type of paint with the Finish Max and a new wax. Both are great products.
If you have any questions about this project, just let me know in the comments. And don’t forget to PIN it!
Enjoy your next paint project.


Great job! I love my sprayer as well. So much faster.
Kim, it’s easier that I thought it would be. Makes me feel like a paint warrior.
I have a sprayer but I have never used it. Fear I guess. 🙂 Thanks for the tips.
Shake off that fear, girlfriend. Once you use it, you will love it.
I’m so glad I found this because I’m about to do the same thing but couldn’t decide what colour. I love the grey! Gorgeous! Thanks for the inspiration.
Linda, let’s do this together. Picking the wall color has me a little stuck. Happy to provide any inspiration I can.
It’s gorgeous, Carol! You definitely made the right call. I know exactly what you mean about something sentimental that doesn’t work any more…..You did a great job! Thanks for sharing at Vintage Charm! xo Kathleen|Our Hopeful Home
Thanks so much, Kathleen. YOu just have to let go sometimes.
How smart to buy a bigger wood round for your table base, looks fantastic. That table base works so much better than pub table. We had pub table very much like yours, at least the top looked like ours. We had 6 chairs that had seats which were small compared to sizes of chair seats now, were gorgeous oak wood.
You did such a wonderful job painting the top, boy would I love to have one of those paint sprayers. Worth every penny with the paint tent.
Happy Easter
JaneEllen, thank you so much for your comments and feedback. That paint sprayer and spray tent have paid for itself a dozen time over. The time saved and the finish product are worth the small price.
Carol you are so ambitious with your projects – want to check me decorate my house? :). Beautiful job!
Katie, too ambitious sometimes? I have a half dozen projects in my head right now. Time, time, time.
Carol,
What a great idea to add a different table top to an existing table. The gray painted wood goes so well with the gray metal base.
Judith
Hi Judith, I’m loving it more everyday.
Carol, the table turned out great! I love the color you chose and the painting seems to be easy enough. I didn’t want to be the guinea pig but since you tried it, I can give it a try now. 😉
Great post.
Thanks so much Cindy. It was really easy. I love my paint sprayer and the Fusion Mineral Paint was great.
Looks fantastic Carol! Great job, and thanks so much for sharing about Fusion and Lost & Found!
Melanie, I was so pleased with how the Fusion paint worked with the HomeRight Paint Sprayer and how the finished project came out, both the color and the application. Can’t wait to use the paint on other projects.
I love the table, Carol. Wonderful job. I need one of those paint sprayers in my life! Isn’t funny how we feel guilt over items in our home until we love the replacement or newer item more.
Lisa, thanks for visiting and commenting on the table project. I just hope one of my kids will want old table!
This looks amazing, Carol!!! Way to go!
Ashley, thank you for visiting and your kind comment.
Way to go girl! Your table looks amazing!
Thanks sweet friend. I value your feedback.
Your table looks great! Round tables can really help with flow and function in a space. I love my HomeRight paint sprayer! A real time saver.
Susan, we are definitely on the same wavelength. I’ve never had a round table (at least that I remember), so this is a great change. I’m loving the color more and more.
That looks fantastic . It truly is hard to part with the sentimental pieces but when you do,you really have to go in a different direction. This is an amazing change.
Linda, thanks so much for your comment. I really hope that one of my kids will want the old table someday.
It looks great, Carol! I’ve been looking for round kitchen tables. All of our tables are square or rectangle. Thinking about putting a round top on our high top square kitchen table. Thanks for the inspiration to start off my day!
Diane, I thought about using the base of the square table, but the stretchers on the bottom don’t allow 2 of the chairs to “scoot in” so that was another reason for using the pewter metal base. Now 4 chairs can be pushed in and don’t take up so much space in the room.