How We Remodeled our Master Bathroom ~ the Before
After I shared How We Remodeled our Master Bedroom and How We Decorated our Master Bedroom, I thought I would just head on into our master bathroom and show you how we remodeled our it.
The Before
The master bathroom definitely was stuck in the 1990’s (our house was built in 1996) when our house was built: browns, beiges, fur downs, and bad lighting.
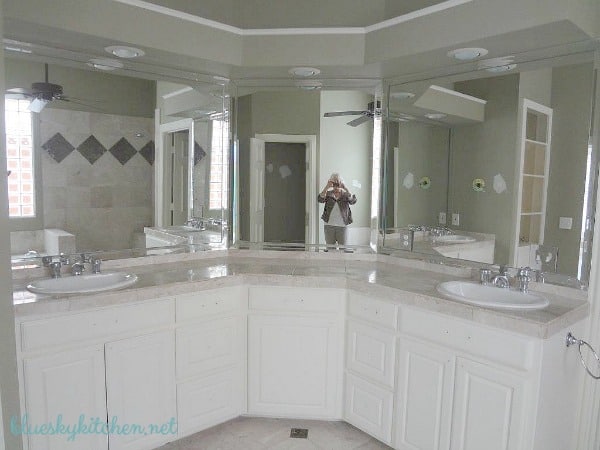
In this first picture, you can see the beige and brown tiles used on the shower enclosure and countertops. The ceiling in the bathroom is 12 feet, but the fur down above the vanity just pulled the ceiling down.
The old light kits weren’t very attractive. And for some reason one of the sinks wasn’t centered which created a wonky look.
Mirrors are great, but here this approach was way too much. The built-in shelf on the left was very deep (We know what happens to deep shelves – things get lost.)
We had a piece of furniture that would add so much character and provide more usable storage. The twin doors in the reflection lead to the toilet area. The patches on the wall are where the previous owner removed the towel bars.
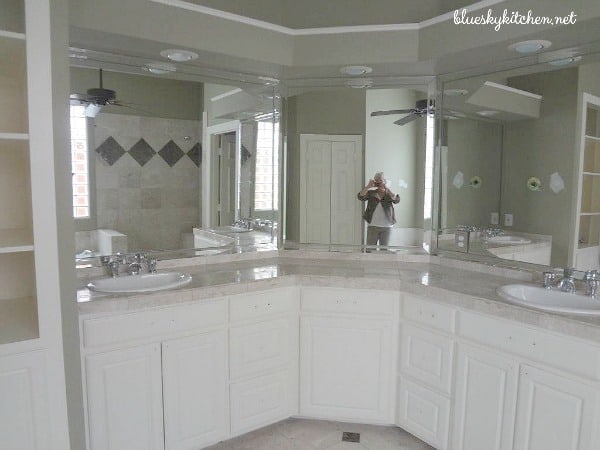
Here’s a similar view. The door to the left leads to the closet. You can see a better view of the built-in shelves on the right. Here the doors to the toilet area are open.
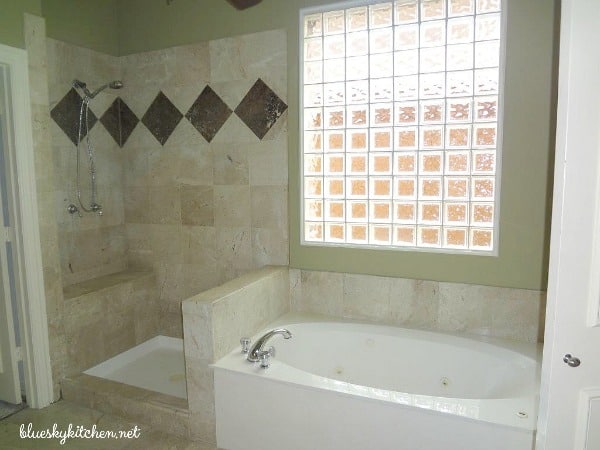
Here is the view of the shower and the tub. Can you see what’s missing? There was no glass around the shower. No one seemed to know what happened to it. The large glass block window provides the only natural light in the bathroom, so even if it is a bit outdated, it’s going to stay. And that green paint? Bye, bye. The big tub? Bye, bye to that too.
You can probably guess from the colors of our kitchen and master bedroom that I wanted a light, airy space with blue and white as the color scheme.
The Plan
So here was the plan for the master bath:
- Remove the fur down and the built-in shelfing.
- Remove the mirrors, lights and ceiling fan.
- Remove the bathtub and shower enclosure.
- Remove the existing tile on the walls and floors.
Oh, what the heck, we just gutted the entire bathroom and started from scratch. Chip would have loved demo day!
The Wish List
So, with a blank slate, what was the vision? Here were my 10 must-haves:
- A light marble for the vanity top, shower and floor
- Beautiful mirrors for the vanity
- Beautiful lighting
- A frameless shower
- A beautiful free-standing bathtub
- Wallpaper in the toilet area
- Blue paint color for the walls
- A better configuration for the vanity – maybe an open area in the center
- Pretty hardware for the vanity
- A rain shower head in the shower
Soon I’ll share the after.


Ellis, so nice to hear from you. I hope you’ll check out tomorrow’s post. I think we made our vision a reality.
I can not wait to see what you did! This looks like a builder bathroom…just like ours. I would love a clawfoot tub. 😉
Stacey, Although the house was a semi-custom, it was built in 1996, therefore the beige and brown. I hope you love the redo.