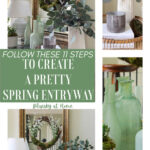
11 Steps to Create a Pretty Spring Entryway
Have you started thinking about spring decorating? Do you know where to begin your spring decorating? How about starting in your entry? I’m going to show you 11 steps to create a pretty spring entryway so you can get started on spring decorating.
Why should you style your entryway?
It’s the first impression of your home and sets the tone for the rest of your spaces.
How do you make your entryway welcoming for spring? You find an image that inspires you and use the elements you love using accessories you already have.
Having a pretty entry creates that feeling of welcome and delight – not just for your guests, but for your family.
It’s like making the bed first thing in the morning. It makes you feel better. Even a simple spring entryway can lift your spirits.
So, how do you create a pretty spring entry? I’m ready to show you how I did ours.

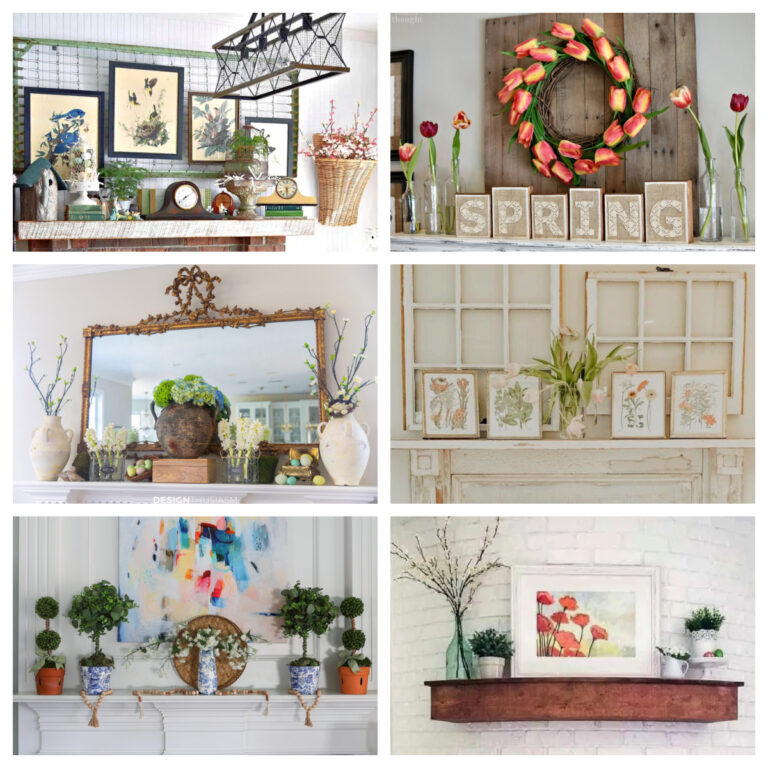
Spring Entryway Inspiration
I love finding a home decor image that strikes my fancy and inspires me to create a pretty space for our home.
Leen of Sand Dollar Lane designed this light, airy and simple vignette that is perfect for early spring. When I saw it, I loved the simple palette of green and white.
It’s a little early to showcase spring flowers, so the natural look of green foliage is the perfect beginning to spring decorating. As the weather warms up and spring becomes more prominent, we can add more color.
The Elements of a Spring Entryway
How do you begin designing an area in your home?
STEP 1 – Anytime you use a picture as inspiration for decorating your home spaces, start by identifying what elements are in the image.
Here are the elements in Leen’s spring entryway.
- console table
- lamp
- glass jars
- tray
- tall vase with greenery
- white planter with plants
- books
- candle
- basket
- spring wreath on the front door
STEP 2 – Analyze what you love about the space and what items you have to use.
What did I love about this entry?
- the neutral palette with whites and creams
- the use of green
- a hint of spring color in the glass jars
- the light and airy feel
- the use of a lamp
- classic accessories, such as books, candles, a vase and planters
- woven tray
- spring wreath
STEP 3 – What items do you have to use?
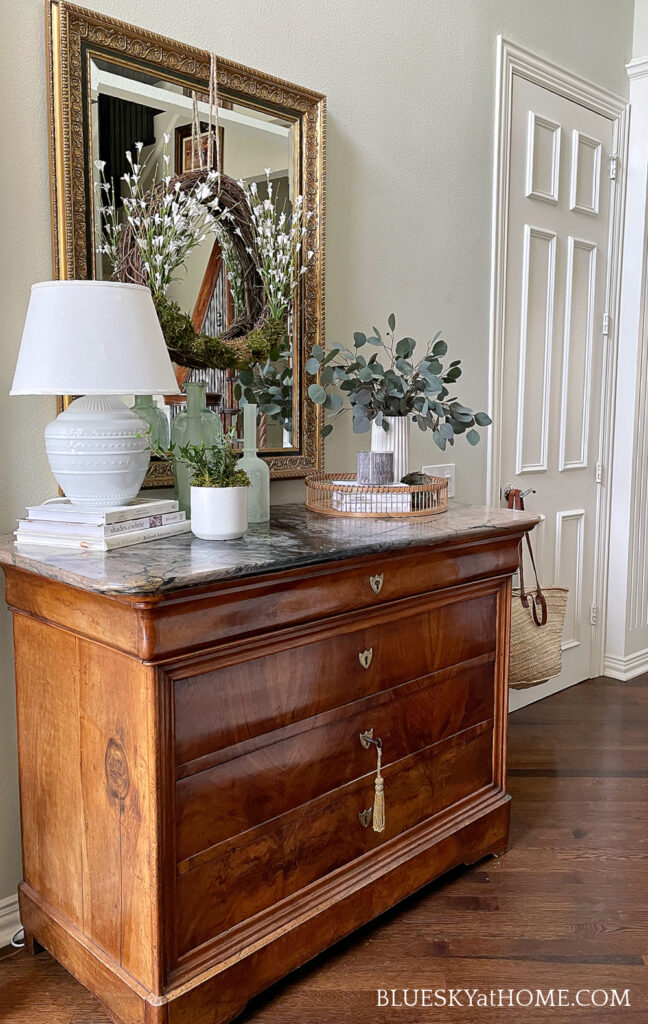
Leen has a neutral-painted console table with a lower shelf for a basket, coffee table books, and plants. We don’t have a console table like Leen in our entry. Instead, we have an antique commode (I use it for china and table accessory storage) in a stained finish and a marble top.
That is the only major difference between Leen’s spring entryway and the one that I’ll create is our entry.
Whatever piece of furniture you have in your entry will work to create a spring entry – or any seasonal display.
Leen’s color palette is warm neutrals in whites and creams with hints of soft color. She has a combination of different textures. I loved that combination and would follow it.
I am trying not to copy Leen’s spring entryway exactly. Instead, I want to use it as inspiration.
Preparing to Create the Spring Entryway
There were two items that I didn’t have at home: tall, vine-type greenery and a small indoor plant. I bought one bunch of eucalyptus at Central Market and the indoor ivy plant at Lowe’s.
Before I actually started designing our entry, I went through my accessory closet (It’s upstairs in one of our guest rooms) and selected several items that I thought might work in the entry.
I had three little projects to create before beginning to design the spring entry.
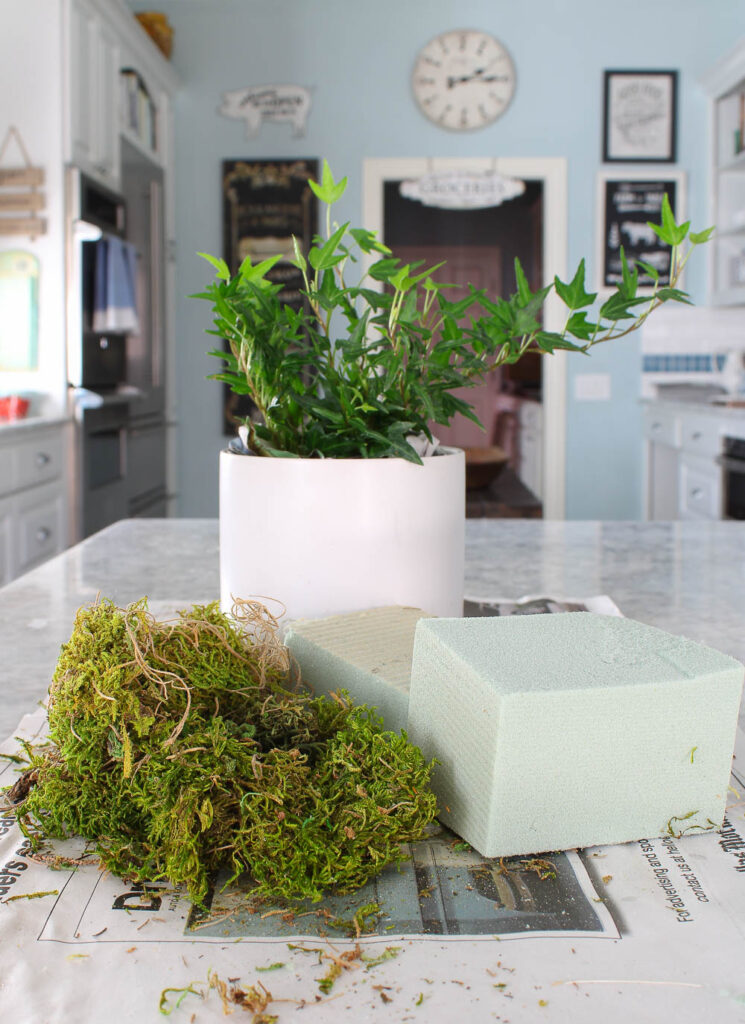
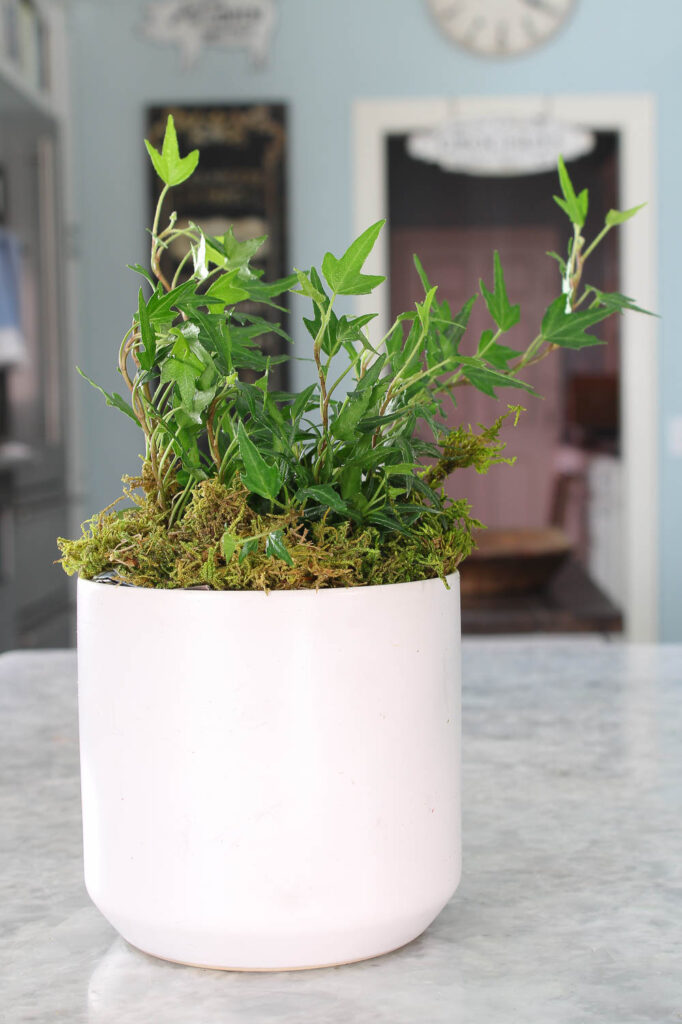
STEP 4 – Create greenery for the spring entry.
I placed an ivy plant in a short white vase. I used a piece of florist foam to raise the plant. A bit of wadded newspaper secures it. To finish the plant, I used my favorite super moss.
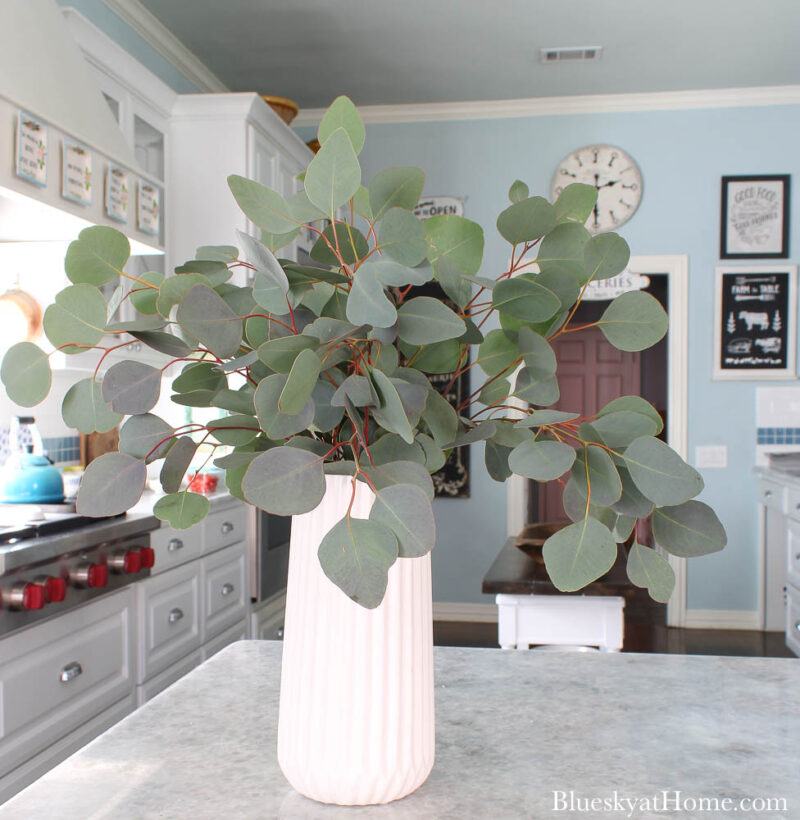
Next, I trimmed the eucalyptus and placed it in a tall white vase. The soft green color fits this early spring palette. You could definitely use faux eucalyptus stems instead.
STEP 5 – Make a wreath or other focal point.
Leen made a wreath for her front door. I wanted one for the mirror in our entry. Fortunately, I had everything I needed had on hand:
- A grapevine wreath that I have used multiple times was my base.
- Faux flowers
- Wired grapevine twine
- Green Moss
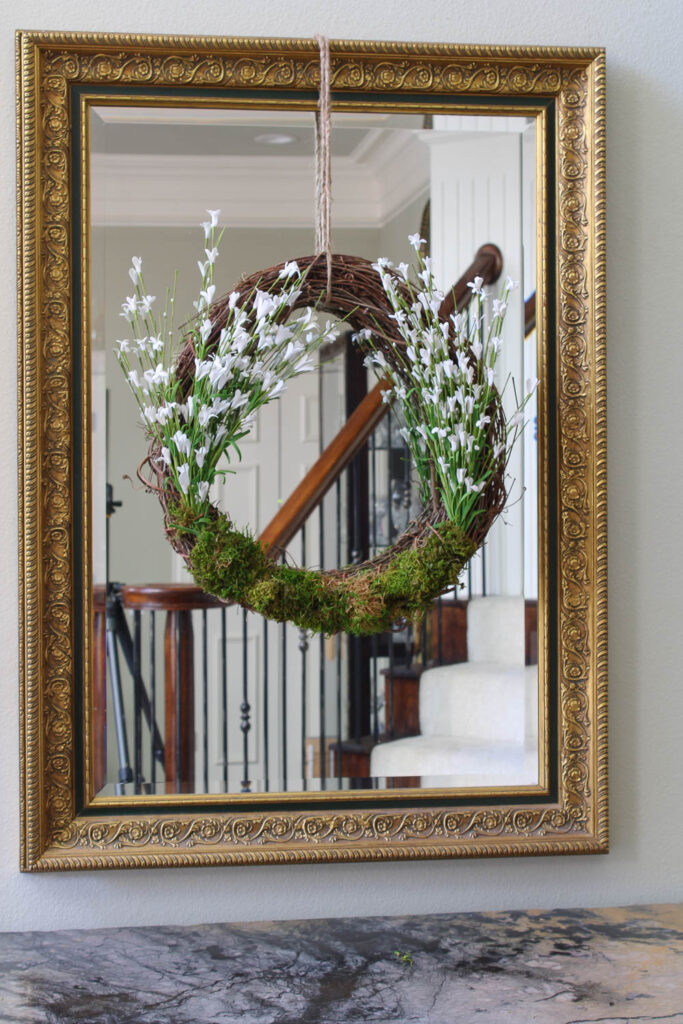
I used the wired twine to wrap around the flowers, adding moss at the bottom of the wreath to cover the flower stems.
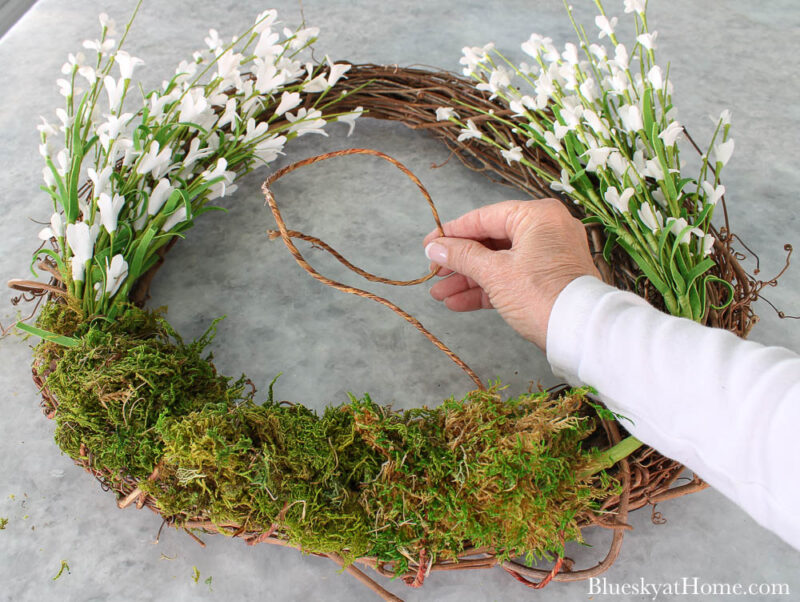
This wreath needed to be simple and have a natural look. It didn’t need a bow.

Steps to Assembling the Spring Entry
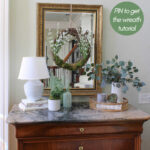
STEP 1 – I hung the spring wreath on the mirror with a piece of jute twine. We have a small nail in the top of our mirror’s frame for hanging decorations.
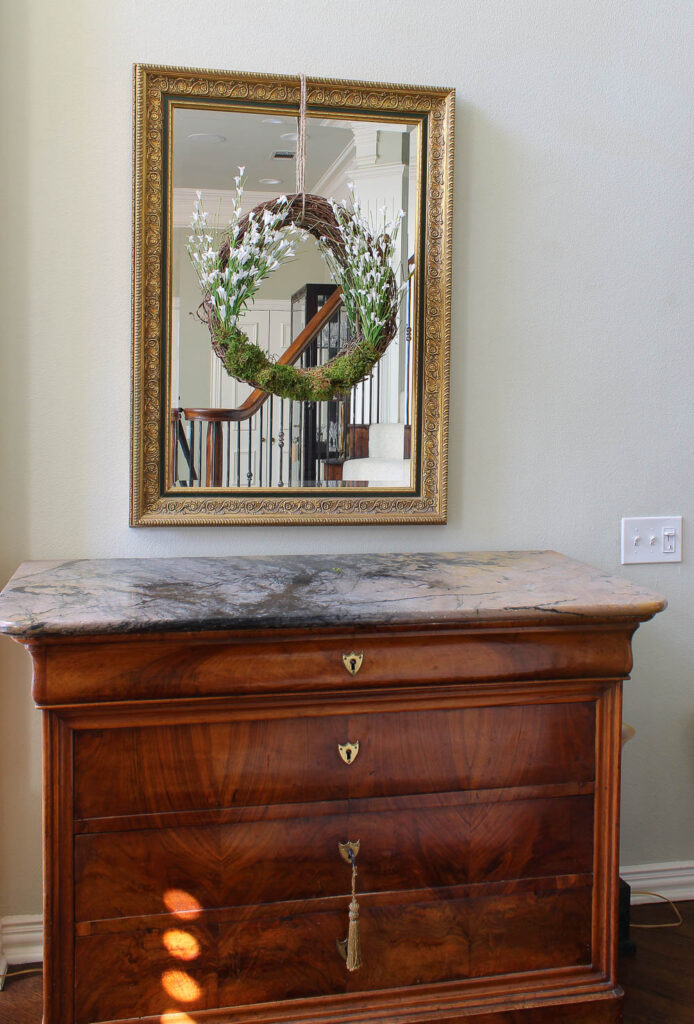
Throughout these images, you are going to see my tripod and camera. No way to get around that when you are photographing a mirror.
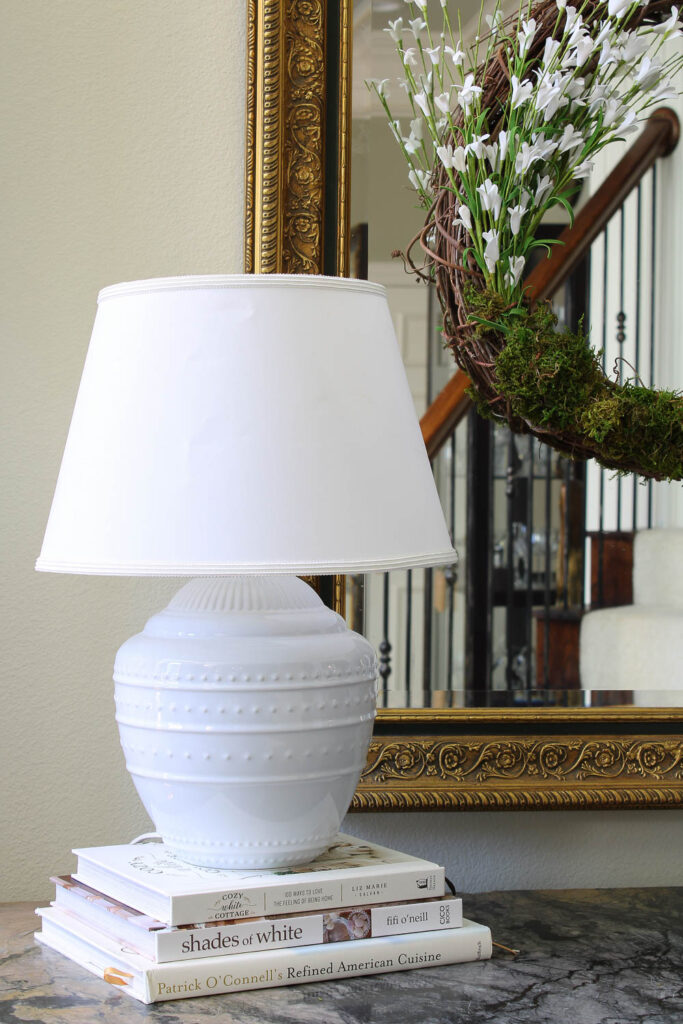
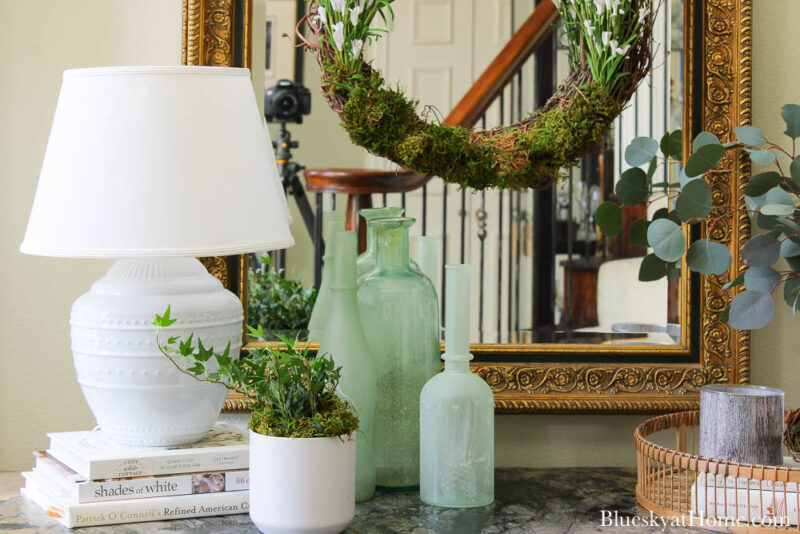
STEP 2 – I start with the largest element which in this case is the lamp. Leen’s lamp was tall; my lamp from Ikea is short and wide.
To give the lamp more height, I placed it on a stack of three white books.
STEP 3 – Next came the small white vase with the ivy and green jars.
The frosted glass jars give just the right touch of soft green color to my spring entryway. The middle one is part of a pair from Home Goods that I’ve had for years. The two on the left and right are liqueur bottles that I painted to give a sea glass look. That is a super easy, but impactful DIY project.
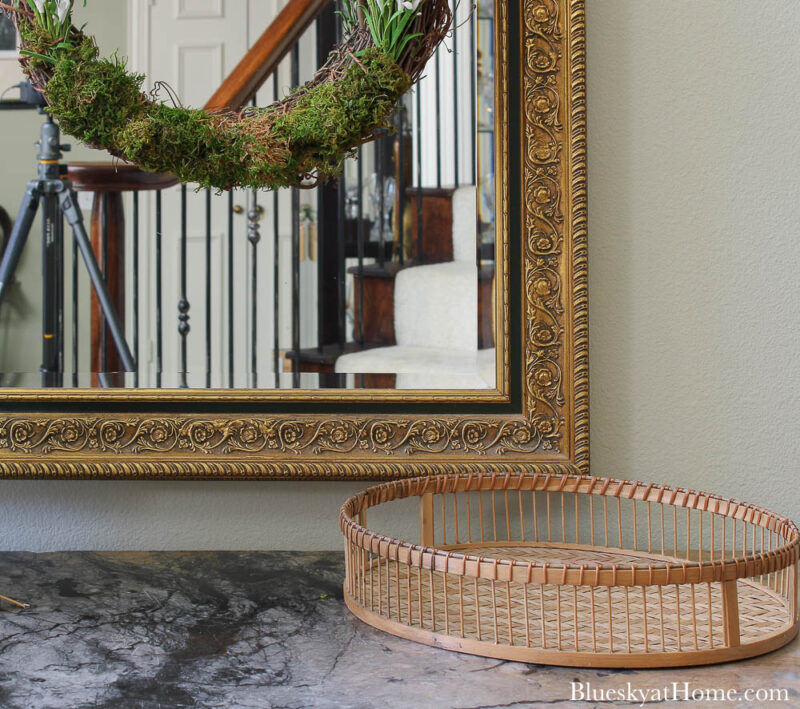
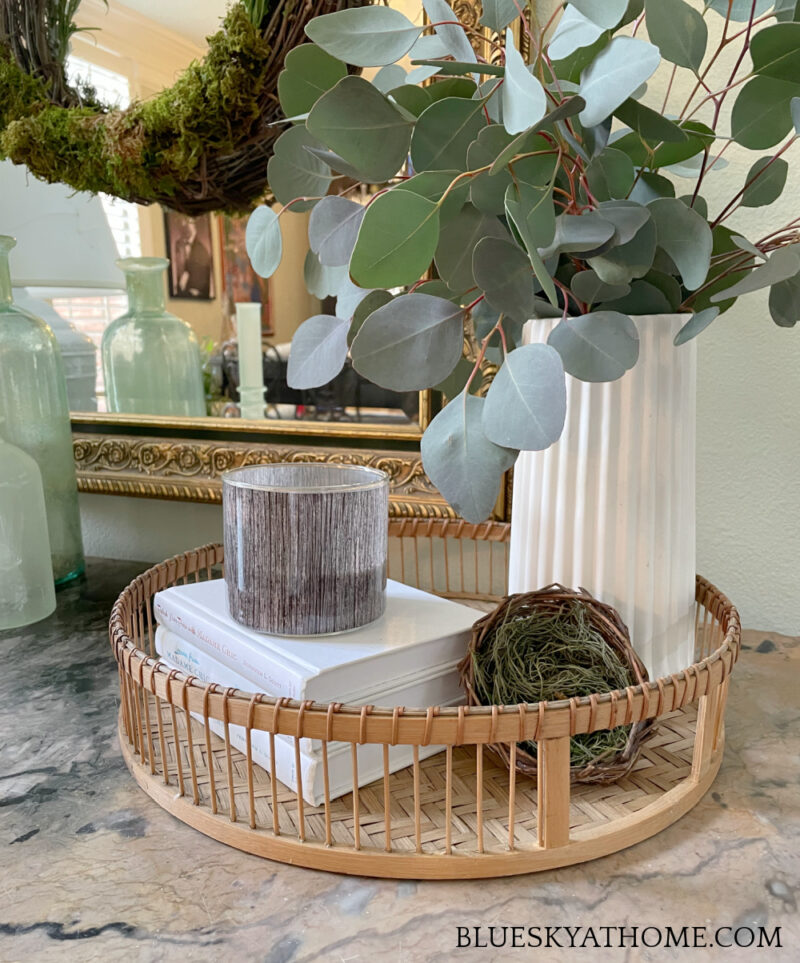
STEP 4 – On the other side of the commode, I added a round woven tray. I love the contrast of shapes and textures.
TIP: Mixing shapes and textures in accessories always creates interest.
The natural wood tones of the tray reflect the natural material of the grapevine wreath.
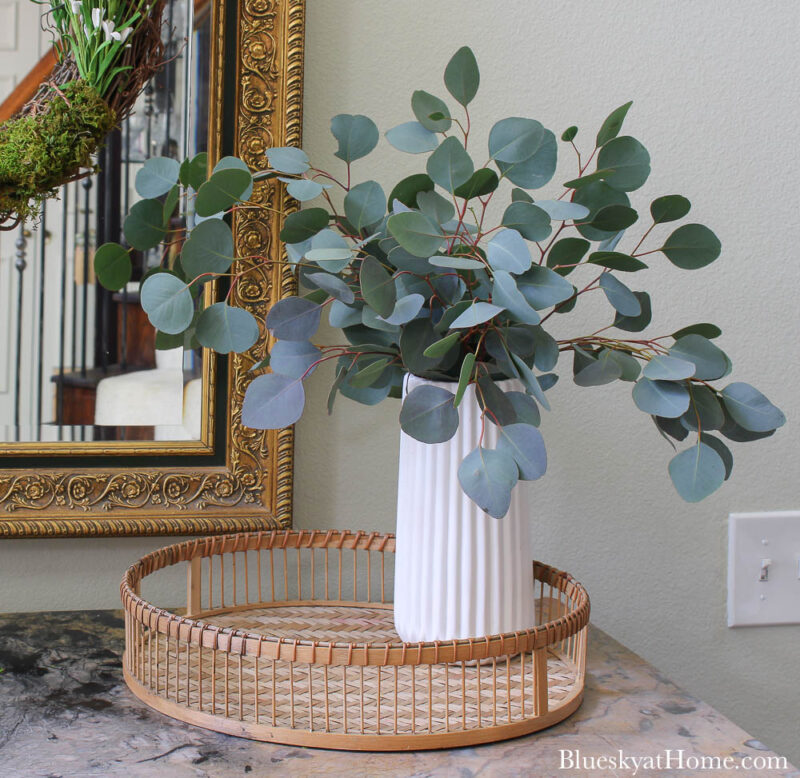
STEP 5 – Next came the tall white vase with the eucalyptus. I love the ridged texture of this vase. It’s amazing how light and airy real eucalyptus looks compared to dried. It also has a softer feel.
TIP: Real eucalyptus is so inexpensive and it will last for several days so try to use it when appropriate.
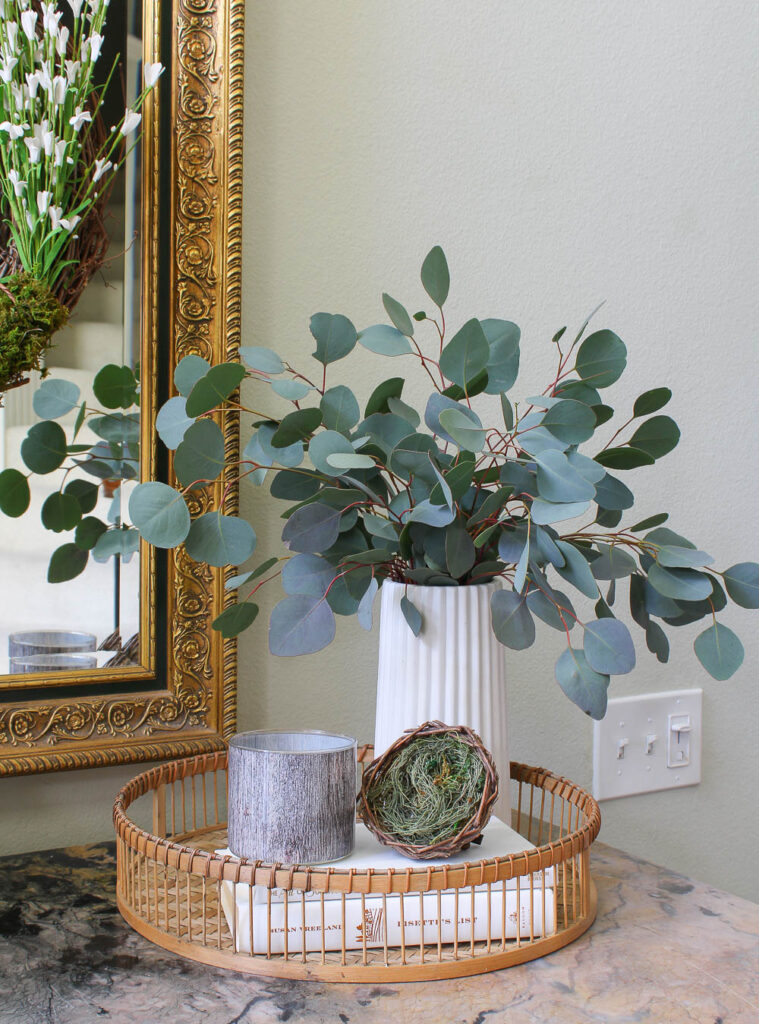
STEP 6 – I added another stack of white books with a candle on top. The candle has a soft, neutral color and is in keeping with the overall style of the entry. (The scent is marshmallow and a tennis friend gave it to me a few years ago.)
As a bonus, the color of the candle compliments the soft grey-green of the eucalyptus leaves.
Nests are perfect for spring, don’t you think? I have a couple of these nests. I’ll put Easter eggs in them soon.
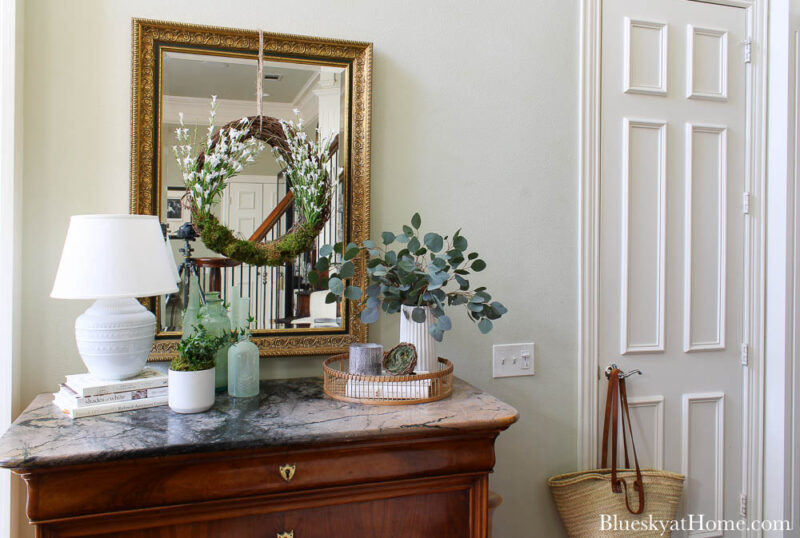
That is how easy it is to create a spring entryway.
I kept the scene simple and didn’t overthink the design.
You may notice that the overall shape of the scene creates a triangle, bringing your eye up in the middle.

On the closet handle is my French market tote. I bought it a couple of years ago as a container for a spring vignette. It now stays on the closet handle and holds Nola’s harness, leashes, poop bags, and my visor for walks.
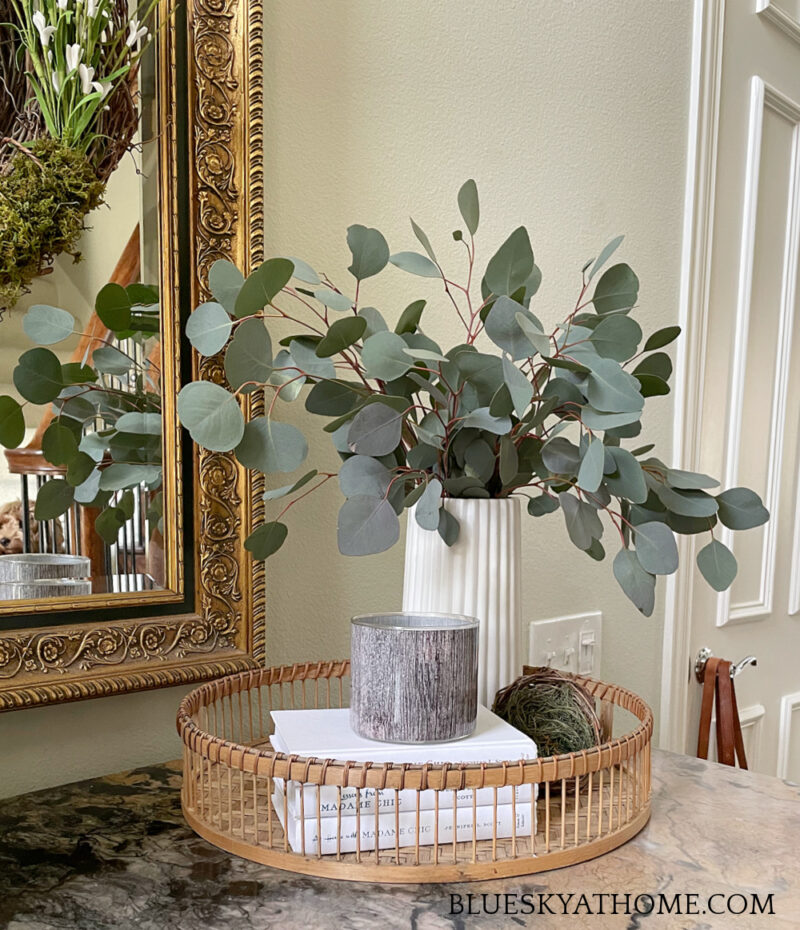
Do you notice something different?
Since I thought the vignette needed as much height as possible, I switched out the shorter green glass vase for the taller one.
I made a change here, too. The first book stack of two was a bit too large, so I replaced it with three books that are slightly smaller. Now there was a bit more height and more space between the elements on the tray.
That is how I created my spring entryway. It came together so easily. What made it so easy?
- Focusing on the colors (white, soft green, and natural woods).
- Keeping to just a few basic elements – lamp, books, vases with greenery, a few glass jars, and a tray.
- Bringing the eye up with the grapevine, flower, and moss wreath.
- An asymmetrical arrangement that is balanced.
- Including one surprise item – the natural nest with moss.
What is your favorite element of the spring entryway? I love the overall look, but I really like that I was able to use my frosted sea glass-inspired jars. The natural eucalyptus in the tall white vase is another special element.
From beginning to end, these 11 steps are so easy. Follow them and you’ll have the prettiest spring entryway.
Want to see more spring entryway ideas? After you PIN my spring entryway (yes, PIN, please!), head over to one of my Pinterest Account and check out Spring DIY Ideas and Spring Home Decor Ideas. I know you will be inspired.


Love what you’ve done, Carol. Your wreath is so cute — and so unique. I am getting anxious to do some Spring decorating but it is snowing at the moment!
Your entry looks so fresh and inviting! Thanks for sharing your step-by-step process; well done!
And thanks so much for joining the Grace at Home party at Imparting Grace. I’m featuring you this week!
I love this step by step tutorial for welcoming Spring into your home! I am excited to feature your post at Tuesday Turn About! xo
I am with you — can’t go wrong with greens and florals for a fresh spring look. Thanks for sharing at Vintage Charm! xo Kathleen
It’s all lovely!! I love that wreath…I just might have to make one of those!
So many pretty ideas, Carol. I really love the way you tucked the moss in around your plant and on the wreath. Great idea for a fresh spring look! Pinned!
Niky @ The House on Silverado
I love this! Super cute, my friend. I hope that you will share this on the Fabulous Friday Link Party. You can find it on my website. Hugs to you.
This spring entryway table is just so pretty Carol. I am loving the frosted bottles. I need some of those. And adding that wreath was the perfect touch. You nailed this challenge.
What a beautiful piece of furniture! Love the bright, fresh colors and textures on it for Spring; so pretty.
You always do such a great job at sharing the how and why in your posts. I know your readers appreciate it. Love what you’ve done and the added wreath on the mirror. Everything is perfectly spring. Thank you for joining in. Your creativity is inspiring.
Carol, I just love that homemade wreath with the moss and flowers! The rest of your vignette is so pretty too!
Your wreath on the mirror is so pretty Carol and really completes the beautiful spring vignettes you created. The eucalyptus is perfect with your sea glass bottles. Love it and pinning!
Carol,
What a beautiful take on the inspiration photo. I loved the moss wreath you added to the mirror. Great Job.
THE WREATH HANGING OVER THE MIRROR IS SO CUTE. GREAT JOB!
Carol, This look is so pretty. I love your step-by-step process. The wreath is such a pretty touch for the vignette!
Hi Carol, I love the wreath in front of the mirror. I never thought to add that and I love it! It looks great. I also love that you have an accessory closet upstairs! Happy Day! Looks great!
laura