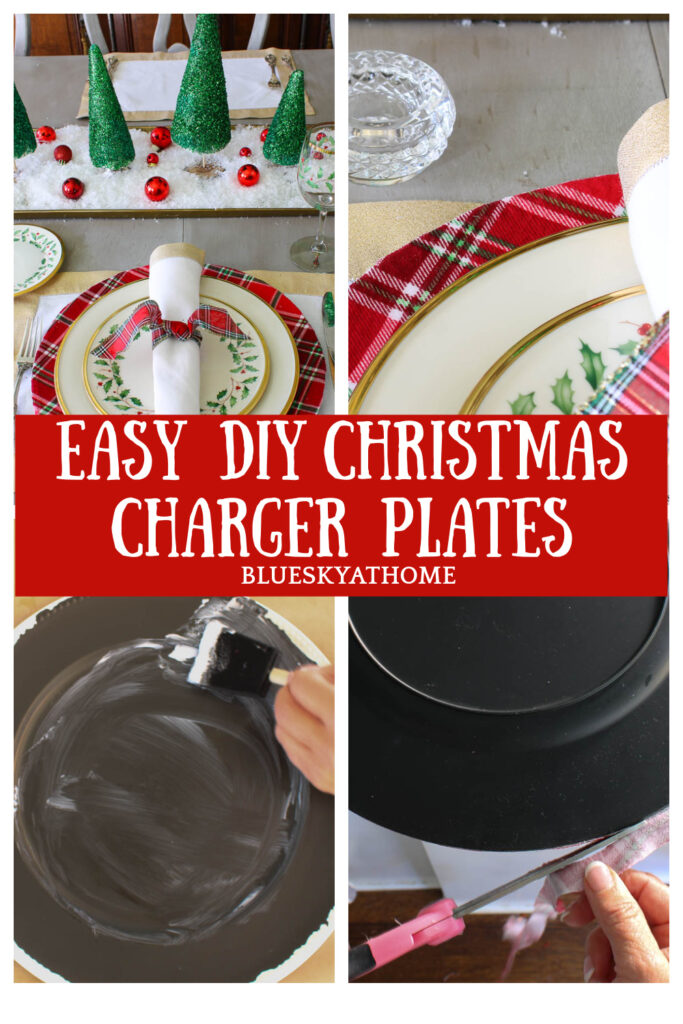
How to Make Dollar Tree DIY Christmas Charger Plates
Do you think that you will be styling a Christmas table for entertaining the holiday season this year? Want to add a festive item to your table? Let me show you how to make Dollar DIY Christmas charger plates.
Welcome to Day 2 of Christmas in July 2022. I love looking back at last year’s Christmas DIY projects. It’s great that they will be just as merry and bright this year as last year.
If you missed Day 1 ~ How to Use Dollar Tree Candles to Make Christmas Candles ~ check it out.
These DIY charger plates are one of my favorite Christmas projects. They will add color and pattern to your Christmas table. Another good thing? Once you know how to make them, you can adjust for any holiday or event.
Chargers can add to your event theme and the style of your table. They can make your place settings more elegant and dressy or casual and festive. It all depends on the fabric that you choose.
This was the first time that I have made DIY charger plates. It had such a big impact on my Christmas table that I can tell you it will not be the last time.
This project was so easy and very inexpensive. I love that the Christmas chargers can be reused for several Christmas table settings.

The Inspiration for the DIY Christmas Chargers
I first saw this idea from my sweet Texas friend Crissy of First Day of Home. Immediately, I knew I wanted to make some plaid DIY charger plates for my own Christmas tablescape.

Here is how I made my DIY charger plates for Christmas.
Supplies for the DIY Christmas Chargers
The list of supplies you need for this project is short. You may have some of the supplies on hand. I already had everything I needed except for the plaid fabric. I know that you could use paper napkins, but I’m going to focus on using fabric.
First, decide how many chargers you need for your event. I needed eight.
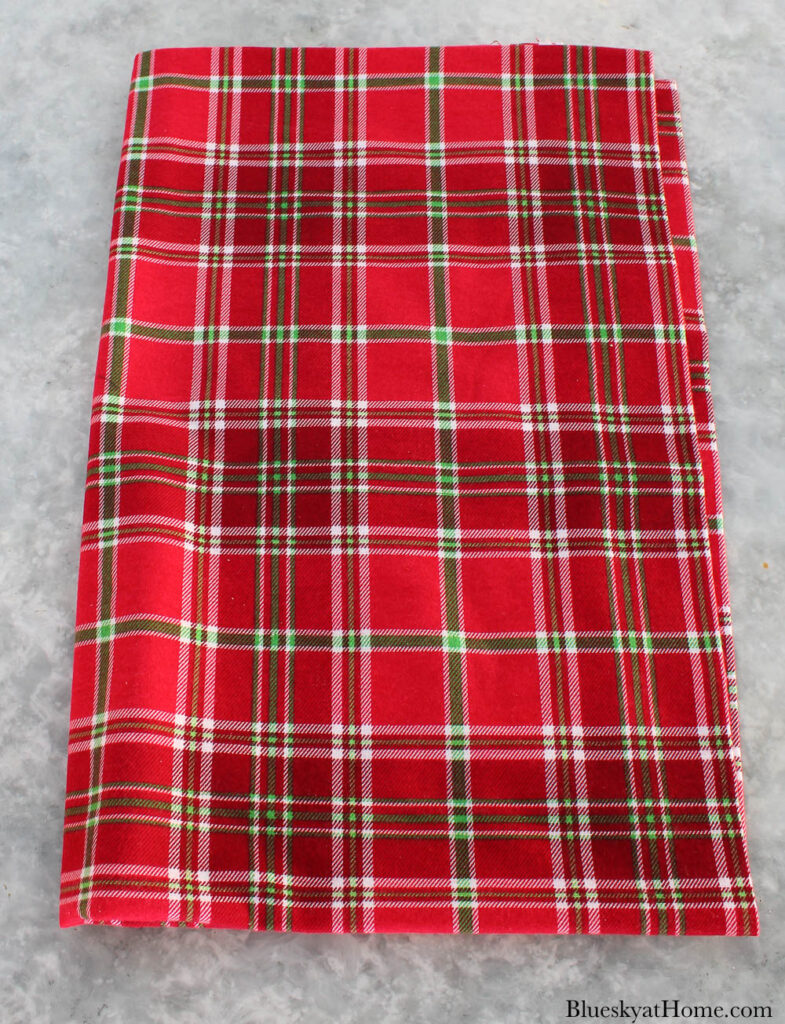
- fabric of your choice of color and pattern. I wanted the red and green color to play off of our Christmas china.
- I knew that I wanted red plaid fabric. I also knew that cotton would be the best fabric. Unfortunately, the fabric with the pattern and color that I liked best was in flannel.
- The flannel worked just fine. I bought 1 1/2 yards just to be sure I had enough. I did have some leftover fabric.
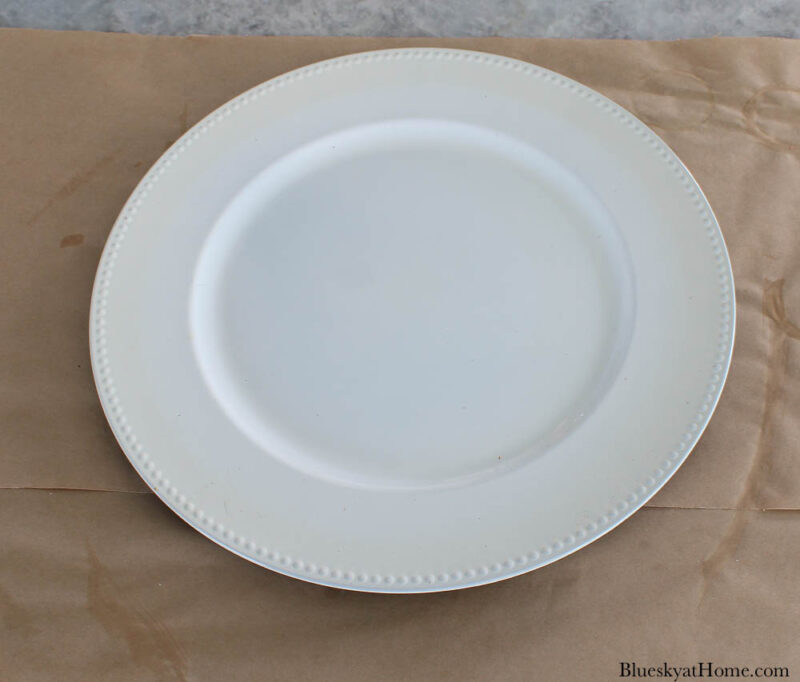
- the number of chargers you need. I needed eight and had six on hand. I bought two new ones at Dollar Tree. You can also find charger plates online. Be sure to get plain, simple ones.
- sewing scissors
- Fabric Mod Podge
- a foam brush or paintbrush or Mod Podge brush applicators. I started with a foam brush, but switched to the Mod Podge brushes. I absolutely love using these brushes. I really like how easily they work and they clean up better than a foam brush.


Steps to Make the Christmas Chargers
This is the process that seemed the easiest to me. I found it quickest to complete the chargers in an assembly~style process. I’ve tried to break down the process as much as possible for you.
Step 1 ~ Cover your work surface.
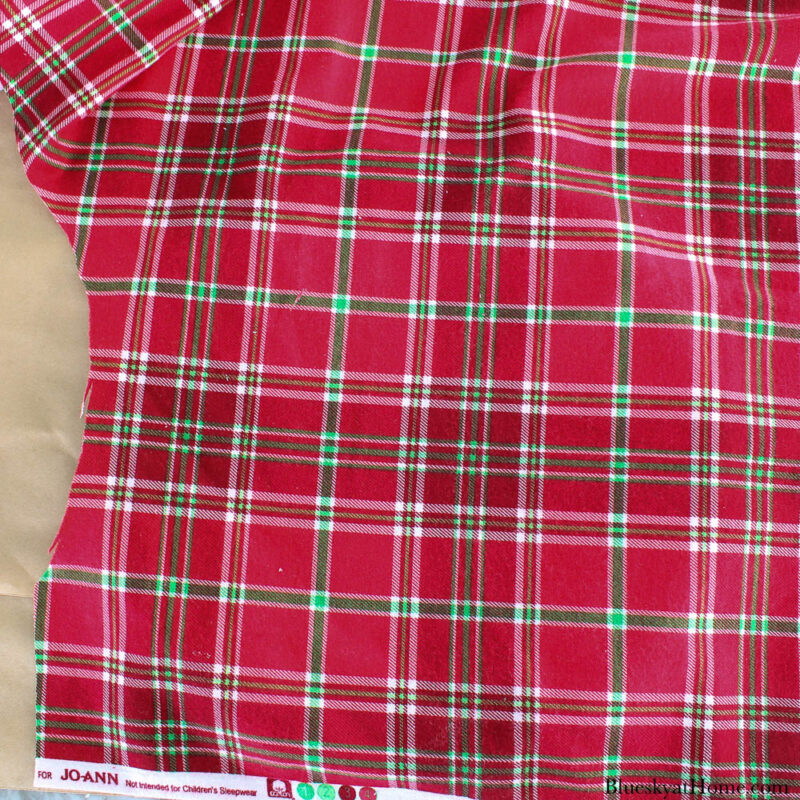
Step 2 ~ Lay out your fabric. If there are wrinkles, iron them out.
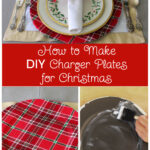
Step 3 ~ Place a charger right side up on your work surface. The white film was coming off some of my chargers, so I pulled off as much as possible.
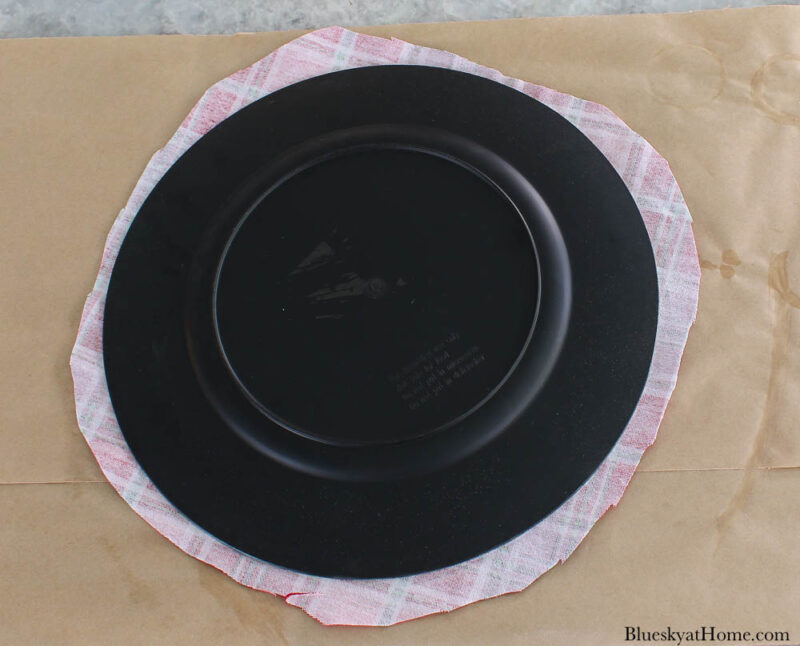
Step 4 ~ Lay your fabric, right side up, on the charger. Position the fabric with the edge and side of the charger underneath the fabric. You want to get the most charger covers out of the fabric you have. Make note of where the fabric is on the charger, then fold it away from the charger.
Step 5 ~ Pour some of the Fabric Mod Podge into a small plastic or glass cup. Using the brush, apply the Mod Podge in long strokes on the charger. Cover all charger surface completely.
I started out using a foam brush, but switched to the Mod Podge brushes, which I like much better.
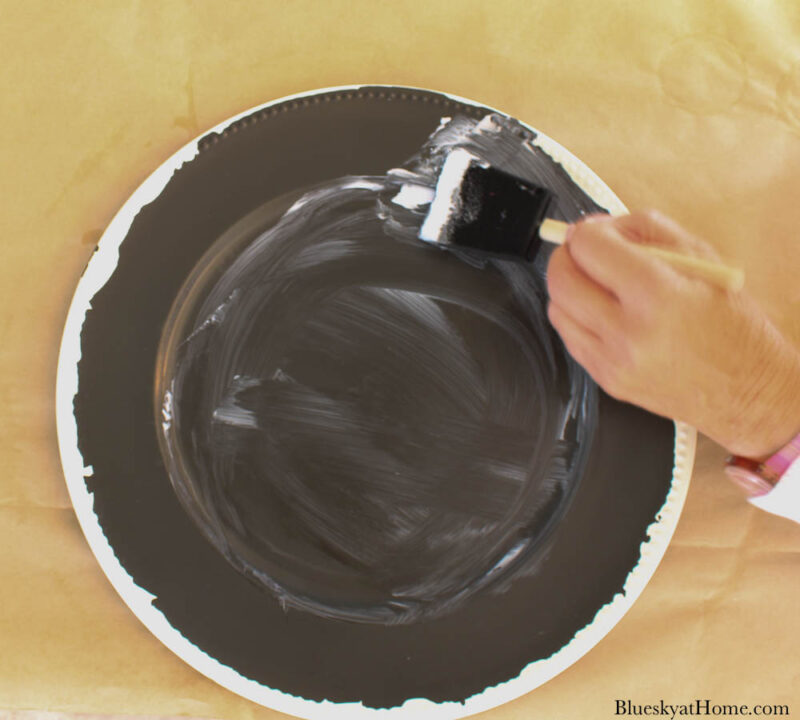
TIP: You can apply a bit more Mod Podge on the edges.
Step 6 ~ Carefully place the fabric on the charger. Use your hands to gently press the fabric down to the charger all the way to the edges. Press the fabric down firmly on the edges of the charger.
Step 7 ~ Cut the fabric around the charger with about 1/2 ~ 1~inch allowance. Set aside to dry. Repeat with all your chargers.
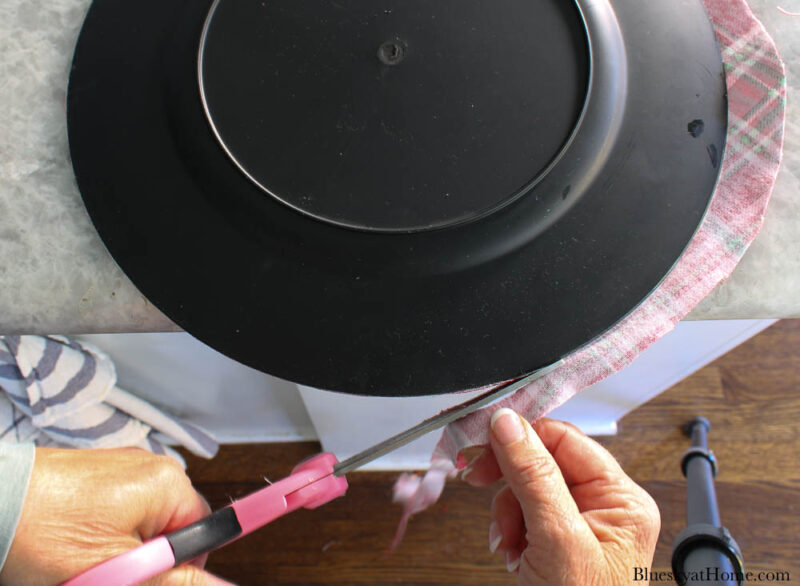
Step 8 ~ Once the Mod Podge is dry, turn the charger over. I found it easiest to cut away the excess fabric by hanging the charger over the kitchen counter. Cut the excess fabric as close to the edge of the charger as possible. Turn the charger over and trim any other excess fabric.
Step 9 ~ If you like, apply a small amount of the Mod Podge to the fabric at the rim of the charger. Set aside to dry.
TIP: Wash your Mod Podge brush in a small amount of dish soap and water. Reshape and allow to dry.
I completed this project in about 1 1/2 hours. That included drying time.
Using Your Christmas Charger Plates
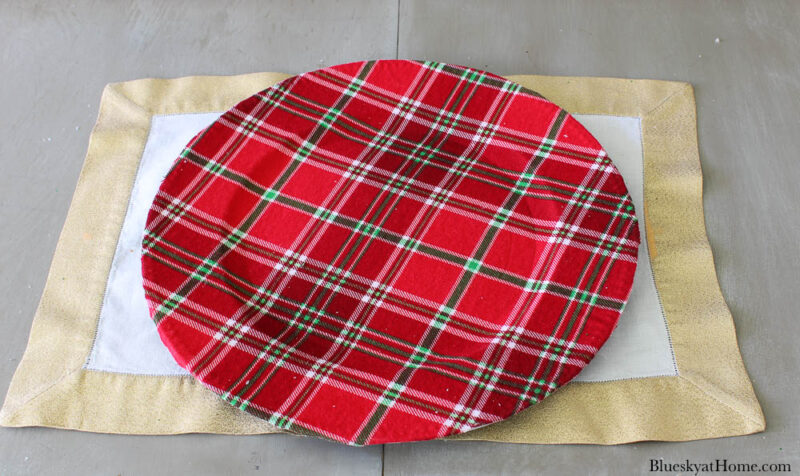
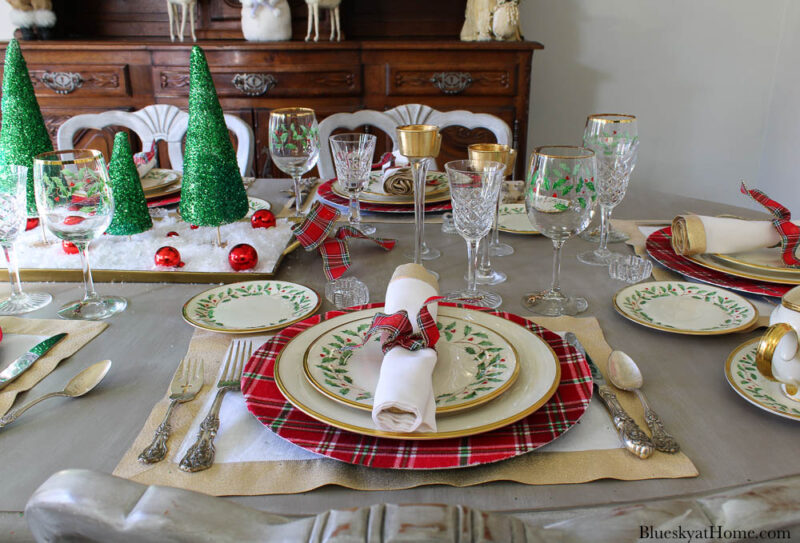
In setting my Christmas tablescape, I placed the red plaid chargers on my white placemats with gold trim. We’ve had these placemats for almost 25 years and they still look lovely.
Then came the dishes, silverware, glasses, napkins, and more plaid ribbon as napkin rings.
Tomorrow, I’ll share how I made the glitter Christmas trees for my Christmas tablescape. Don’t you think they are the cutest?
If you have never used Mod Podge for decoupage projects, then this is a time to try it. If you have never decoupaged fabric, then try it, too.
Be sure to PIN this project. I’m sure you’ll want to try it.


I always love how easy to follow your tutorials are! Although I am not a charger-using person, I would use red and black buffalo plaid caz it would be good (here in Maine) from fall (hunting season) thru the winter! We paraphrased Jeff Foxworthy’s You might be a redneck if… to be You might be a Mainer if…your going to church jacket involves red/black Buffalo plaid (i.e., the best coat you own)!
Oh, that’s funny. Loved that you can take this idea and make it your own.