How to Make the Cutest Edible Party Favors
Whatever party hosting you have in your future, I’m going to show you how to make the cutest edible party favors that will have your guests ~ of all ages ~ loving your party.
Party favors can be one of the best treats for your guests when you host a party ~ any kind of party: a birthday party, graduation party, bridal shower, baby shower, the possibilities are endless.
When my kids were young and we hosted and attended birthday parties, the take~home favors were as special as cake or presents. And when party favors are cute and edible and personal, they are even better. As a bonus, party favors can add to the party decorations.

If you read my post How to Host a Valentine’s Party for Your Girlfriends, you got the first glimpse at these yummy white chocolate covered marshmallows. They were such a hit that I knew I had to make them again.
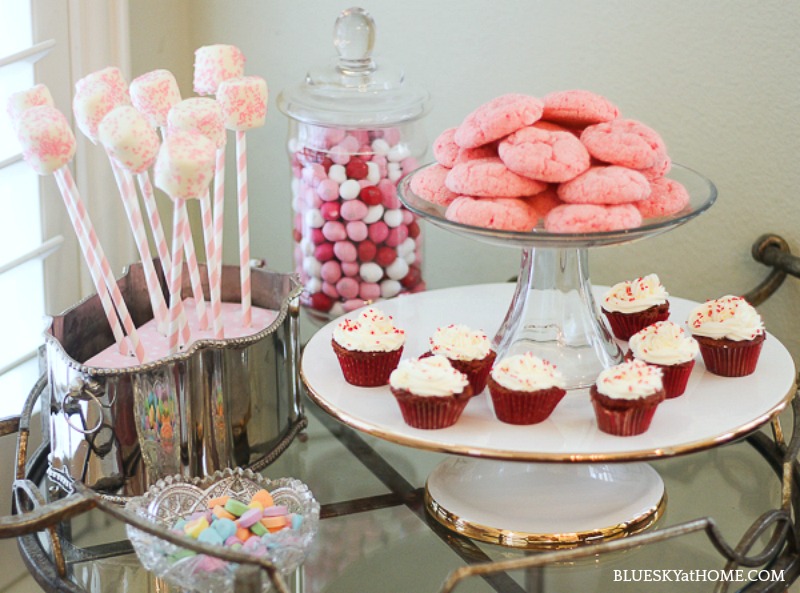
Fortunately, one of my dearest and longtime friends (We met when our girls were in pre~school together and they just turned 31!) was having a birthday party last week. A few friends were getting the location, sending out invitations, and making the centerpieces. I volunteered to make the edible party favors. And I thought the marshmallows would make fabulous party favors.
How to Make the Cutest Edible Party Favors
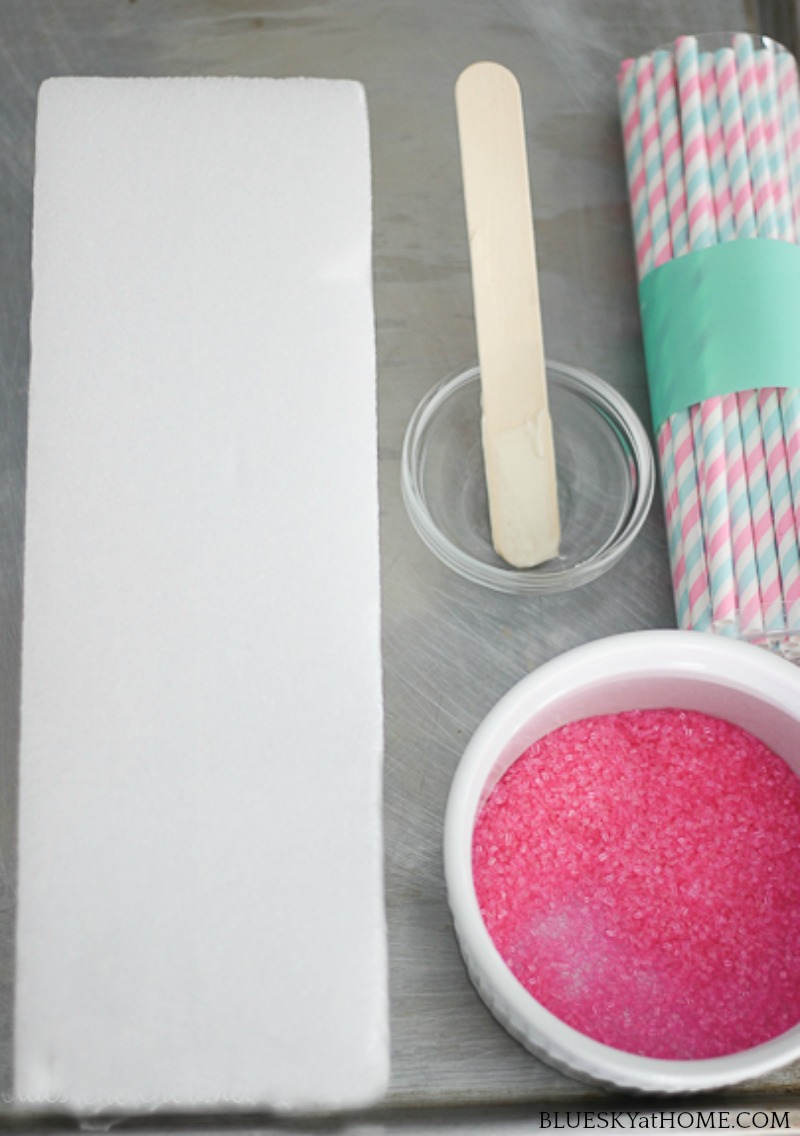
Party Favor Supplies
For each party favor, you will need:
1 standard size marshmallow (a bag of Kraft Jet~Puff contains about 40 marshmallows),
1 11~ounce bag white chocolate (I used Ghirardelli White Chocolate Baking Chips.)
1 sturdy paper straw in your desired colors/patterns (available at any party store for about $4.99 for a package of 50.)
1 jar colored sparkling sugar or other edible decorative sprinkles in color of choice* (cost varies, depending on the size of the container from $1.40 ~ $3.49)
1 4~inch X 6~inch plastic gift bag* (package of 100 for $4.99)
curling ribbon to tie plastics bags in color of choice* ($1.00)
1 styrofoam rectangle* ($4.99 – $1.20 coupon)
*available at Joann, Michaels or Hobby Lobby
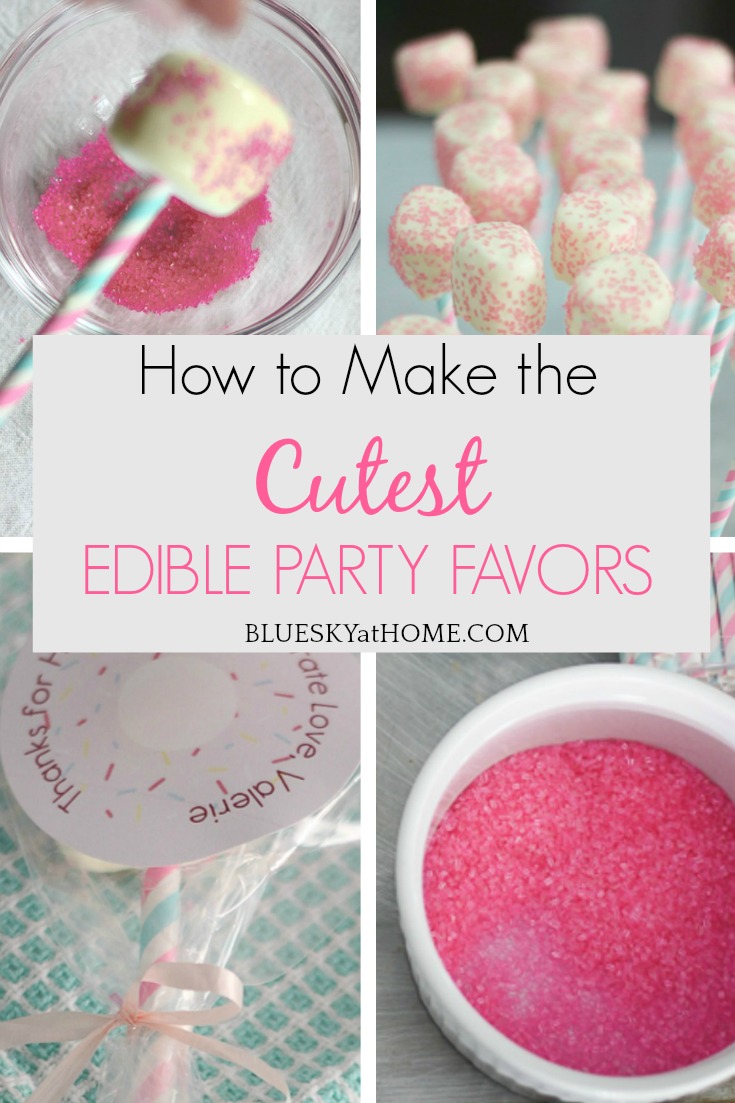
Step 1 ~ Assemble your Supplies and Ingredients for the Party Favors
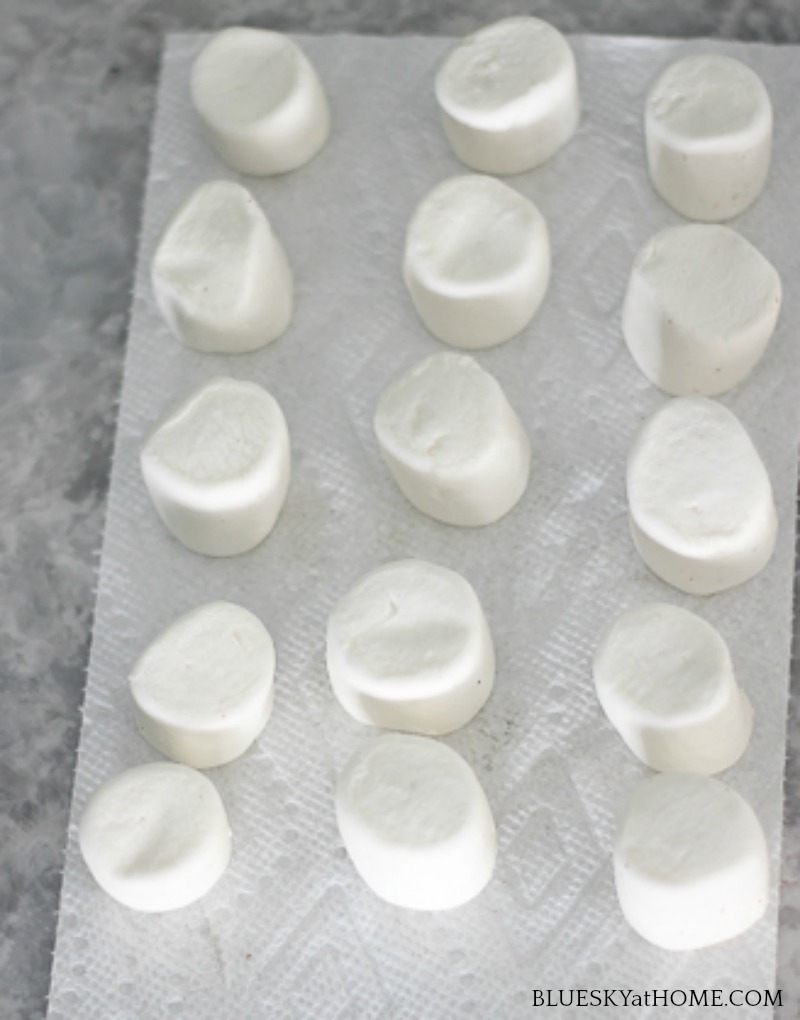
Place the sprinkles in a bowl.
Count out the number of marshmallows you need. (I needed 26 for this party.)
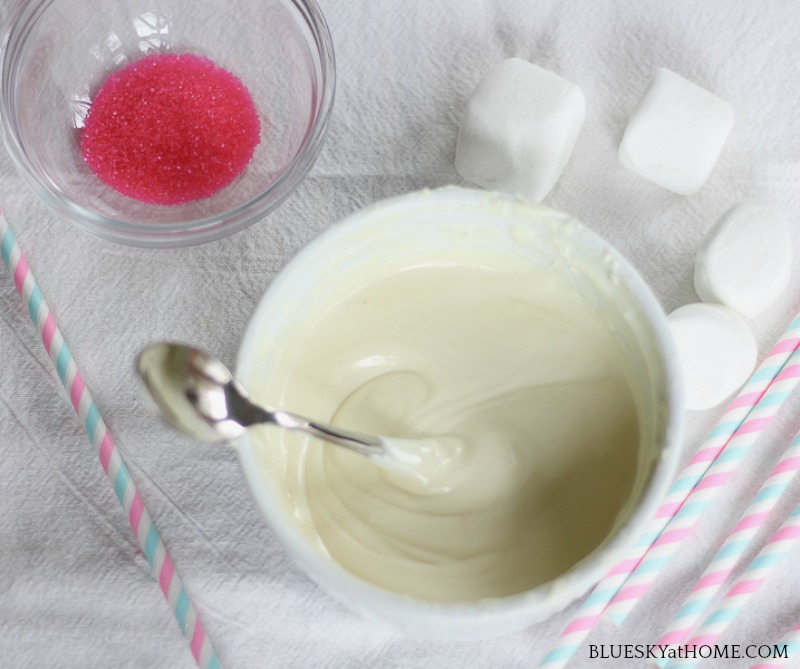
Step 3 ~ Melt the Chocolate
Place about 1 cup of white chocolate chips in a microwaveable bowl and microwave according to directions. Stir with a spoon or popsicle stick until all the chocolate chips are completely melted and the mixture is smooth.
Step 4 ~ Spear a Marshmallow with a Straw and Dip in Chocolate
Carefully push a straw almost to the top of the marshmallow and immediately dip the marshmallow in the warm chocolate, swirling it around to cover most of the marshmallow. Remove the marshmallow from the chocolate and gently tap the straw against the rim of the dish to allow excess chocolate to drip back into the bowl, turning the marshmallow.
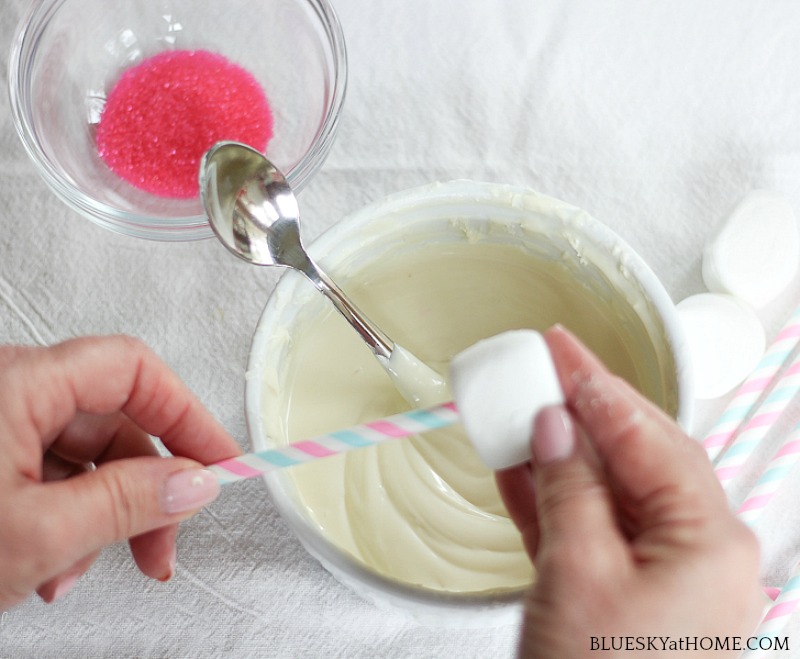
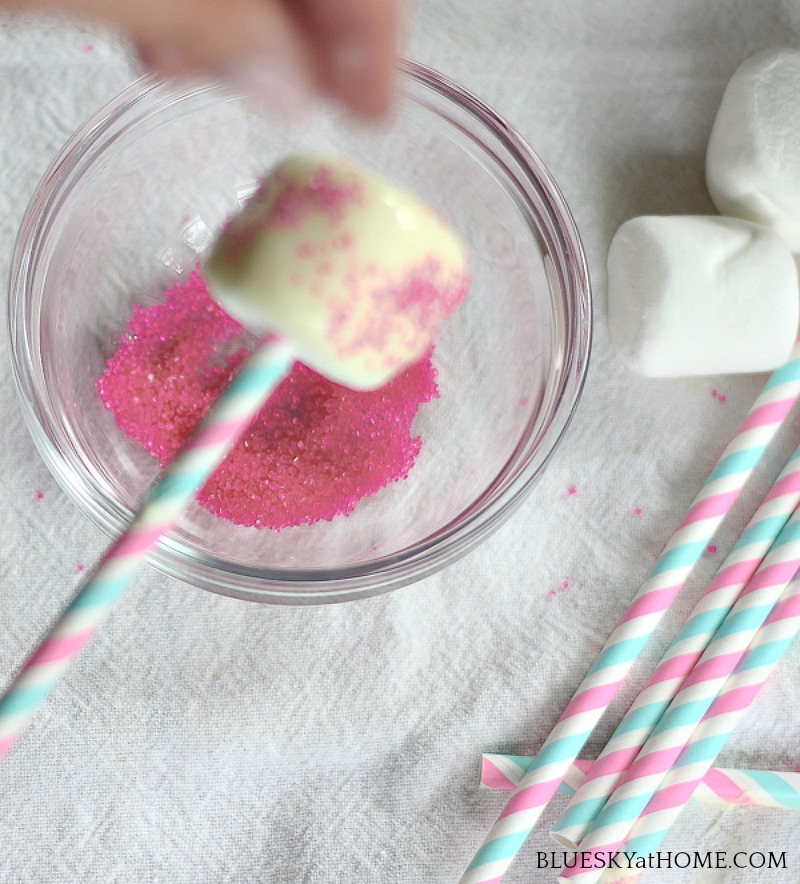
Step 5 ~ Sprinkle to Decorate the Party Favors
Holding the straw with one hand use the other hand to lightly sprinkle the sprinkles on the white chocolate. You don’t want to cover the marshmallow too much.
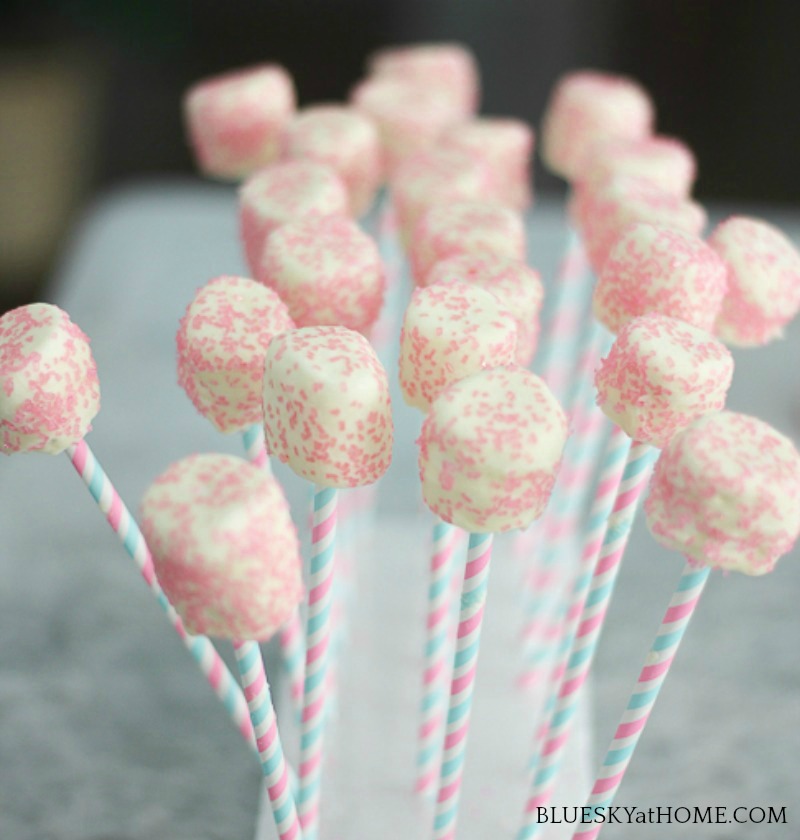
Step 6 ~ Place the Straw in the Styrofoam to Set
If you want you can make holes ahead in the styrofoam. I used the point of my instra~read thermometer. As you finish each party favor, place it in a hole. This step will make the process so easy, keeping the straws upright and the marshmallows not touching as the chocolate sets. I recommend at least 30 minutes. I stopped and went to lunch and when I came back the chocolate and sprinkles were set and I prepared the stickers and the bags.
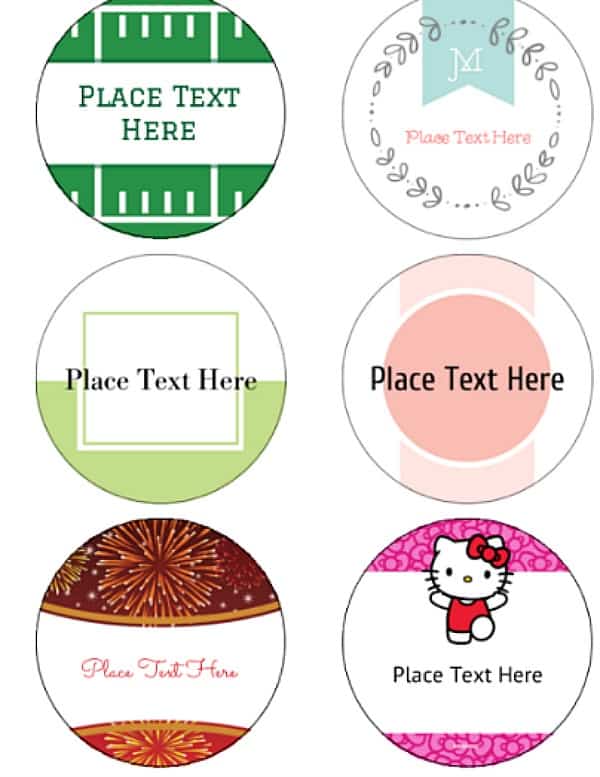
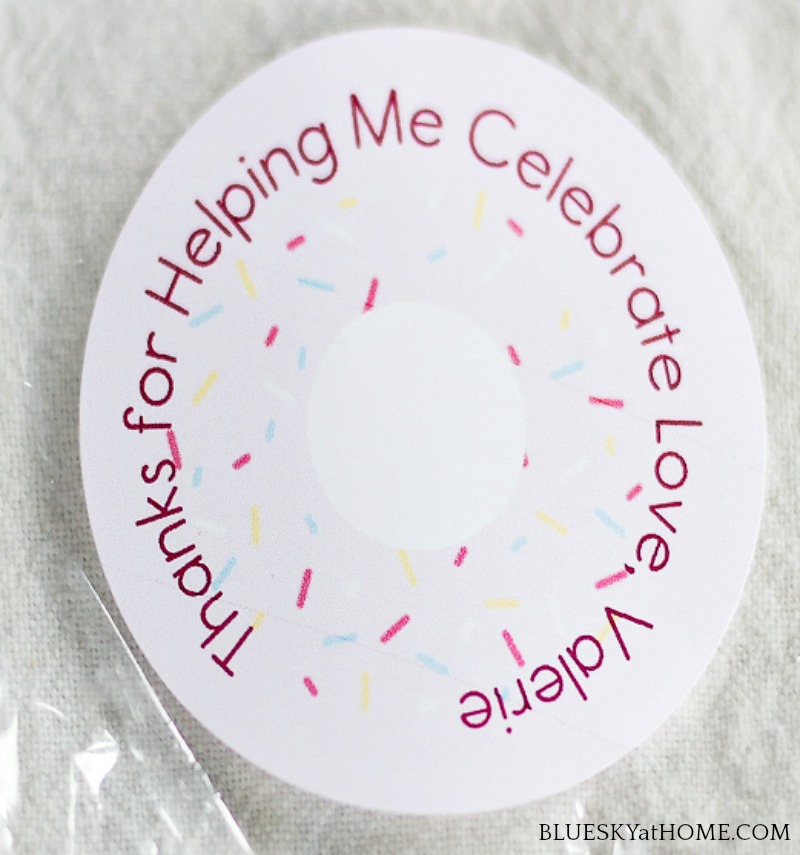
Step 7 ~ Make Your Party Stickers
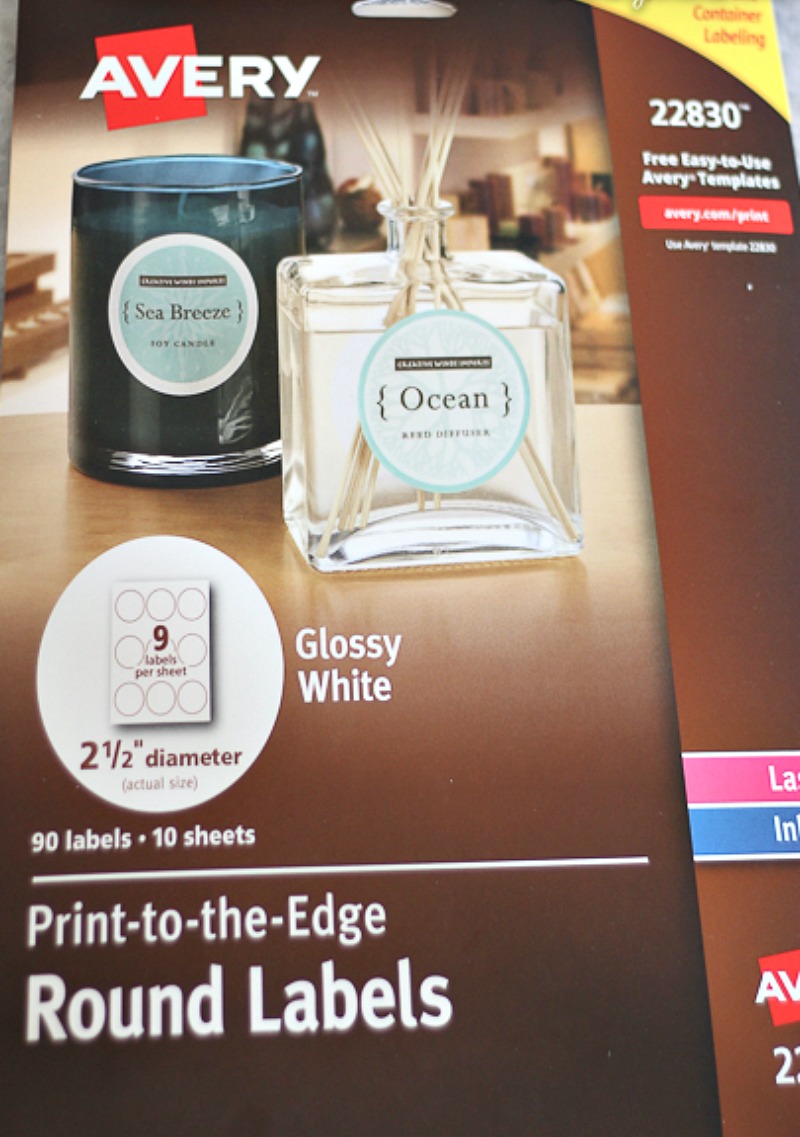
In my humble opinion, the sticker is a must. It adds the personal touch to the edible party favor. I purchased Avery Round Labels #22830 in the 2 1/2~inch size. (90 stickers,$16.79 a package, ) Adding your own text and printing the labels was so easy. The only hard part was choosing from all the template choices ~ they are all so cute.
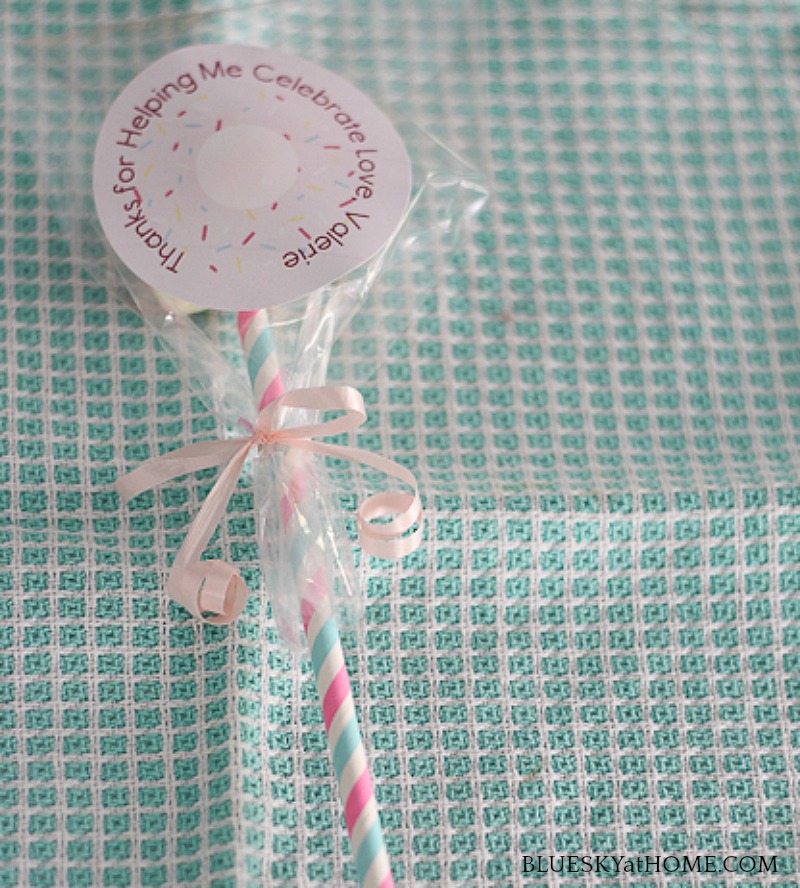
Step 8 ~ Place the Stickers on the Bags
Be sure to do this first before you place the marshmallow in the bag.

Step 9 ~ Tie the Bags with Ribbon
I first tied one of the silver twist ties that come with the bags to hold it while I tied the ribbon on. I used curling ribbon, but you could use any kind you like. Then remove the twist tie, which I reused for all the bags. You are done and can just lay the bags down now.
Making these cute edible party favors is easy, but it does take time. I think I spent about 1 1/2 hours start to finish (not counting going to lunch for an hour.), but it was so worth the smile on my friend’s face and to be part of the preparations. Everyone loved the party favors. It’s just enough to say thank you for coming and I appreciate your presence.
I’m already thinking of future parties to use these white chocolate covered marshmallow party favors. One of my friends at the birthday party asked if I would make them for her daughter’s upcoming wedding reception. I asked how many? 300! I said that was more than I could handle, but a bridal shower would be fine. Maybe a new side career? What do you think? Out of curiosity, I’m wondering if people would order these as party favors. Anything under 300, please.
Please PIN this post for your future party ideas.


These are adorable and so thoughtful. I agree that the sticker adds so much personality. 🙂
I admired these in your earlier post. Thanks for the very easy (if time consuming) instructions!
Jeanie, actually each marshmallow can be made in less than a minute ~ like 20 seconds. While the chocolate is setting you can make your stickers if you are giving them away at a party. Placing the stickers on the bags and tying with ribbon is another 30 seconds, so under a minute for each one. I’m not a fast ribbon tie~er.