How to Make a No-Sew Blanket for Your Home
Last week I shared my no~sew pillow, which was such a hit with readers that I thought I would share last year’s how to make a no~sew blanket project. And since today I’m flying home from Atlanta to Dallas, it was a great time for a rerun.
During cold months, I love a warm, soft, snuggly blanket or throw to cover me when we are watching T.V. or relaxing (napping, I wish) on the sofa. Pretty throws can provide not just physical warmth, but they can add color and pattern to any home decor. Some, especially cashmere, can be expensive.
Did you know that you can make the warmest, prettiest blanket without a sewing machine or a needle and thread? I didn’t know that either until last January I helped to make 8 no~sew blankets. So I became an expert overnight. I have been dying to show you how to make a no-sew blanket. It’s so easy, whether you are a sewer or not.

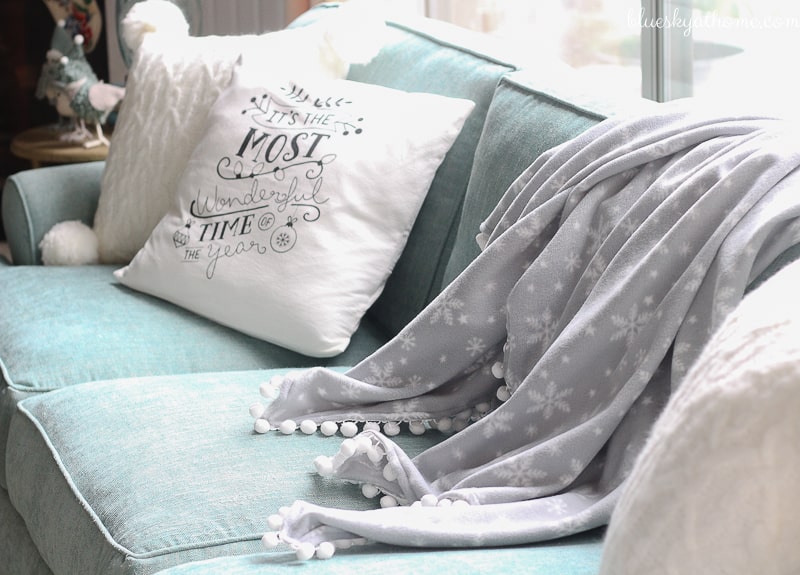
There’s a little story behind the inspiration for how to make a no~sew blanket. I made a blanket for our living room just for the Christmas holidays with pom~poms all the way around. Between pinning and basting and sewing, it was quite a project, but I loved having the soft grey fleece with white snowflakes out on the sofa during the holidays.
Before Christmas I had such good intentions of making one for my younger daughter to use on the new sofa that she bought for her apartment last fall. I even bought a pretty grey fleece to go with the charcoal grey of her Ikea sofa. Don’t shoot me, but I never got around to making it. After making the one with pom~poms, I was tuckered out of sewing and it was too close to Christmas to make her one like it and get it shipped.
So I still had the piece of grey fleece and thought I would just sew a plain hem around the edge. Then after the first of the year, I was introduced to the no~sew blanket technique.
How to Make a No-Sew Blanket for Your Home
In January, I was in charge of a volunteer session at my home for a women’s charity organization that I have belonged to for 14 years. Besides raising money for our local county hospital every year, every member has a certain number of volunteer hours to complete. In the fall, we sign up for the different social service opportunities. This particular session was a blanket~making session. I had never attended one of these and assumed that I would get out my sewing machine and a few other ladies would bring theirs.
When the volunteer coordinator brought all the fabric over to my house, she explained that these were no~sew blankets ~ ones that were given to the patients in the rehabilitation unit and they took them home with them upon discharge. She brought instructions and one of the ladies coming to my house the next day had made them before and would show the rest of us how to make them. In less than 2 hours, 8 ladies made 8 no~sew blankets.
The idea of making a no~sew blanket for my younger daughter was born. I purchased a second piece of fleece in a grey and white pattern to compliment the grey solid I already had.
Supplies for the No~Sew Blanket
Here’s the beautiful thing about making these blankets. You will need:
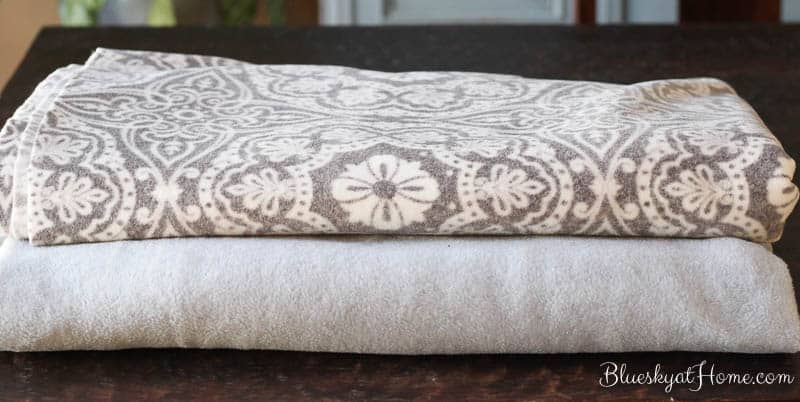
- 2 pieces of coordinating (color/pattern) pieces of fleece, about 2 1/2 yards each ~ I bought my fleece at Joann.
- good sewing scissors
- a ruler
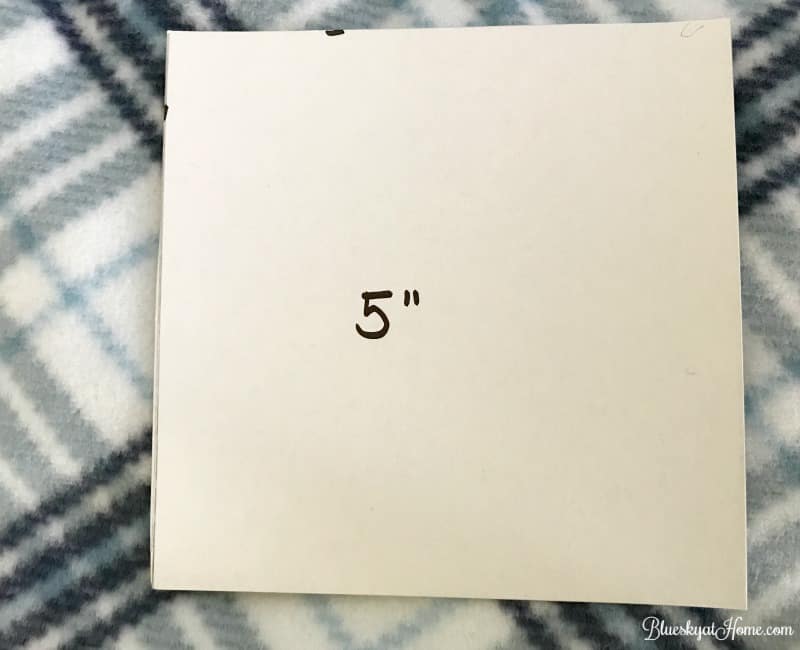
If you want to get really fancy, you can make a 5″ card to measure your corners. That’s it. Look, ma, no sewing machine, needle or thread.
Making the No~Sew Blanket
Since I had a trip to Atlanta planned to visit my daughters, I decided to take the fleece and my good sewing scissors with me and make the no~sew blanket there. And yes, it all fit in my suitcase. My older daughter has a large rectangle dining room table that would be perfect for laying out the fabric.
Step 1
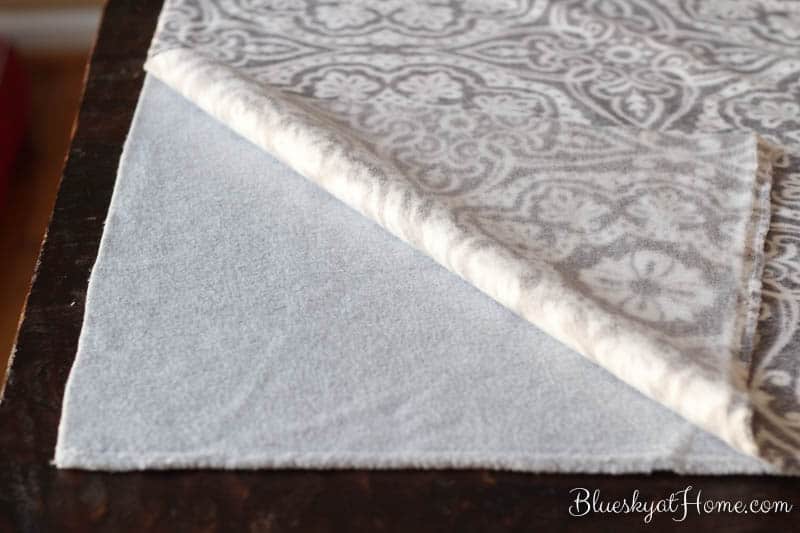
Lay out your 2 pieces of fleece WRONG sides together, lining up 1 long side and 1 end, so that 2 sides of the fabric are even. If your top (the short side) is uneven, then use a yard stick or other straight edge to cut it straight across. Smooth out any wrinkles.
Step 2
Cut off the selvage on the long side. You can use the printed selvage as a guide. Just eye~ball it. It doesn’t have to be perfectly straight, but I try to cut it was straight as possible.

Step 3
On the other short end (the bottom), cut straight across so that the ends are even. On the other long side, cut the selvage off as you did the first long side. If the long sides are not exactly the same size to begin with, the even them. You want your top and bottom pieces of fleece to be exactly the same size.
Step 4
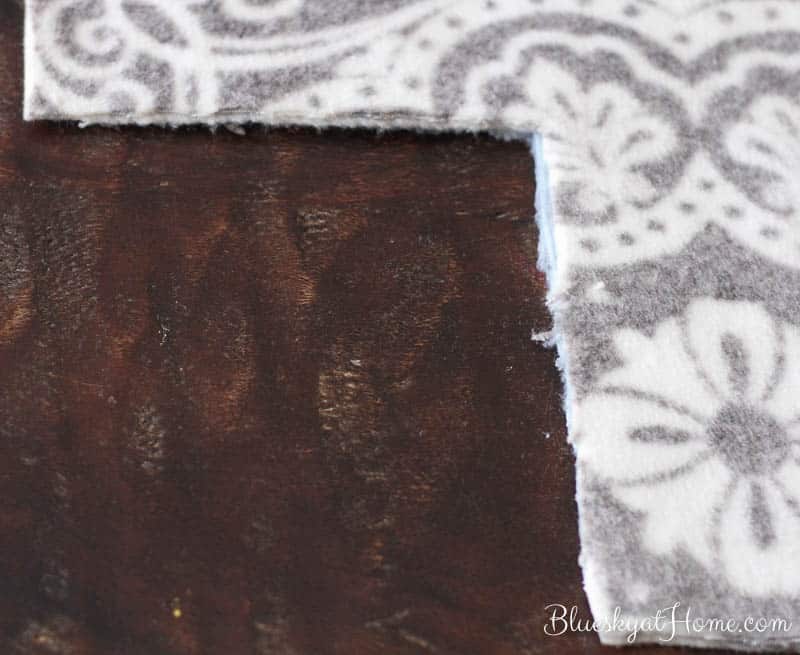
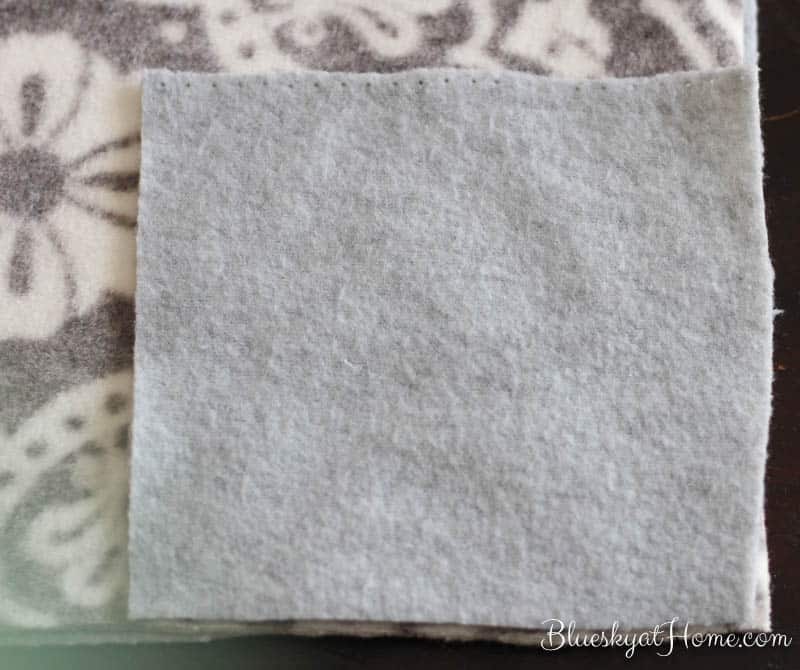
At each corner, cut out a 5~inch by 5~inch square. You are actually only cutting 2 sides of the square. You can cut out a 5~inch square of cardboard, poster board or paper to use as a pattern, as we did at my house OR just use a ruler to measure 5 inches in at each corner.
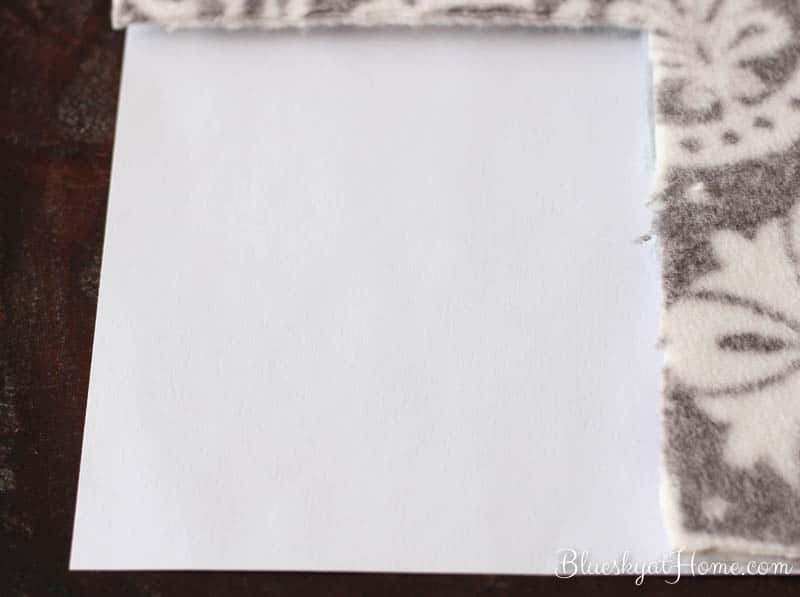
Once you have cut out one 5~inch corner, you can use the corner fabric remnants as a guide for your other corners.
TIP: Don’t throw away the corner pieces; you may want to use them later for some other project.
Step 5
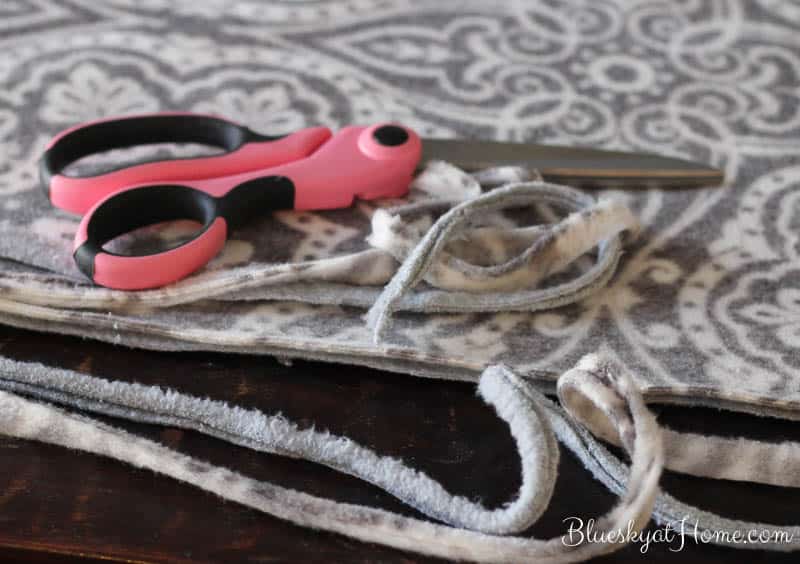
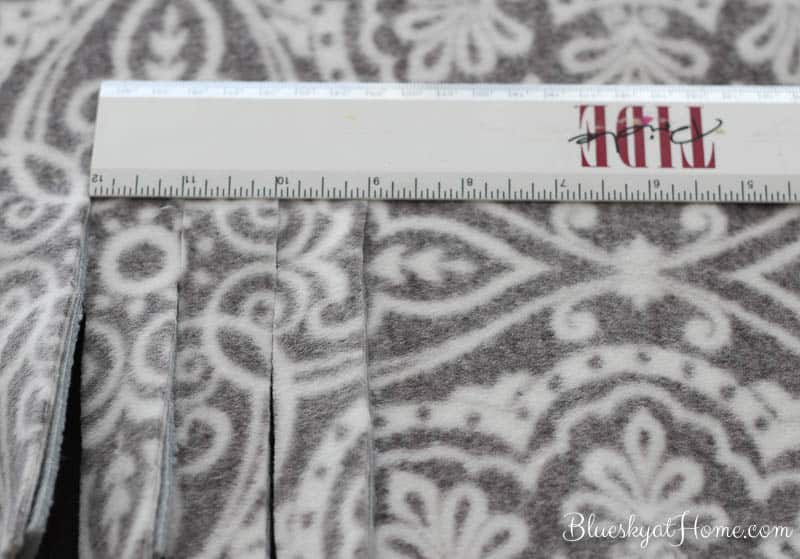
Now you need your ruler. At 1 corner, line up the ruler 5 inches from the edge of the fabric; start cutting strips in 1~inch intervals.
We discovered that it is easiest to cut the length of the ruler (11 strips) in each direction on both sides of your first corner. (Yes, that is a Roll Tide ruler, courtesy of my son~in~law.)
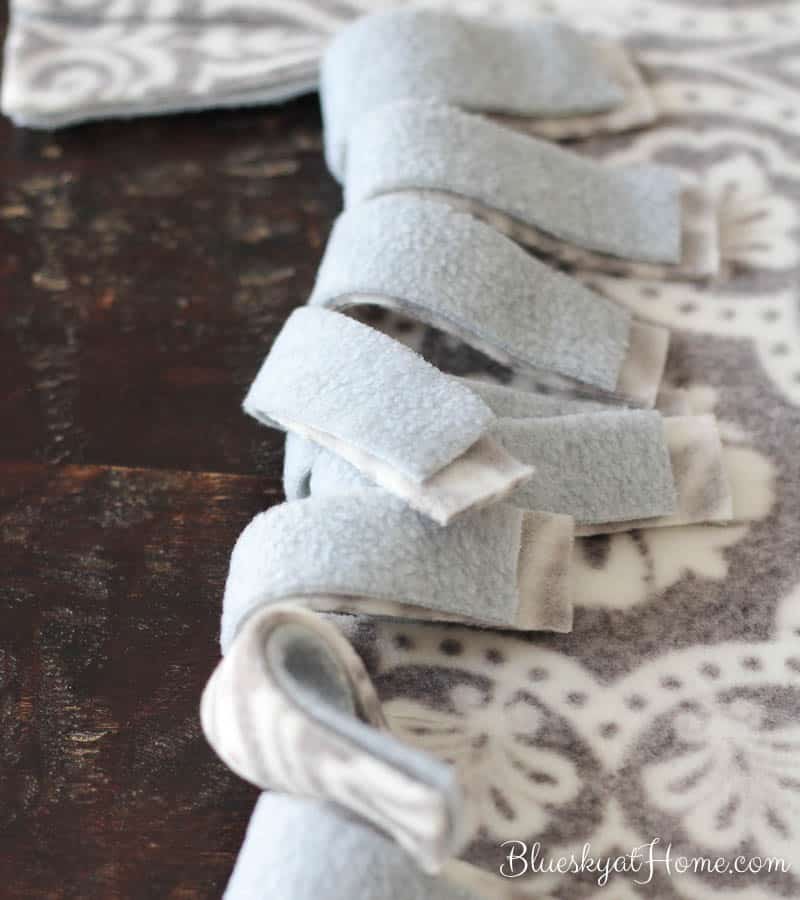
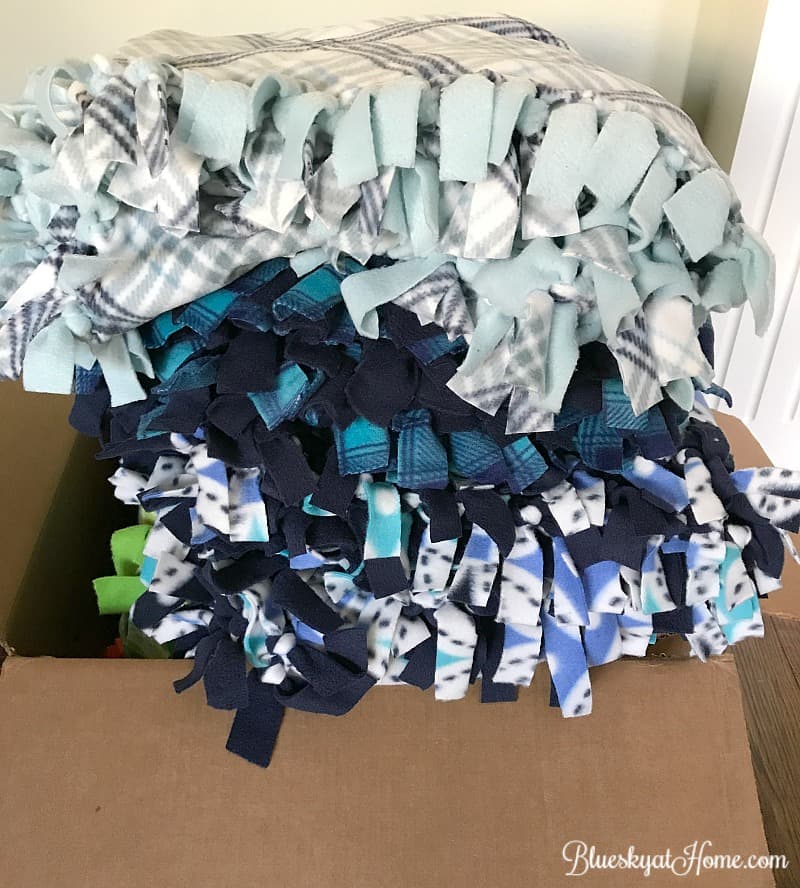
Once you have about 11 strips cut in both directions on 1 corner, start trying 2 strips together ~ the top fabric with the bottom fabric. You want to double tie each pair of strips of fabric ~ over and under. Your knots do not have to be tight, just secure.
When you have tied your corner knots in each direction, repeat with the other 3 corners.
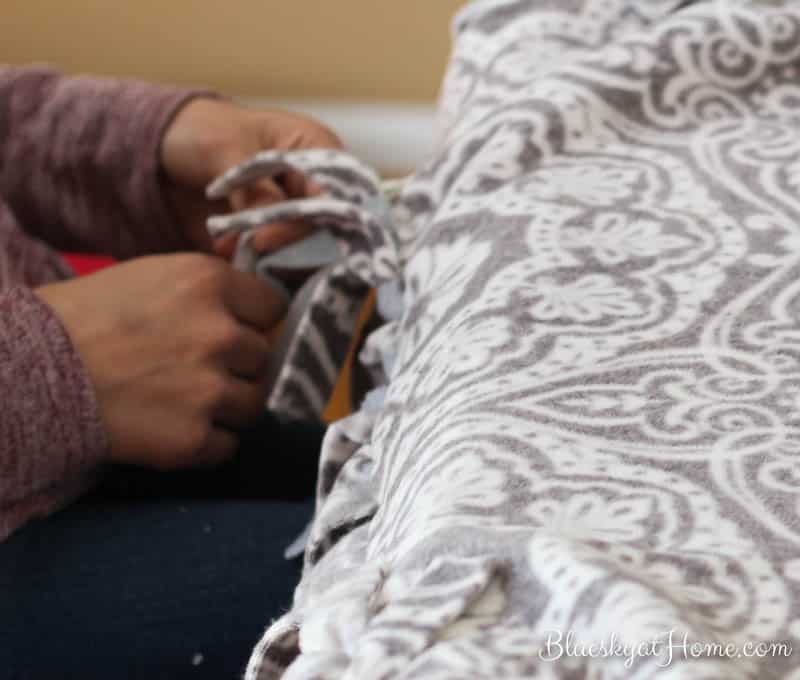
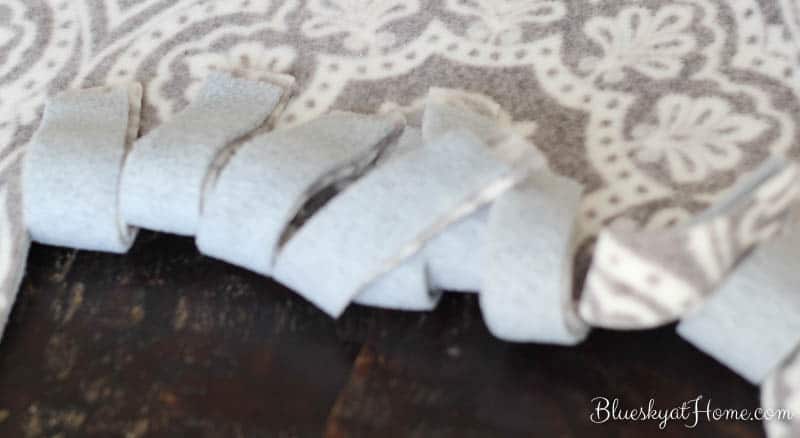
My older daughter, who was helping me make the no~sew blanket, and I found that securing the corners first kept the fabric aligned together as you worked on the rest of the blanket. Now you can cut the strips for all 4 sides of the blanket and then tie all the strips together.
The tied strips are what makes the blanket appealing.
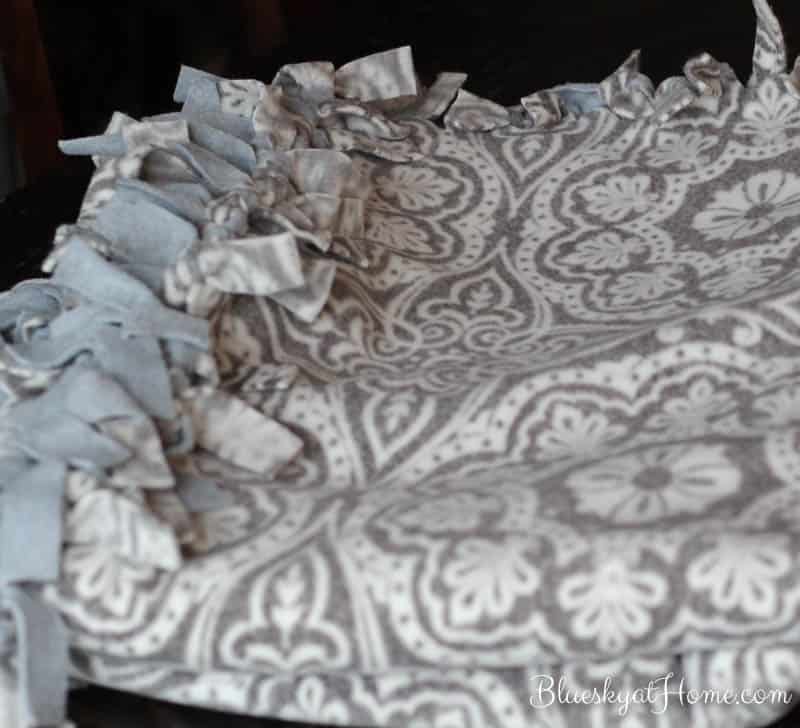
Once you have secured the corners (a foot in each direction), you don’t even have to sit at a table. My daughter and I sat on the sofa and watched reruns of Fixer Upper and tied knots. In no time we had finished the knotting and didn’t even realize how fast it went.
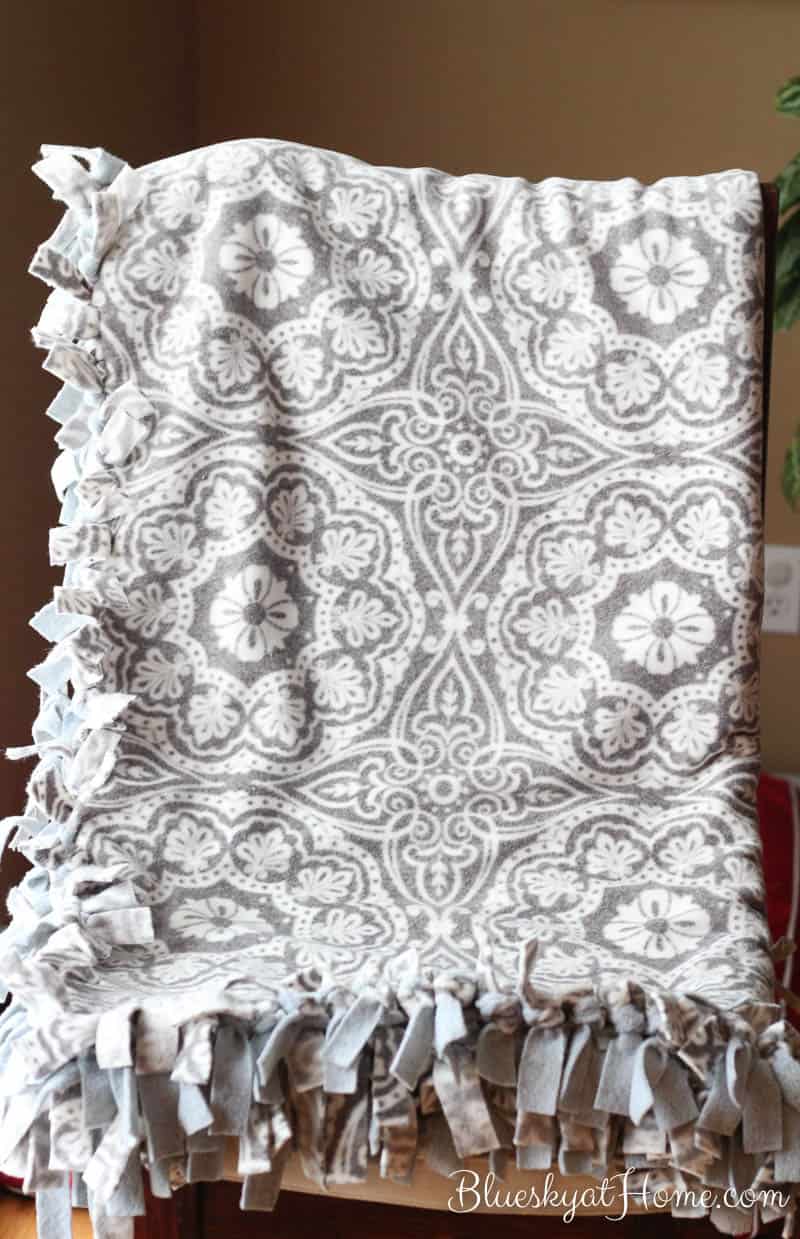
We made the no~sew blanket over a 3~day period, just whenever we had time to stop and work on it. We could have easily done it in less than a day if we wanted to work straight from start to finish.
Giving the No~Sew Blanket
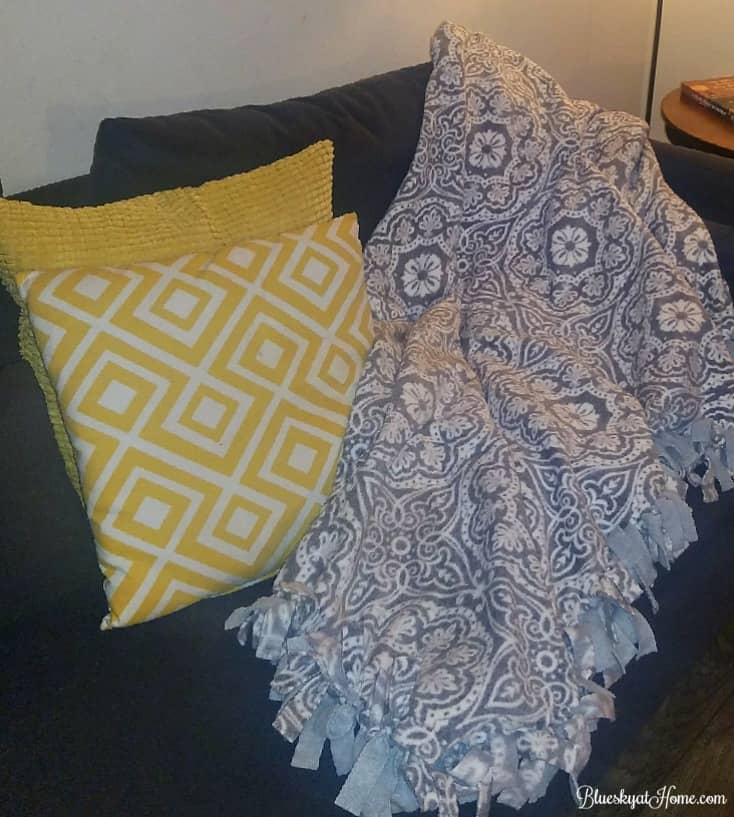
The next morning, I put the no~sew blanket in a large bag in the trunk of my older daughter’s car as I was meeting my younger daughter for a shopping trip to Ikea. Several times during our shopping, she would point out a throw for her sofa. After me telling her for the third time not to get one, she started giving me funny looks. It was everything I could do not to smile and tell her I already made her one. When we returned to the car and opened the trunk to put in her purchases (She had been shopping for lamps and more pillows.), I showed her the no~sew blanket. She was so excited and said she loved it and it was perfect for her apartment.
We went to her apartment and took all her purchases and the blanket inside. After putting her new lamps together (Ikea is a genius.), we placed the no~sew blanket on the sofa. It looked great with the sofa and the pillows. The chevron pillow is one of a pair from Hobby Lobby I sent her last fall and the texture pillow is one of a pair she bought that day.
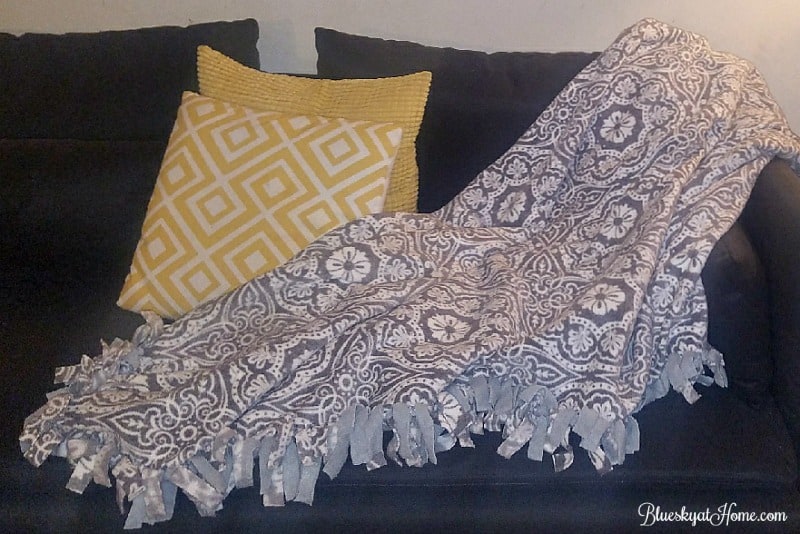
If you’ve ever wanted a throw blanket, but can’t find the color or pattern you want at the price you want, you can easily make one using this no~sew blanket technique. Since the only expense is the fleece fabric, which is often on sale or you can use a coupon, this is a relatively inexpensive project. It’s so simple that even my 6~year~old granddaughter tied a few knots. But you know the best part? Seeing the look on my daughter’s face when I gave her the blanket. Priceless.
In case you DO like to sew, here are some other sewing projects I’ve shared:
10 Fun, Easy Projects for Repurposing Dish Towels
How to Make a Monogrammed Pillow from a Dish Towel
How to Make an Easy 2~Sided Napkin with Pom~Poms


I love these blankets. My favorite is one I made for my son as a stroller blanket when he was a baby — and he just turned 15 yesterday! We still have it:) Love your pattern and color choices. Thanks for sharing at Vintage Charm! xo Kathleen
Wow, this looks simple enough that even I could do it! I love these blankets and look forward to making some!!
Karin, of course, you can! Thanks for visiting and let me know when you make one.
I have a few of these blankets that were given to me as gifts and love them. I have never tried to make one myself, but maybe it’s time I try. Thanks for sharing.
Chas, you should absolutely make one for yourself.
I have made many of these types of blankets. Found you on Over The Moon Link Party.