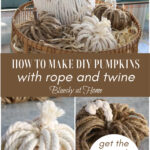
How to Decorate Pumpkins with Rope and Twine
Is it time to bring out the pumpkin? Do you like to decorate pumpkins? I hope so. I have some great tutorials showing you how to decorate pumpkins with rope and twine.
I have painted pumpkins. I have gilded pumpkins I have decoupaged pumpkins.
For the first time, I am decorating pumpkins with rope and making pumpkins with twine. They are very easy to make and even more fun to use in your fall decorating.
If you like to embellish pumpkins for your home decor, these pumpkin decorating ideas should give you a little inspiration. They are really cute and can be adapted to any color and any size pumpkin.
I love DIY projects with a simple supply list and easy construction. Rope and twine are easy supplies to find at your local craft store or online. This project is easy-to-make-while-watching-TV.
Let’s begin to decorate pumpkins with rope and twine.

Now, that we are semi-officially into fall, I’m ready to add pumpkins to my fall decorative items. That means making some new pumpkins.
Let’s get started with my pumpkin projects.
Rope and Twine to Make Pumpkins
- Supplies to Decorate Your Pumpkins with Rope
- Steps to Decorate Your Pumpkins with Rope
- Embellishing Your Rope Pumpkin
- Tips for Decorating Your Pumpkin with Rope
- Supplies to Make a Pumpkin with Twine
- Steps to Make a Pumpkin with Twine
- Making a Pumpkin with Rope
- Using My Rope and Twine Pumpkins in a Vignette
Supplies to Decorate Your Pumpkins with Rope
You only need a few supplies to decorate a pumpkin with rope:
- a faux pumpkin, either paper maché, styrofoam, or plastic – I have had this paper maché pumpkin for a year
- rope of chosen color and thickness – I found this rope in the macrame aisle at Joann. I like the look of the unbleached rope best for pumpkins.
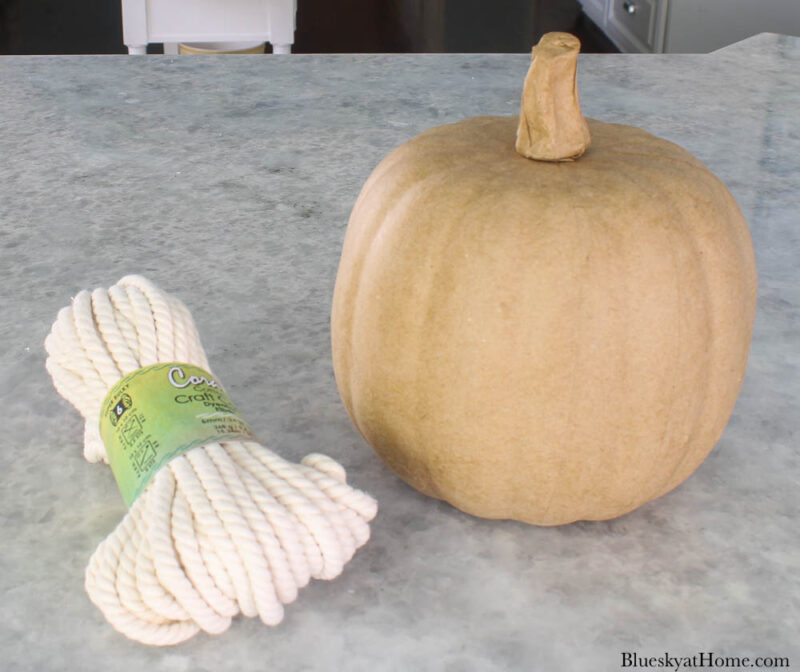
- glue gun and glue sticks – I had to order a new package of glue sticks

- sharp scissors
Steps to Decorate Your Pumpkins with Rope
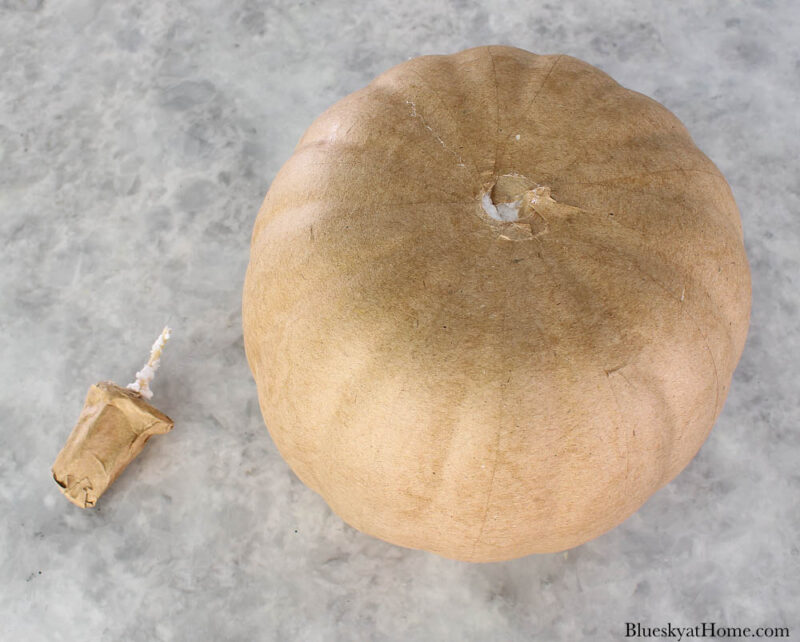
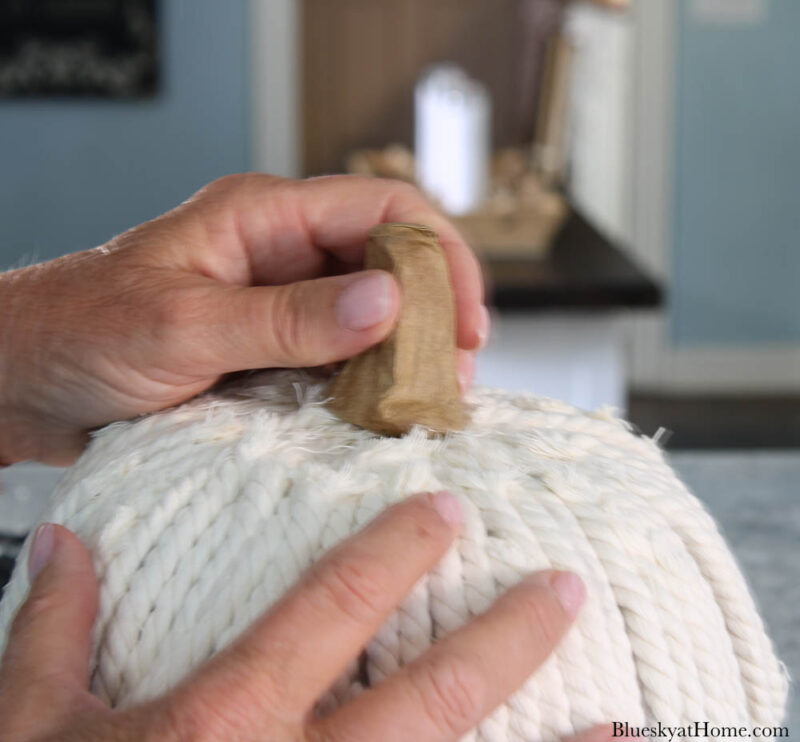
- Step 1 – Remove the stem from your pumpkin. Set aside.
- Step 2 – Unwind your rope for several feet so you have plenty to work with.
- Step 3 – Starting at either the top or the bottom of the pumpkin (it doesn’t matter which) in the indentations, run a bead of glue at least halfway down.
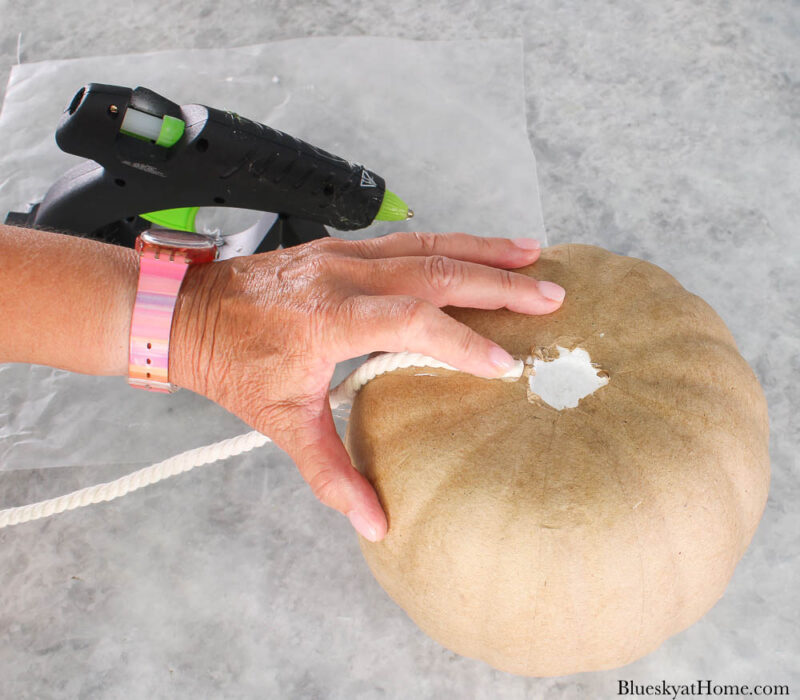
- Step 4 – Add the rope and gently press down on it to adhere to the pumpkin. Then continue with glue and rope all the way to the bottom or top of the pumpkin; when I started, I thought I would wrap and glue the rope around the pumpkin. I found it was much better to glue from top to bottom and then cut the rope.
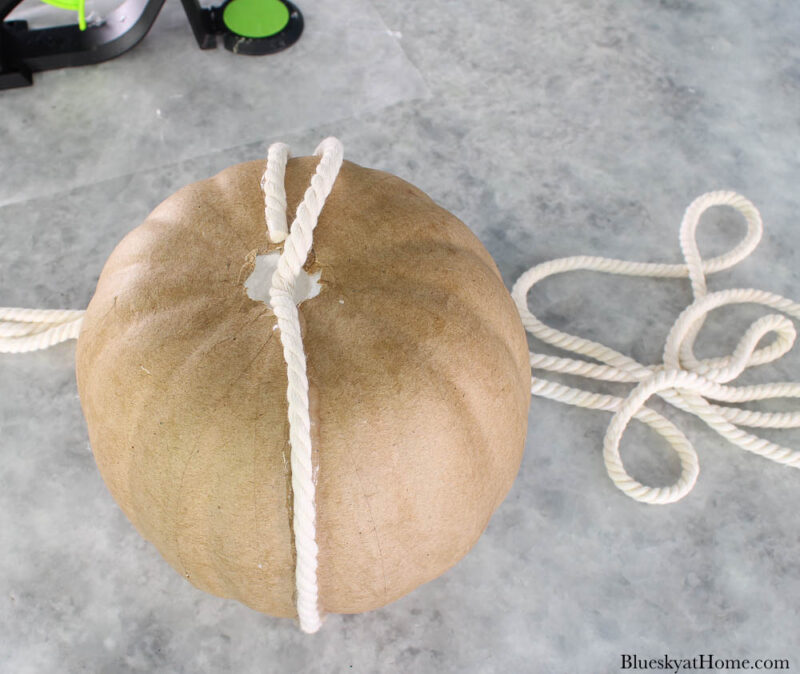
- Step 5 – Cut the rope and press down with glue.
- Step 6 – Repeat all around the pumpkin until it is covered with rope.
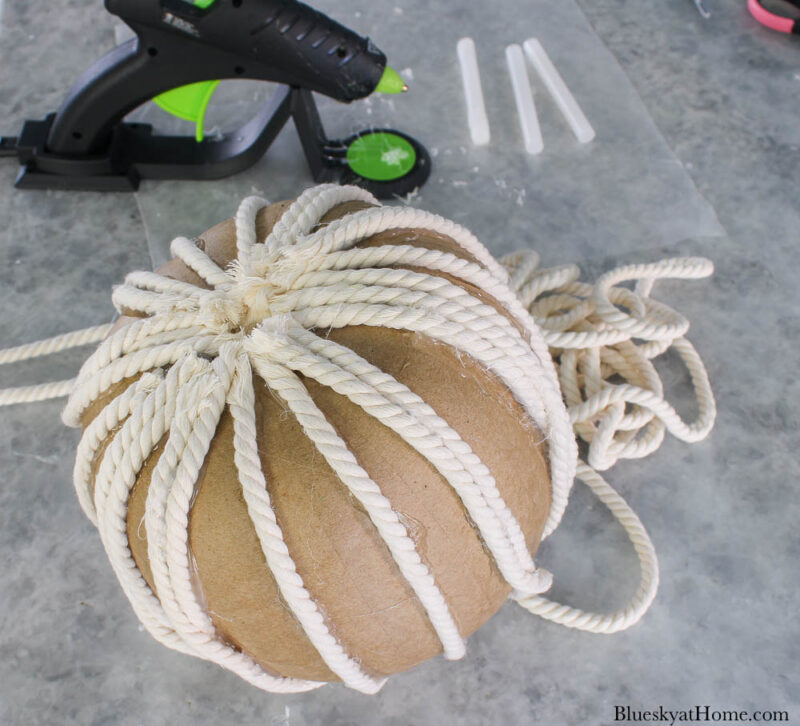
- NOTE: For variety, I looped some lengths of rope over a straight length.
- NOTE: You will notice the places where you have to cut shorter lengths of rope. I actually liked how the frayed rope added a bit of a rustic look to the pumpkin.
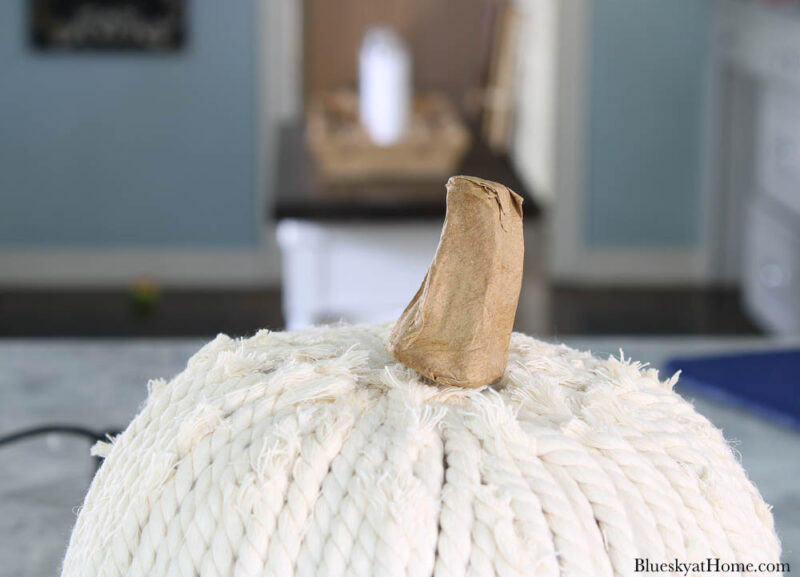
- Step 7 – After gluing all the rope around your pumpkin, glue the stem back on the top of the pumpkin.
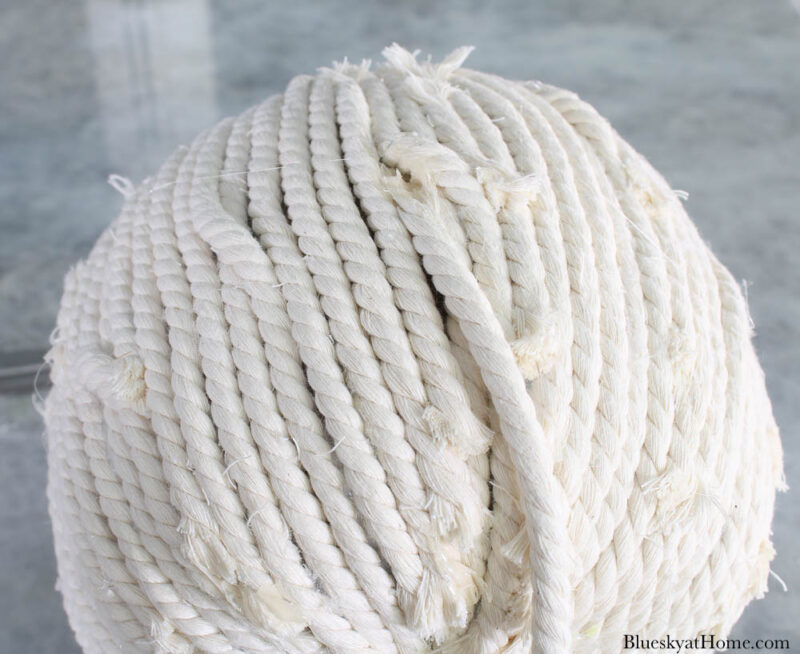
- You may notice that some of the paper maché pumpkin showed through, but I liked that look.
Embellishing Your Rope Pumpkin
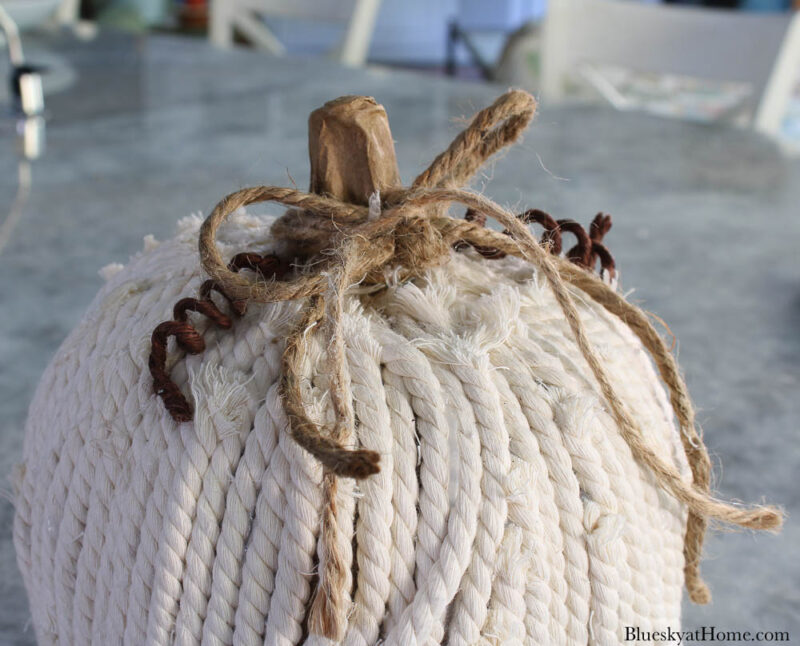
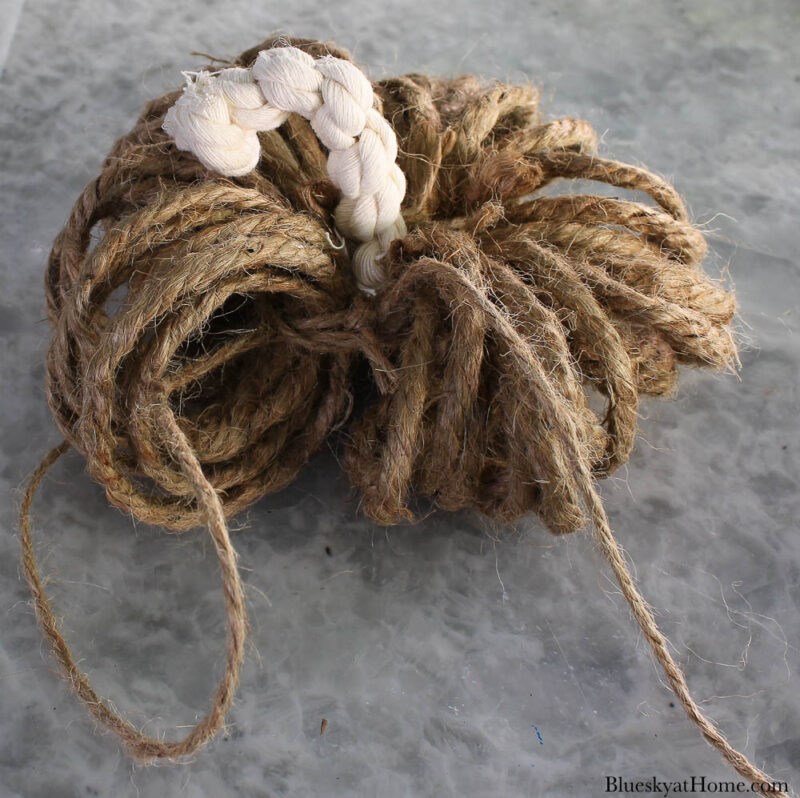
After I finished adding all the rope, I wanted to add some “garnishes” to the pumpkin.
In my craft stash, I found a 6 – 8-inch piece of wired twine. I wrapped a short section around a pencil four times.
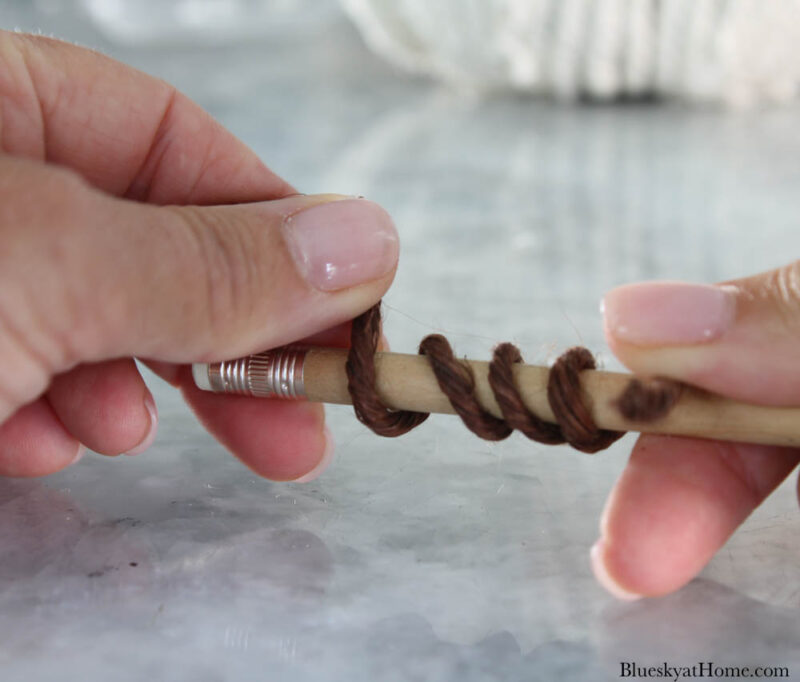
I used wire snips to cut the wired twine. Then I repeated with a second piece.
I used my hot glue gun to attach the wired twine pieces to the top of the pumpkin at the base of the stem.
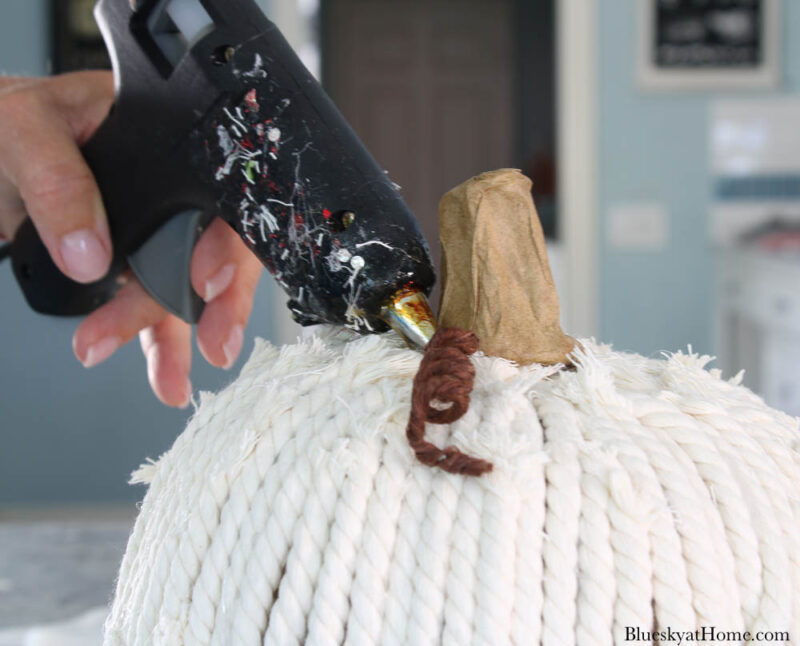
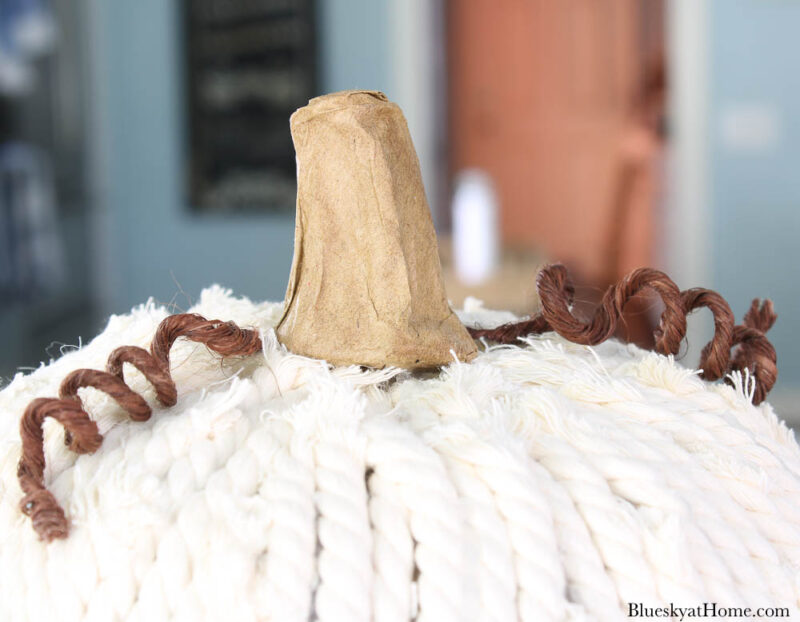
To finish off the area around the stem, I glued and wrapped a piece of small twine (another leftover piece) around the stem.
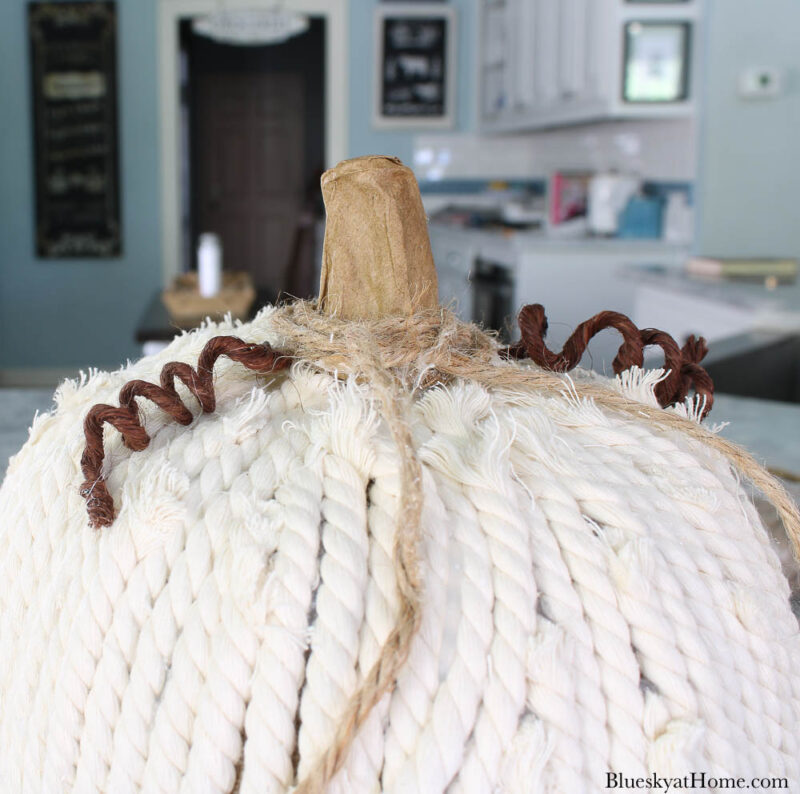
As the final touch to my pumpkin decorated with rope, I tied a bow with thin jute twine.
Tips for Decorating Your Pumpkin with Rope
Here are some tips that I discovered as I decorated my pumpkin:
- You may see rope packages described as “cord”. Use it the same way described above.
- Cut your rope on the diagonal.
- As you fill in the pumpkin with rope, your pieces will get shorter, some only about 4 inches long.
- The ends of the rope may fray a bit. You can leave them as is for a more rustic look. Or you can “shave” them with sharp scissors for a smoother look. I did both.
- On the bottom of the pumpkin, you don’t have to go all the way to the middle of the bottom, just enough to cover the pumpkin.
Now, that I’ve shown you how to decorate a pumpkin with rope, let me show you a way to use twine to make a pumpkin.
Supplies to Make a Pumpkin with Twine
This process for this pumpkin project is very different. I have seen several variations of this process on YouTube. After watching the videos, I decided to make my own.
For this pumpkin project, you will need:
- jute twine in thickness of choice; I had thick and medium versions in my craft stash.
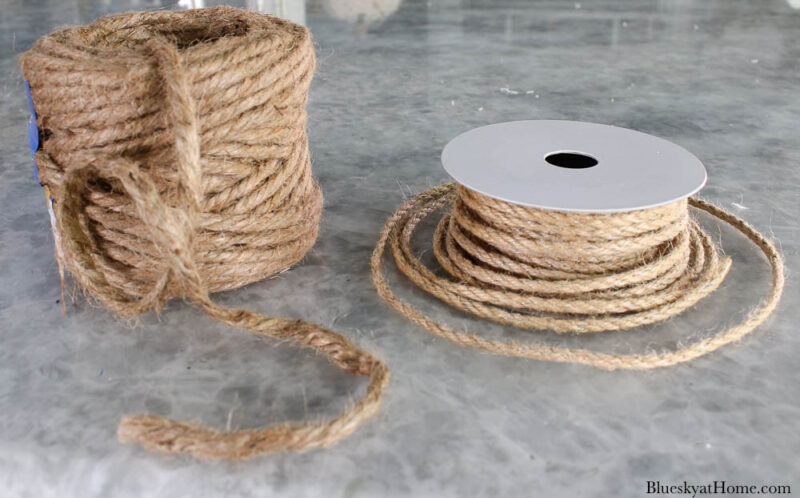
- thin jute twine, pipe cleaners or string to tie pumpkin rolls. I used this thin jute twine since I already had it. You can cut several 6-inch pieces ahead, if you like.
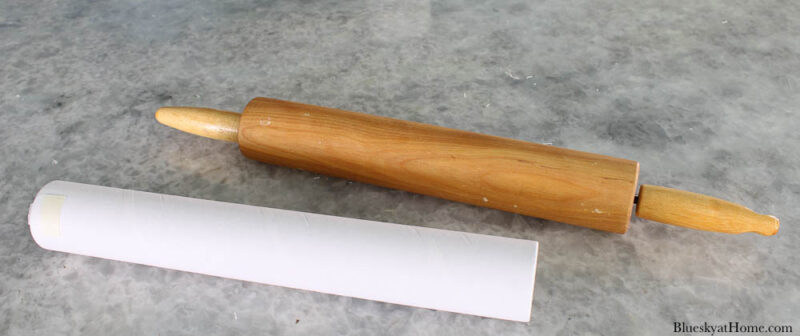
- a rolling pin, cardboard or plastic tube
- sharp scissors
- glue glue and glue sticks for stems
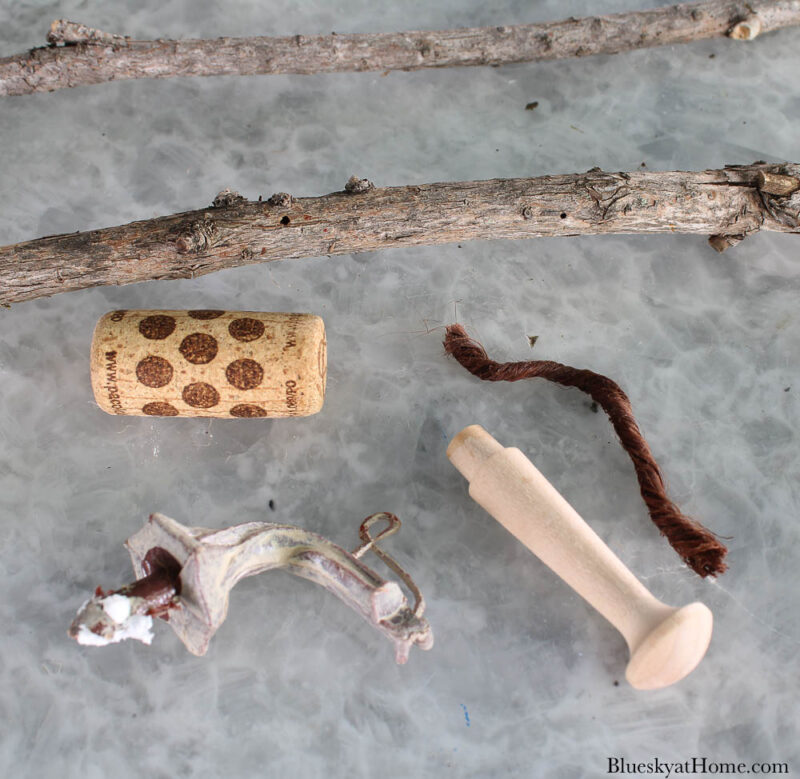
- items to use as stems: corks, wood sticks, real or faux pumpkin stems, wood dowels, wired grapevine
Steps to Make a Pumpkin with Twine
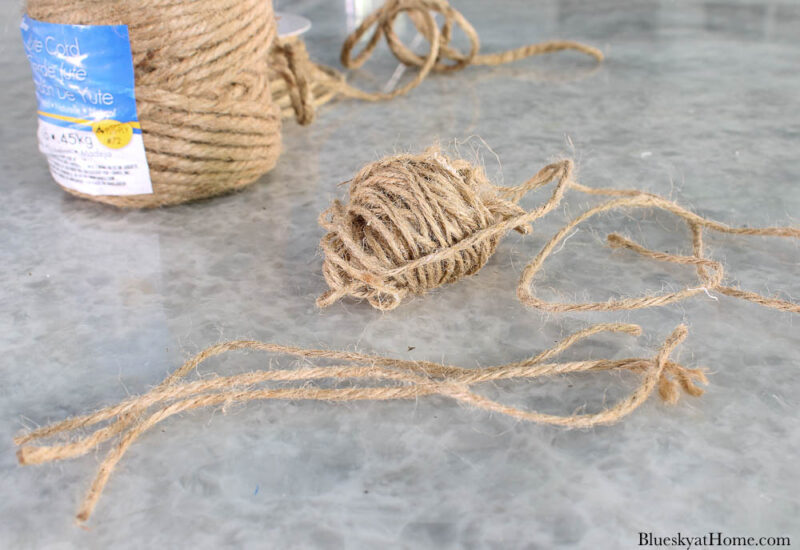
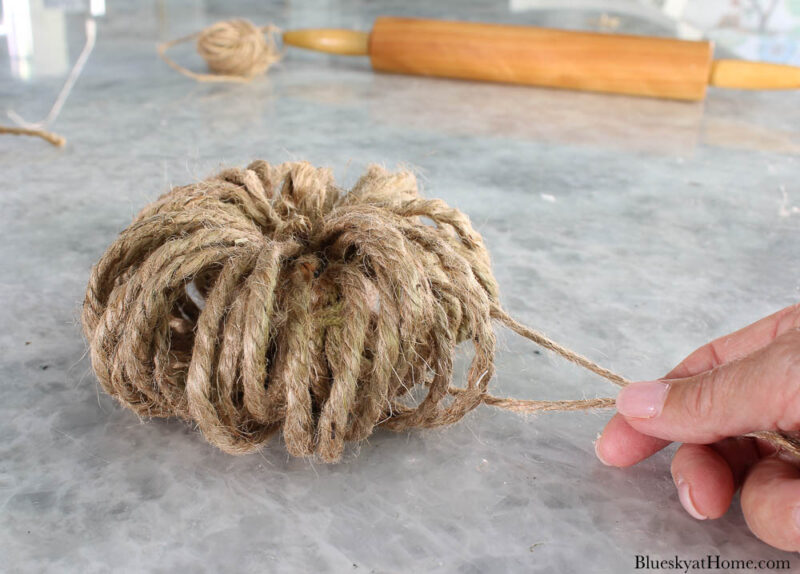
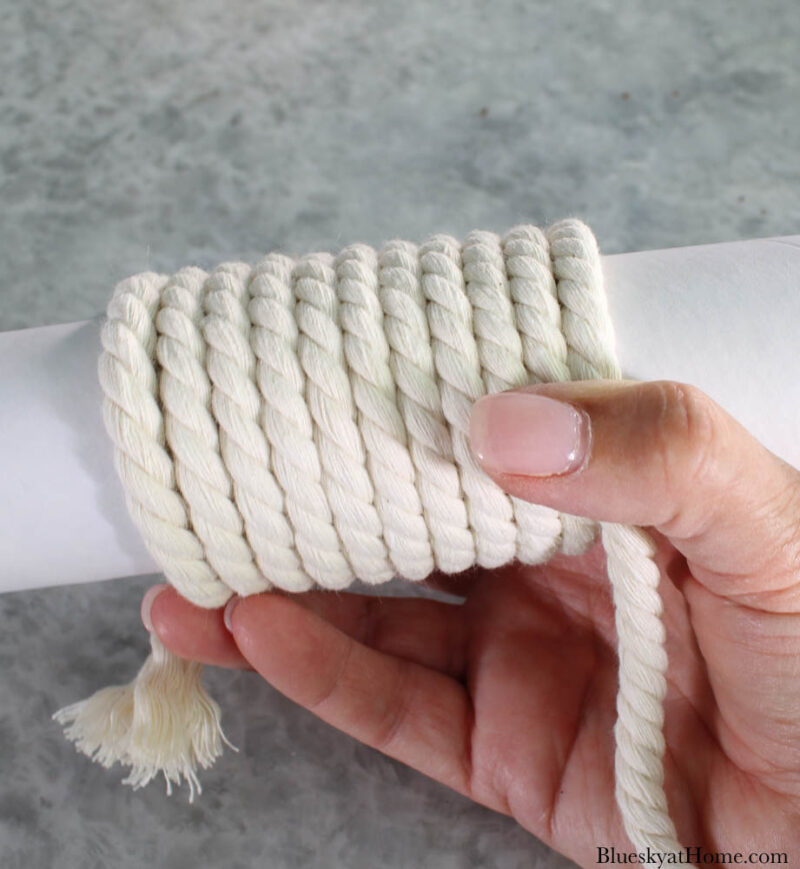
- Step 1 – Wrap the twine around the rolling pin, starting about 1/3 of the way on the pin. I chose to wrap it 15 times. You want it fairly taut. Make sure that the loops are flat – don’t overlap.
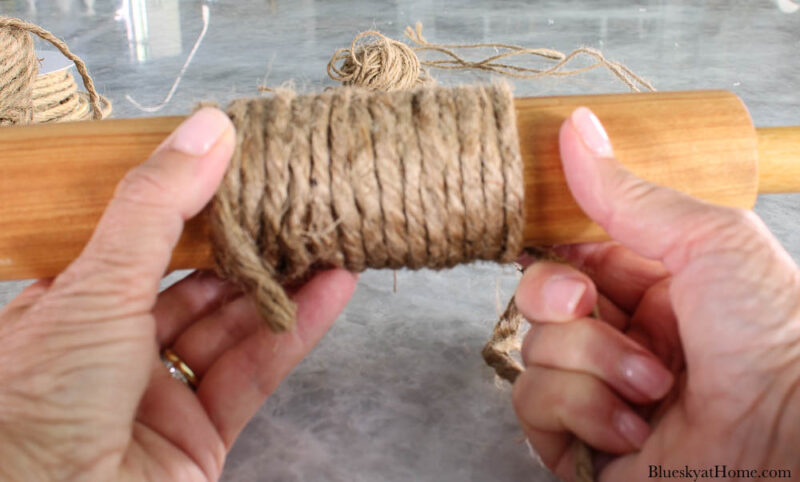
- Step 2 – Push the wrapped twine to the end of the rolling pin, keeping the loops tight. It helps to put your fingers around the end that is coming off the rolling pin first.
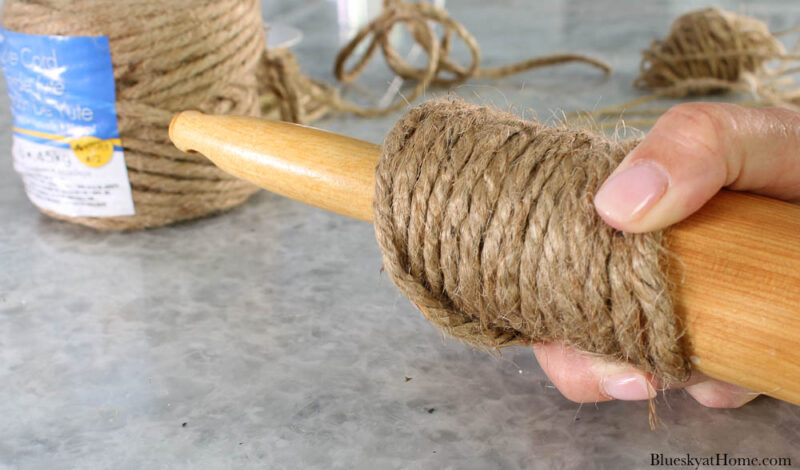
- Step 3 – Hold the looped twine tightly so it doesn’t unwind. I put my thump inside the loops.
- Step 4 – Use a 6-inch piece of thin twine or string. Push it through the twine bundle and tie the two ends together and pull tightly. Make a double knot and cut off the excess.
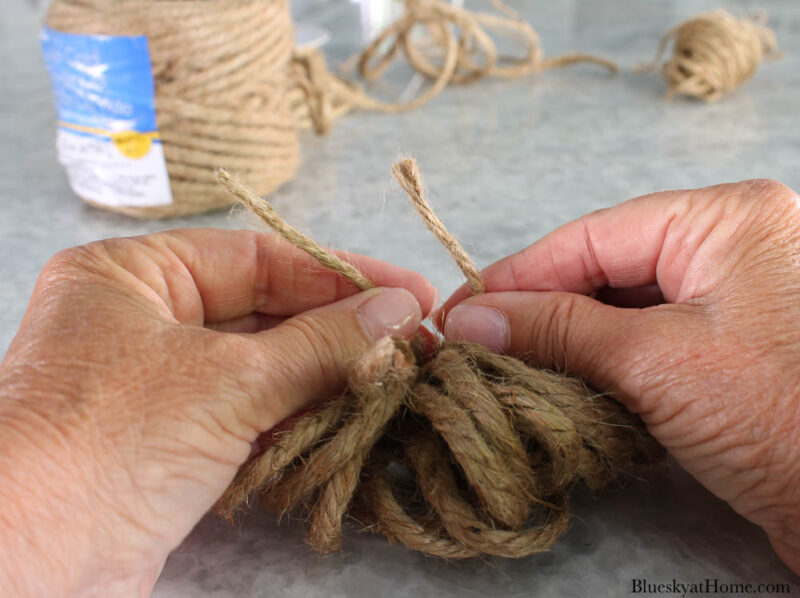
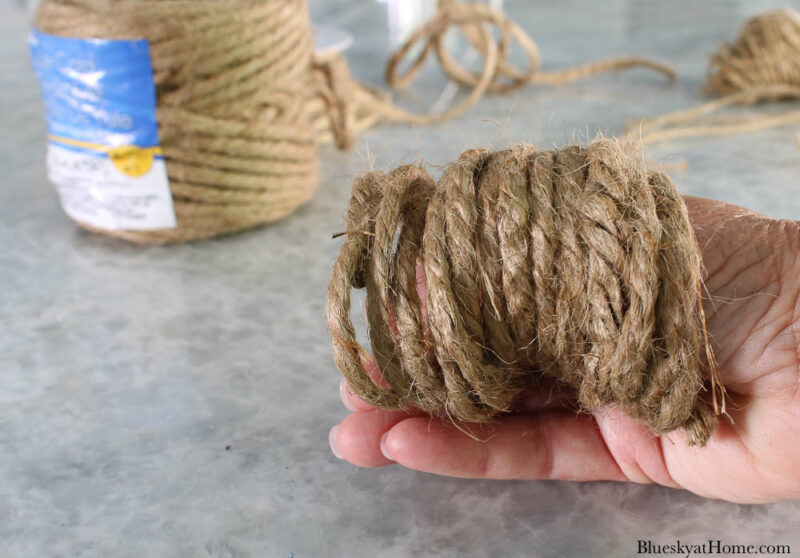
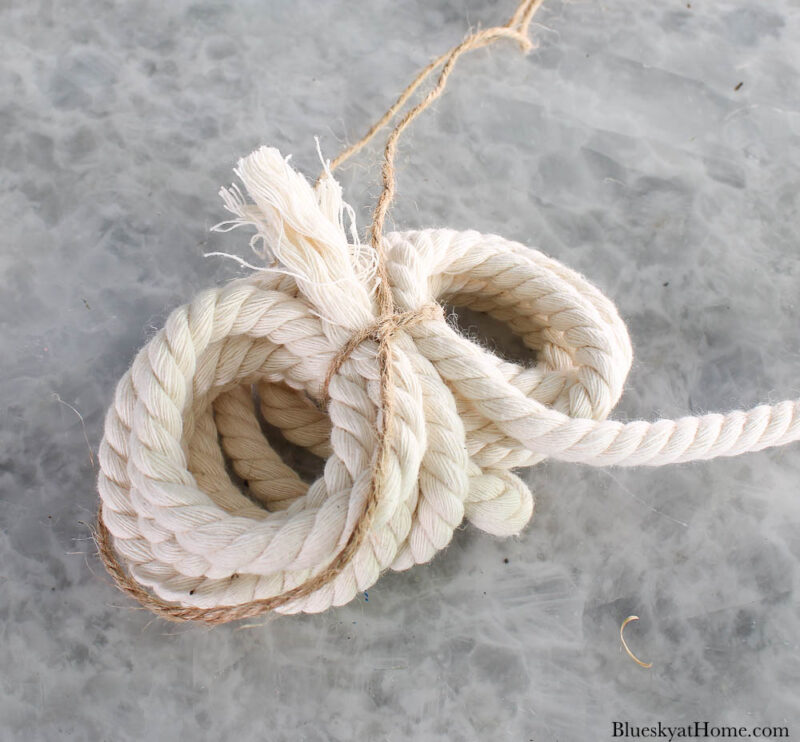
- Step 5 – Repeat this step 2 more times, for a total of 3 twine bundles.
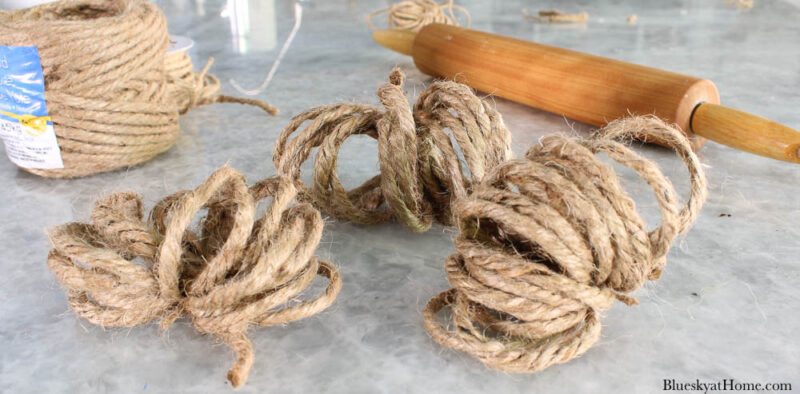
- Step 6 – Hold all 3 bundles together as one.
- Step 7 -Push a 8-inch piece of thin twine through all 3 bundles.
- Step 8 – Tie the thin twine in a knot.
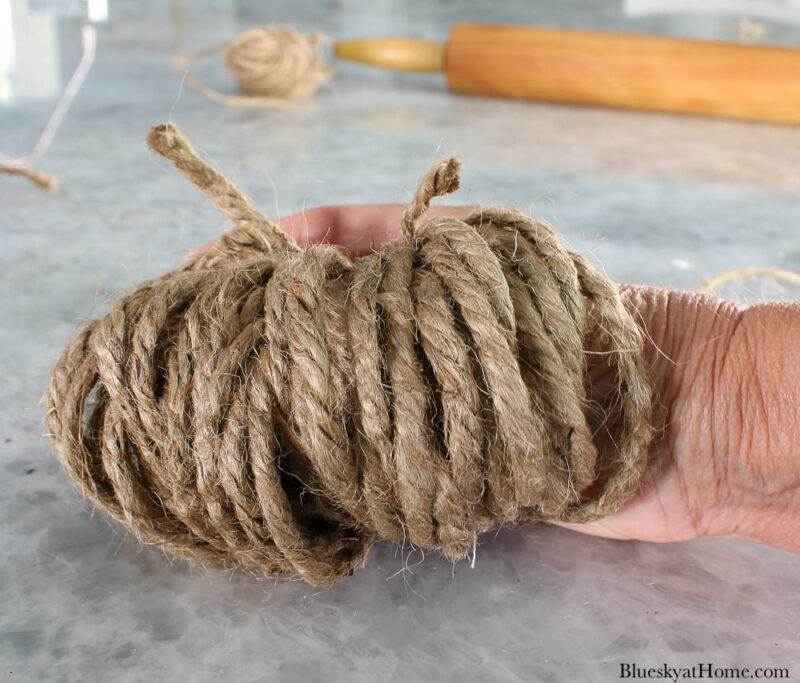
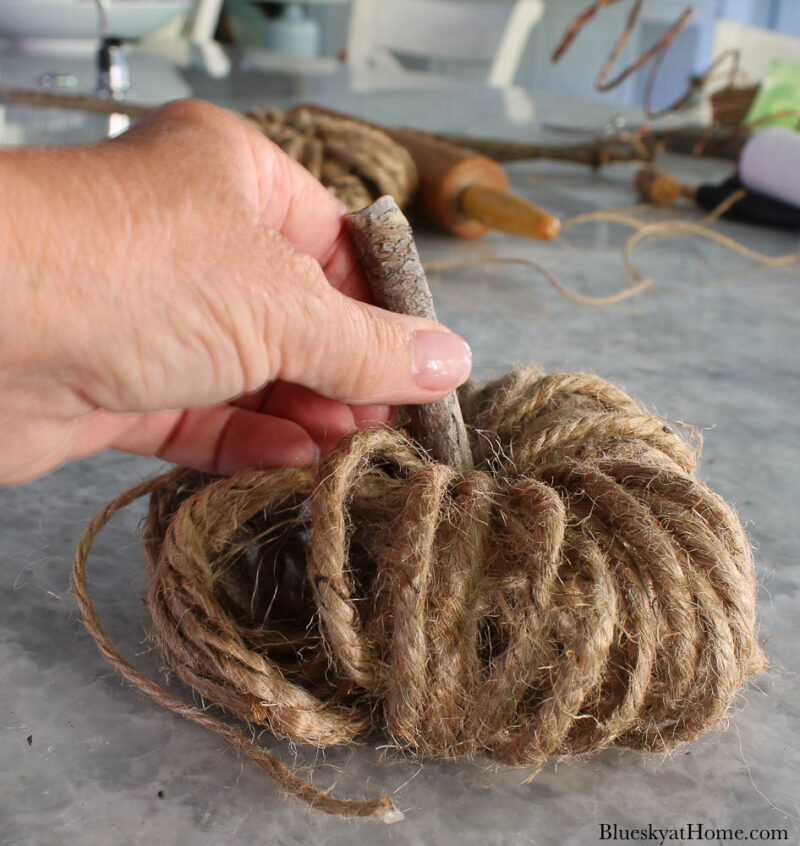
- Step 9 – Decide what you want to use for the stem. I decided for my first twine pumpkin to use a twig that I found in our front yard.
- Step 10 – Heat up your glue gun. Add a dollop of glue to one end of the stem and push it down into the center of the pumpkin. Hold for a few seconds until set.
- Step 11 – Pull the thin twine tightly, knot again, and cut off the excess.
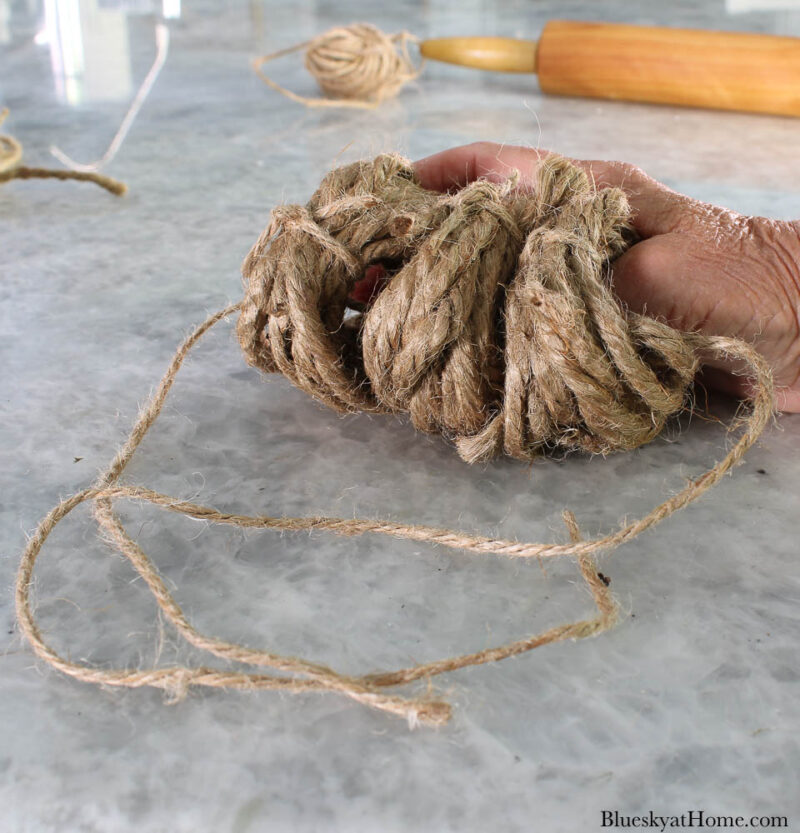
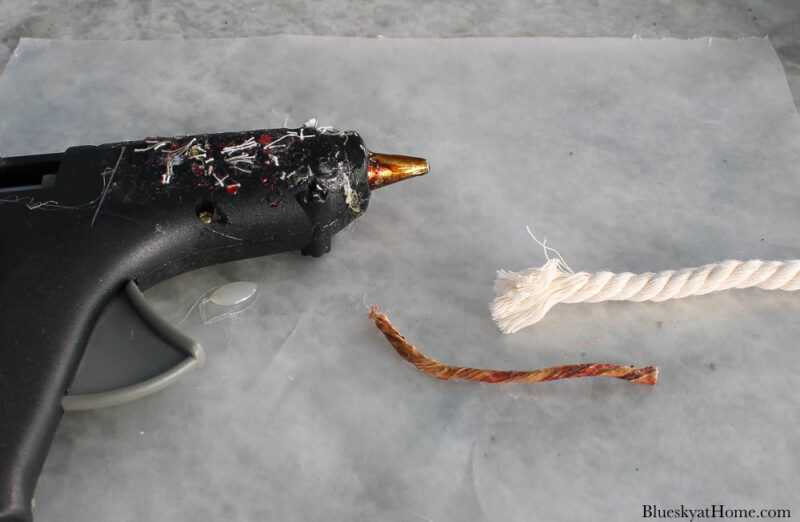
For my second pumpkin with twine, I decided to try making a stem with a 4-inch piece of wired grapevine and the white rope. First, I glued the rope tightly around the wired grapevine. Cut off the rope and add more glue at the top.
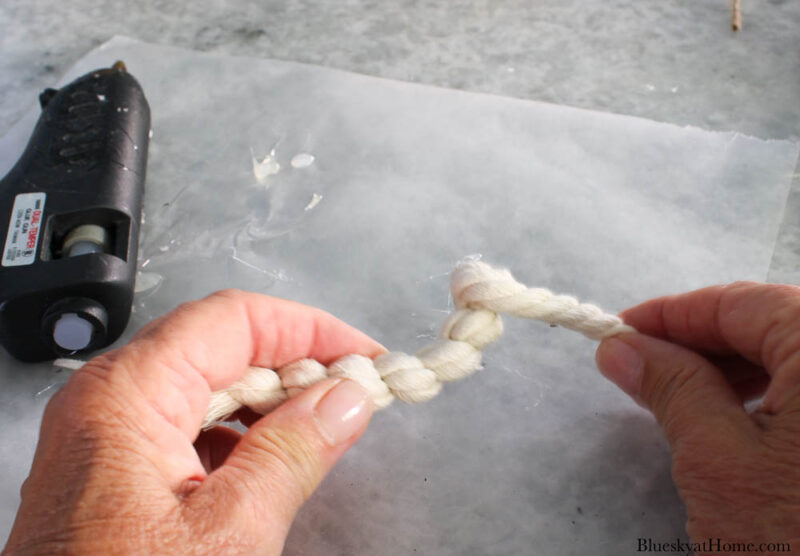
Then I glued the stem into the center of the twine pumpkin and tightend the thin twine, double knotted it, and cut the excess. I really like the contrast in color and texture.
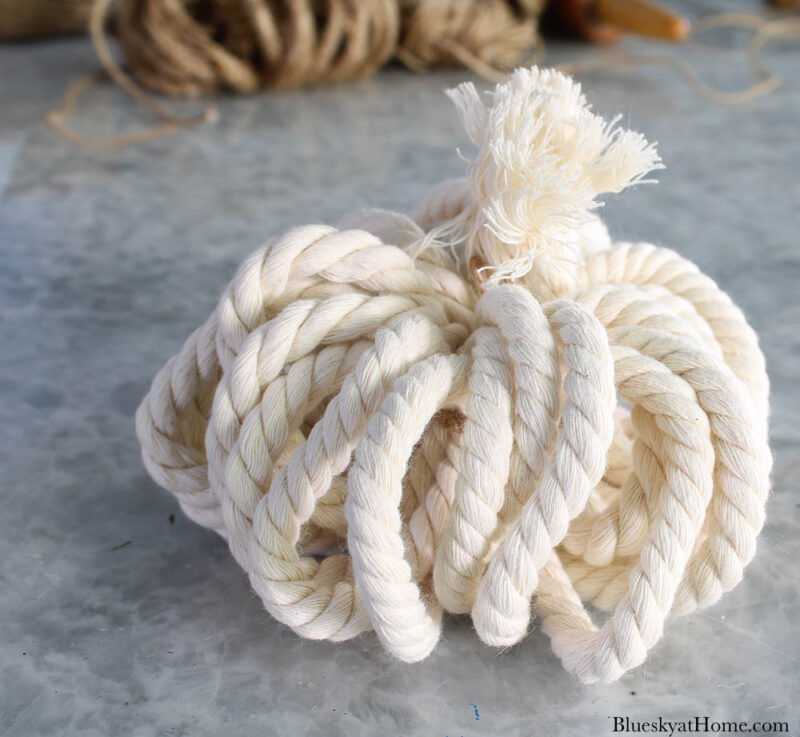
Making a Pumpkin with Rope
For a third version of the twine pumpkin, I decided to use more of the white rope that I used for my first pumpkin. I used the exact same process. The only change I made was to use the white cardboard tube. I also only made 10 loops around it for a smaller pumpkin.
Notice the frayed end of the white rope?
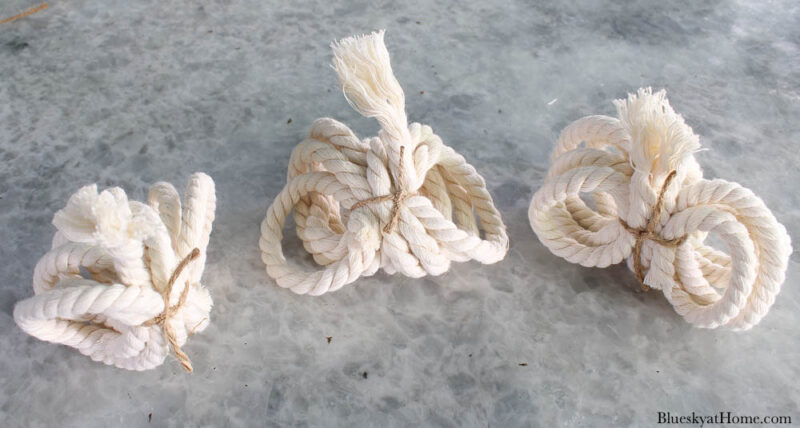
I used the frayed end as my stem. Pretty cute, uh?
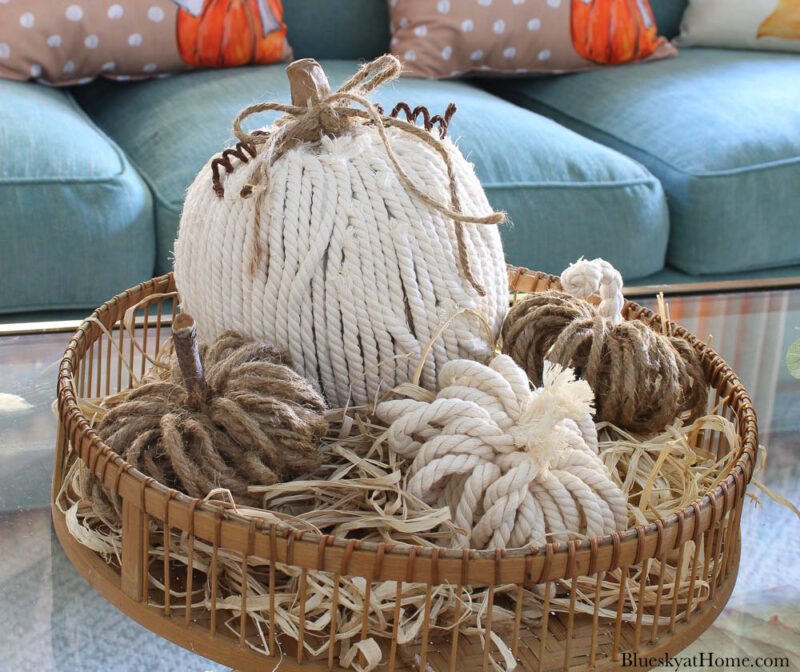
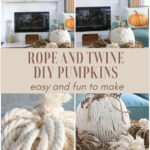
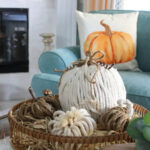
Using My Rope and Twine Pumpkins in a Vignette
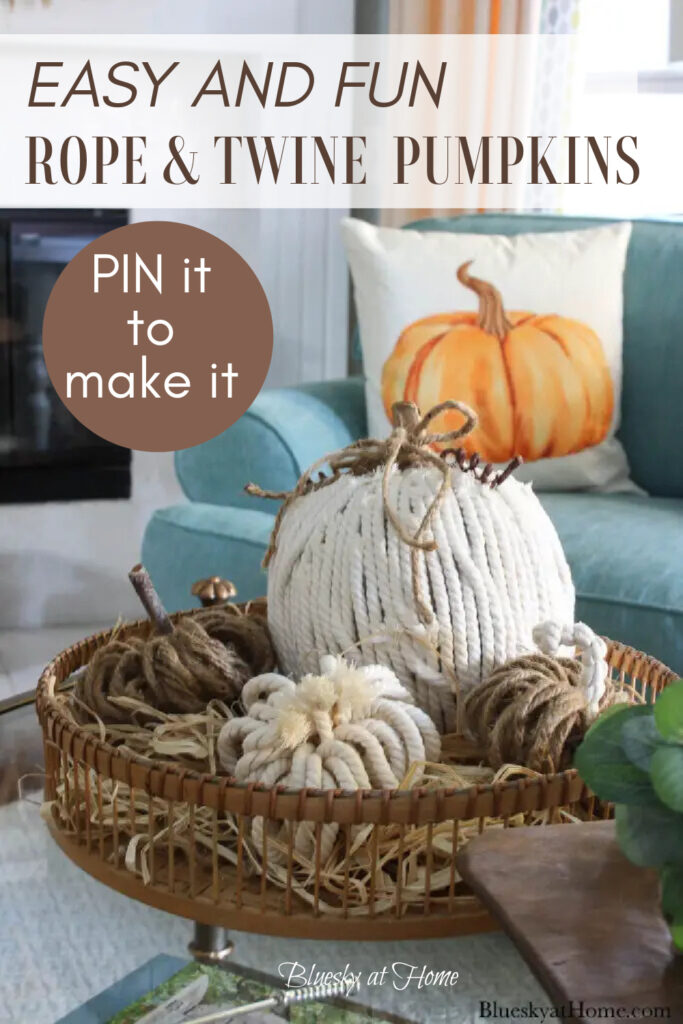
I had a total of 4 pumpkins: one large pumpkin decorated with white yarn and three pumpkins made with twine (two with jute twine and one with white rope).
I decided to use all 4 pumpkins on our coffee table. My round woven tray would be the right size and shape to feature the pumpkins.
First I used raffia to fill the bottom of the tray. Then all I had to do was place the decorated pumpkins in the tray.

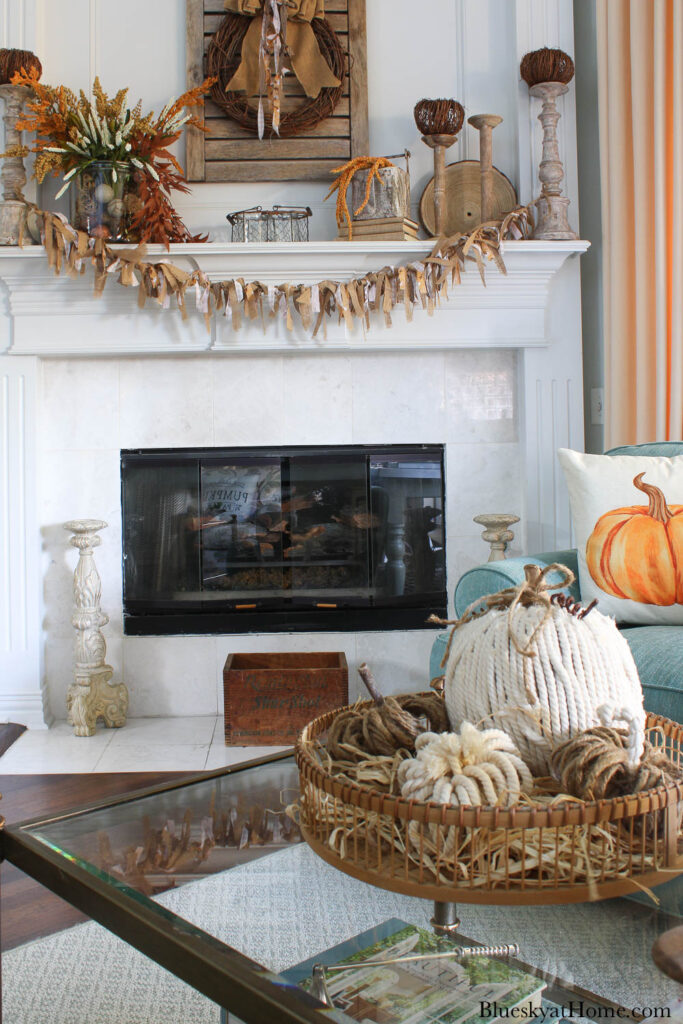
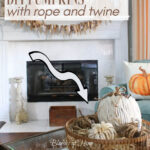
I love the finished look of our new fall mantel.
Can you decorate these pumpkins with rope and twine? Of course, you can! Both versions are easy. I will say that the pumpkin with rope does take longer – it’s a good project to do while watching your favorite movie.
Want more fall pumpkin DIY projects?
More Pumpkin Projects You Will Love
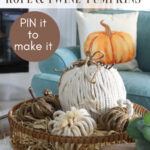
Will you PIN these new fall pumpkin decorating projects please?


Hi Carol – I love the texture that the rope and twine imparts. Also, the colors are fabulous. Thanks for a great tutorial. As always, thank you for sharing this post on the Home Imagined Link Party.
Carol, how cute these are and beginners “Dream”. Thanks so much for sharing.
Patricia, I’m so happy that you liked this project. It is so easy for any crafter level. Thanks for sharing your feedback.
Thanks for adding these cute yarn pumpkins the the FWF link party Carol. I’m featuring you at tomorrow party!
These are just amazing. What a fun way to add more texture and interest to your Fall decorating!
Thanks so much for joining the Grace at Home party at Imparting Grace. I’m featuring you this week!
I always find your tutorials so easy to follow. Great job! I like the twine ones the best; rhe texture fascinates me, but the white rope ones are cute, too!
It is always so fun to make new versions of pumpkins every year. Love these rope pumpkins. They look so good in your home. #HomeMattersParty
These are so cute, Carol! Like you, I have lots of DIY pumpkin varieties, but it’s always fun to try a new technique! Pinned!
Carol,
These turned out so cute. I love the rustic feel.
So festive Carol! Love the neutral palette and how your pumpkins blend with your burlap decor and items on your mantel. Happy Fall!
Carol these little darlings have tons of texture and personality! They make such a easy to do project for an autumn craft. Love that!
Very cute pumpkins Carol!! You can never have too many pumpkins! Your tutorial is great, thanks for the info, Happy Fall~
Your rope and twine pumpkins are so adorable, Carol! And look perfect in your lovely fall decor!
Thank you, Gail. Always appreciate the feedback from a top DIYer.
So many great ideas for decorating pumpkins in this post Carol, like how you created a stem out of wired grapevine and the white rope! When brought together in the basket, it’s so rustic and charming; love it!
Wow, these are awesome! I love the way they all turned out and they look fabulous with your gorgeous fall mantel in the background. Great step by step tutorial. Pinned!
Shelley
Carol, Love the view of your Fall mantel. Those pumpkins fit in perfectly. Thanks for sharing your tutorial!