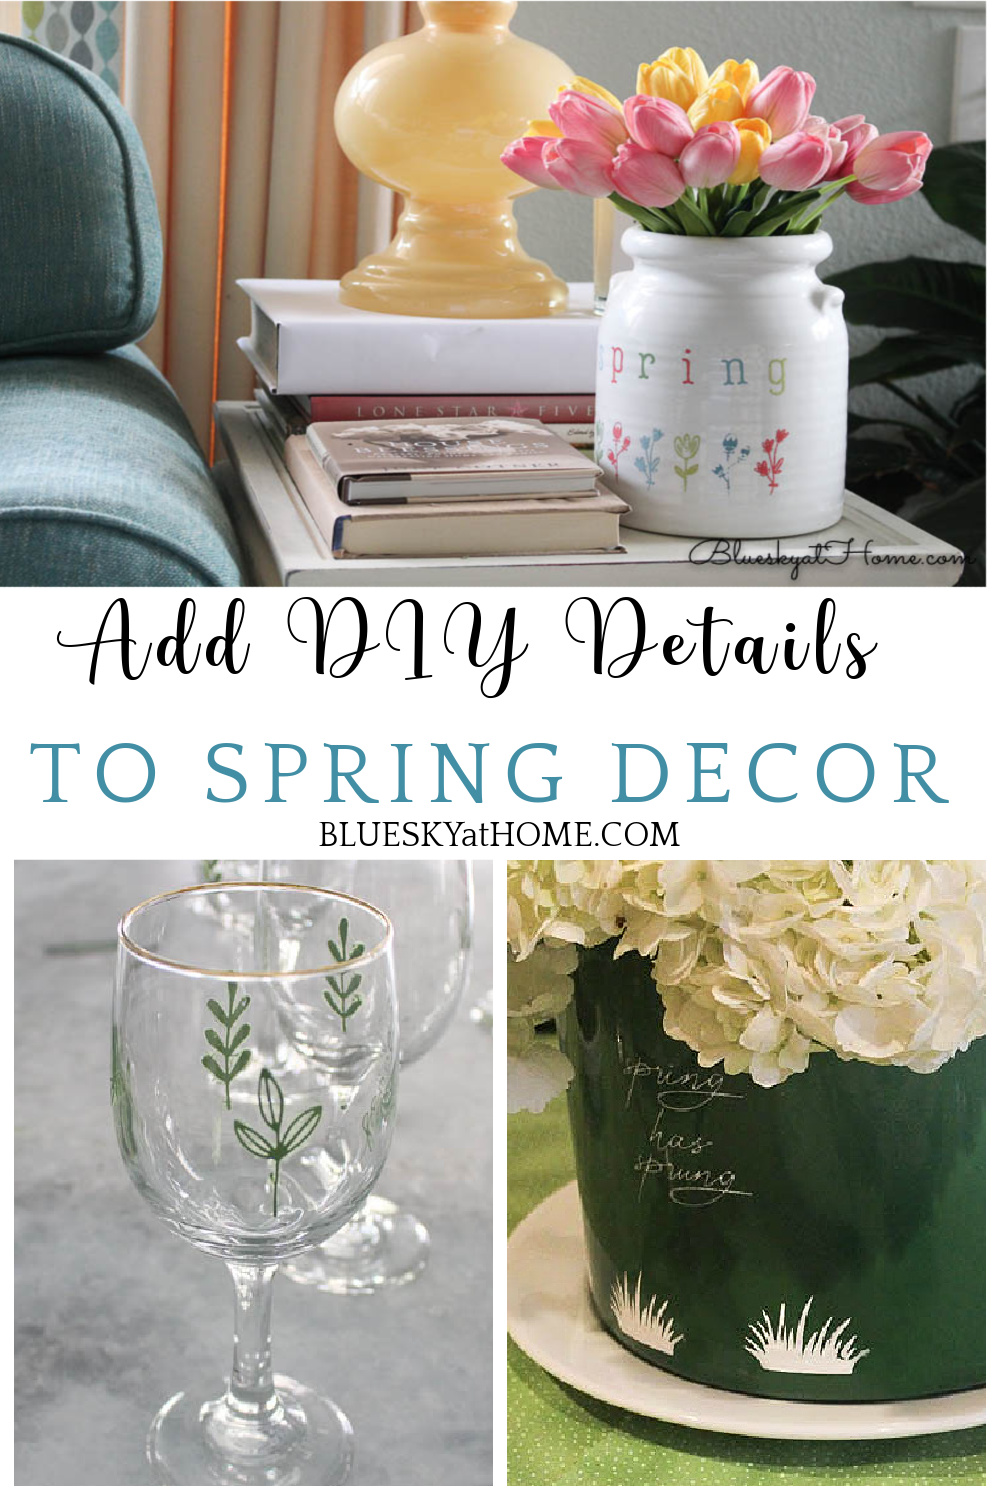
How to Add DIY Details to Spring Decor
It’s hard not to be anxious for springtime to arrive. After days of cold and snow, a brilliant day of sunshine reminded me that spring is coming. It is time to add DIY details to spring decor.
How do you add DIY details to spring decor? One way is by adding paint and stencil designs to a variety of surfaces.
These three projects not only add spring details. It’s not too early to show you ideas for including a bunny or two into the mix. That way you can prepare these projects early.
Just because outside is still lacking in spring color (Our tulips did start opening up!!) doesn’t mean that we can’t create spring inside. It’s actually easy to do with some paint, inspiration, and DIY know~how; which I hope to provide you by showing you how to add DIY details to spring decor.

How to Add DIY Details to Spring Decor
This post contains affiliate links to products that I love, use, and highly recommend. If you should order any product through this site, I may receive compensation, but you so not pay one penny more.
I’m so pleased to show you how easy it is to create these DIY spring decor projects.
These spring decor projects are inspired by springtime stencil designs.
STENCIL ART
Most of the time when we stencil, we use a brush or a spreader. If you’ve ever tried to stencil on a rounded or curved surface, it’s not that easy. If you are using plastic stencils, it’s almost impossible to get them to adhere to a curved surface.
That’s why I love the tri~mesh adhesive~backed stencils from A Maker’s Studio. These stencils solve the problem of stenciling on curved surfaces.
I discovered that there is an even easier way to apply your paint to stencils on rounded surfaces ~ finger paint. Yes, be a kid again and just use your finger.
So here is how I used the finger painting method and stencils to add DIY details for spring decor on three different curved surfaces.
DIY CENTERPIECE CONTAINER
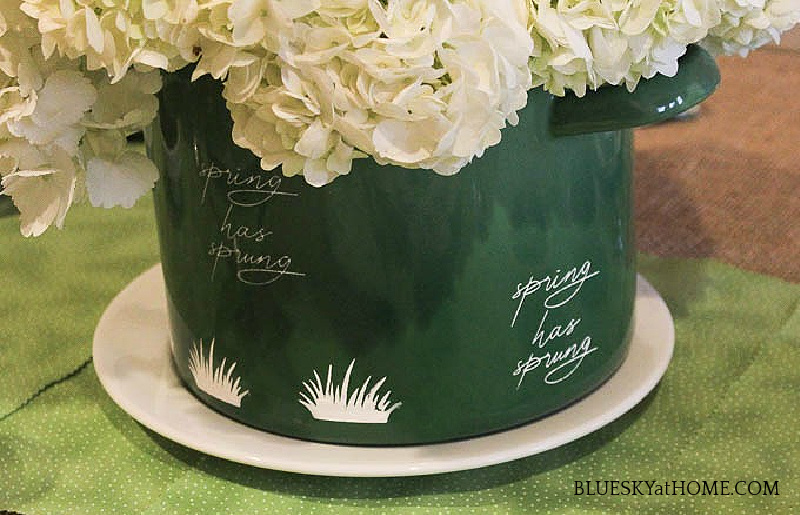
For my green and white spring tablescape, I used my Le Creuset stockpot as my centerpiece container for white hydrangeas. Adding two spring designs to the stockpot is what turned it from practical to pretty on my table.
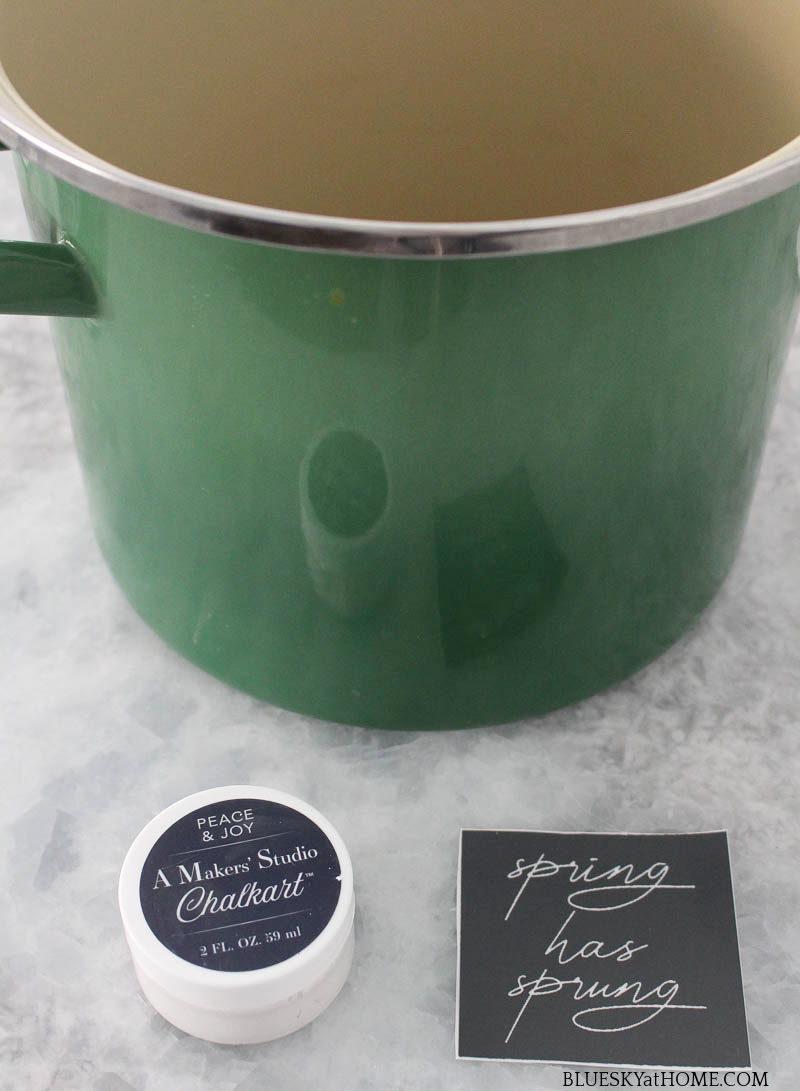
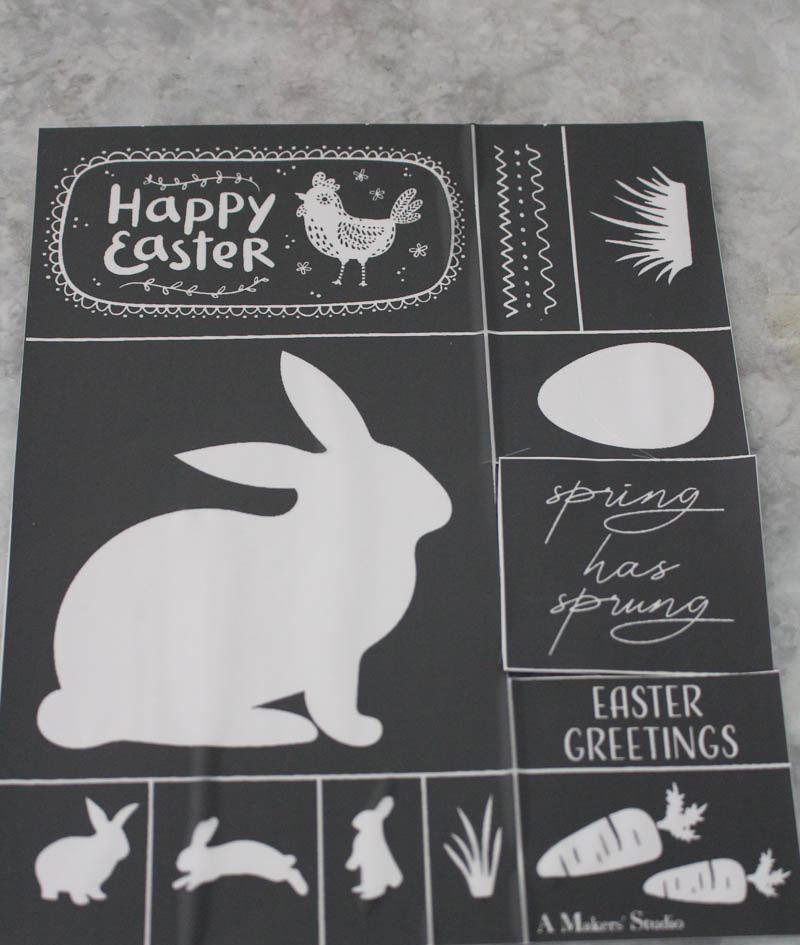
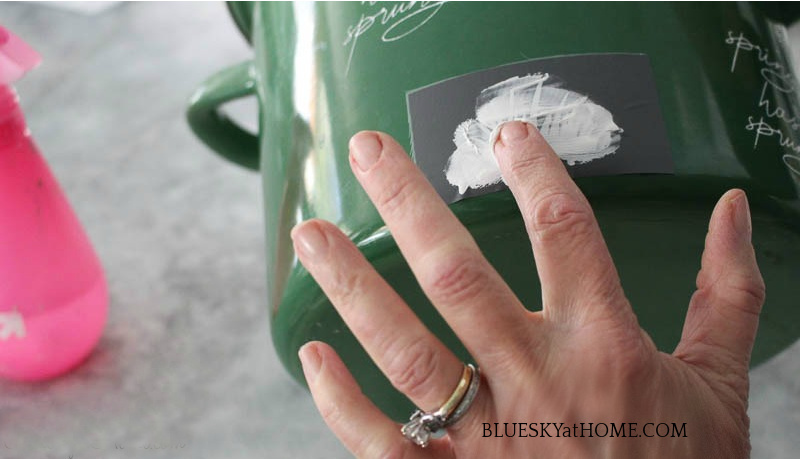
A plain green stock pot needed some embellishment with spring designs. I couldn’t wait to use some of the spring design stencils. I decided the “grass” stencil and the “spring has sprung” on the Happy Easter stencil (sold out) would be perfect on the stockpot.
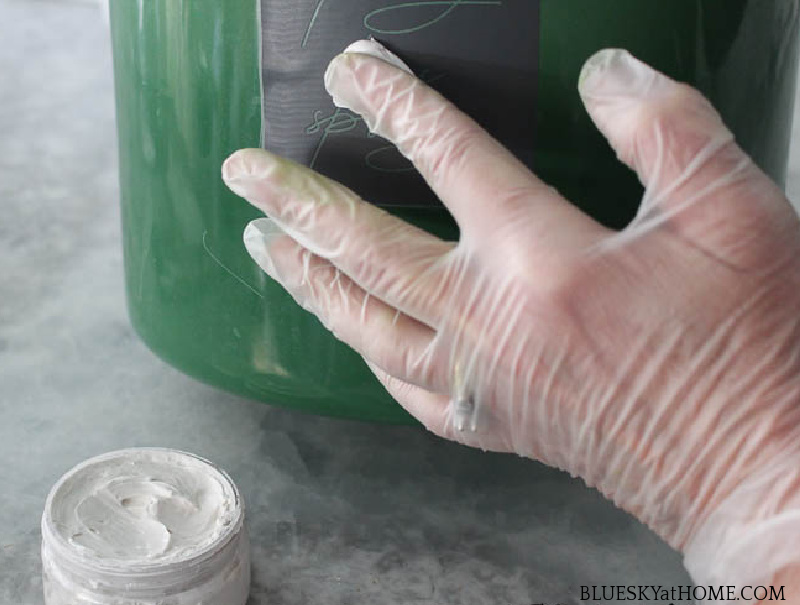
I cut the two stencils out, peeled them from the paper backing, and smoothed them on the stockpot. They easily stuck to the curved surface. I used ChalkArt in Peace and Joy.

I used a food service glove (I always have a box on hand for cooking classes and sometimes for paint projects.). I just dipped my finger in the ChalkArt and started rubbing a small amount on the stencil.
Then just peel the stencil away.
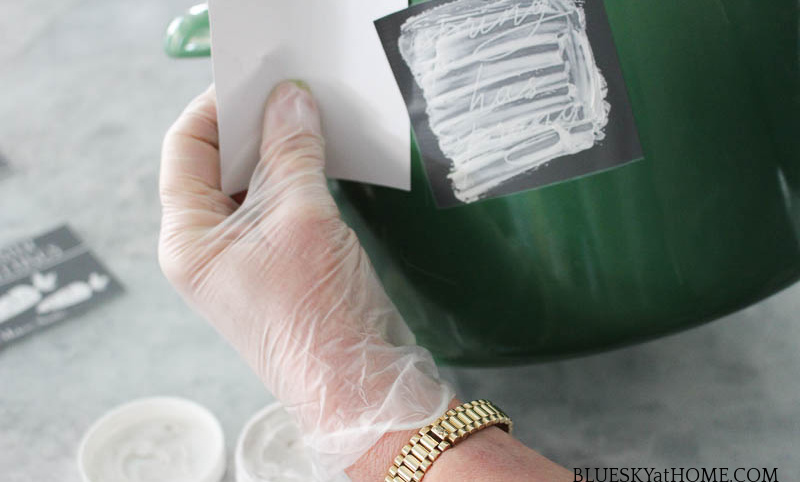
I repeated this stencil around all sides of the stockpot. Then I added the grass stencil around the bottom of the stockpot.
This time I didn’t use a glove. I really need a manicure!
The stencils made all the difference in creating a pretty container for spring.
DIY SPRING WINE GLASSES
I love my gold~trimmed Dollar Tree wine glasses. They definitely will look better with a shot of springtime color and motif.
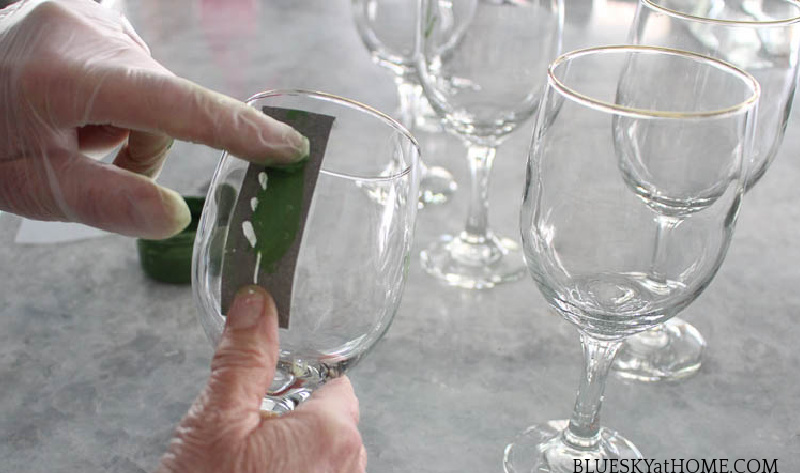
Adding a design to glasses was easy with the adhesive tri-mesh stencils and ChalkArt. This time I used four leaf designs from the Nest stencil. I started out using a color called Hey Good Lookin’ and my finger paint method.
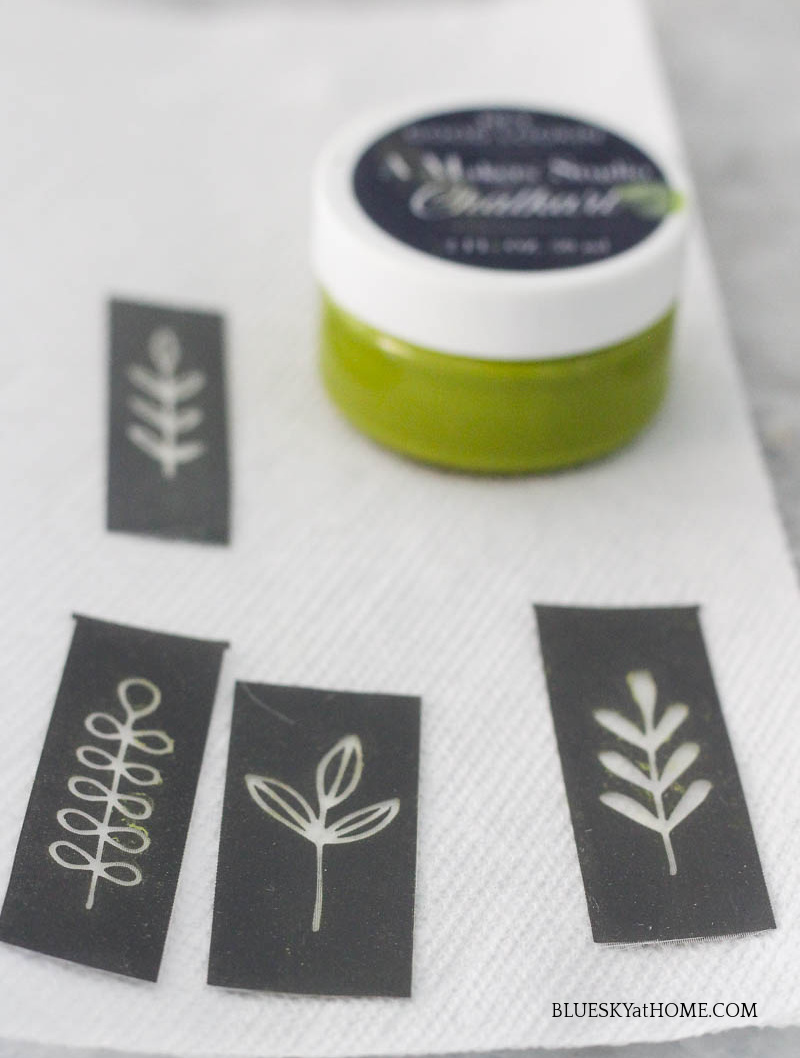
I attached one stencil at a time, rubbed on the ChalkArt with my finger and then removed the stencil. I basically stenciled a different leaf design on all four sides of the glass.
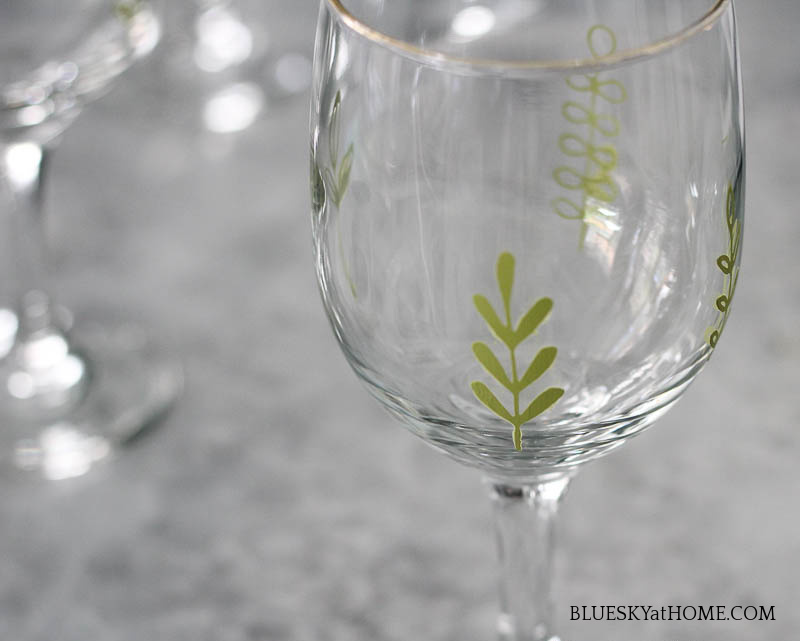
After “painting” on the ChalkArt, I decided that “Hey Good Lookin'” wasn’t dark enough, so I wiped it off (Another great feature of ChalkArt) and changed to Together Forever, a darker green that I had used for Christmas projects. It was perfect for a leaf color.
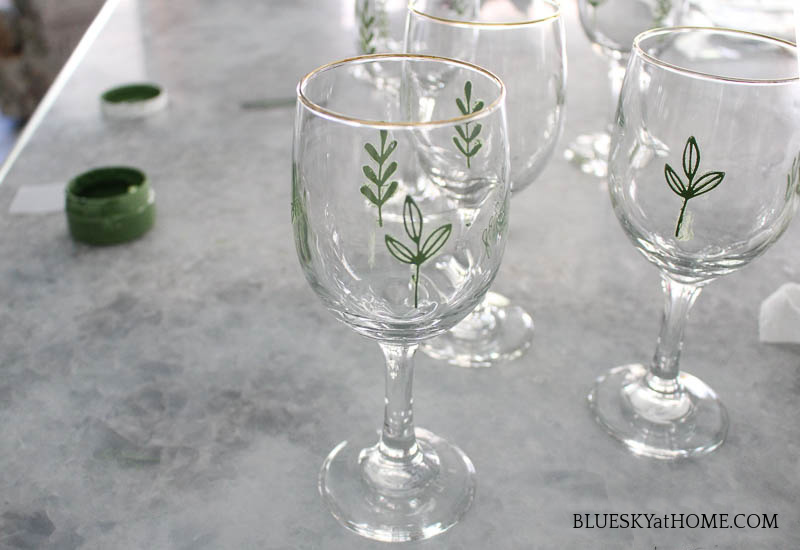
Since green sprouts will soon be coming up in our yard, this leaf motif reminds me that spring is coming and I can bring spring indoors.
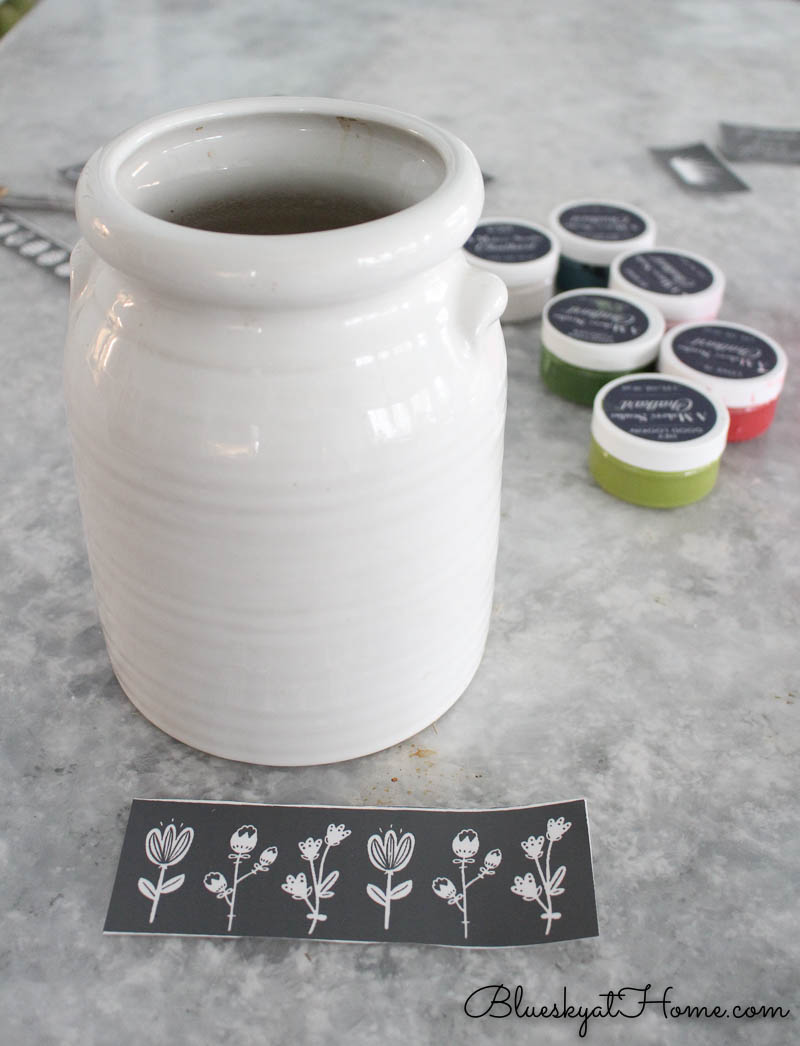
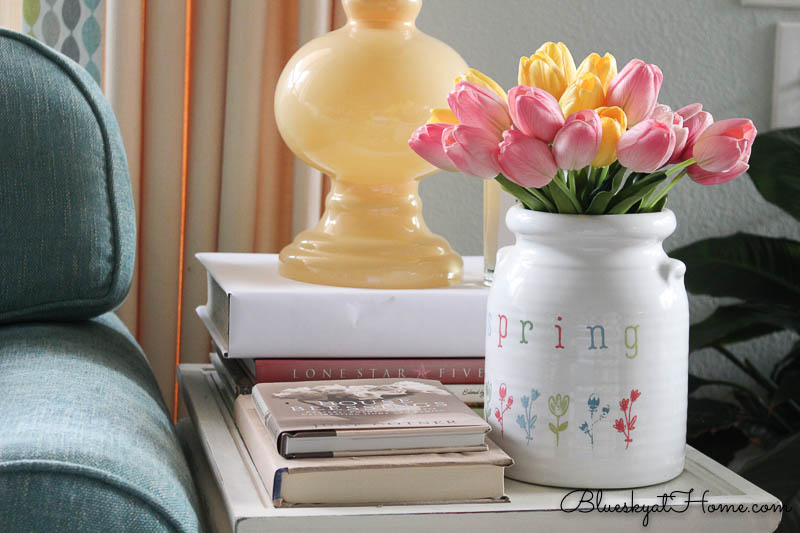
WHITE CROCK GETS A SPRING DIY TREATMENT
Originally, this white flea market crock was going to be my centerpiece container for my springtime tablescape ~ until I found the Le Creuset stockpot and switched plans.
I had another stencil design I was itching to use ~ the “Hippity Hoppity” stencil (sold out). Now I could use it to create another springtime container.
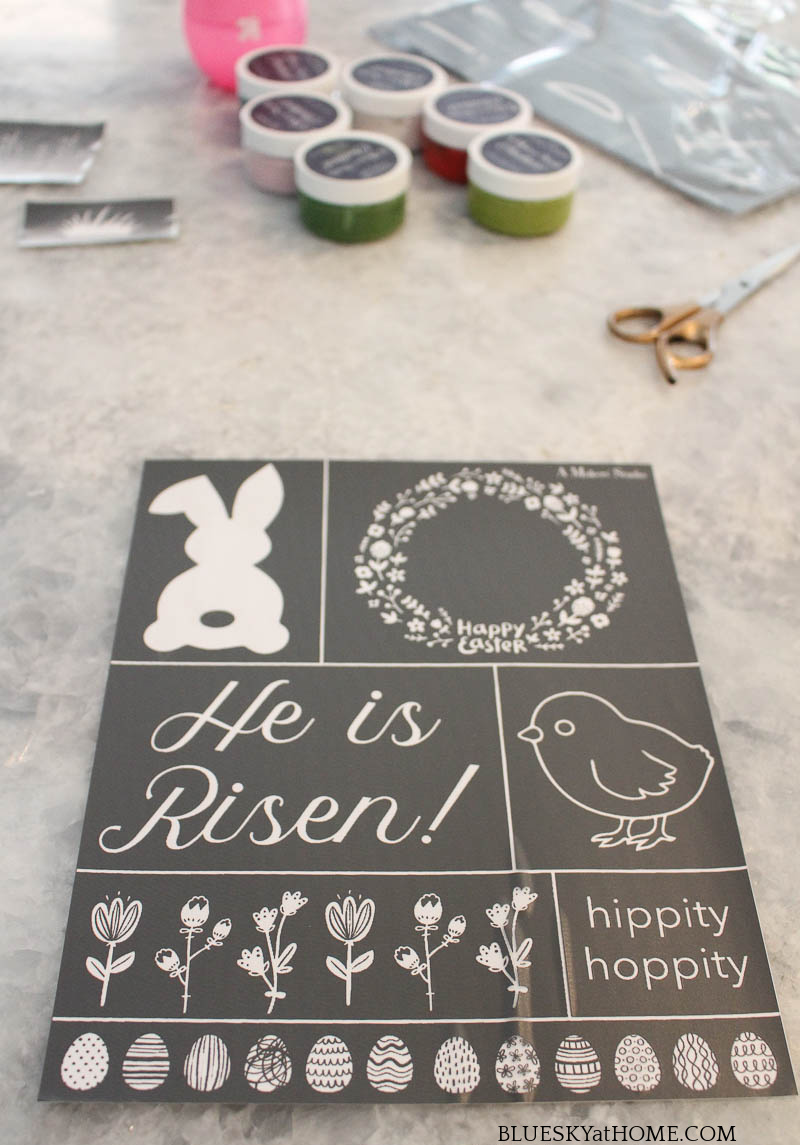
I wanted to bring flowers into the house with this design and different colors of ChalkArt.
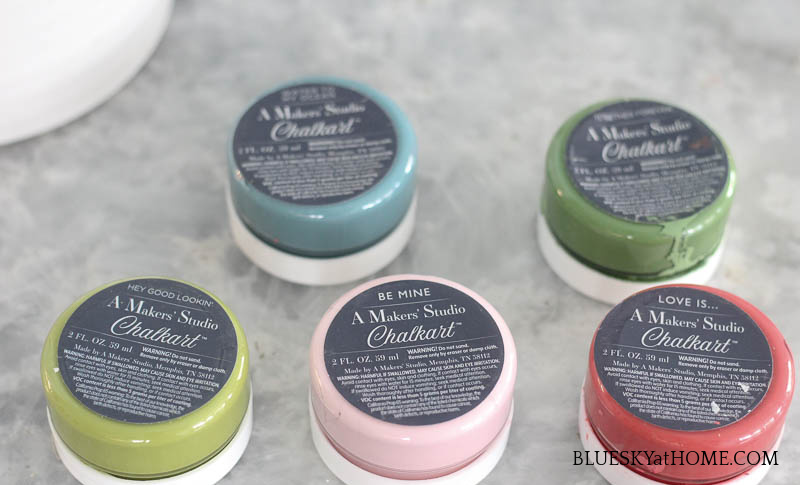
I used 6 colors of ChalkArt:
- Hey Good Looking ~ light green
- Together Forever ~ dark green
- Love Is ~ light red
- Sew On & So Forth ~ deep blue
- Water to my Ocean ~ slate blue
- Be Mine ~ light pink
Not only was the crock curved, but it had little horizontal ridges. But no problem, the adhesive stencils stuck just fine.
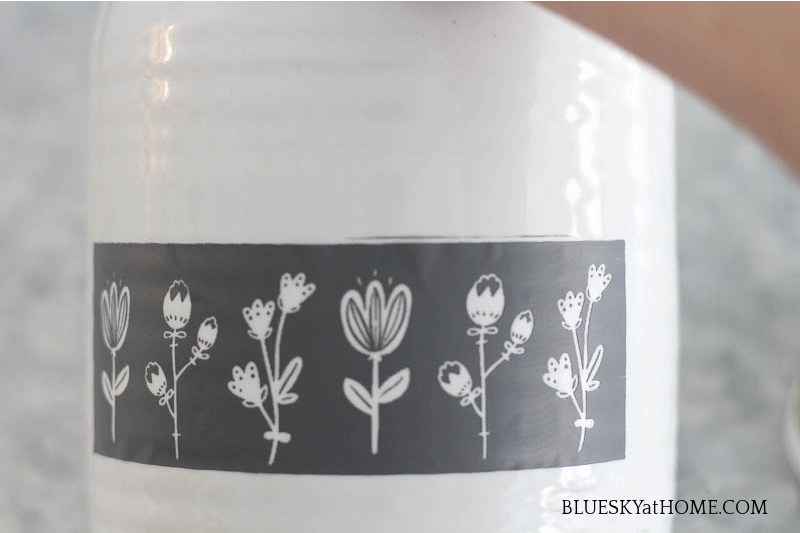
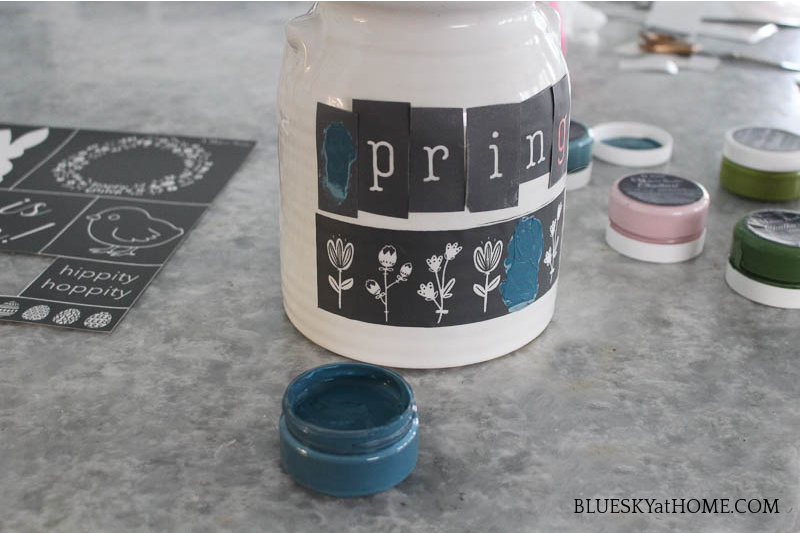
To spell “spring”, I used the Alphabet 4 stencil.
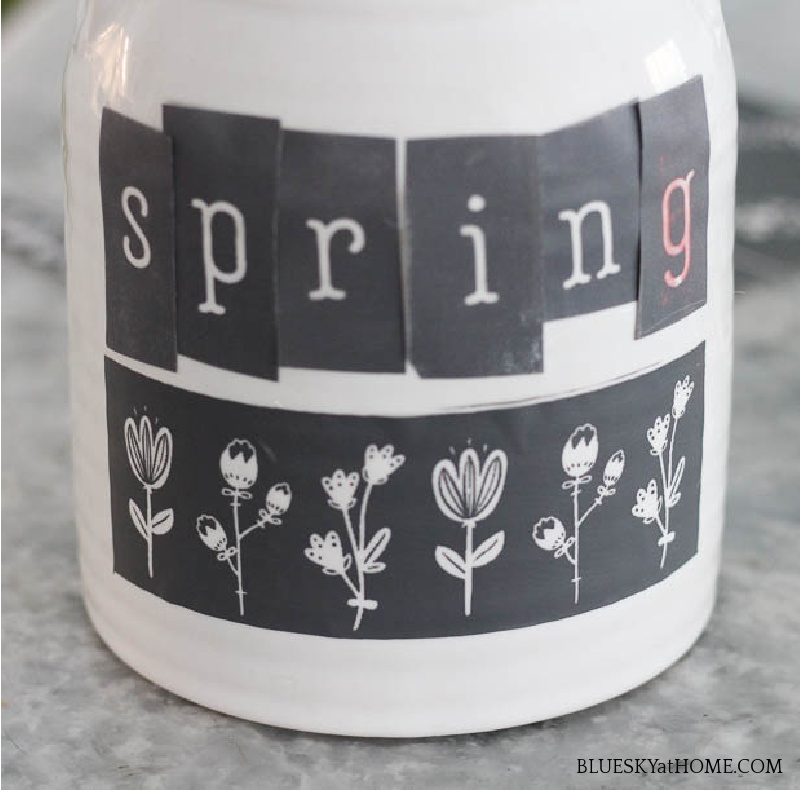
I finger~painted one letter and one flower in each color.
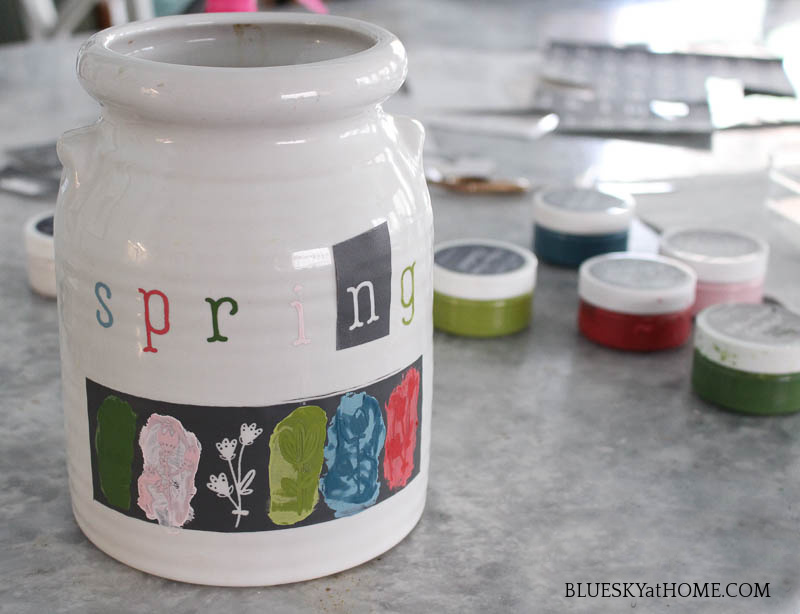
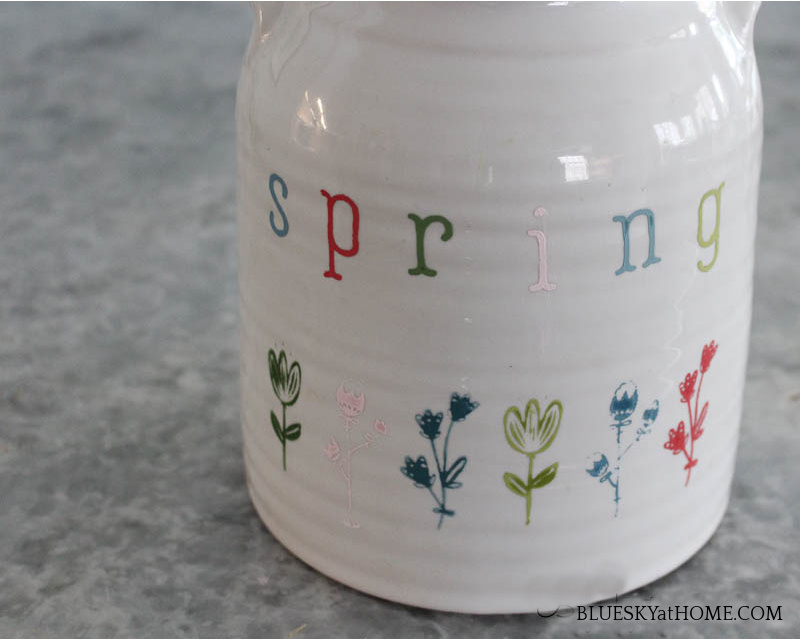
I decided that Be Mine ~ the pretty pink ~ didn’t show up enough, so I wiped it off and added Love Is instead.
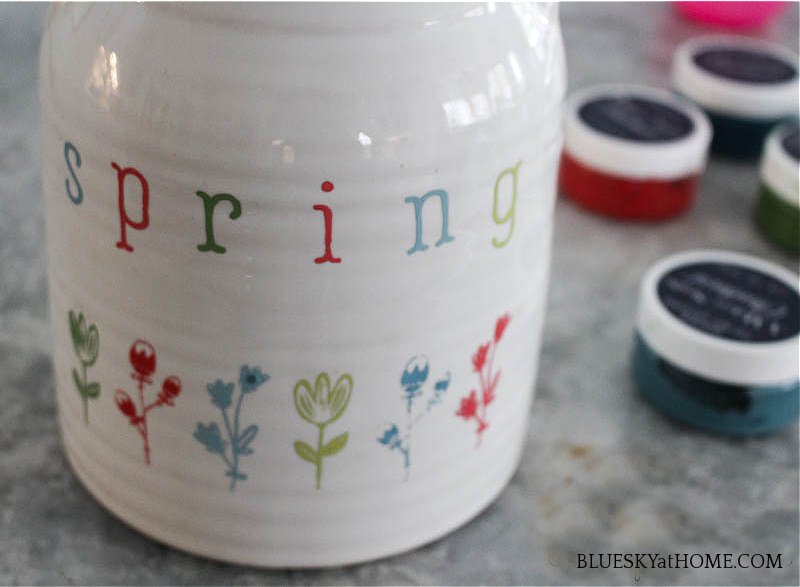
I love how my plain white crock went all colorful, blooming springtime.
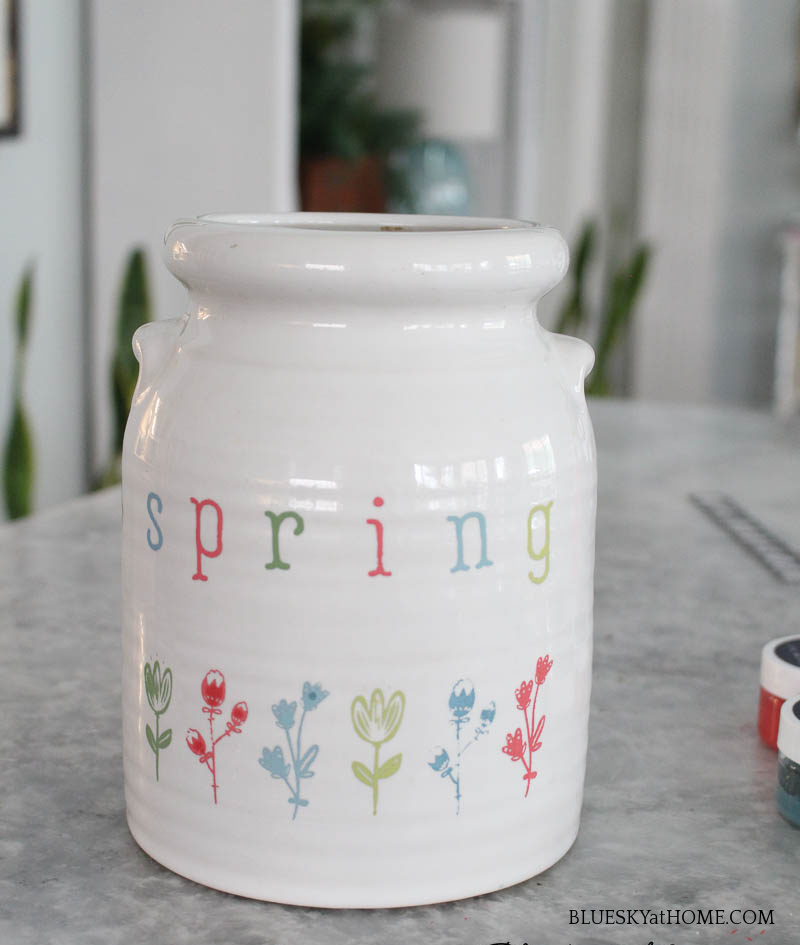
I didn’t intend to add flowers just yet, but I remembered some faux tulips that I bought weeks ago and added them. That completed the spring DIY details.
I love the punch of spring this project gives our living room side table. I’ll add real tulips as soon as I get to the grocery store.
I actually did not purchase a single thing for any of these projects. I already had the stockpot, the wine glasses (originally $1 each at Dollar Tree), and the white crock and have used them many times.
The ChalkArt and spring stencils I already had and have used and will use again multiple times so it’s hard to put a price on using them for just a few projects.
Be sure to visit the A Makers’ Studio site for the latest stencil designs. The new ones are amazing
I do hope that you loved seeing how to take a plain container and make it something special for spring with just some embellishments using ChalkArt and stencils and a little imagination.
And your fingers.
And please PIN these projects for future reference.


The white crock is my favorite. But all of them are so pretty and I love that you reused what you already had. Hopefully Spring will be here soon! Thanks so much for sharing every week. #HomeMattersParty
Happy Spring, Carol! I love all of the spring touches you added using your stencils! The addition of the leaves on those gold-rimmed wine glasses is so pretty. It was fun hopping with you. Pinned!
Thank you, Lynne, Such an easy way to add design and detail to surfaces.
Carol, I love how you can add seasonal flair to everyday items with those stencils. Even better is that it washes off so you can change it up again for the next season! The crock looks so cute filled with tulips on your side table. It was fun hopping with you. Pinned 🙂 Happy (almost) Spring!
Thank you, Rebecca. Stencils are such easy and inexpensive way to add fun designs.
What a cool idea for special occasions, you can keep reusing the same glassware without ending up with a cupboard filled with glassware.
You are exactly right, Anita. Redesign and reuse!!
You help teach me to think outside of the box, Carol.
Love the way you use your stencils throughout the varies projects. Those clear wine glasses with the leaf stencils would be a good way to start.
Rachelle, I’m a teacher at heart. The wine glasses might be the easiest surface to start on. SImple stencil designs work best here.
These are all such great ideas and so super cute! Thank you so much for sharing Carol.
Cute projects Carol! I know we are all in the mood for Spring! The Chalk Art paint looks great, I haven’t tried that. You are the Queen of stenciling, what fun creations!
Hi Carol,
I hope you don’t have any side effects from the vaccine. We heard birds yesterday morning and snow melting sounds/ water running down the gutters. It’s nice to think of Spring!
Such cute ideas for adding touches of spring around the house, and just with simple stencils! Fun craft ideas, Carol!
All great projects Carol! I especially love the last crock with it’s Spring theme and happy colours :).
I have to say this couldn’t come to me fast enough. I for one have messed up so many time trying to stencil round items. Great tutorial Carol. Thank you so much!
You were on a roll with all these painting projects, Carol! Each one is just as fabulous as the next! Using stencils makes it seem so easy, too!
What fun ideas! I especially love the wine glasses!
http://www.paperandvine.com
Hillary, you are so sweet for commenting. I love adding cute embellishments to wine glasses ~ so easy, yet makes such a great decor statement. And you can erase and use again! I hope that you’ll come back for more DIY ideas.
Hi Carol! I wanted to stop by and let you know that your stencil project is one of my features at Homestyle Gathering this week. Such a creative way to add a touch a spring! And I’m going to have to check out those adhesive stencils. Thanks for joining us at Homestyle Gathering and sharing your project!
Thank you so much Kim for the feature. I’m so excited. And yes, you should definitely check out the stencils. They are amazing. Let me know if you need in help in ordering.
Your projects are beautiful, Carol. I never thought of using my finger to apply the paint since I learned stenciling with stencil brushes…time to get out of that box! I also need to investigate adhesive stencils, they certainly sound like the way to go!
I love everything you made Carol… these accents are great! I especially love the wine glasses! Pinned it!
these are very pretty ideas and ways to upcycle old items you’re not sure you want to keep around…just repurpose them for holidays! Thanks for linking this post with us at #OMHGWW!
Fun gardening projects, Carol! I can’t wait until we are all settled and I can get back to creating fun projects ~ my plan for the next 10 on the 10th. 😉 Love how each of your stenciled crocks and the wine glasses turned out.
Happy 10 on the 10th (and almost spring to you!),
Hugs,
Barb 🙂
❤Love this idea! Thank you for sharing!
Thank you Chris. Thanks for visiting Bluesky at Home.
I have got to get some of those stencils! I love all of your ideas and everything is perfectly spring ans so stinkin’ cute! Happy Monday Carol.
I’ve been telling you girlfriend. THey are awesome to use. They really have allowed me to be more creative because I used to hate using stencils.
Carol, I love how you used your stencils to add spring touches. I also love that if you don’t like it, you can wash it off and start over when stenciling on glass and dishware. That is such a bonus! I can’t tell you how many times I wish I could have wiped it away and started over on a stencil project. That white crock with the flowers is absolutely beautiful! Thank you so much for participating and for creating out new image for us! Hugs!